This tutorial provides step-by-step instructions to install OpenCV 4 (with Python bindings) on your macOS machine.
OpenCV 4 was released on November 20th, 2018.
I originally wrote this blog post when the alpha version was released, and it has now been updated on November 30th, 2018 to support the official release.
OpenCV 4 comes with new features, particularly in the DNN module for deep learning.
To learn how to install OpenCV 4 on macOS, just keep reading.
Install OpenCV 4 on macOS
In this blog post we’re going to install OpenCV 4 on macOS. OpenCV 4 is packed with new features, many of which are deep-learning focused.
Note: If you landed on the wrong install tutorial (perhaps you want to install OpenCV on Ubuntu or your Raspberry Pi), then you should visit my OpenCV installation guides page. I post links to all my OpenCV install tutorials there.
First, we’ll install Xcode and set up Homebrew.
From there, we’ll establish Python virtual environments.
Then we’ll compile OpenCV 4 from source. Compiling from source allows us to have full control over the compile and build as well as to install the full OpenCV 4 build. I’ll cover alternative methods (pip and Homebrew) in future installation guides (neither of these methods can be covered until OpenCV 4 is officially released).
Finally, we’ll test out our OpenCV 4 install and get our feet wet with a real OpenCV project.
Let’s begin!
Step #1: Install Xcode
First we need to install Xcode.
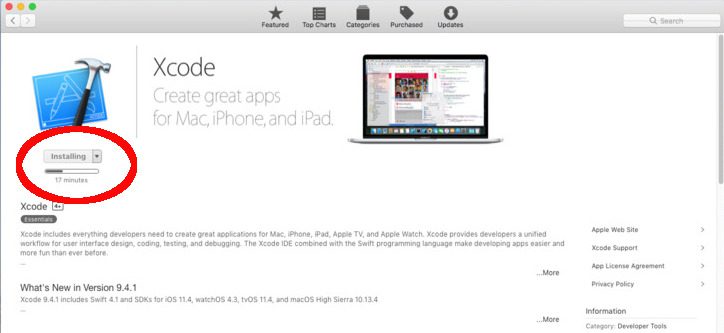
To install Xcode, fire up the Apple App Store, find the Xcode app, and install. You’ll need to wait patiently as this figure indicates:
After Xcode has installed we need to accept a license agreement. Launch a terminal and enter the following command:
$ sudo xcodebuild -license
To accept the license, simply scroll down and accept it.
Once you’ve accepted the license agreement, let’s install Apple Command Line Tools. This is required, so that you’ll have make
, gcc
, clang
, etc. You can install the tools via:
$ sudo xcode-select --install
Click the “Install” button and wait about 5 minutes for the installation to complete.
Step #2: Install Homebrew
For this step we’re going to install the Mac community package manager, Homebrew.
Homebrew runs on Ruby which is a popular programming language. When you’re ready, copy the entire command below to install Homebrew:
$ /usr/bin/ruby -e "$(curl -fsSL https://raw.githubusercontent.com/Homebrew/install/master/install)"
Homebrew commands are shortened to brew
.
Let’s update the Homebrew definitions:
$ brew update
And now let’s edit our Mac’s bash profile. This script is run each time you launch a terminal. For simplicity, I suggest the nano text editor. If you’re more comfortable with vim or emacs, then go for it.
Edit your bash profile with nano using the following command:
$ nano ~/.bash_profile
Once you’re actively editing the file, append the following lines to the end to update your PATH
:
# Homebrew export PATH=/usr/local/bin:$PATH
From there, save the profile. If you’re using nano, you’ll see the shortcut keys at the bottom of the window which demonstrate how to save (write) and exit.
Once you’re back in bash, source your bash profile:
$ source ~/.bash_profile
Step #3: Install OpenCV prerequisites using Homebrew
In this section we’ll ensure that Python 3.6 is installed. We’ll also install prerequisites for building OpenCV from source.
Install Python 3.6
It is extremely important to use Python 3.6. By default High Sierra and Mojave are coming with Python 3.7 now. It sounds good, but Python 3.7 is unsupported by Keras/TensorFlow (both are used often on this blog) and thus are not a good choice for OpenCV either.
These commands will install Python 3.6.5_1:
$ brew install https://raw.githubusercontent.com/Homebrew/homebrew-core/f2a764ef944b1080be64bd88dca9a1d80130c558/Formula/python.rb $ brew switch python 3.6.5_1
Be sure to copy the entire command + URL.
Let’s verify:
$ python3 Python 3.6.5 (default, Jun 17 2018, 12:13:06) [GCC 4.2.1 Compatible Apple LLVM 9.1.0 (clang-902.0.39.2)] on darwin Type "help", "copyright", "credits" or "license" for more information. >>>
Great! I can see that we have Python 3.6.5 installed now.
Let’s verify one more thing:
$ which python3 /usr/local/bin/python3
If you see /usr/local/bin/python3
you are using the Homebrew Python (which is what we desire). If you see /usr/bin/python3
then you are using the system Python and you likely need to fix your bash profile and/or source it.
Take the time now to verify you are using the Homebrew version of Python and not the system version.
Install other prerequisites
OpenCV requires a few prerequisites to be installed before we compile it. These packages are related to either (1) tools used to build and compile, (2) libraries used for image I/O operations (i.e., loading various image file formats from disk such as JPEG, PNG, TIFF, etc.) or (3) optimization libraries.
To install these prerequisites for OpenCV on macOS execute the following commands:
$ brew install cmake pkg-config $ brew install jpeg libpng libtiff openexr $ brew install eigen tbb
A tool you’ll learn to love is wget
. All wget
does is download files from the command line. We can use Homebrew to install wget:
$ brew install wget
Step #4: Install Python dependencies for OpenCV 4
We’re going to install the Python dependencies for OpenCV 4 in this step.
Taking advantage of the wget
tool that we just installed, let’s download and install pip (a Python package manager):
$ wget https://bootstrap.pypa.io/get-pip.py $ sudo python3 get-pip.py
Now that we have pip installed, we can install virtualenv and virtualenvwrapper, two tools for managing virtual environments. Python virtual environments are a best practice for Python development and I strongly urge you to take full advantage of them.
Each week, I receive countless emails and blog comments about problems that can be avoided with use of virtual environments. Virtual environments are different than virtual machines despite the similar name.
To learn about virtual environments, I suggest you give this article a read.
Let’s install virtualenv
and virtualenvwrapper
, then do a bit of cleanup:
$ sudo pip3 install virtualenv virtualenvwrapper $ sudo rm -rf ~/get-pip.py ~/.cache/pip
From there, we need to edit our bash profile again so that these two tools work properly.
Fire up nano (or your preferred text editor):
$ nano ~/.bash_profile
And then add these lines to the end of the file:
# virtualenv and virtualenvwrapper export WORKON_HOME=$HOME/.virtualenvs export VIRTUALENVWRAPPER_PYTHON=/usr/local/bin/python3 source /usr/local/bin/virtualenvwrapper.sh
nano
text editor to edit the ~/.bash_profile
prior to installing OpenCV 4 for macOS.Pro-tip: You can use bash commands to append to the file without opening an editor:
$ echo -e "\n# virtualenv and virtualenvwrapper" >> ~/.bash_profile $ echo "export WORKON_HOME=$HOME/.virtualenvs" >> ~/.bash_profile $ echo "export VIRTUALENVWRAPPER_PYTHON=/usr/local/bin/python3" >> ~/.bash_profile $ echo "source /usr/local/bin/virtualenvwrapper.sh" >> ~/.bash_profile
Then source the file:
$ source ~/.bash_profile
You’ll see several lines printed in your terminal indicating that virtualenvwrapper is setup.
The virtualenvwrapper
tool provides us a number of terminal commands:
mkvirtualenv <env_name> <options>
: Used to “make a virtual environment”rmvirtualenv <env_name>
: Destroys a virtual environmentworkon <env_name>
: Activates a virtual environmentdeactivate
: Deactivates the current virtual environment- You’ll want to read the docs for more information.
Let’s take advantage of the first command to create a Python virtual environment for OpenCV:
$ mkvirtualenv cv -p python3 Running virtualenv with interpreter /usr/local/bin/python3 Using base prefix '/usr/local/Cellar/python/3.6.5_1/Frameworks/Python.framework/Versions/3.6' New python executable in /Users/admin/.virtualenvs/cv/bin/python3.6 Also creating executable in /Users/admin/.virtualenvs/cv/bin/python Installing setuptools, pip, wheel... done. virtualenvwrapper.user_scripts creating /Users/admin/.virtualenvs/cv/bin/predeactivate virtualenvwrapper.user_scripts creating /Users/admin/.virtualenvs/cv/bin/postdeactivate virtualenvwrapper.user_scripts creating /Users/admin/.virtualenvs/cv/bin/preactivate virtualenvwrapper.user_scripts creating /Users/admin/.virtualenvs/cv/bin/postactivate virtualenvwrapper.user_scripts creating /Users/admin/.virtualenvs/cv/bin/get_env_details
Notice that cv
is the name of our environment and that I am creating a Python 3 (controlled by the -p python3
switch) environment.
Important: Take note in the output that Python 3.6 is being utilized for the environment as well (highlighted).
You may name your environment differently if you’d like. I actually like to name my environments like so:
py3cv4
py3cv3
py2cv2
- etc.
Here my py3cv4
virtual environment can be used for Python 3 + OpenCV 4. My py3cv3
virtual environment is used for Python 3 and OpenCV 3. And my py2cv2
environment can be used to test legacy Python 2.7 + OpenCV 2.4 code. These virtual environment names are easy to remember and allow me to switch between OpenCV + Python versions (nearly) seamlessly.
Next, let’s install NumPy while we’re inside the environment.
Chances are, the environment is already active (indicated by (cv)
preceding your bash prompt). Just in case, let’s workon
(activate) the environment:
$ workon cv
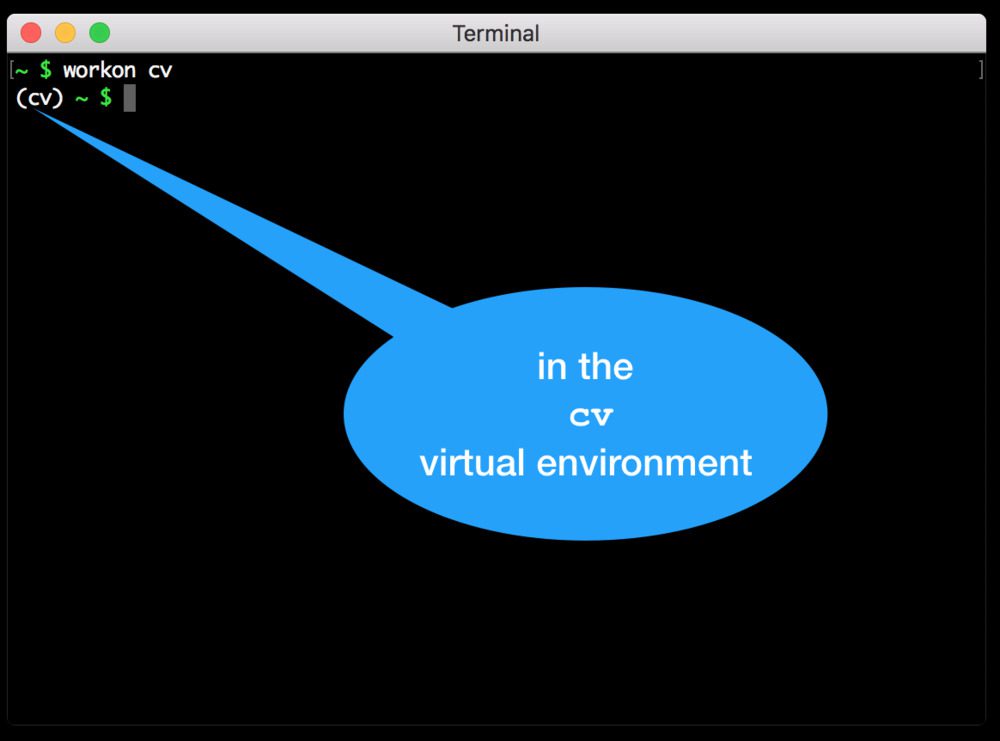
cv
virtual environment as is denoted by (cv)
before the bash prompt. This is necessary prior to installing packages and compiling OpenCV 4.Each time you wish to use the environment or install packages into it you should use the workon
command.
Now that our environment is activated, we can install NumPy:
$ pip install numpy
Step #5: Compile OpenCV 4 for macOS
Compiling from source gives you the most control over your build as opposed to package managers such as pip, Homebrew, and Anaconda.
Package managers are convenient for sure and I’ll cover them in a future installation tutorial, I just want to give you fair warning — while they appear easy on the surface, you won’t be able to get the latest revision of OpenCV and in some cases it won’t work well with virtual environments. You also might be missing features.
I still compile from source all the time and you should definitely learn how if you’re serious about working with OpenCV.
Download OpenCV 4
Let’s download OpenCV.
First, navigate to our home folder and download both opencv and opencv_contrib. The contrib repo contains extra modules and functions which we frequently use here on the PyImageSearch blog. You should be installing the OpenCV library with the additional contrib modules as well.
When you’re ready, just follow along to download both the opencv
and opencv_contrib
code:
$ cd ~ $ wget -O opencv.zip https://github.com/opencv/opencv/archive/4.0.0.zip $ wget -O opencv_contrib.zip https://github.com/opencv/opencv_contrib/archive/4.0.0.zip
Update 2018-11-30: OpenCV 4.0.0 is officially released and I have updated the download URLs above.
From there, let’s unzip the archives:
$ unzip opencv.zip $ unzip opencv_contrib.zip
I also like to rename the directories:
$ mv opencv-4.0.0 opencv $ mv opencv_contrib-4.0.0 opencv_contrib
If you skip renaming the directories, don’t forget to update the CMake paths next.
Now that opencv
and opencv_contrib
are downloaded and ready to go, let’s set up our environment.
Compile OpenCV4 from source
Now that opencv
and opencv_contrib
are downloaded and ready to go, let’s employ CMake to setup our compile and Make to perform the compilation.
Navigate back to your OpenCV repo and create + enter a build
directory:
$ cd ~/opencv $ mkdir build $ cd build
Now we’re ready for CMake. Be sure to use the workon
command before executing the cmake
command as shown:
$ workon cv $ cmake -D CMAKE_BUILD_TYPE=RELEASE \ -D CMAKE_INSTALL_PREFIX=/usr/local \ -D OPENCV_EXTRA_MODULES_PATH=~/opencv_contrib/modules \ -D PYTHON3_LIBRARY=`python -c 'import subprocess ; import sys ; s = subprocess.check_output("python-config --configdir", shell=True).decode("utf-8").strip() ; (M, m) = sys.version_info[:2] ; print("{}/libpython{}.{}.dylib".format(s, M, m))'` \ -D PYTHON3_INCLUDE_DIR=`python -c 'import distutils.sysconfig as s; print(s.get_python_inc())'` \ -D PYTHON3_EXECUTABLE=$VIRTUAL_ENV/bin/python \ -D BUILD_opencv_python2=OFF \ -D BUILD_opencv_python3=ON \ -D INSTALL_PYTHON_EXAMPLES=ON \ -D INSTALL_C_EXAMPLES=OFF \ -D OPENCV_ENABLE_NONFREE=ON \ -D BUILD_EXAMPLES=ON ..
Update 2018-11-30: I added a CMake compile flag to enable nonfree algorithms (OPENCV_ENABLE_NONFREE=ON
). This is required for OpenCV 4 if you want access to patented algorithms for educational purposes.
Note: For the above CMake command, I spent considerable time creating, testing, and refactoring it. It is effectively self-configuring with no work required on your part. I’m confident that it will save you time and frustration if you use it exactly as it appears.
Once CMake has finished, scroll up (ever so slightly) until you see the following information in your terminal:
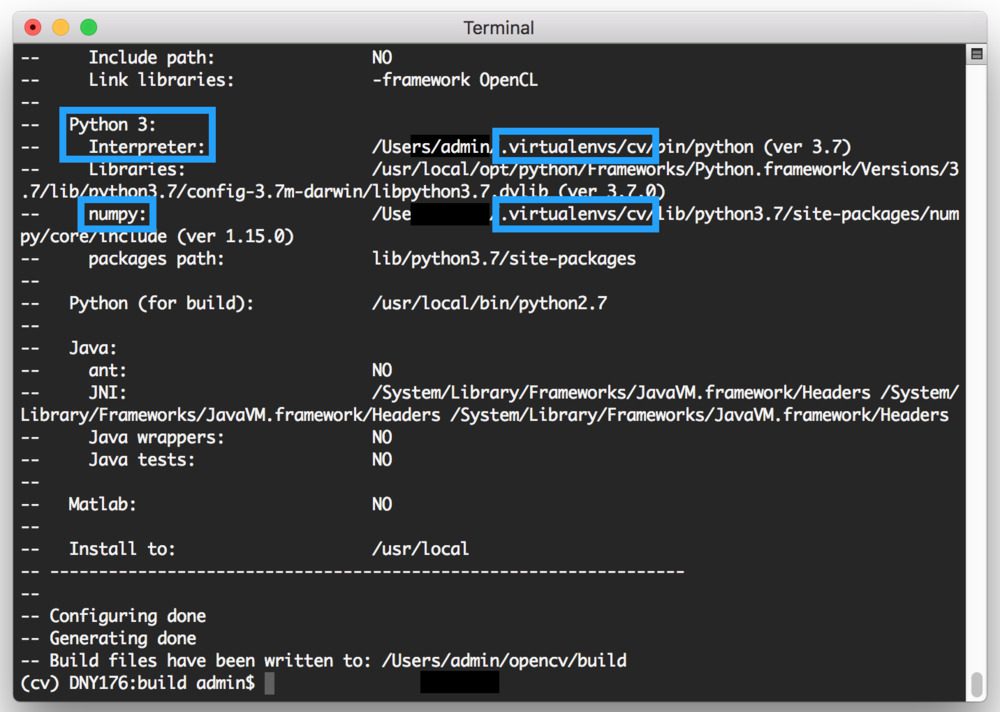
cv
virtual environment is being used for Python and NumPy.Your output should look very similar to mine. What you’re looking for is to ensure that your Python 3 interpreter and NumPy in the virtual environment will both be used. If you don’t see this, then you likely executed CMake without being “in” the cv
virtual environment (or whatever you named your Python virtual environment). If that’s the case, no worries — just delete the build
directory, activate the virtual environment with the workon
command, and re-run CMake.
Next, scroll up a little further to check that your output matches mine where I’ve highlighted:
Provided that your CMake output is good to go you can kick off the compilation via:
$ make -j4
Note: The -j4 argument is optional and will instruct make
to take advantage of 4 CPU cores. You can adjust the numerical value or leave the argument off completely. It doesn’t happen often, but sometimes race conditions may prevent the compile from finishing — at which point you should execute make
without the flag.
Take a break while the compilation continues, but don’t forget to come back and create symbolic links.
When make
is finished, you should see this:
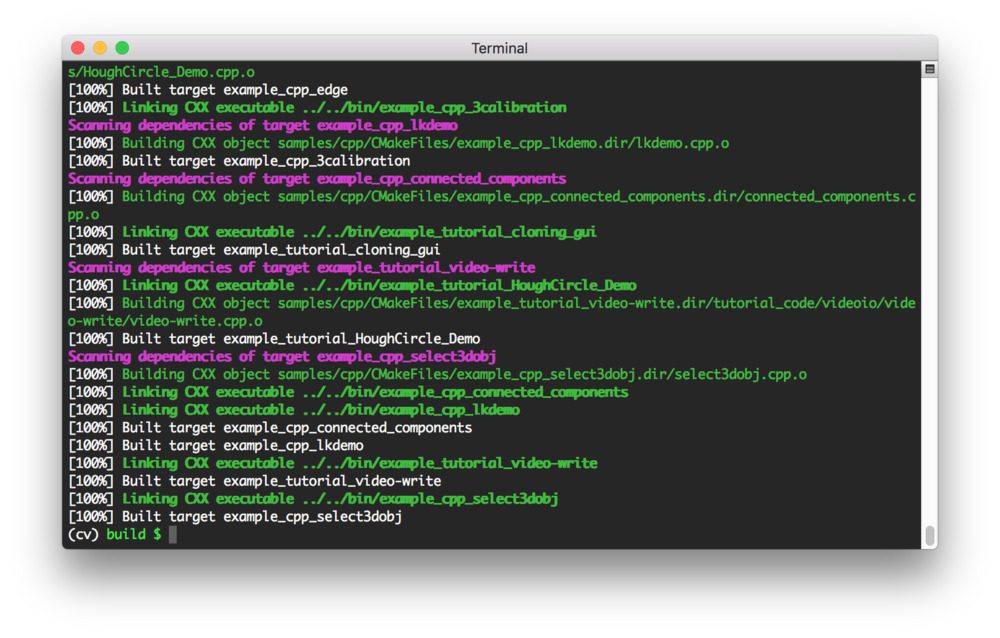
cv
environment.If you’ve reached 100%, then there is one additional command to install OpenCV 4 prior to Step #6:
$ sudo make install
Step #6: Sym-link OpenCV 4 on macOS to your virtual environment site-packages
Now let’s create what is called a “symbolic link”. We need a link from our cv
virtual environment site-packages
to our system site-packages
where OpenCV was installed. Effectively, OpenCV will then be “linked” into the virtual environment allowing you to import it into Python scripts as well as the command line interpreter.
Before we make a symbolic link to link OpenCV 4 into our Python virtual environment, let’s determine our Python version:
$ workon cv $ python --version Python 3.6
Using the Python version, we can easily navigate to the correct site-packages
directory next (although I do recommend tab-completion in the terminal).
Update 2018-12-20: The following paths have been updated. Previous versions of OpenCV installed the bindings in a different location (/usr/local/lib/python3.6/site-packages
), so be sure to take a look at the paths below carefully.
At this point, your Python 3 bindings for OpenCV should reside in the following folder:
$ ls /usr/local/python/cv2/python-3.6 cv2.cpython-36m-darwin.so
Let’s rename them to simply cv2.so
:
$ cd /usr/local/python/cv2/python-3.6 $ sudo mv cv2.cpython-36m-darwin.so cv2.so
Pro-tip: If you are installing OpenCV 3 and OpenCV 4 alongside each other, instead of renaming the file to cv2.so
, you might consider naming it cv2.opencv4.0.0.so
and then in the next sub-step sym-link appropriately from that file to cv2.so
as well.
Our last sub-step is to sym-link our OpenCV cv2.so
bindings into our cv
virtual environment:
$ cd ~/.virtualenvs/cv/lib/python3.6/site-packages/ $ ln -s /usr/local/python/cv2/python-3.6/cv2.so cv2.so
Important considerations:
- Take the time to understand how sym-linking works — you might read this article.
- Be sure your paths are correct. I recommend tab-completion rather than copy/paste.
I can’t stress this point enough: The cv
Python virtual environment is entirely independent and sequestered from the default Python version on your system. Any Python packages in the global directories will not be available to the cv
virtual environment. Similarly, any Python packages installed in site-packages
of cv
will not be available to the global install of Python. Keep this in mind when you’re working in your Python virtual environment and it will help avoid a lot of confusion and headaches.
Install imutils
I also recommend that you install my very own imutils package if you’ll be frequently visiting my blog as we use it quite often:
$ workon cv $ pip install imutils
Step #7: Test your macOS + OpenCV 3 install
It is always important to test your OpenCV install to make sure the proper links have been made.
I like to fire up a Python shell in the virtual environment and check that it imports without error and that the version matches my intention:
$ workon cv $ python >>> import cv2 >>> cv2.__version__ '4.0.0' >>> exit()
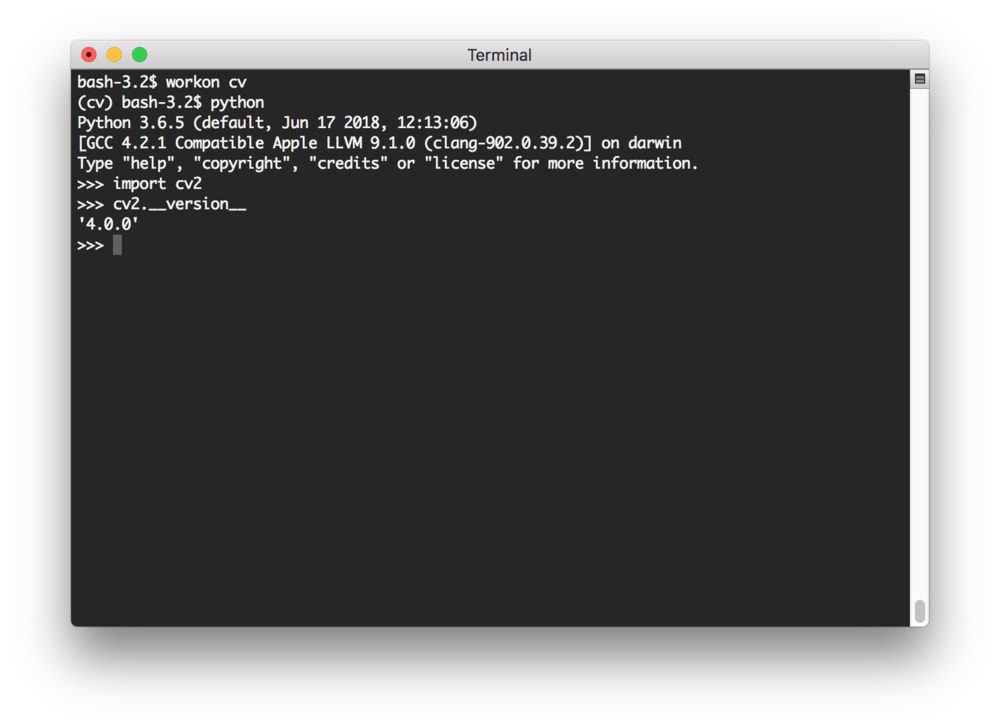
cv2.__version__
after importing cv2
.Provided you see no errors and OpenCV 4 is installed, you’re good to go!
Run your first example with your fresh install of OpenCV 4!
If you’re breaking into the field of computer vision with OpenCV, my guess is that you want to run something cool with OpenCV.
Let’s start by building a simple “document scanner” with OpenCV.
I’m not going to review all the code here — you should check out the original post if you’re interested or when you have more time.
To get started, simply scroll to the “Downloads” and grab the source code + images.
From there just enter the following commands to prepare:
$ workon cv $ unzip document-scanner.zip $ cd document-scanner $ tree . ├── images │ ├── page.jpg │ └── receipt.jpg ├── pyimagesearch │ ├── __init__.py │ └── transform.py └── scan.py 2 directories, 5 files
As you can see, there are two sample images, a pyimagesearch
module (which needs to be downloaded via the “Downloads” section — it is not pip-installable), and the scan script.
We’ll need one additional library added to our cv
environment: Scikit-image. To install it, simply use pip. While you’re at it, if you didn’t install imutils earlier, go ahead and install it as well:
$ pip install scikit-image imutils
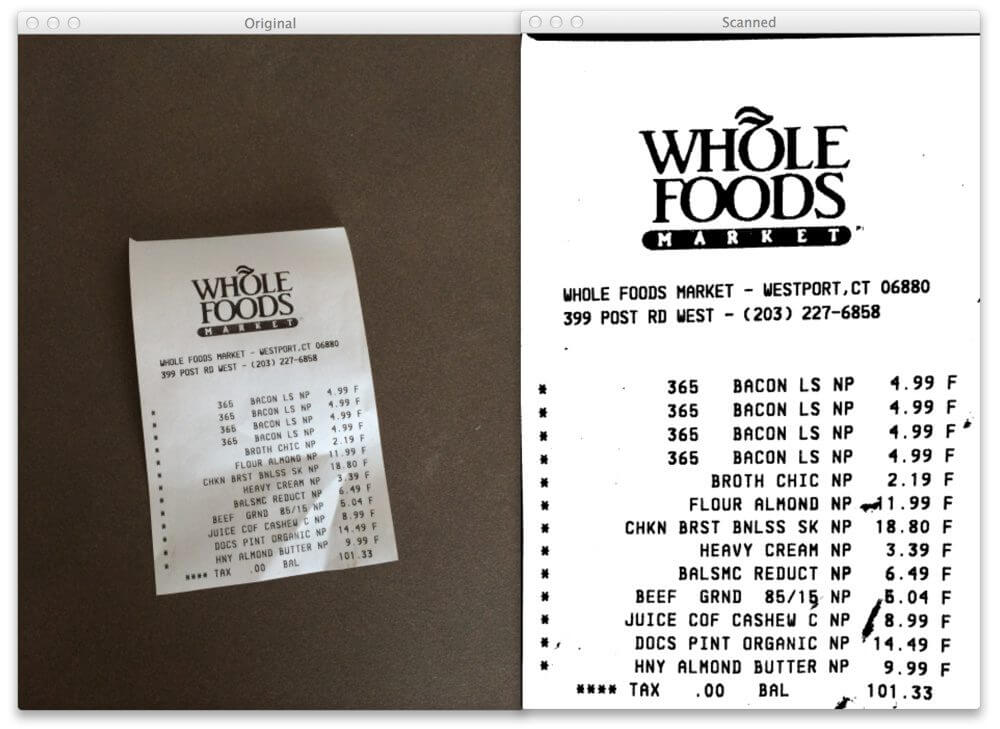
From there you can execute the following command to give OpenCV 4 a workout:
$ python scan.py --image images/receipt.jpg STEP 1: Edge Detection STEP 2: Find contours of paper STEP 3: Apply perspective transform
At the end of each step, you’ll need to press a key — with the window in focus on your desktop.
Sometimes OpenCV’s hides windows under one another, so be sure to drag the OpenCV image windows around to see what is available.
Here’s a screenshot of the last step of document scanning:
That was fun!
Learn how the code works by reading the original blog post.
If you’d like to build additional projects with OpenCV 4, just continue to follow my blog!
Troubleshooting and FAQ
In this section, I address some common questions and problems that readers encounter when installing OpenCV 4 on macOS.
Q. Can I run OpenCV 4 with Python 2.7 on macOS?
A. I suggest you stick with Python 3, but if you’re working on legacy projects, I understand that you might want to use Python 2.7. Here is what you need to do:
- Install Python 2.7 via Homebrew using
brew install python2
- You should pip with 2.7 in Step #3:
sudo python get-pip.py
andsudo pip install virtualenv virtualenvwrapper
- In Step #3, simply create a Python 2.7 environment:
mkvirtualenv cv -p python2.7
- Verify CMake output is using your Python 2.7 virtual environment interpreter in Step #4, Figure 5.
Q. Do I need to run brew install Python? Python seems to already be installed on my Mac!
A. Yes. Python is installed, but you’ll want Brew’s updated Python and plus Brew will put Python in /usr/local/bin
which is separate from your system Python.
Q. When I execute mkvirtualenv
or workon
, I encounter a “command not found error”.
A. There a number of reasons why you would be seeing this error message, all of come from to Step #3:
- First, make sure you have installed
virtualenv
andvirtualenvwrapper
properly using thepip
package manager. Verify by runningpip freeze
, and ensure that you see bothvirtualenv
andvirtualenvwrapper
in the list of installed packages. - Your
~/.bash_profile
file may have mistakes. View the contents of your~/.bash_profile
file to see the properexport
andsource
commands are present (check Step #3 for the commands that should be appended to~/.bash_profile
). - You may have forgotten to
source
your~/.bash_profile
. Make sure you runsource ~/.bash_profile
after editing it to ensure you have access to themkvirtualenv
andworkon
commands.
Q. When I open a new terminal, logout, or reboot my macOS system, I cannot execute the mkvirtualenv
or workon
commands.
A. See #2 from the previous question.
Q. I reached the end, however when I run Python in my terminal and try to import cv2
, I encounter an error. What next?
A. Unfortunately this situation is hard to diagnose without being on your system. Many things could have gone wrong. The most likely point of failure is the symbolic linking step. I suggest you do the following to check the symbolic link:
$ cd ~/.virtualenvs/cv/lib/python3.6/site-packages $ ls -al cv2* lrwxr-xr-x 1 admin _developer 21 Nov 30 11:31 cv2.so -> /usr/local/python/cv2/python-3.6/cv2.so
What you’re looking for is the ->
arrow and that it points to a valid path on your system. If the path is invalid, then you have a sym-link issue that you need to fix. You can correct it by deleting the symlink and trying Step #5 again.
Q. Why do I get a “NONFREE” error when trying to use a patented algorithm such as SURF?
A. With OpenCV 4 there is a new requirement for compiling. Please refer to Step #5 where this is addressed for OpenCV 4 with a CMake argument.
Q. Can I install OpenCV with Brew instead of compiling from source?
A. Beware! The answer is yes, but it if you plan on using virtual environments you’ll still need symbolic links. I’ll do another writeup on the Homebrew method in the future.
Q. Can I install OpenCV 4 with pip into my virtual environment?
A. Currently you can’t install OpenCV 4 with pip. But you can install OpenCV 3.4.3. See how to pip install opencv.
What's next? We recommend PyImageSearch University.
86+ total classes • 115+ hours hours of on-demand code walkthrough videos • Last updated: February 2025
★★★★★ 4.84 (128 Ratings) • 16,000+ Students Enrolled
I strongly believe that if you had the right teacher you could master computer vision and deep learning.
Do you think learning computer vision and deep learning has to be time-consuming, overwhelming, and complicated? Or has to involve complex mathematics and equations? Or requires a degree in computer science?
That’s not the case.
All you need to master computer vision and deep learning is for someone to explain things to you in simple, intuitive terms. And that’s exactly what I do. My mission is to change education and how complex Artificial Intelligence topics are taught.
If you're serious about learning computer vision, your next stop should be PyImageSearch University, the most comprehensive computer vision, deep learning, and OpenCV course online today. Here you’ll learn how to successfully and confidently apply computer vision to your work, research, and projects. Join me in computer vision mastery.
Inside PyImageSearch University you'll find:
- ✓ 86+ courses on essential computer vision, deep learning, and OpenCV topics
- ✓ 86 Certificates of Completion
- ✓ 115+ hours hours of on-demand video
- ✓ Brand new courses released regularly, ensuring you can keep up with state-of-the-art techniques
- ✓ Pre-configured Jupyter Notebooks in Google Colab
- ✓ Run all code examples in your web browser — works on Windows, macOS, and Linux (no dev environment configuration required!)
- ✓ Access to centralized code repos for all 540+ tutorials on PyImageSearch
- ✓ Easy one-click downloads for code, datasets, pre-trained models, etc.
- ✓ Access on mobile, laptop, desktop, etc.
Summary
Today we installed OpenCV4 with Python bindings on your macOS machine.
I’ll be back with future installation tutorials for OpenCV 4 (including one for the Raspberry Pi). If you’re looking for my other, already published OpenCV install tutorials, be sure to refer to this page.
Stay tuned!
To download the source code for today’s tutorial, just enter your email in the form below.
Download the Source Code and FREE 17-page Resource Guide
Enter your email address below to get a .zip of the code and a FREE 17-page Resource Guide on Computer Vision, OpenCV, and Deep Learning. Inside you'll find my hand-picked tutorials, books, courses, and libraries to help you master CV and DL!
It’s nice tutorial that millions euros can’t buy.. Thank you so much for great tutorial.
Thanks Benya!
Hi Adrian- I got an error during make-
…
initialize a variable of type ‘char *’ with an rvalue of type
‘const char *’
char* str = PyString_AsString(obj);
^ ~~~~~~~~~~~~~~~~~~~~~~
…
Any Ideas?
Try the following commit IDs:
Check out those IDs using git, delete your “build” directory, and then start the compile again.
Solved =)
Awesome, I’m glad that worked!
The build completed successfully with these two commit ids. Thanks!
Thanks for confirming, Florian 🙂
Worked for me as well, thanks
Awesome, congrats on getting OpenCV 4 installed!
Hi Adrian — that commit ID for opencv_contrib doesn’t exist?
$(opencv_contrib)> git checkout 9adf7a58a02be9db1152b9c7ba5fc2404a7925ed
fatal: reference is not a tree: 9adf7a58a02be9db1152b9c7ba5fc2404a7925ed
Hey Tom — I would suggest trying again. Other readers are reporting success with that specific commit.
That worked for me too!
Dear Adrian,
thank you very much,
I am having an issue when to make opencv 4.
the error appear:
can you help?
…
char* str = PyString_AsString(obj);
^ ~~~~~~~~~~~~~~~~~~~~~~
1 error generated.
I have python 3.7 on my workon py3cv4
thanks, Paulo.
thank you Adrian,
your previous answers worked ok.
OpenCV: 76eb38976103c86610f73d87e46b7cb5a74f0017
Contrib: 9adf7a58a02be9db1152b9c7ba5fc2404a7925ed
Check out those IDs using git, delete your “build” directory, and then start the compile again.
best,
Paulo.
I’m fine to the point of making the symlinks at
$ ls /usr/local/lib/python3.7/site-packages/cv2.cpython-37m-darwin.so
I have the file cv2.cpython-36m-darwin.so at $ ls /usr/local/lib/python3.6/site-packages/
but not in the /usr/local/lib/python3.7/site-packages/ directory.
I have python 3.7 installed (using brew) at /usr/local/Cellar/python/3.7.0
Where does cv2.cpython-37m-darwin.so get installed?
If you’re using Python 3.7 I’m not sure why you would have a file named “cv2.cpython-36m-darwin.so” in your Python 3.7 site-packages directory. My guess is that your paths are incorrect. Go back and double-check them.
I did not create a virtual env but proceeded with the steps excluding that. I can’t see cv2 in my site-packages and I have an anaconda version of python.
If you’re using Anaconda your PYTHON3_LIBRARY, PYTHON3_INCLUDE_DIR, and PYTHON3_EXECUTABLE paths will need to be updated. You’ll need to manually verify them yourself.
Hi Adrian, I built mine successfully using python 3.6.5. However the built cv2.cpython-36m-darwin.so file ended up in a python3 folder located within the opencv build folder. I could have created the link from there, but just ended up copying the file into the usr/local/lib/python3.6/site-packages folder.
Awesome, congrats on getting OpenCV 4 installed on your macOS machine, Andrew!
thanks Adrian,
For publishing this blog, and giving us head start with Open CV 4.
The commit ids provided in the QnA section was required to overcome the build error.
Thank you for confirming, Jesudas! 🙂 And congrats on getting OpenCV 4 installed on your machine.
Can you please help me setup caffe in my mac please!
Billions of Thanks Adrian for helping in setting up openCV 4 on python 3.7
Thanks Ashutosh! I’m glad you were able to get OpenCV 4 installed 🙂
For the love of God, please adhere to the “make -j4” vs “make”
advise by Adrian while compiling the opencv4. Miss it and you can be on a one way ticket to a hellish install.
No matter which commit I use (head, 76eb38976103c86610f73d87e46b7cb5a74f0017, or 46def2fdc194ebd43a703845013bc54c59ce9d75) I get errors on the CMake stage of the installation.
First one is:
error “__POPCNT__ is not defined by compiler”
Not sure how many after that are due to the initial one blowing up the compile process.
This is OS X 10.13.6, python version is 3.7 via homebrew.
Any possible suggestions for why it’s dying there?
Hey Bob — I’m sorry to hear about the error. Unfortunately, I’m not sure what the exact issue is. I imagine it’s due to a development release of OpenCV 4 and not the official release. I’m sure the problem will be cleared up for the final release later this year 🙂
Bob,
I had a lot of problems like you.
But Today(26/September) a did:
git clone https://github.com/opencv/opencv.git
git clone https://github.com/opencv/opencv_contrib.git
No chekout, and built as recommended by Adrian. Everything built perfect!!
Good Luck!
Same configuration and same issue. Have you found solution?
weren’t we supposed to install python 3.6.5_1
Hi Adrien, No so far from the end (cmake -D CMAKE_BUILD_TYPE=RELEASE \), I get that alert : -bash: cmake: command not found
any help?
If the “cmake” command is not installed I think you may have forgotten to either:
1. Install Xcode
2. And/or run
sudo xcode-select --install
Go back to Step #1 and verify you’ve ran those commands.
I did not get cmake after toolchain installation / update.
Installed via ‘brew install cmake’
Hi Adrian. Your tutorials are amazing, for both practitioners and students.
I wonder how do you keep multiple versions of OpenCV in OSX (say 3.1.0 and 3.4.3) without creating conflicts. Between major versions (3 and 4) maybe easier? Thanks.
I like to:
1. Create a separate Python virtual environment for each install
2. Compile OpenCV but only sym-link in the bindings from my “build” directory (I keep one “build” directory per each install)
Fixed the previous problem. But there is a new issue:
fatal error:
‘Python.h’ file not found
This comment is rather old but today I ran into this issue and got help from https://stackoverflow.com/questions/35778495/fatal-error-python-h-file-not-found-while-installing-opencv
Specifically, I added the following environment variable to run the `make` command:
`CPLUS_INCLUDE_PATH=/Python.framework/Headers`
Since I’m using pyenv, `path/to` resembles `/versions/3.6.8/`.
Hi Adrian, thank you for the awesome guide. I do not have any python/opencv experience, but seems that I finished all steps and got results 😀 You’ve earned +1 into your fanbase 😉
However I got few problems during process, that were not covered in your guide (__POPCNT__ almost sent me into space):
problem: `cmake: command not found`
solution: `brew install cmake`
problem: `error “__POPCNT__ is not defined by compiler”` error in CMakeError.log
investigation: happens only with `-D OPENCV_EXTRA_MODULES_PATH`
solution:
1. cmake via terminal w/o `-D OPENCV_EXTRA_MODULES_PATH`
2. open build folder and add `-D OPENCV_EXTRA_MODULES_PATH` via cmake GUI, configure, generate
note: no idea what the problem
problem: `error: (-215) npoints >= 0 && (depth == CV_32F || depth == CV_32S) in function contourArea` after `python scan.py –image images/receipt.jpg`
solution:
– `cnts = cnts[0] if imutils.is_cv2() else cnts[1]`
+ `cnts = cnts[0]`
Thank you Kirow… you saved my night!
Thank you!
This should definitely go into the Troubleshooting section
Thanks for the clear instructions!
After installing, sometimes the following error occurs (for example when running SIFT):
error: OpenCV(3.4.3) /io/opencv_contrib/modules/xfeatures2d/src/sift.cpp:1207: error: (-213:The function/feature is not implemented) This algorithm is patented and is excluded in this configuration; Set OPENCV_ENABLE_NONFREE CMake option and rebuild the library in function ‘create’
So when running CMAKE one more option should be added as follows:
-D OPENCV_ENABLE_NONFREE=ON
Hi Adrain – Nice tutorial. I have a question for you though. I have an installation of Anaconda installed on my Mac. Is there a benefit to using your installation procedures instead of using Anaconda to create a virtual environment? .
You can use an Anaconda virtual environment if you wish. I find virtualenv/virtualenvwrapper to have less overhead/bloat but it’s entirely a personal choice.
Hi Adrian,
It seems that release version of OpenCV 4.0.0 installs cv2.cpython-37m-darwin.so as /usr/local/python/cv2/python-3.7/cv2.cpython-37m-darwin.so thus your Step #5 will require update, I am afraid.
Since Raspberry Pi does the same, I guess OpenCV changed the path?
Hi Shigeru, the blog post is updated to reflect the official download URLs, the new symlinks, and the new “non-free algorithms” issue ? .
Tried to install OpenCV using Hombrew a few times and on this page:
https://pyimagesearch.com/2016/12/19/install-opencv-3-on-macos-with-homebrew-the-easy-way/#comment-490362
And commented that I couldn’t get it working. So I have now tried this update.
Seems to all go OK until I try to sumlink.
When I try and run:
ls /usr/local/lib/python3.7/site-packages/cv2.cpython-37m-darwin.so
I get:
ls: /usr/local/lib/python3.7/site-packages/cv2.cpython-37m-darwin.so: No such file or directory
Should I be doing this inside the vitualenv or outside of it?
Anyway when I look in:
ls /usr/local/lib/python3.7/site-packages/
There is no cv2.cpython-37m-darwin.so because on a previous attempt it was renamed to cv2.so, but I can’t understand as I have followed this guide to completely re-install it?
Sorry – somewho I got the sylink commands mixed up between pages. Just tried again and I can now import OpenCV when in my virtual environmemt
hi,
after the cmake i checked for the right libraries, but however many times I tried I couldn’t get it to have the right libraries and the bumpy. sorry for the bad explanation, but is there anybody that an help
thanks in advance
Did you double and triple check that you were in the “cv” Python virtual environment prior to running “cmake”?
$ workon cv
Hi Adrian, when I follow the step to type “ln -s /usr/local/python/cv2 cv2” in terminal.
it comes out “ln: cv2/cv2: Permission denied” , how can I solve it ? please help me,thank you!
Are you in the “~/.virtualenvs/cv/lib/python3.6” first? Make sure you are before trying to create the sym-link.
How can I add opencv 4 into my app bundle for distribution? Not just a reference. I’ve tried adding the whole cv2 folder instead of symlink and got the error:
ImportError: ERROR: recursion is detected during loading of “cv2” binary extensions. Check OpenCV installation.
There really isn’t an easy way to add OpenCV to a Python application. I haven’t found a clean, easy way to do it, unfortunately.
hello Adrian
thanks for sharing face recognition code.
i have opencv 4 installed on python 3.6.5 for mac using your website instructions.
i have tested your shared source code for face recognition. however face recognition for video file is very slow.
do you have any recommendation ?
Which face recognition post are you specifically referring to? I have a few of them.
Hi Adrian,
Really love the tutorials 😀 However, I’m receiving the error ‘fatal error: ‘tesseract/baseapi.h’ file not found’ after the make -j4 command. Any ideas?
It sounds like for whatever reason OpenCV thinks Tesseract is installed and is trying to compile bindings for it. Do you have Tesseract installed on your system?
I’d already removed tesseract, however I removed brew python installs and reconstructed my virtual environments and it’s now worked first time
Hi Charlie, I’m strugling with the same issue. I once installed tesseract but I am not sure how to remove it completely. I tried ‘brew uninstall tesseract’. What did you exactly do additionaly? Thanks a lot in advance for your response!
The non-ideal, but definitely workable solution is to:
1. Find your favorite text editor
2. Use text editor to open for modification the header file `~/opencv_contrib/modules/text/src/precomp.hpp`
3. Change lines like `#include ` to an absolute location (e.g. `#include “/usr/local/Cellar/tesseract/4.0.0_1/include/tesseract/baseapi.h”`)
Like Ramon, I had tesseract installed but am unsure how to completely remove it. Could anyone please help with this?
Not sure if its still relevant, but this fixed the issue with tesseract.
It was installed on my machine with ffmpeg, and even after uninstalling everything, it kept failing, until I found this:
https://superuser.com/questions/1441118/error-tesseract-baseapi-h-file-not-found-when-building-opencv-from-source-on-m
You need to re-install ffmpeg and tesseract, and while installing it will give you the location of the install in brew:
brew uninstall ffmpeg
brew install ffmpeg
In one of the outputs you will see the location of the install:
? /usr/local/Cellar/tesseract/4.1.0: 65 files, 29.7MB
Then you run your make command like this (add the “include” to the path):
CPATH=/usr/local/Cellar/tesseract/4.1.0/include make -j6
And now it seems to work.
Hope it helps, good luck!
Thanks for sharing, Roman!
I have same problem compiling 4.0.0 & 4.0.1 version on Mac OS Mojave.
Problem solved by using last version of openCV (4.1.0) it is compiled without any problems.
P.S. Sorry for my English
Another thank you! Having wasted countless hours recently trying to complete Tensorflow’s & Caffe’s installation instructions I really appreciate your effort writing instructions that are current, tested, and actually work.
That’s awesome, Marco! Congrats on getting OpenCV installed on your Mac.
Hi Adrian,
Thanks for the excellent tutorial! I wrote up a short addendum for anyone looking to install OpenCV for an Anaconda virtual environment instead of a Homebrew one https://jrw.cloudapps.unc.edu/OpenCV_Install.html
Thanks for sharing, Rob!
Hello Adrian, I was able to install OpenCV4 on a Mac accordingly to your instructions. No problem at all. Thanks!
However, when I was trying to run the example at “Run your first example with your fresh install of OpenCV 4!”, I got the black image and in the Terminal showed:
Unable to revert mtime: /Library/Fonts
Did I missed something?
That is very strange and it sounds like it’s not related to your install of OpenCV 4, that is likely some other issue with your Mac. Unfortunately without physical access to your machine I’m not sure what the exact issue is.
If I need to build with .jp2 support then is it as simple as “brew install jasper” and then add “-D BUILD_JASPER=ON” to my cmake command?
I have not verified that myself but based on my experience with OpenCV and cmake, yes, that is all you need.
Excellent tutorial! The only problem I had was figuring out when you were in the (CV) virtual environment and when you weren’t. Not very clear.
Hey John — did you see Figure 4? Figure 4 does a good job depicting if you are in the “cv” virtual environment or not.
Hi Adrian,
Thanks for this amazing tutorial. However, everything is fine until I moved to the last step that after I executed the “python scan.py –image images/receipt.jpg” command, The program is holding and not moving down. I read your post “How to Build a Kick-Ass Mobile Document Scanner in Just 5 Minutes” and found a similar problem, but is that for OpenCV 2 and 3 and not suit to OpenCV 4? Thanks for answering my question!
Click on the window opened by OpenCV and press any key on your keyboard to advance execution.
Hi Adrian, you can probably trash my questions above. I worked around the first tbb issue (at least I think I have). The second xfeatures problem was caused by following your recipe without thinking enough. I unpacked opencv_contrib somewhere other than ~/. Unfortunately I had an older version ~/opencv_contrib so cmake was picking this up rather than 4.0. All sorted now … in that I was able to run the “document scanner” example successfully. Cheers, Darran.
Congratulations on resolving the issue, Darren!
Hi Adrian, when I run brew switch python 3.6.5_1 after i installed python 3.6, i get the error:
Error: Could not symlink bin/2to3
Target /usr/local/bin/2to3
already exists. You may want to remove it:
rm ‘/usr/local/bin/2to3’
To force the link and overwrite all conflicting files:
brew link –overwrite python
To list all files that would be deleted:
brew link –overwrite –dry-run python
Just wondering if you knew why this error occurred.
Thank you,
I haven’t encountered that error before but it looks like you and a couple other readers have ran into the same error. I’ll see if I can replicate.
Hi John, I wasn’t able to replicate on High Sierra — are you running High Sierra or Mojave? I think that you can safely remove the 2to3 conversion script (Python 2.7 to Python 3). My guess is that they just have a new version of the script. I don’t know the reason why exactly Brew is giving you that error, but it doesn’t seem to be a big show stopper. My advice is to “go for it” and follow the instructions in the terminal output.
Hi Adrian, awesome tutorial! I just have an issue when running “brew switch python 3.6.5_1”, and I get the error: Error: Could not symlink bin/2to3. I have python 3.6 downloaded so Im just wondering if you knew the solution. Thanks.
Hey Jeff, it looks like both you and John are receiving the same error. I’m not sure why that is happening as I’ve never encountered that error before.
It looks like John has resolved the issue though but I’ll check on my end.
Hi Jeff, see my latest response to John.
Hey Adrian, thanks for the awesome tutorial. Quick question though, are there any updates on Python3.7 compatibility? I would like to install OpenCV 4 but I’d rather not go back to Python3.6, if it’s even possible of course.
You can use Python 3.7 for OpenCV, that’s not a problem. The only thing you should keep in mind is if you’re interested in doing deep learning — TensorFlow, currently, does not support Python 3.7.
Awesome tutorial, Adrian. Well done.
I’m curious if OpenCV can still be included in a C++ project if it’s installed in this way? C++ linking is… a nightmare, but maybe you can offer some guidance?
Hi Adrian,
Great tutorial! I completed it easily on my computer. Once I started the practical python book, I had trouble with Matplotlib on TkAgg, but thats another problem. I uninstalled homebrew and reinstalled to start the process over (all the simlinks were so messed up I didnt know what else to do) and now I get this error when trying to install python. python contains a recursive dependency on itself:
python depends on sphinx-doc
sphinx-doc depends on python
It seems like the issue has been documented here, but they have not made any moves to fix it. https://github.com/scalacenter/bloop/issues/446
Any ideas?
Python 3.7 installs perfectly fine with brew install python.
Oh no, I’m sorry to hear about the error, Carlene. Unfortunately I’ve never encountered that error before so I’m not sure what the exact error is. If your sym-links were messed up though then that’s likely the root cause. Unfortunately just about the only thing I can recommend is a fresh install of macOS to ensure you have a fresh slate. I know that’s not the answer you were hoping for but given the state of the machine I unfortunately don’t have many other recommendations. Sorry I couldn’t be of more help here!
Just found this one
brew install –ignore-dependencies https://raw.githubusercontent.com/Homebrew/homebrew-core/f2a764ef944b1080be64bd88dca9a1d80130c558/Formula/python.rb
got the same error message, came across this ‘fix’:
https://github.com/tensorflow/tensorflow/issues/25093#issuecomment-458747479
Hi Adrian, I have followed all the steps and faced no errors.
But when I run “python scan.py –image images/receipt.jpg” only blank page is displayed.
No error is thrown. I am not sure what’s wrong? Any suggestions?
Could you elaborate a bit on what you mean by “only blank page” is displayed? What happens when you click on the active window opened by OpenCV and press a key to advance execution of the script?
Today, I created a project in Pycharm and installed Opencv-python/ imutils/scikit-image packages. All other dependent packages were downloaded automatically.
Now the test program works as expected.
is this step needed for this complete installation to work or without above step it should work?
No, it’s not a required step to use a PyCharm project. It sounds like there was just an issue with your initial script or input image.
python contains a recursive dependency on itself:
python depends on sphinx-doc
sphinx-doc depends on python
Are you using macOS Mojave and/or Python 3.7?
Hi Adrian,
I’ve got the same error on a fresh formatted machine.
Im using MacOS High Sierra and python 3.7 is not installed by default.
After getting the dependency error I installed python 3.7 using “brew install python” and then I tried again to install python 3.6 but I still got the dependency error.
Any suggestion ?
Take a look at this brand new post which includes a resolution to the dependency error.
Hi Adrian,
I solved it in a different way:
First of all I uninstalled the python 3.7 release I installed two days ago using “brew uninstall python”.
Then I downloaded the python installer 3.6.8 from python web site and installed it using its installer.
Because of this, python components have not been installed on /usr/local/Cellar/python/3.6.5_1/Frameworks … but they are in /Library/Frameworks …
This is not a problem for virtualenv that recognize the correct directory.
Up to now I did not found any problem related to this solution so I’d like to share it 🙂
Hi Adrian. When I run the ‘make’ command it does not compile and instead shows another message:
make: *** No targets specified and no makefile found. Stop.
Could you please tell me what the problem is?
Your “cmake” command exited with an error and your build files were not generated. Go back to the “cmake” step and look for the error.
Hi Adrian,
i had to add the following line on make to MACos Mojave
-D OPENCV_EXTRA_MODULES_PATH=../../opencv_contrib/modules \
i got errors on make (very strange). Hope help someone.
Sorry Adrian, my fault.
i didn´t used my home to compile, i worked on another directory not my home.
Congrats on resolving the issue!
Thanks Fabio, had the same issue.
And thanks Adrian, great tutorial!
I just completed this tutorial and everything worked exactly, wow!! thank you for this educational tutorial. Well done.
Thanks for the kind words — and congrats on getting OpenCV installed!
how to update new release (update)
You will need to download the latest release of OpenCV, compile it, and install it.
I searched a lot for a tutorial to help me!!! Very good !!! Tks = D
Congrats on getting OpenCV installed on your macOS machine!
Hello, Im having a problem with installing Python 3.6.5_1
It said:
Error: python contains a recursive dependency on itself:
python depends on sphinx-doc
Looking forward for your help
Take a look at this tutorial where I discuss the solution to that problem.
Thank you Adrian! great tutorial. Was extremely detailed and I was able to install OpenCV4.0.0 on my Mac without a single glitch just by following these steps.
That’s great, congrats on getting OpenCV 4 installed on your Mac!
Thanks a lot, very useful !
Adrian,
Thanks for the tutorial. I got this working on Mojave with zero problems.
It seems that you should emphasize to people new to OpenCV on Mac that setting up in the virtual environment is not just an optional way of doing this, but has real advantages in keeping a botched install from tangling up their machine and possibly making other programs and packages unusable.
It seems that unless a user really knows what they are doing and how to un-do an action, they should work in the virtual environment.
Congrats on getting up and running with OpenCV, Wade! I also appreciate the feedback as well.
Hi!
I thinks you want say about this address: /usr/local/Cellar/opencv/4.0.1/lib/python3.7/site-packages/cv2/python-3.7/cv2.cpython-37m-darwin.so
I can rename this file on this path?
Yes, you can rename it and it will work.
thank you very much, this is the only guide that works! YOU ROsebroCK!!
Thank you for the kind words, Francesco!
Hi Adrian,
Many thanks for this tutorial. I have already installed opencv on Mac. But I can’t close image window (the x button is un-clickable) when I use cv2.imshow(‘img’, img) method to show image. Have you come across with this issue on opencv 4.0 or 4.1?
In addition, you know how to add opencv documentation to the pycharm? The documentation only pops up when i use homebrew to install opencv.
The “close” button on those windows doesn’t work. You simply click on the open window and press any key on your keyboard to advance execution.
As for PyCharm docs inside PyCharm, sorry, I don’t know about that.
Hey Adrian, I love your project and Im looking forward for more projects from you. I have 1 question since I am just beginning to start my quest on discovering computer vision and its technologies, seriously where do I put the “images” file that i have downloaded?
What “images” directory are you referring to? The one included with the the downloads of this tutorial?
You can place it anywhere you want, just specify the path to the Python script and input image via command line argument.
Is this a typo: If you’ve reached 100%, then there is one additional command to install OpenCV 4 prior to Step #5:
Should it be Step #6
Thanks! Typo has been fixed.
Also a small change might help other novices like me.
in the installation flow you are switching in and out of Virtual env, sometimes hard to catch. I caught it few times when i saw “workon cv” in the next set of commands.
Specifically “Step #6: Sym-link OpenCV 4 on macOS to your virtual environment site-packages”
Once you are in the Python virtual environment you don’t need to leave it. I just mentioned the “workon” command multiple times as readers often forget to enter it in the first place.
Alright so thank you for an amazing tutorial, but unfortunately I am yet unable to use OpenCV + Python in Xcode.
It simply throws an error:
ModuleNotFoundError: No module named ‘cv2’
PLEASE HELP!
You need to set the Python interpreter for your Xcode environment. See this tutorial.
any uninstall tips?
Simply delete your “opencv” and “opencv_contrib” directories and then delete the “cv2.so” bindings from your “site-packages” directory.
That’s really nice, tanks you
Thanks, I’m glad you enjoyed the tutorial!
Really easy to follow tutorial! Loved it! Thank you Adrian!
Thanks Dharmin!
Hi Sir,
it is a very nicely written tutorial, but I have one question. I noticed that in the image of your cmake output, there is a “matlab”, while I don’t have that in my output and I searched “matlab” in the cmakelists.txt of recent versions of opencv but found none. I also noticed that cmake told me that the matlab module in opencv_contrib is unavailable.
Do you know what is going on here?
Should we continue to install opencv 4.0.0 or can we install the latest versions?
For example: as of today (11/10/19) , the latest is 4.1.2. And just change the numbering in the code in Step #5?
Thanks
Yes, you can use the latest versions of OpenCV (just make sure you download the latest version and update the file paths).
Hi, I am having trouble inside the build directory when I try to create cmakes since it says the Cmakelist.txt should be int he build directory. should I move it there/ and be using the long command when I am inside the build directory or the opencv directory?
Thanks
Double-check your file paths and make sure you’re:
1. In the “build” directory
2. Supplying the parent root path (i.e. the “..” at the end of the cmake command)
The problem is solved when I corrected the opencv_contrib path.
Do you have any suggestions for me about how to set FFMPEG in opencv?
I tried “brew install ffmpeg” then it did compile with ffmpeg.
Hi! How do I undo all this stuff? I am unable to run a bunch of my other work because Homebrew now points to this medusa stuff, and would like to re-visit this later..
Thanks Adrian, worked perfectly; had to rewrite a few lines since I was using python 3.7, but great easy tutorial to read and follow.
Hey, great tutorial. I just wanted to add a bit to it. I already had Python 3.7 installed so in the step for installing Python 3.6 I had to follow these steps to install it: https://stackoverflow.com/questions/51726203/installing-python3-6-alongside-python3-7-on-mac.
It will be a useful addition to the blog post.
Adrian et all – I am just getting started and definitely motivated, I have one successful RPI project, including code modifications, Ive read a bunch of the “14 days” tutorials, and I have a recurring impediment maybe you / community could assist with:
Version / configuration control of MAC OS, OpenCV, Python and ability to compile appropriate environment for each project. Im trying to run the projects on my MAC OS instead of RPI which introduced one variable not yet overcome, and I see some of the projects reference different versions of Python and also different versions of Open CV. Getting through compile on the RPI took many trouble shooting sessions (nights) and I am looking for some kind of solution that may stream line my ability to execute each of the projects… Some ideas I have… but realistically, I don’t know what is feasible or realistic: a summary of config needed at top of each project, open source bash scripts for each combination of configuration, reference to a tutorial in this topic, other… Adrian thanks ahead for all you do… community too.
Hi Bob — installing OpenCV can be a bit of a pain, I can certainly empathize with that. Were you able to get your macOS and RPi systems configured with OpenCV?
I noticed a potential problem with how PYTHON3_LIBRARY is defined.
The python-config executable that subprocess invokes might not belong to the python instance that was used to create the virtualenv.
In my case python-config references the Apple-provided Python2.7 instance, even when I’m inside a Python3 virtualenv. The python-config executable isn’t part of the virtualenv, possibly because I didn’t use virtualenv/virtualenvwrapper (just python3 -m venv).
Another way of figuring out the dylib path could be to use ctypes.util.find_library(“python3.7”). That gives what looks like the right path without shelling out.
Thank you for sharing, Bill!
unfortunately it seems nice tutorial but i stuck in some things.
The biggest is that when run cmake command for opencv and finished when i run make it tell’s me that “no target specified and no makefile found”.
can anyone help? i am on mac.
Double-check your “cmake” output — that command likely terminated in an error, hence why no build files were created.
Using python 3.7.3 on Catalina 10.15.1
When trying to import cv2 got the error:
ImportError: dlopen(/Users/ronald/.virtualenvs/cv/lib/python3.7/site-packages/cv2.so, 2): Library not loaded: /usr/local/opt/openssl/lib/libssl.1.0.0.dylib
Referenced from: /usr/local/opt/ffmpeg/lib/libavformat.58.dylib
Reason: image not found
Solution is:
brew upgrade ffmpeg
Thanks for sharing the solution!
Finally, how about a Docker Image of your preferred development environment? Would love to follow along and learn from you. At this point with 40+ hours of installation and still don’t have an environment, I’m going to use a docker image from another source for OpenCV unless you have other alternatives.
Sounds like TLS and OpenSSL are at odds for PIP and something broke it but doesn’t tell you how to get to newer Mac TLS standards.
Hey Michale — I would recommend you take a look at Practical Python and OpenCV. That book includes a VM that has OpenCV pre-installed.