You know what’s a really good feeling?
Contributing to the open source community.
PyPI, the Python Package Index repository is a wonderful thing. It makes downloading, installing, and managing Python libraries and packages a breeze.
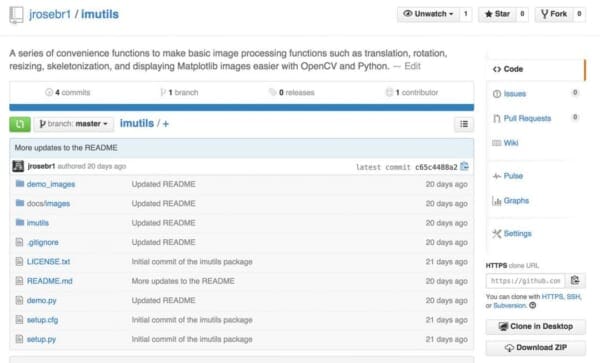
And with all that said, I have pushed my own personal imutils package online. I use this package nearly every single day when working on computer vision and image processing problems.
This package includes a series of OpenCV + convenience functions that perform basics tasks such as translation, rotation, resizing, and skeletonization.
A diverse image dataset is beneficial for testing the convenience functions in the imutils package. It allows users to explore how these functions can simplify common tasks in image processing.
Roboflow has free tools for each stage of the computer vision pipeline that will streamline your workflows and supercharge your productivity.
Sign up or Log in to your Roboflow account to access state of the art dataset libaries and revolutionize your computer vision pipeline.
You can start by choosing your own datasets or using our PyimageSearch’s assorted library of useful datasets.
Bring data in any of 40+ formats to Roboflow, train using any state-of-the-art model architectures, deploy across multiple platforms (API, NVIDIA, browser, iOS, etc), and connect to applications or 3rd party tools.
In the future we will (probably, depending on feedback in the comments section) be performing a detailed code review of each of the functions in the imutils package, but for the time being, take a look at the rest of this blog post to see the functionality included in imutils , then be sure to install it on your own system!
Installing
This package assumes that you already have NumPy and OpenCV installed (along with matplotlib, if you intend on using the opencv2matplotlib function).
To install the the imutils library, just issue the following command:
$ pip install imutils
My imutils package: A series of OpenCV convenience functions
Let’s go ahead and take a look at what we can do with the imutils package.
Translation
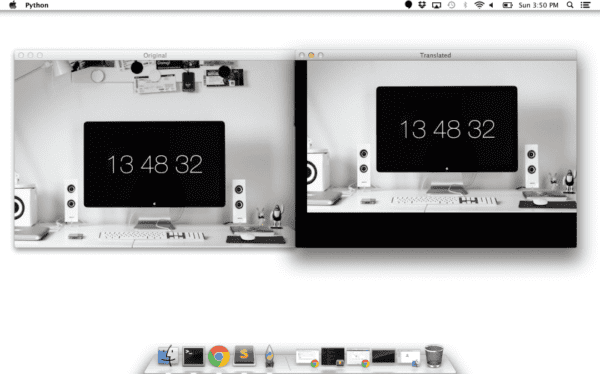
Translation is the shifting of an image in either the x or y direction. To translate an image in OpenCV you need to supply the (x, y)-shift, denoted as (tx, ty) to construct the translation matrix M:
And from there, you would need to apply the cv2.warpAffine function.
Instead of manually constructing the translation matrix M and calling cv2.warpAffine , you can simply make a call to the translate function of imutils .
Example:
# translate the image x=25 pixels to the right and y=75 pixels up
translated = imutils.translate(workspace, 25, -75)
Output:
Rotation
Rotating an image in OpenCV is accomplished by making a call to cv2.getRotationMatrix2D and cv2.warpAffine . Further care has to be taken to supply the (x, y)-coordinate of the point the image is to be rotated about. These calculation calls can quickly add up and make your code bulky and less readable. The rotate function in imutils helps resolve this problem.
Example:
# loop over the angles to rotate the image
for angle in xrange(0, 360, 90):
	# rotate the image and display it
	rotated = imutils.rotate(bridge, angle=angle)
	cv2.imshow("Angle=%d" % (angle), rotated)
Output:
Resizing
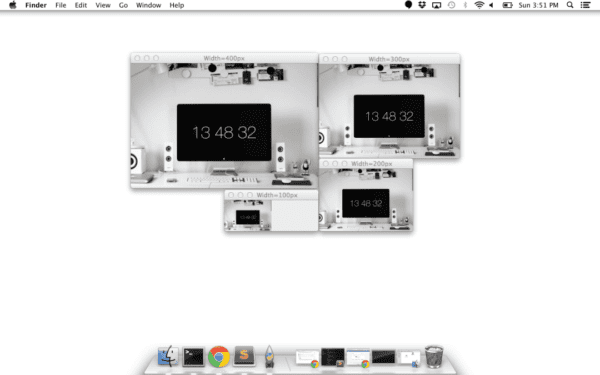
Resizing an image in OpenCV is accomplished by calling the cv2.resize function. However, special care needs to be taken to ensure that the aspect ratio is maintained. This resize function of imutils maintains the aspect ratio and provides the keyword arguments width and height so the image can be resized to the intended width/height while (1) maintaining aspect ratio and (2) ensuring the dimensions of the image do not have to be explicitly computed by the developer.
Another optional keyword argument, inter , can be used to specify interpolation method as well.
Example:
# loop over varying widths to resize the image to
for width in (400, 300, 200, 100):
	# resize the image and display it
	resized = imutils.resize(workspace, width=width)
	cv2.imshow("Width=%dpx" % (width), resized)
Output:
Skeletonization
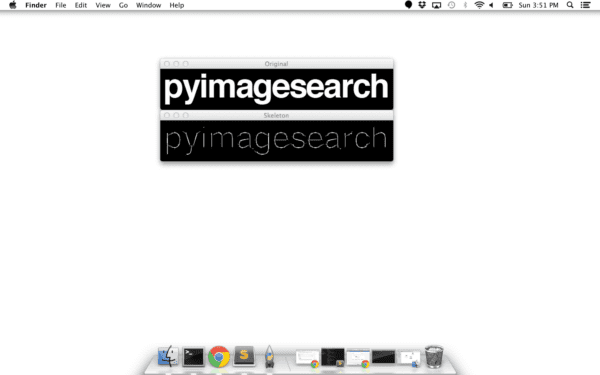
Skeletonization is the process of constructing the “topological skeleton” of an object in an image, where the object is presumed to be white on a black background. OpenCV does not provide a function to explicity construct the skeleton, but does provide the morphological and binary functions to do so.
For convenience, the skeletonize function of imutils can be used to construct the topological skeleton of the image.
The first argument, size is the size of the structuring element kernel. An optional argument, structuring , can be used to control the structuring element — it defaults to cv2.MORPH_RECT , but can be any valid structuring element.
Example:
# skeletonize the image
gray = cv2.cvtColor(logo, cv2.COLOR_BGR2GRAY)
skeleton = imutils.skeletonize(gray, size=(3, 3))
cv2.imshow("Skeleton", skeleton)
Output:
Displaying with Matplotlib
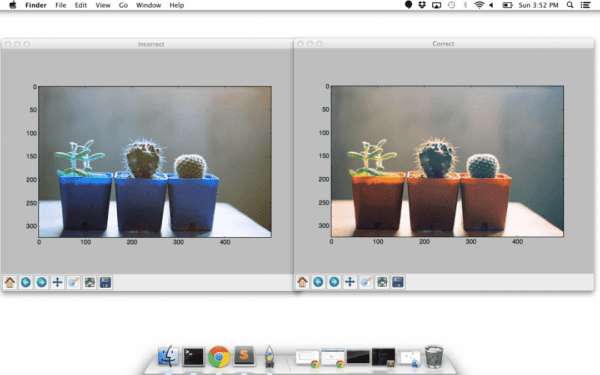
In the Python bindings of OpenCV, images are represented as NumPy arrays in BGR order. This works fine when using the cv2.imshow function. However, if you intend on using Matplotlib, the plt.imshow function assumes the image is in RGB order. A simple call to cv2.cvtColor will resolve this problem, or you can use the opencv2matplotlib convenience function.
Example:
# INCORRECT: show the image without converting color spaces
plt.figure("Incorrect")
plt.imshow(cactus)

# CORRECT: convert color spaces before using plt.imshow
plt.figure("Correct")
plt.imshow(imutils.opencv2matplotlib(cactus))
plt.show()
Output:
What's next? We recommend PyImageSearch University.
86+ total classes • 115+ hours hours of on-demand code walkthrough videos • Last updated: July 2025
★★★★★ 4.84 (128 Ratings) • 16,000+ Students Enrolled
I strongly believe that if you had the right teacher you could master computer vision and deep learning.
Do you think learning computer vision and deep learning has to be time-consuming, overwhelming, and complicated? Or has to involve complex mathematics and equations? Or requires a degree in computer science?
That’s not the case.
All you need to master computer vision and deep learning is for someone to explain things to you in simple, intuitive terms. And that’s exactly what I do. My mission is to change education and how complex Artificial Intelligence topics are taught.
If you're serious about learning computer vision, your next stop should be PyImageSearch University, the most comprehensive computer vision, deep learning, and OpenCV course online today. Here you’ll learn how to successfully and confidently apply computer vision to your work, research, and projects. Join me in computer vision mastery.
Inside PyImageSearch University you'll find:
- ✓ 86+ courses on essential computer vision, deep learning, and OpenCV topics
- ✓ 86 Certificates of Completion
- ✓ 115+ hours hours of on-demand video
- ✓ Brand new courses released regularly, ensuring you can keep up with state-of-the-art techniques
- ✓ Pre-configured Jupyter Notebooks in Google Colab
- ✓ Run all code examples in your web browser — works on Windows, macOS, and Linux (no dev environment configuration required!)
- ✓ Access to centralized code repos for all 540+ tutorials on PyImageSearch
- ✓ Easy one-click downloads for code, datasets, pre-trained models, etc.
- ✓ Access on mobile, laptop, desktop, etc.
Summary
So there you have it — the imutils package!
I hope you install it and give it a try. It will definitely make performing simple image processing tasks with OpenCV and Python substantially easier (and with less code).
In the coming weeks we’ll perform a code review of each of the functions and discuss what is going on under the hood.
Until then!
Downloads:
Grab the imutils package from GitHub.

Join the PyImageSearch Newsletter and Grab My FREE 17-page Resource Guide PDF
Enter your email address below to join the PyImageSearch Newsletter and download my FREE 17-page Resource Guide PDF on Computer Vision, OpenCV, and Deep Learning.
