Table of Contents
- Thermal Vision: Measuring Your First Temperature from an Image with Python and OpenCV
- Thermal Imaging Formats: Gray8 vs. Gray16
- Configuring Your Development Environment
- Having Problems Configuring Your Development Environment?
- Project Structure
- Measuring Your First Temperature from a Thermal Image
- Measuring Your First Temperature from a Thermal Video/Camera
- Summary
Thermal Vision: Measuring Your First Temperature from an Image with Python and OpenCV
In today’s lesson, you will learn the fundamentals of thermal/mid-far infrared vision. You will finish this lesson knowing how to measure your first temperature value from each pixel in a thermal image, including:
- Thermal imaging formats: gray8 vs. gray16
- Measuring your first temperature from a thermal image
- Measuring your first temperature from a thermal video/camera
This tutorial is the 2nd in a 4-part series on Infrared Vision Basics:
- Introduction to Infrared Vision: Near vs. Mid-Far Infrared Images (recommended to gain a better understanding of today’s tutorial)
- Thermal Vision: Measuring Your First Temperature from an Image with Python and OpenCV (today’s tutorial)
- Thermal Vision: Fever Detector with Python and OpenCV (starter project)
- Thermal Vision: Night Object Detection with PyTorch and YOLOv5 (real project)
By the end of this lesson, you’ll have measured the temperature value of each pixel in a thermal image and a thermal video in a very easy way, only using Python and OpenCV. In addition, you’ll be able to get the video stream from a thermal camera and the temperature values in real time if you have one of these amazing cameras on hand.
To learn how to measure your first temperature value from each pixel in a thermal image, just keep reading.
Thermal Vision: Measuring Your First Temperature from an Image with Python and OpenCV
Thermal Imaging Formats: Gray8 vs. Gray16
Gray8
Before we start measuring the temperature value of each pixel, we need to understand the different basic image formats that thermal cameras/images provide.
We all are familiar with common color visible pictures or RGB images (Figure 1, left). However, as you’ve probably learned from the OpenCV 101 — OpenCV Basics course at PyImageSearch University, the information is usually codified in RGB color space (i.e., the Red, Green, and Blue colors) are presented by an integer in the range from 0 to 255. Therefore, we have three 8-bit unsigned channels that represent how Red, Green, and Blue our image is (Figure 1, left).
When the image is represented in a grayscale space (Figure 1, center), each pixel is only characterized by a single channel or value, usually between 0 and 255 (i.e., black and white).
This format, shown in Figure 1 (right) and known as grayscale or gray8 (8 bits = pixel values from 0 to 255), is the most extended in thermal vision.
As Figure 2 shows, gray8 images are colored with different colormaps or color scales to enhance the visualization of the temperature distribution in thermal images. These maps are known as thermal color palettes.
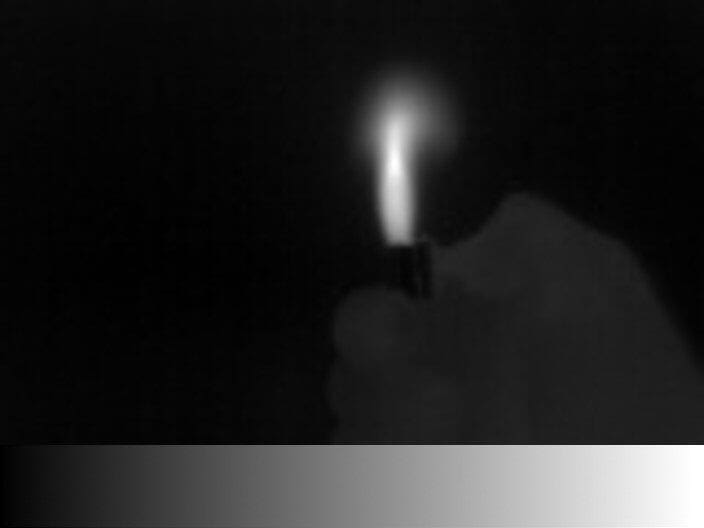
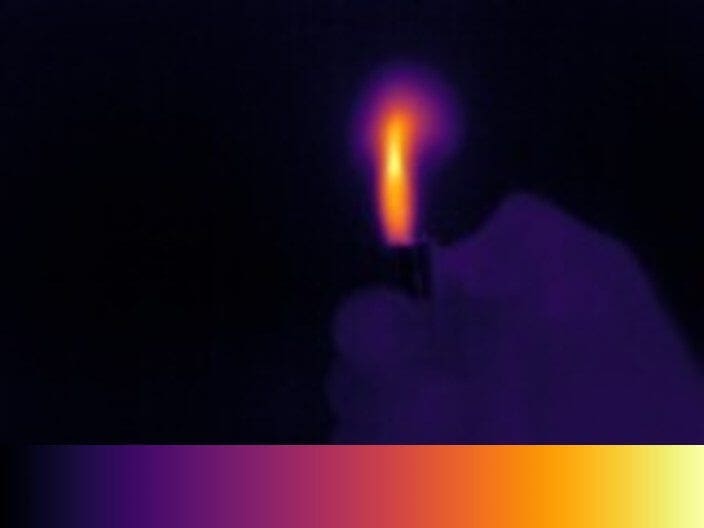
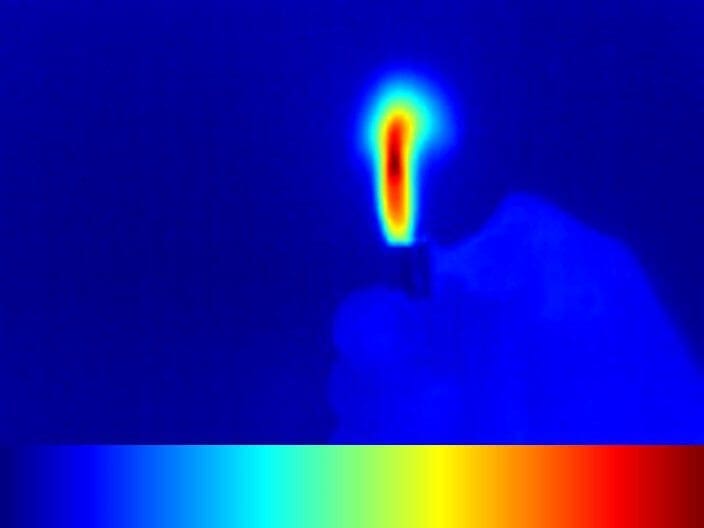
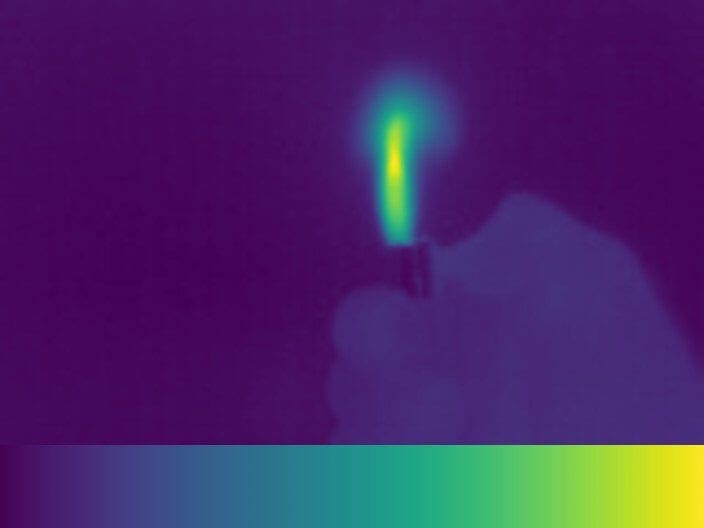
For example, the Inferno palette shows the temperature variation between purple (0) and yellow (255).
Gray16
Great, now we understand where these amazing colorful images come from, but how can we calculate the temperature (you might be wondering)?
For this purpose, thermal cameras also provide gray16 images. Instead of using pixel values from 0 to 255 (Figure 3, left), this format codifies the information in 16 bits, that is, 0 to 65,535 values (Figure 3, right).
lighter_gray8.jpg) vs. Gray16 thermal image (right, lighter_gray16_image.tiff).But, what for?
We will discover it in the next section, but first, let’s apply what we have learned so far.
In the following short piece of code, you will learn how to:
- open a gray16 thermal image (
lighter_gray16_image.tiff) - convert it to a gray8 image
- color it using different thermal color palettes
As you may have noticed, this image has a particular format, TIFF (Tag Image File Format), to store the 16 information bits. It has been captured with an affordable thermal camera: RGMVision ThermalCAM 1 (it is an excellent starting option if you are interested in discovering the thermal vision world).
Configuring Your Development Environment
To follow this guide, you need to have the OpenCV library installed on your system.
Luckily, OpenCV is pip-installable:
$ pip install opencv-contrib-python
If you need help configuring your development environment for OpenCV, we highly recommend that you read our pip install OpenCV guide — it will have you up and running in a matter of minutes.
Having Problems Configuring Your Development Environment?

All that said, are you:
- Short on time?
- Learning on your employer’s administratively locked system?
- Wanting to skip the hassle of fighting with the command line, package managers, and virtual environments?
- Ready to run the code right now on your Windows, macOS, or Linux system?
Then join PyImageSearch University today!
Gain access to Jupyter Notebooks for this tutorial and other PyImageSearch guides that are pre-configured to run on Google Colab’s ecosystem right in your web browser! No installation required.
And best of all, these Jupyter Notebooks will run on Windows, macOS, and Linux!
Project Structure
We first need to review our project directory structure.
Start by accessing this tutorial’s “Downloads” section to retrieve the source code and example images.
Let’s inspect the simple project structure:
$ tree --dirsfirst
.
├── gray8_vs_gray16.py
├── measure_image_temperature.py
├── measure_video_temperature.py
├── measure_camera_video_temperature.py
├── lighter_gray16_image.tiff
└── gray16_sequence
    ├── gray16_frame_000.tiff
    ├── gray16_frame_001.tiff
    ├── gray16_frame_002.tiff
    ├── ...
    └── gray16_frame_069.tiff

1 directory, 76 files
Each Python file corresponds to the 4 sections of the tutorial. The lighter_gray16_image.tiff file is our 16-bit/gray16 thermal image.
Open the gray8_vs_gray16.py file in your project directory structure, and insert the following code to import NumPy and OpenCV libraries:
# import the necessary packages
import numpy as np
import cv2
First, we are going to start opening the gray16 thermal image, lighter_gray16_image.tiff:
# open the gray16 image
gray16_image = cv2.imread("lighter_gray16_image.tiff", cv2.IMREAD_ANYDEPTH)
The cv2.IMREAD_ANYDEPTH flag allows us to open the gray16 image in 16-bit format.
Then, we convert it into a gray8 image to be able to process and visualize it properly:
# convert the gray16 image into a gray8
gray8_image = np.zeros((120, 160), dtype=np.uint8)
gray8_image = cv2.normalize(gray16_image, gray8_image, 0, 255, cv2.NORM_MINMAX)
gray8_image = np.uint8(gray8_image)
On Lines 9, 10, and 11, respectively, we create an empty 160x120 image, we normalize the gray16 image from 0-65,553 (16 bits) to 0-255 (8 bits), and we ensure that the final image is an 8-bit image.
We color the gray8 image using our favorite OpenCV colormap* to get the different thermal color palettes:
# color the gray8 image using OpenCV colormaps
inferno_palette = cv2.applyColorMap(gray8_image, cv2.COLORMAP_INFERNO)
jet_palette = cv2.applyColorMap(gray8_image, cv2.COLORMAP_JET)
viridis_palette = cv2.applyColorMap(gray8_image, cv2.COLORMAP_VIRIDIS)
(*) Please, visit ColorMaps in OpenCV to ensure that your selected colormap is available on your OpenCV version. In this case, we are using OpenCV 4.5.4.
Finally, we show the results:
# show the different thermal color palettes
cv2.imshow("gray8", gray8_image)
cv2.imshow("inferno", inferno_palette)
cv2.imshow("jet", jet_palette)
cv2.imshow("viridis", viridis_palette)
cv2.waitKey(0)
Measuring Your First Temperature from a Thermal Image
Now that we understand the basic thermal imaging formats, we are ready to measure our first temperature from a thermal image!
We left the previous section wondering why gray16 images are helpful in determining the temperature.
The answer is simple: 16-bit-pixel values give us enough information to calculate the temperature of each pixel.
Important: At this point, you should check how the information is codified in your thermal/image camera!
But don’t worry; we will simplify this step by seeing how the temperature is presented in the sample image, lighter_gray16_image.tiff, captured with RGMVision ThermalCAM 1.
This camera follows:
(1) Temperature (°C) = (Gray_16_value)/100 (K) – Absolute_zero (K).
For example, if we get a gray16 value of 40,000, the resulting temperature at Celsius scale is:
(2) Temperature (°C) = 40,000/100 (K) – 273.15 (K) = 126.85 °C,
what it means is
(3) Temperature = 126.85 °C = 260.33 °F.
With this information, let’s start coding!
Open the measure_image_temperature.py file and import NumPy and OpenCV libraries:
# import the necessary packages
import numpy as np
import cv2
Open the gray16 thermal image, lighter_gray16_image.tiff as in the previous section:
# open the gray16 image
gray16_image = cv2.imread("lighter_gray16_image.tiff ", cv2.IMREAD_ANYDEPTH)
The cv2.IMREAD_ANYDEPTH flag allows us to open the gray16 image in 16-bit format.
We are going to measure the temperature value of the desired pixel. Let’s start with a hot value in the middle of the flame. As RGMVision ThermalCAM 1 provides 160x120 images, we can choose, for example, the x, y = (90, 40) value, as is shown in Figure 4.
# get the first gray16 value

# pixel coordinates
x = 90
y = 40

pixel_flame_gray16 = gray16_image [y, x]
Now, we can apply equation (1), and we get the temperature value in °C or in °F:
# calculate temperature value in ° C
pixel_flame_gray16 = (pixel_flame_gray16 / 100) - 273.15

# calculate temperature value in ° F
pixel_flame_gray16 = (pixel_flame_gray16 / 100) * 9 / 5 - 459.67
That’s it! As simple as that!
Finally, we display the value in the gray16 and the gray8 images:
# convert the gray16 image into a gray8 to show the result
gray8_image = np.zeros((120,160), dtype=np.uint8)
gray8_image = cv2.normalize(gray16_image, gray8_image, 0, 255, cv2.NORM_MINMAX)
gray8_image = np.uint8(gray8_image)

# write pointer
cv2.circle(gray8_image, (x, y), 2, (0, 0, 0), -1)
cv2.circle(gray16_image, (x, y), 2, (0, 0, 0), -1)

# write temperature value in gray8 and gray16 image
cv2.putText(gray8_image,"{0:.1f} Fahrenheit".format(pixel_flame_gray16),(x - 80, y - 15), cv2.FONT_HERSHEY_PLAIN, 1,(255,0,0),2)
cv2.putText(gray16_image,"{0:.1f} Fahrenheit".format(pixel_flame_gray16),(x - 80, y - 15), cv2.FONT_HERSHEY_PLAIN, 1,(255,0,0),2)

# show result
cv2.imshow("gray8-fahrenheit", gray8_image)
cv2.imshow("gray16-fahrenheit", gray16_image)
cv2.waitKey(0)
Figure 5 shows the result.
We are not displaying the degree symbol “°” because the default OpenCV fonts follow a limited ASCII and don’t provide this kind of symbol. If you are interested in it, please, use PIL (Python Imaging Library).
If we want to verify that this value makes sense, we can obtain a different temperature point, in this case, a cooler one: the hand that lights the lighter.
# get the second gray16 value

# pixel coordinates
x = 90
y = 100
We simply change the coordinates and obtain the results shown in Figure 6.
Measuring Your First Temperature from a Thermal Video/Camera
In this last section, we will apply again what we have learned in this tutorial, but from a thermal video source: a thermal camera or a thermal video file.
Measuring Temperature from a Thermal Video
If you don’t have one of these incredible cameras on hand, don’t worry, we will use a sample video sequence, gray16_sequence folder, extracted from RGMVision ThermalCAM 1.
In the following piece of code, you will learn how to do it easily.
Open measure_video_temperature.py and import NumPy, OpenCV, OS, and argparse libraries:
# import the necessary packages
import cv2
import numpy as np
import os
import argparse
If you are familiar with the PyImageSearch tutorials, you already know the argparse Python library. We use it to give a program additional information (e.g., command line arguments) at runtime. In this case, we’ll use it to specify our thermal video path:
# construct the argument parse and parse the arguments
ap = argparse.ArgumentParser()
ap.add_argument("-v", "--video", required=True, help="path of the video sequence")
args = vars(ap.parse_args())
The following code shows you how to implement a mouse pointer to easily display the temperature of your chosen pixel instead of selecting a fixed point:
# create mouse global coordinates
x_mouse = 0
y_mouse = 0

# create thermal video fps variable (8 fps in this case)
fps = 8

# mouse events function
def mouse_events(event, x, y, flags, param):
    # mouse movement event
    if event == cv2.EVENT_MOUSEMOVE:

    # update global mouse coordinates
    global x_mouse
    global y_mouse

    x_mouse = x
    y_mouse = y

# set up mouse events and prepare the thermal frame display
gray16_frame = cv2.imread("lighter_gray16_image.tiff", cv2.IMREAD_ANYDEPTH)
cv2.imshow('gray8', gray16_frame)
cv2.setMouseCallback('gray8', mouse_events)
From Lines 20-29, we define our mouse events function. First, we update the previous x and y pixel coordinates when we detect mouse movements (cv2.EVENT_MOUSEMOVE).
We recommend that you check out the Capturing mouse click events with Python and OpenCV tutorial to go deeper into the mouse capturing events.
# loop over the thermal video frames
for image in sorted(os.listdir(args["video"])):

    # filter .tiff files (gray16 images)
    if image.endswith(".tiff"):

        # define the gray16 frame path
        file_path = os.path.join(args["video"], image)

        # open the gray16 frame
        gray16_frame = cv2.imread(file_path, cv2.IMREAD_ANYDEPTH)

        # calculate temperature
        temperature_pointer = gray16_frame[y_mouse, x_mouse]
        temperature_pointer = (temperature_pointer / 100) - 273.15
        temperature_pointer = (temperature_pointer / 100) * 9 / 5 - 459.67

        # convert the gray16 frame into a gray8
        gray8_frame = np.zeros((120, 160), dtype=np.uint8)
        gray8_frame = cv2.normalize(gray16_frame, gray8_frame, 0, 255, cv2.NORM_MINMAX)
        gray8_frame = np.uint8(gray8_frame)

        # colorized the gray8 frame using OpenCV colormaps
        gray8_frame = cv2.applyColorMap(gray8_frame, cv2.COLORMAP_INFERNO)

        # write pointer
        cv2.circle(gray8_frame, (x_mouse, y_mouse), 2, (255, 255, 255), -1)

        # write temperature
        cv2.putText(gray8_frame, "{0:.1f} Fahrenheit".format(temperature_pointer), (x_mouse - 40, y_mouse - 15), cv2.FONT_HERSHEY_PLAIN, 1, (255, 255, 255), 1)

        # show the thermal frame
        cv2.imshow("gray8", gray8_frame)

        # wait 125 ms: RGMVision ThermalCAM1 frames per second = 8
        cv2.waitKey(int((1 / fps) * 1000))
Loop over the thermal video sequence, gray16_sequence folder, and get the gray16 temperature value (Lines 37-46). To simplify the process, we use a gray16 frame sequence, TIFF images, instead of a gray16 video file (common compressed video files tend to lose information).
On Lines 49-51, we apply equation (1) and calculate the temperature of our thermal mouse pointer in °C (or in °F): x_mouse and y_mouse.
Then, we obtain the gray8 image to show the result per frame.
On Line 71, we wait 125 ms because our RGMVision ThermalCAM 1 provides an 8 fps stream.
Measuring Temperature from a Thermal Camera
As the last point of this tutorial, we will learn how to loop over each frame of our UVC (USB Video Class) thermal camera, in our case, the RGMVision ThermalCAM 1, while measuring and displaying the temperature of our mouse pixel.
Open measure_camera_video_temperature.py and import the NumPy and OpenCV libraries:
# import the necessary packages
import cv2
import numpy as np
Define the mouse event function as in the above “Measuring Temperature from a Thermal Video” section:
# create mouse global coordinates
x_mouse = 0
y_mouse = 0

# mouse events function
def mouse_events(event, x, y, flags, param):
    # mouse movement event
    if event == cv2.EVENT_MOUSEMOVE:

    # update global mouse coordinates
    global x_mouse
    global y_mouse

    x_mouse = x
    y_mouse = y
Set up the thermal camera index and resolution, in our case, 160x120:
# set up the thermal camera index (thermal_camera = cv2.VideoCapture(0, cv2.CAP_DSHOW) on Windows OS)
thermal_camera = cv2.VideoCapture(0)

# set up the thermal camera resolution
thermal_camera.set(cv2.CAP_PROP_FRAME_WIDTH, 160)
thermal_camera.set(cv2.CAP_PROP_FRAME_HEIGHT, 120)
On Line 22, you should select your camera ID. If you are using Windows OS, be sure to specify your backend video library, for example, Direct Show (DSHOW): thermal_camera = cv2.VideoCapture(0, cv2.CAP_DSHOW).
For more information, please visit Video I/O with OpenCV Overview.
Set up the thermal camera to work as a gray16 source and to receive the data in raw format.
# set up the thermal camera to get the gray16 stream and raw data
thermal_camera.set(cv2.CAP_PROP_FOURCC, cv2.VideoWriter.fourcc('Y','1','6',' '))
thermal_camera.set(cv2.CAP_PROP_CONVERT_RGB, 0)
Line 30 prevents the RGB conversion.
Set up the mouse events and prepare the thermal frame display (Lines 33-35):
# set up mouse events and prepare the thermal frame display
grabbed, frame_thermal = thermal_camera.read()
cv2.imshow('gray8', frame_thermal)
cv2.setMouseCallback('gray8', mouse_events)
Loop over the thermal camera frames and calculate the gray16 temperature value (Lines 38-63).
# loop over the thermal camera frames
while True:

    # grab the frame from the thermal camera stream
    (grabbed, thermal_frame) = thermal_camera.read()

    # calculate temperature
    temperature_pointer = thermal_frame[y_mouse, x_mouse]
    # temperature_pointer = (temperature_pointer / 100) - 273.15
    temperature_pointer = (temperature_pointer / 100) * 9 / 5 - 459.67

    # convert the gray16 image into a gray8
    cv2.normalize(thermal_frame, thermal_frame, 0, 255, cv2.NORM_MINMAX)
    thermal_frame = np.uint8(thermal_frame)

    # colorized the gray8 image using OpenCV colormaps
    thermal_frame = cv2.applyColorMap(thermal_frame, cv2.COLORMAP_INFERNO)

    # write pointer
    cv2.circle(thermal_frame, (x_mouse, y_mouse), 2, (255, 255, 255), -1)

    # write temperature
    cv2.putText(thermal_frame, "{0:.1f} Fahrenheit".format(temperature_pointer), (x_mouse - 40, y_mouse - 15), cv2.FONT_HERSHEY_PLAIN, 1, (255, 255, 255), 1)

    # show the thermal frame
    cv2.imshow('gray8', thermal_frame)
    cv2.waitKey(1)

# do a bit of cleanup
thermal_camera.release()
cv2.destroyAllWindows()
We convert the gray16 image to a gray8 on Lines 49 and 50 to display the results.
Then we apply our favorite thermal palette, as we have already learned, and write the temperature value and the pointer position.
Here it is!
A real-time temperature mouse meter using your thermal camera and OpenCV!
This last section code and the RGMVision ThermalCAM 1 are available on RGM Vision.
What's next? We recommend PyImageSearch University.
86+ total classes • 115+ hours hours of on-demand code walkthrough videos • Last updated: December 2025
★★★★★ 4.84 (128 Ratings) • 16,000+ Students Enrolled
I strongly believe that if you had the right teacher you could master computer vision and deep learning.
Do you think learning computer vision and deep learning has to be time-consuming, overwhelming, and complicated? Or has to involve complex mathematics and equations? Or requires a degree in computer science?
That’s not the case.
All you need to master computer vision and deep learning is for someone to explain things to you in simple, intuitive terms. And that’s exactly what I do. My mission is to change education and how complex Artificial Intelligence topics are taught.
If you're serious about learning computer vision, your next stop should be PyImageSearch University, the most comprehensive computer vision, deep learning, and OpenCV course online today. Here you’ll learn how to successfully and confidently apply computer vision to your work, research, and projects. Join me in computer vision mastery.
Inside PyImageSearch University you'll find:
- ✓ 86+ courses on essential computer vision, deep learning, and OpenCV topics
- ✓ 86 Certificates of Completion
- ✓ 115+ hours hours of on-demand video
- ✓ Brand new courses released regularly, ensuring you can keep up with state-of-the-art techniques
- ✓ Pre-configured Jupyter Notebooks in Google Colab
- ✓ Run all code examples in your web browser — works on Windows, macOS, and Linux (no dev environment configuration required!)
- ✓ Access to centralized code repos for all 540+ tutorials on PyImageSearch
- ✓ Easy one-click downloads for code, datasets, pre-trained models, etc.
- ✓ Access on mobile, laptop, desktop, etc.
Summary
In this tutorial, we’ve learned the differences between a gray8 and a gray16 image (i.e., the most common thermal imaging formats). We learned to measure our first temperature from an image, using only Python and OpenCV to display the results in different color palettes. Going deeper, we have also discovered how to calculate, in real time, each pixel temperature of a video stream and a UVC thermal camera.
In the next tutorial, we will implement a simplified solution for facial temperature measurement, a valuable approach during the COVID pandemic. You’ll be able to apply and adapt this knowledge to your own practical project using, for example, your Raspberry Pi in a straightforward way.
Citation Information
Garcia-Martin, R. “Thermal Vision: Measuring Your First Temperature from an Image with Python and OpenCV,” PyImageSearch, P. Chugh, A. R. Gosthipaty, S. Huot, K. Kidriavsteva, and R. Raha, eds., 2022, https://pyimg.co/mns3e
@incollection{Garcia-Martin_2022_Measuring,
  author = {Raul Garcia-Martin},
  title = {Thermal Vision: Measuring Your First Temperature from an Image with {P}ython and {OpenCV}},
  booktitle = {PyImageSearch},
  editor = {Puneet Chugh and Aritra Roy Gosthipaty and Susan Huot and Kseniia Kidriavsteva and Ritwik Raha},
  year = {2022},
  note = {https://pyimg.co/mns3e},
}
Unleash the potential of computer vision with Roboflow - Free!
- Step into the realm of the future by signing up or logging into your Roboflow account. Unlock a wealth of innovative dataset libraries and revolutionize your computer vision operations.
- Jumpstart your journey by choosing from our broad array of datasets, or benefit from PyimageSearch’s comprehensive library, crafted to cater to a wide range of requirements.
- Transfer your data to Roboflow in any of the 40+ compatible formats. Leverage cutting-edge model architectures for training, and deploy seamlessly across diverse platforms, including API, NVIDIA, browser, iOS, and beyond. Integrate our platform effortlessly with your applications or your favorite third-party tools.
- Equip yourself with the ability to train a potent computer vision model in a mere afternoon. With a few images, you can import data from any source via API, annotate images using our superior cloud-hosted tool, kickstart model training with a single click, and deploy the model via a hosted API endpoint. Tailor your process by opting for a code-centric approach, leveraging our intuitive, cloud-based UI, or combining both to fit your unique needs.
- Embark on your journey today with absolutely no credit card required. Step into the future with Roboflow.
To download the source code to this post (and be notified when future tutorials are published here on PyImageSearch), simply enter your email address in the form below!

Download the Source Code and FREE 17-page Resource Guide
Enter your email address below to get a .zip of the code and a FREE 17-page Resource Guide on Computer Vision, OpenCV, and Deep Learning. Inside you'll find my hand-picked tutorials, books, courses, and libraries to help you master CV and DL!


Comment section
Hey, Adrian Rosebrock here, author and creator of PyImageSearch. While I love hearing from readers, a couple years ago I made the tough decision to no longer offer 1:1 help over blog post comments.
At the time I was receiving 200+ emails per day and another 100+ blog post comments. I simply did not have the time to moderate and respond to them all, and the sheer volume of requests was taking a toll on me.
Instead, my goal is to do the most good for the computer vision, deep learning, and OpenCV community at large by focusing my time on authoring high-quality blog posts, tutorials, and books/courses.
If you need help learning computer vision and deep learning, I suggest you refer to my full catalog of books and courses — they have helped tens of thousands of developers, students, and researchers just like yourself learn Computer Vision, Deep Learning, and OpenCV.
Click here to browse my full catalog.