Table of Contents
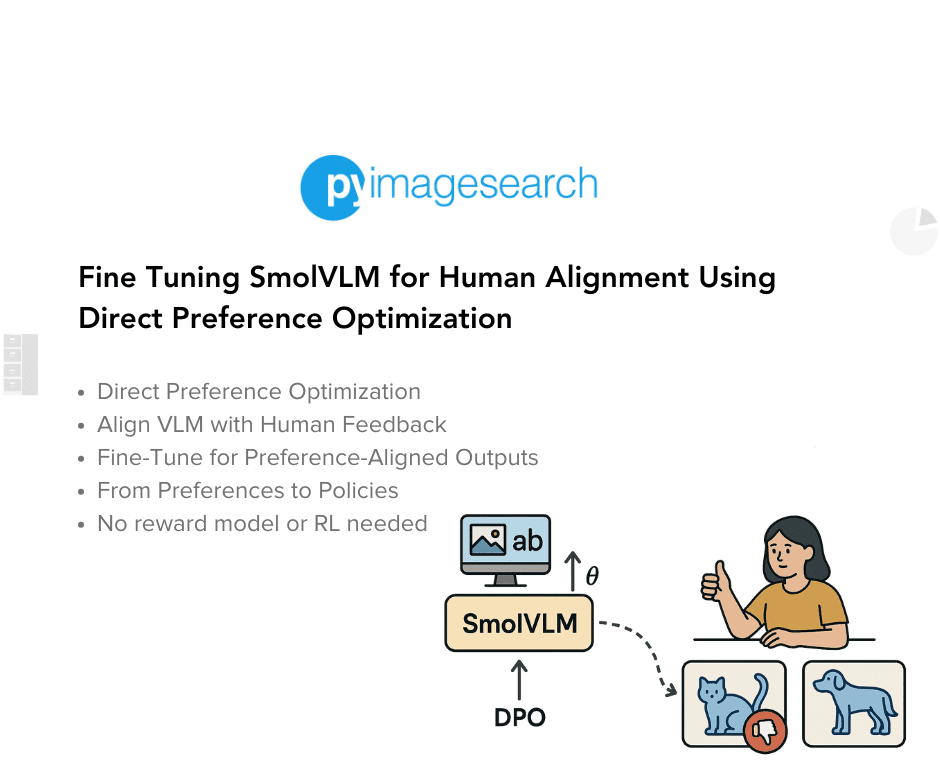
Fine Tuning SmolVLM for Human Alignment Using Direct Preference Optimization
Preference optimization shines when we want models to make choices that feel naturally human, not just syntactically correct. Consider a chatbot that answers “technically” correctly but in a tone that feels rude or robotic. Or a VLM that captions an image with irrelevant details because it’s maximizing likelihood, not usefulness. In such cases, standard supervised fine tuning falls short because it doesn’t capture what people actually want.
Preference optimization bridges this gap by teaching models to choose the better response between options, based on real human or proxy judgments. Whether it’s prioritizing clear over verbose explanations, emotionally attuned over tone-deaf replies, or safe over harmful outputs, this paradigm brings us closer to models that act with intent, not just fluency.
While traditional fine tuning and reward-based reinforcement learning (e.g., RLHF/RLAIF) have paved the way, they often introduce complexity, instability, or prohibitive computational costs. Enter Direct Preference Optimization (DPO) — a simple yet principled method that cuts through the noise by directly learning from human preferences without requiring a separate reward model or policy optimization loop.
In this post, we’ll explore how DPO brings alignment within reach for smaller architectures (e.g., SmolVLM). You’ll see how we can guide model behavior using nothing more than preference-labeled data and a clever contrastive objective.
To learn how to fine tune SmolVLM using Direct Preference Optimization, just keep reading.
What Is Preference Optimization? Types of Techniques
Preference optimization refers to a class of fine-tuning techniques designed to align machine learning models, particularly language or vision-language models (VLMs), with human or proxy preferences. Instead of just predicting the next word or token, the model is optimized to produce outputs that are preferable according to some evaluator, whether that’s a human annotator or another model. This is crucial for making generative models more useful, safe, and engaging in real-world applications.
At its core, preference optimization involves exposing a model to pairs of outputs (e.g., one preferred, one rejected) and adjusting its behavior to increase the likelihood of producing preferred responses. This approach bypasses rigid rule-based alignments and allows fine-grained control based on qualitative judgments — something humans excel at, but machines don’t learn out of the box.
Reinforcement Learning from Human Feedback (RLHF)
RLHF (Figure 1) is the original heavyweight of preference optimization. It has been used to align various flagship models (e.g., ChatGPT) with Human Preferences. It uses human-labeled comparisons to train a reward model, which then guides the model’s behavior through reinforcement learning.

Fine tuning models using RLHF typically involves the following three steps:
- Supervised Fine Tuning (SFT): The base model is fine-tuned on curated prompt-response pairs. This provides us with an initial model that we aim to optimize and align with human preferences.
- Reward Modeling: Human annotators rank multiple outputs from the supervised, fine-tuned model. These human-provided rankings are used to train a reward model to score new outputs, just like humans.
- Policy Optimization: The model is fine-tuned using Proximal Policy Optimization (PPO) — a reinforcement learning policy optimization algorithm that tunes the base model by maximizing the reward model’s score.
While RLHF produces models with impressive conversational and coding abilities, the RLHF pipeline is considerably more complex than supervised learning, involving the training of multiple LMs and sampling from the LM policy during the training loop, which incurs significant computational costs.
Reinforcement Learning from AI Feedback (RLAIF)
RLAIF borrows the structure of RLHF but replaces human annotators with a preference proxy model trained on existing human ratings. This AI critic can generalize preference judgments at scale, reducing labeling costs.
While this cuts human effort and accelerates iterations, it introduces the risk of compounding model biases. Still, it has proven surprisingly effective in projects like Constitutional AI and other forms of scalable alignment.
Direct Preference Optimization (DPO)
DPO (Figure 2) is a preference-based fine-tuning method that directly optimizes a language model to prefer certain outputs over others based on human feedback. Unlike RLHF, which requires training a separate reward model and using reinforcement learning (e.g., PPO), DPO simplifies the process by directly optimizing the model’s policy.

Intuitively, the DPO update increases the relative log probability of preferred responses over dispreferred ones. However, it incorporates a dynamic, per-example importance weight that prevents the model from degeneration that we find occurs with a naive probability ratio objective.
While existing methods (RLHF, RLAIF) utilize the preference model to define a preference loss for training a reward model, they then train a policy that optimizes the learned reward model. In contrast, DPO employs a change of variables to define the preference loss directly as a function of the policy.
Identity Preference Optimization (IPO)
IPO builds on DPO by adding a regularization term to discourage the model from straying too far from a reference (usually the original supervised model). This helps:
- Maintain fluency and task-specific knowledge
- Prevent overfitting to noisy or sparse preference data
- Ensure alignment doesn’t come at the cost of model collapse
Mathematically, IPO augments the DPO loss with an identity constraint, subtly blending stability into preference learning.
Group Relative Policy Optimization (GRPO)
First introduced in DeepSeek-R1, GRPO (Figure 3) is a reinforcement learning technique that optimizes model behavior based on relative preferences across groups of responses. Instead of relying on a single reward signal or binary preference pair, GRPO samples multiple candidate responses for a given prompt and evaluates them using rule-based or heuristic feedback.

This makes GRPO especially well-suited for domains with verifiable outcomes (e.g., math, programming, or logic puzzles), where correctness can be determined without human annotation.
Generally, GRPO involves the following steps:
- Group Sampling: For each prompt, the model generates a group of candidate responses.
- Reward Assignment: Each response is scored using automated rules (e.g., test case success, symbolic correctness).
- Relative Ranking: The responses are ranked, and the model is trained to increase the likelihood of higher-ranked outputs.
- Policy Update: A PPO-style update is applied, eliminating the need for a value function, thereby simplifying training.
Unlike PPO, GRPO doesn’t require a learned value function. Instead, it uses group-level comparisons to guide learning, making it more robust in tasks where scalar rewards are hard to define.
Direct Preference Optimization (DPO)
One of the core challenges of RLHF-style fine-tuning for large language models is complexity: learning a reward function and then optimizing it via reinforcement learning introduces instability, compute overhead, and implementation friction. Direct Preference Optimization (DPO) offers a powerful alternative: it eliminates the reward model and allows us to optimize the final policy directly, using preference comparisons alone.
From Rewards to Policies: The Change-of-Variables Insight
We begin with the classical RLHF setup — maximize expected rewards under a KL constraint that keeps the fine-tuned policy  close to a reference policy
  . The optimal policy under this setup is known to take the form:
 = \displaystyle\frac{1}{Z(x)} \pi_{\text{ref}}(y \mid x) \exp\left(\displaystyle\frac{1}{\beta} r(x, y)\right),")
where:
 : A prompt or input to the language model (e.g., a question or instruction).
 : A possible output or completion that the model generates in response to xx.
") : A scalar reward representing how “good” the output is for input — higher means more preferred.
: A scalar reward representing how “good” the output is for input — higher means more preferred.") : A policy distribution — the model’s probability of generating output given input .
: A policy distribution — the model’s probability of generating output given input .") : A fixed reference policy, often the supervised fine-tuned model, used to constrain drift.
: A fixed reference policy, often the supervised fine-tuned model, used to constrain drift.") : A partition function that normalizes the policy distribution under reward-based weighting.
: A partition function that normalizes the policy distribution under reward-based weighting.
 : A possible output or completion that the model generates in response to xx.
") : A scalar reward representing how “good” the output
: A scalar reward representing how “good” the output ") : A policy distribution — the model’s probability of generating output
: A policy distribution — the model’s probability of generating output ") : A fixed reference policy, often the supervised fine-tuned model, used to constrain drift.
: A fixed reference policy, often the supervised fine-tuned model, used to constrain drift.The above equation tells us the optimal policy is a Boltzmann distribution over  , weighted by the exponentiated reward. The catch? We don’t know the reward function or the partition function
 ") , and approximating them is costly (that is what techniques like RLHF do).
, and approximating them is costly (that is what techniques like RLHF do).
Now, here’s the DPO magic: take the log of both sides and rearrange it to solve for the reward:
 = \beta \log \displaystyle\frac{\pi_r(y \mid x)}{\pi_\text{ref}(y \mid x)} + \beta \log Z(x)")
This reparameterization expresses the reward in terms of the policy — a reward-as-policy view. Now, we can plug this into a standard preference model like the Bradley-Terry model, which only depends on the difference in rewards between two completions:
 = \sigma\left( r(x, y_w) - r(x, y_l) \right),")
where  is the preferred response over
  for a given input prompt
  and
and ") , represents the probability that the model (or a human) prefers response over response , given a particular input prompt .
, represents the probability that the model (or a human) prefers response over response , given a particular input prompt .
Substituting in the policy-based reward expression, the normalization term ") cancels out. We’re left with a preference probability expressed entirely in terms of policies:
cancels out. We’re left with a preference probability expressed entirely in terms of policies:
 = \sigma\left( \beta \log \displaystyle\frac{\pi(y_w \mid x)}{\pi_\text{ref}(y_w \mid x)} - \beta \log \displaystyle\frac{\pi(y_l \mid x)}{\pi_\text{ref}(y_l \mid x)} \right)")
DPO Objective Function
With this formulation, we can now write the DPO loss as a negative log-likelihood over the preference dataset:
![\mathcal{L}_{\text{DPO}} = - \mathbb{E}_{(x, y_w, y_l) \sim \mathcal{D}} \left[ \log \sigma \left( \beta \log \displaystyle\frac{\pi_{\theta}(y_w \mid x)}{\pi_{\text{ref}}(y_w \mid x)} - \beta \log \displaystyle\frac{\pi_{\theta}(y_l \mid x)}{\pi_{\text{ref}}(y_l \mid x)} \right) \right]](https://b2633864.smushcdn.com/2633864/wp-content/latex/9ec/9ece0cb57ad495cf161553afd0eba802-ffffff-000000-0.png?size=475x41&lossy=2&strip=1&webp=1 "\mathcal{L}_{\text{DPO}} = - \mathbb{E}_{(x, y_w, y_l) \sim \mathcal{D}} \left[ \log \sigma \left( \beta \log \displaystyle\frac{\pi_{\theta}(y_w \mid x)}{\pi_{\text{ref}}(y_w \mid x)} - \beta \log \displaystyle\frac{\pi_{\theta}(y_l \mid x)}{\pi_{\text{ref}}(y_l \mid x)} \right) \right]")
Here,  acts as an inverse temperature hyperparameter controlling the sharpness of preference decisions.
  is our learned policy (the language model we’re optimizing), and is typically the SFT model or an MLE baseline.
What the Gradient Really Does
To get a mechanistic sense of how DPO updates the model, let’s examine the gradient:
![\nabla_\theta \mathcal{L}_{\text{DPO}} = - \beta \, \mathbb{E}_{(x, y_w, y_l) \sim \mathcal{D}} \left[ \sigma\left(\hat{r}_\theta(x, y_l) - \hat{r}_\theta(x, y_w) \right) \left( \nabla_\theta \log \pi_\theta(y_w \mid x) - \nabla_\theta \log \pi_\theta(y_l \mid x) \right) \right],](https://b2633864.smushcdn.com/2633864/wp-content/latex/f8c/f8c3d21f9af863463210c2b0a2cb3a3f-ffffff-000000-0.png?size=625x20&lossy=2&strip=1&webp=1 "\nabla_\theta \mathcal{L}_{\text{DPO}} = - \beta \, \mathbb{E}_{(x, y_w, y_l) \sim \mathcal{D}} \left[ \sigma\left(\hat{r}_\theta(x, y_l) - \hat{r}_\theta(x, y_w) \right) \left( \nabla_\theta \log \pi_\theta(y_w \mid x) - \nabla_\theta \log \pi_\theta(y_l \mid x) \right) \right],")
where:
 = \beta \log \displaystyle\frac{\pi_\theta(y \mid x)}{\pi_{\text{ref}}(y \mid x)}.")
This tells us:
- If the model already ranks
 above
above  , the gradient is small.
 - If the model gets the preference wrong, the gradient pushes it harder to favor .
Crucially, the update is self-corrective, scaled by the severity of the model’s preference inversion.
How DPO Works in Practice
Figure 4 explains how DPO works in practice.
- Dataset Creation: Sample candidate completions
") , label the preferred one via human feedback or proxy scoring.
, label the preferred one via human feedback or proxy scoring. - Set Reference Policy: Usually
 , or an MLE-trained model on preferred completions.
 - Optimize: Minimize
 using standard gradient descent.
") , label the preferred one via human feedback or proxy scoring.
, label the preferred one via human feedback or proxy scoring. , or an MLE-trained model on preferred completions.
 using standard gradient descent.
Fine Tuning SmolVLM Using DPO
In this section, we will explore how to fine tune a vision language model (e.g., Hugging Face SmolVLM) using Direct Preference Optimization. For this implementation, we will align the model responses using the OpenBMB RLHF-V-Dataset (Figure 5), which is human preference data containing a large amount of fine-grained segment-level human corrections on diverse instructions, including detailed descriptions and question-answering instructions. The dataset contains a total of 5,733 preference pairs.

We will start by installing the necessary libraries.
pip install -U -q datasets trl peft transformers==4.46.3
Loading the SmolVLM
After setting up the environment, we will begin by loading our model and defining our LoRA config for parameter-efficient fine tuning (rather than fully fine tuning all model parameters, which is costly) of SmolVLM.
import torch
from transformers import Idefics3ForConditionalGeneration, AutoProcessor

model_id = "HuggingFaceTB/SmolVLM-Instruct"

# Load model and tokenizer
model = Idefics3ForConditionalGeneration.from_pretrained(
    model_id,
    device_map="auto",
    torch_dtype=torch.bfloat16
)

processor = AutoProcessor.from_pretrained(model_id)
On Lines 1-13, we import the torch library for deep learning and Idefics3ForConditionalGeneration and AutoProcessor from the transformers library. We define the model ID as "HuggingFaceTB/SmolVLM-Instruct" and then load the pre-trained model and its corresponding processor using the from_pretrained method. We specify device_map="auto" to automatically distribute the model across available devices and torch_dtype=torch.bfloat16 for using bfloat16 precision.
from peft import LoraConfig, get_peft_model

# Configure LoRA
peft_config = LoraConfig(
    r=8,
    lora_alpha=8,
    lora_dropout=0.1,
    target_modules=["down_proj", "o_proj", "k_proj", "q_proj", "gate_proj", "up_proj", "v_proj"],
    use_dora=True,
    init_lora_weights="gaussian",
)

# Apply PEFT model adaptation
peft_model = get_peft_model(model, peft_config)

# Print trainable parameters
peft_model.print_trainable_parameters()
On Lines 14-30, we import LoraConfig and get_peft_model from the peft library. We then configure LoRA (Low-Rank Adaptation), a parameter-efficient fine-tuning technique, by creating a LoraConfig object with specified parameters. Finally, we apply the LoRA configuration to the model using the get_peft_model function.
Loading and Formatting the Dataset
Next, we begin by loading our preference dataset and SmolVLM.
from datasets import load_dataset

train_dataset, test_dataset = load_dataset("openbmb/RLHF-V-Dataset", split=["train[:1000]", "train[-100:]"])

print("Train set: ", len(train_dataset))
print("Test set: ", len(test_dataset))
On Lines 31-36, we load a dataset named "openbmb/RLHF-V-Dataset" using the load_dataset function from the datasets library. We split the dataset into training and testing sets, taking the first 1000 examples for training and the last 100 for testing. We then print the number of examples in each set.
from PIL import Image
import json

def format(example):
    text = json.loads(example["text"])
    # Prepare the input for the chat template
    prompt = [
        {
            "role": "user",
            "content": [{"type": "image"}, {"type": "text", "text": text["question"]}],
        },
    ]
    chosen = [
        {
            "role": "assistant",
            "content": [{"type": "text", "text": text["chosen"]}],
        },
    ]
    rejected = [
        {
            "role": "assistant",
            "content": [{"type": "text", "text": text["rejected"]}],
        },
    ]
    # Apply the chat template
    prompt = processor.apply_chat_template(prompt, tokenize=False)
    chosen = processor.apply_chat_template(chosen, tokenize=False)
    rejected = processor.apply_chat_template(rejected, tokenize=False)
    # Resize the image to ensure it fits within the maximum allowable
    # size of the processor to prevent OOM errors.
    max_size = processor.image_processor.size["longest_edge"]
    example["image"].thumbnail((max_size, max_size))

    return {"images": [example["image"].convert('RGB')], "prompt": prompt, "chosen": chosen, "rejected": rejected}
On Lines 37-70, we define a format function that takes an example from the dataset as input. This function processes the data to prepare it for fine tuning. Inside the function, we parse the text, format it into a chat-like structure with roles (user and assistant), and create separate prompts for the chosen and rejected answers. We use the processor’s apply_chat_template to format the text inputs. We also resize the image in the example to prevent potential out-of-memory (OOM) errors. Finally, the function returns a dictionary containing the processed image and text data.
# Apply the transformation to the dataset
train_dataset = train_dataset.map(format, remove_columns=train_dataset.column_names, num_proc=32)
test_dataset = test_dataset.map(format, remove_columns=test_dataset.column_names, num_proc=32)

display(train_dataset[0]["images"][0])
print()
print("Input Prompt: ", train_dataset[0]["prompt"])
print("Chosen Answer: ", train_dataset[0]["chosen"])
print("Rejected Answer: ", train_dataset[0]["rejected"])
On Lines 72 and 73, we apply the format function to both the training and testing datasets using the .map() method. This transforms each example in the dataset according to the logic defined in the format function. We use remove_columns to keep only the newly processed columns and set num_proc to 32 to speed up processing using multiple processes.
Then, on Lines 71-79, we display the image (Figure 6) from the first example of the processed training dataset and print the corresponding input prompt, chosen answer, and rejected answer. This allows us to verify that the data has been processed correctly.

DPO Fine Tuning
Now that our model and dataset have been loaded and formatted, we will begin defining our DPO-related training parameters and start the fine tuning.
from trl import DPOConfig, DPOTrainer

training_args = DPOConfig(
    output_dir="smolvlm-instruct-trl-dpo-rlhf-v",
    bf16=True,
    gradient_checkpointing=True,
    per_device_train_batch_size=8,
    per_device_eval_batch_size=8,
    gradient_accumulation_steps=16,
    num_train_epochs=3,
    dataset_num_proc=8,  # tokenization will use 8 processes
    dataloader_num_workers=8,  # data loading will use 8 workers
    logging_steps=1,
    save_strategy="steps",
    save_steps=10,
    save_total_limit=1,
    eval_steps=10,  # Steps interval for evaluation
    eval_strategy="steps",
)

trainer = DPOTrainer(
    model=model,
    ref_model=None,
    args=training_args,
    train_dataset=train_dataset,
    eval_dataset=test_dataset,
    peft_config=peft_config,
    processing_class=processor,
)

trainer.train()
trainer.save_model(training_args.output_dir)
The code initializes and trains a model using Direct Preference Optimization (DPO) with the DPOTrainer from the trl library.
On Lines 80-98, we create a DPOConfig object named training_args. This object contains various arguments for the training run. Next, on Lines 100-111, we instantiate the DPOTrainer and start the training loop using trainer.train(). The trainer will iterate over the training data for the specified number of epochs, performing forward and backward passes and optimizing the model based on the DPO loss. After training is complete, we save the final trained model to the output directory.
Figure 7 shows the output of the above training.

As can be seen, the model has started assigning higher scores to chosen answers in the test dataset. The reward accuracy also reaches 62.5% by the end of the third epoch. This will further improve as we conduct training for longer epochs and with more samples from the original dataset.
Testing the Fine-Tuned Model
Now that our model is trained, it is time to test it on a few examples.
def generate_text_from_sample(model, processor, sample, max_new_tokens=256, device="cuda"):
    # Prepare the text input by applying the chat template
    text_input = sample["prompt"]

    image_inputs = []
    image = sample["images"][0]
    image_inputs.append([image])

    # Prepare the inputs for the model
    model_inputs = processor(
        text=text_input,
        images=image_inputs,
        return_tensors="pt",
    ).to(
        device
    )  # Move inputs to the specified device

    # Generate text with the model
    generated_ids = model.generate(**model_inputs, max_new_tokens=max_new_tokens)

    # Trim the generated ids to remove the input ids
    trimmed_generated_ids = [out_ids[len(in_ids) :] for in_ids, out_ids in zip(model_inputs.input_ids, generated_ids)]

    # Decode the output text
    output_text = processor.batch_decode(
        trimmed_generated_ids, skip_special_tokens=True, clean_up_tokenization_spaces=False
    )

    return output_text[0]  # Return the first decoded output text
We define a generate_text_from_sample function that takes the model, processor, a data sample, the maximum number of new tokens to generate, and the device as input. On Line 114, we extract the formatted text input (prompt) from the sample. On Lines 116-118, we create a list to hold the image inputs and add the image from the sample to it.
On Lines 121-127, we use the processor to prepare the model inputs (text and image) and move them to the specified device. On Line 130, we generate text using the model’s generate method, passing the prepared inputs and the max_new_tokens parameter.
On Line 133, we trim the generated token IDs to remove the input IDs, keeping only the newly generated tokens. On Lines 136-138, we decode the trimmed token IDs back into text using the processor’s batch_decode method, skipping special tokens and cleaning up spaces. Finally, on Line 140, we return the first decoded output text.
Finally, we test the model on a sample from the test split.
display(test_dataset[20]["images"][0])
print()
print("Input Prompt: ", train_dataset[0]["prompt"])
print("Chosen Answer: ", train_dataset[0]["chosen"])
print("Rejected Answer: ", train_dataset[0]["rejected"])
print("Generated Answer: ", generate_text_from_sample(model, processor, test_dataset[20]))
Figure 8 displays the output of the code snippet above.

As shown in Figure 8, the model’s response is both descriptive and factually accurate. It resembles the chosen answer more than the rejected one, demonstrating the effectiveness of the DPO algorithm.
What's next? We recommend PyImageSearch University.

86+ total classes • 115+ hours hours of on-demand code walkthrough videos • Last updated: April 2026
★★★★★ 4.84 (128 Ratings) • 16,000+ Students Enrolled
I strongly believe that if you had the right teacher you could master computer vision and deep learning.
Do you think learning computer vision and deep learning has to be time-consuming, overwhelming, and complicated? Or has to involve complex mathematics and equations? Or requires a degree in computer science?
That’s not the case.
All you need to master computer vision and deep learning is for someone to explain things to you in simple, intuitive terms. And that’s exactly what I do. My mission is to change education and how complex Artificial Intelligence topics are taught.
If you're serious about learning computer vision, your next stop should be PyImageSearch University, the most comprehensive computer vision, deep learning, and OpenCV course online today. Here you’ll learn how to successfully and confidently apply computer vision to your work, research, and projects. Join me in computer vision mastery.
Inside PyImageSearch University you'll find:
- ✓ 86+ courses on essential computer vision, deep learning, and OpenCV topics
- ✓ 86 Certificates of Completion
- ✓ 115+ hours hours of on-demand video
- ✓ Brand new courses released regularly, ensuring you can keep up with state-of-the-art techniques
- ✓ Pre-configured Jupyter Notebooks in Google Colab
- ✓ Run all code examples in your web browser — works on Windows, macOS, and Linux (no dev environment configuration required!)
- ✓ Access to centralized code repos for all 540+ tutorials on PyImageSearch
- ✓ Easy one-click downloads for code, datasets, pre-trained models, etc.
- ✓ Access on mobile, laptop, desktop, etc.
Summary
This blog post examines the emerging field of preference optimization, a crucial area in aligning AI models with human expectations. We begin by understanding different optimization techniques, including RLHF and its AI-driven counterpart RLAIF. These approaches rely on feedback loops to train models. However, newer strategies (e.g., Direct Preference Optimization (DPO), Identity Preference Optimization (IPO), and Group Relative Policy Optimization (GRPO)) are pushing the boundaries. Each technique offers a unique lens for interpreting preferences, with GRPO adding a group-based structure to improve alignment across diverse feedback.
As we delve deeper into DPO, we uncover its elegant foundation: By transforming the reward-maximization paradigm into a policy-learning objective through the change-of-variables trick, DPO bypasses the need for explicit reward modeling. We examine its objective function, dissect what the gradient truly represents, and analyze how this shift in perspective enables a more direct and efficient optimization process. The blog makes a compelling case for why DPO has become increasingly favored in real-world alignment tasks.
In the final section, we roll up our sleeves and apply DPO to fine tune the SmolVLM. We’re guided through loading the model, formatting the preference dataset, and executing the fine-tuning steps. The hands-on walkthrough culminates in evaluating the performance of the newly trained model, offering us a practical demonstration of how DPO can be successfully employed to enhance AI responses in a more aligned, human-centered manner.
Citation Information
Mangla, P. “Fine Tuning SmolVLM for Human Alignment Using Direct Preference Optimization,” PyImageSearch, P. Chugh, S. Huot, A. Sharma, and P. Thakur, eds., 2025, https://pyimg.co/wp9dc
@incollection{Mangla_2025_fine-tuning-smolvlm-for-human-alignment-using-dpo,
  author = {Puneet Mangla},
  title = {{Fine Tuning SmolVLM for Human Alignment Using Direct Preference Optimization}},
  booktitle = {PyImageSearch},
  editor = {Puneet Chugh and Susan Huot and Aditya Sharma and Piyush Thakur},
  year = {2025},
  url = {https://pyimg.co/wp9dc},
}
To download the source code to this post (and be notified when future tutorials are published here on PyImageSearch), simply enter your email address in the form below!

Download the Source Code and FREE 17-page Resource Guide
Enter your email address below to get a .zip of the code and a FREE 17-page Resource Guide on Computer Vision, OpenCV, and Deep Learning. Inside you'll find my hand-picked tutorials, books, courses, and libraries to help you master CV and DL!

Comment section
Hey, Adrian Rosebrock here, author and creator of PyImageSearch. While I love hearing from readers, a couple years ago I made the tough decision to no longer offer 1:1 help over blog post comments.
At the time I was receiving 200+ emails per day and another 100+ blog post comments. I simply did not have the time to moderate and respond to them all, and the sheer volume of requests was taking a toll on me.
Instead, my goal is to do the most good for the computer vision, deep learning, and OpenCV community at large by focusing my time on authoring high-quality blog posts, tutorials, and books/courses.
If you need help learning computer vision and deep learning, I suggest you refer to my full catalog of books and courses — they have helped tens of thousands of developers, students, and researchers just like yourself learn Computer Vision, Deep Learning, and OpenCV.
Click here to browse my full catalog.