In this tutorial, you will learn how to perform OCR handwriting recognition using OpenCV, Keras, and TensorFlow.
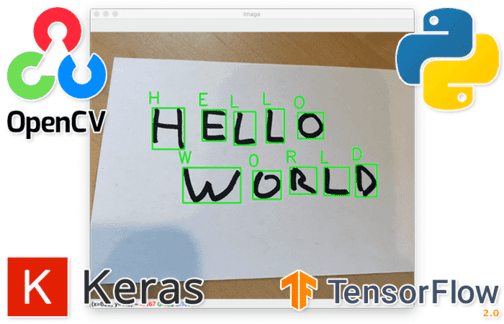
This post is Part 2 in our two-part series on Optical Character Recognition with Keras and TensorFlow:
- Part 1: Training an OCR model with Keras and TensorFlow (last week’s post)
- Part 2: Basic handwriting recognition with Keras and TensorFlow (today’s post)
As you’ll see further below, handwriting recognition tends to be significantly harder than traditional OCR that uses specific fonts/characters.
The reason this concept is so challenging is that unlike computer fonts, there are nearly infinite variations of handwriting styles. Every one of us has a personal style that is specific and unique.
A handwritten text dataset is crucial for handwriting recognition tasks. It helps in training a model that can accurately recognize various handwriting styles, enhancing the system’s versatility.
Roboflow has free tools for each stage of the computer vision pipeline that will streamline your workflows and supercharge your productivity.
Sign up or Log in to your Roboflow account to access state of the art dataset libaries and revolutionize your computer vision pipeline.
You can start by choosing your own datasets or using our PyimageSearch’s assorted library of useful datasets.
Bring data in any of 40+ formats to Roboflow, train using any state-of-the-art model architectures, deploy across multiple platforms (API, NVIDIA, browser, iOS, etc), and connect to applications or 3rd party tools.
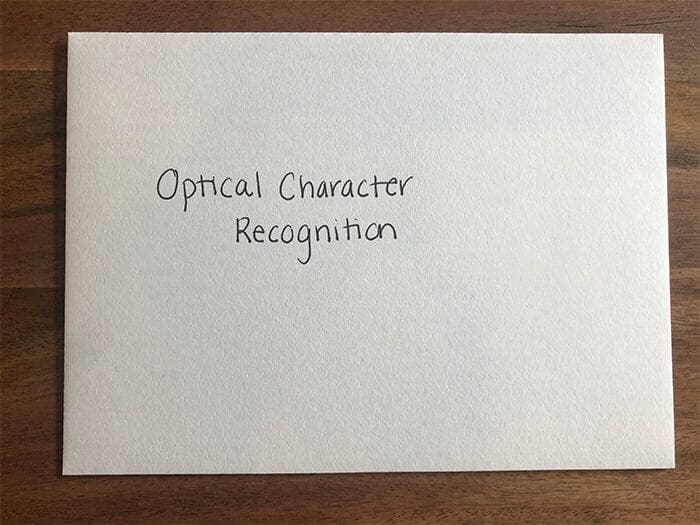
My wife, for example, has amazing penmanship. Her handwriting is not only legible, but it’s stylized in a way that you would think a professional calligrapher wrote it:
Me on the other hand … my handwriting looks like someone crossed a doctor with a deranged squirrel:
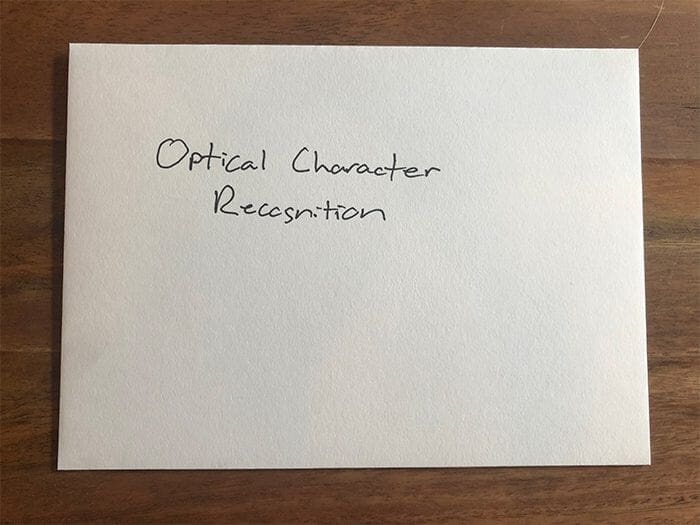
It’s barely legible. I’m often asked by those who read my handwriting at least 2-3 clarifying questions as to what a specific word or phrase is. And on more than one occasion, I’ve had to admit that I couldn’t read them either.
Talk about embarrassing! Truly, it’s a wonder they ever let me out of grade school.
These variations in handwriting styles pose quite a problem for Optical Character Recognition engines, which are typically trained on computer fonts, not handwriting fonts.
And worse, handwriting recognition is further complicated by the fact that letters can “connect” and “touch” each other, making it incredibly challenging for OCR algorithms to separate them, ultimately leading to incorrect OCR results.
Handwriting recognition is arguably the “holy grail” of OCR. We’re not there yet, but with the help of deep learning, we’re making tremendous strides.
Today’s tutorial will serve as an introduction to handwriting recognition. You’ll see examples of where handwriting recognition has performed well and other examples where it has failed to correctly OCR a handwritten character. I truly think you’ll find value in reading the rest of this handwriting recognition guide.
To learn how to perform handwriting recognition with OpenCV, Keras, and TensorFlow, just keep reading.
OCR: Handwriting recognition with OpenCV, Keras, and TensorFlow
In the first part of this tutorial, we’ll discuss handwriting recognition and how it’s different from “traditional” OCR.
I’ll then provide a brief review of the process for training our recognition model using Keras and TensorFlow — we’ll be using this trained model to OCR handwriting in this tutorial.
Note: If you haven’t read last week’s post, I strongly suggest you do so now before continuing, as this post outlines the model that we trained to OCR alphanumeric samples. You should have a firm understanding of the concepts and scripts from last week as a prerequisite for this tutorial.
We’ll review our project structure and then implement a Python script to perform handwriting recognition with OpenCV, Keras, and TensorFlow.
To wrap up today’s OCR tutorial, we’ll discuss our handwriting recognition results, including what worked and what didn’t.
What is handwriting recognition? And how is handwriting recognition different from traditional OCR?
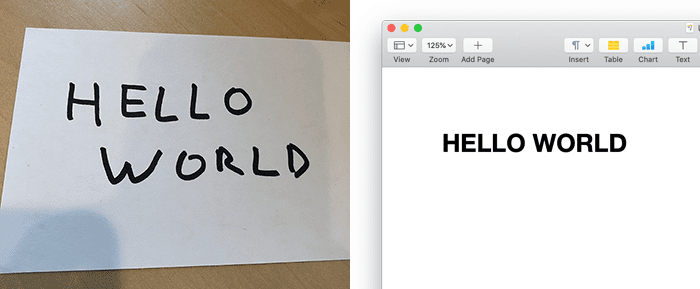
Traditional OCR algorithms and techniques assume we’re working with a fixed font of some sort. In the early 1900s, that could have been the font used by microfilms.
In the 1970s, specialized fonts were developed specifically for OCR algorithms, thereby making them more accurate.
By the 2000s, we could use the fonts that came pre-installed on our computers to automatically generate training data and use these fonts to train our OCR models.
Each of these fonts had something in common:
- They were engineered in some manner.
- There was a predictable and assumed space between each character (thereby making segmentation easier).
- The styles of the fonts were more conducive to OCR.
Essentially, engineered/computer-generated fonts make OCR far easier.
Handwriting recognition is an entirely different beast though. Consider the extreme amount of variations and how characters often overlap. Everyone has their own unique writing style.
Characters can be elongated, swooped, slanted, stylized, crunched, connected, tiny, gigantic, etc. (and come in any of these combinations).
Digitizing handwriting recognition is extremely challenging and is still far from solved — but deep learning is helping us improve our handwriting recognition accuracy.
Handwriting recognition – what we’ve done so far

In last week’s tutorial, we used Keras and TensorFlow to train a deep neural network to recognize both digits (0-9) and alphabetic characters (A-Z).
To train our network to recognize these sets of characters, we utilized the MNIST digits dataset as well as the NIST Special Database 19 (for the A-Z characters).
Our model obtained 96% accuracy on the testing set for handwriting recognition.
Today, we will learn how to use this model for handwriting recognition in our own custom images.
Configuring your OCR development environment
If you have not already configured TensorFlow and the associated libraries from last week’s tutorial, I first recommend following the relevant tutorial below:
The tutorials above will help you configure your system with all the necessary software for this blog post in a convenient Python virtual environment.
Project structure
If you haven’t yet, go to the “Downloads” section of this blog post and grab both the code and dataset for today’s tutorial.
Inside, you’ll find the following:
$ tree --dirsfirst --filelimit 10
.
└── ocr-handwriting-recognition
    ├── images
    │   ├── hello_world.png
    │   ├── umbc_address.png
    │   └── umbc_zipcode.png
    ├── pyimagesearch
    │   ├── az_dataset
    │   │   ├── __init__.py
    │   │   └── helpers.py
    │   ├── models
    │   │   ├── __init__.py
    │   │   └── resnet.py
    │   └── __init__.py
    ├── a_z_handwritten_data.csv
    ├── handwriting.model
    ├── ocr_handwriting.py
    ├── plot.png
    └── train_ocr_model.py

5 directories, 13 files
Once we unzip our download, we find that our ocr-handwriting-recognition/ directory contains the following:
pyimagesearch- Includes the sub-modules
az_datasetfor I/O helper functions andmodelsfor implementing the ResNet deep learning model
- Includes the sub-modules
a_z_handwritten_data.csvtrain_ocr_model.pyhandwriting.model: The custom OCR ResNet model we created in last week’s tutorialplot.png
images/ocr_handwriting.py
With the exception of ocr_handwriting.py and our new PNG files in images/, all of this should look very familiar from our tutorial from last week.
Now that we have a handle on the project structure, let’s dive into our new script.
Implementing our handwriting recognition OCR script with OpenCV, Keras, and TensorFlow
Let’s open up ocr_handwriting.py and review it, starting with the imports and command line arguments:
# import the necessary packages
from tensorflow.keras.models import load_model
from imutils.contours import sort_contours
import numpy as np
import argparse
import imutils
import cv2

# construct the argument parser and parse the arguments
ap = argparse.ArgumentParser()
ap.add_argument("-i", "--image", required=True,
	help="path to input image")
ap.add_argument("-m", "--model", type=str, required=True,
	help="path to trained handwriting recognition model")
args = vars(ap.parse_args())
Line 2 imports the load_model utility, which allows us to easily load the OCR model that we developed last week.
Using my imutils package, we then import sort_contours (Line 3) and imutils (Line 6), to facilitate operations with contours and resizing images.
Our command line arguments include:
--image: Our input image path (Lines 11 and 12)--model
Next, we will load our custom handwriting OCR model that we developed in last week’s tutorial:
# load the handwriting OCR model
print("[INFO] loading handwriting OCR model...")
model = load_model(args["model"])
The load_model utility from Keras and TensorFlow makes it super simple to load our serialized handwriting recognition model (Line 19). Recall that our OCR model uses the ResNet deep learning architecture to classify each character corresponding to a digit 0-9 or a letter A-Z.
Note: For more details on the ResNet CNN architecture, please refer to the Deep Learning for Computer Vision with Python Practitioner Bundle.
Since we’ve loaded our model from disk, let’s grab our image, pre-process it, and find character contours:
# load the input image from disk, convert it to grayscale, and blur
# it to reduce noise
image = cv2.imread(args["image"])
gray = cv2.cvtColor(image, cv2.COLOR_BGR2GRAY)
blurred = cv2.GaussianBlur(gray, (5, 5), 0)

# perform edge detection, find contours in the edge map, and sort the
# resulting contours from left-to-right
edged = cv2.Canny(blurred, 30, 150)
cnts = cv2.findContours(edged.copy(), cv2.RETR_EXTERNAL,
	cv2.CHAIN_APPROX_SIMPLE)
cnts = imutils.grab_contours(cnts)
cnts = sort_contours(cnts, method="left-to-right")[0]

# initialize the list of contour bounding boxes and associated
# characters that we'll be OCR'ing
chars = []
After loading the image (Line 23), we convert it to grayscale (Line 24), and then apply Gaussian blurring to reduce noise (Line 25).
From there, we detect the edges of our blurred image using cv2.Canny (Line 29).
To locate the contours for each character we apply contour detection (Lines 30 and 31). In order to conveniently sort the contours from "left-to-right" (Line 33), we use my sort_contours method.
Line 37 initializes the chars list, which will soon hold each and every character image and associated bounding box.
In Figure 5, we can see the example results from our image pre-processing steps:

Our next steps will involve a large contour processing loop. Let’s break that down in more detail, so that it is easier to get through:
# loop over the contours
for c in cnts:
	# compute the bounding box of the contour
	(x, y, w, h) = cv2.boundingRect(c)

	# filter out bounding boxes, ensuring they are neither too small
	# nor too large
	if (w >= 5 and w <= 150) and (h >= 15 and h <= 120):
		# extract the character and threshold it to make the character
		# appear as *white* (foreground) on a *black* background, then
		# grab the width and height of the thresholded image
		roi = gray[y:y + h, x:x + w]
		thresh = cv2.threshold(roi, 0, 255,
			cv2.THRESH_BINARY_INV | cv2.THRESH_OTSU)[1]
		(tH, tW) = thresh.shape

		# if the width is greater than the height, resize along the
		# width dimension
		if tW > tH:
			thresh = imutils.resize(thresh, width=32)

		# otherwise, resize along the height
		else:
			thresh = imutils.resize(thresh, height=32)
Beginning on Line 40, we loop over each contour and perform a series of four steps:
Step 1: Select appropriately-sized contours and extract them:
- Line 42 computes the bounding box of the contour.
- Next, we make sure these bounding boxes are a reasonable size and filter out those that are either too large or too small (Line 46).
- For each bounding box meeting our size criteria, we extract the region of interest (
roi) associated with the character (Line 50).
Step 2: Clean up the images using a thresholding algorithm, with a goal of having white characters on a black background:
- Apply Otsu’s binary thresholding method to the
roi(Lines 51 and 52). This results in a binary image consisting of a white character on a black background.
Step 3: Resize every character to a 32×32 pixel image with a border:
- Depending on whether the width is greater than the height or the height is greater than the width, we resize the thresholded character ROI accordingly (Lines 57-62).
But wait! Before we can continue our loop that began on Line 40, we need to pad these ROIs and add them to the chars list:
		# re-grab the image dimensions (now that its been resized)
		# and then determine how much we need to pad the width and
		# height such that our image will be 32x32
		(tH, tW) = thresh.shape
		dX = int(max(0, 32 - tW) / 2.0)
		dY = int(max(0, 32 - tH) / 2.0)

		# pad the image and force 32x32 dimensions
		padded = cv2.copyMakeBorder(thresh, top=dY, bottom=dY,
			left=dX, right=dX, borderType=cv2.BORDER_CONSTANT,
			value=(0, 0, 0))
		padded = cv2.resize(padded, (32, 32))

		# prepare the padded image for classification via our
		# handwriting OCR model
		padded = padded.astype("float32") / 255.0
		padded = np.expand_dims(padded, axis=-1)

		# update our list of characters that will be OCR'd
		chars.append((padded, (x, y, w, h)))
Step 3 (continued): Now that we have padded those ROIs and added them to the chars list, we can finish resizing and padding:
- Compute the necessary
padding(Lines 67-69). - Apply the
paddingto create apaddedimage (Lines 72-74), which ensures that each character is centered and the image has a size of 32×32 pixels.
Step 4: Prepare each padded ROI for classification as a character:
- Scale pixel intensities to the range [0, 1] and add a batch dimension (Lines 79 and 80).
- Finally, to finish the character processing loop, we simply package both the
paddedcharacter and bounding box as a 2-tuple, and add it to ourcharslist (Line 83).
With our extracted and prepared set of character ROIs completed, we can perform OCR:
# extract the bounding box locations and padded characters
boxes = [b[1] for b in chars]
chars = np.array([c[0] for c in chars], dtype="float32")

# OCR the characters using our handwriting recognition model
preds = model.predict(chars)

# define the list of label names
labelNames = "0123456789"
labelNames += "ABCDEFGHIJKLMNOPQRSTUVWXYZ"
labelNames = [l for l in labelNames]
Lines 86 and 87 extract the original bounding boxes with associated chars in NumPy array format.
To perform handwriting recognition OCR on our set of pre-processed characters, we classify the entire batch with the model.predict method (Line 90). This results in a list of predictions, preds.
As we learned from last week’s tutorial, we then concatenate our labels for our digits and letters into a single list of labelNames (Lines 93-95).
We’re almost done! It’s time to see the fruits of our labor. To see if our handwriting recognition results meet our expectations, let’s visualize and display them:
# loop over the predictions and bounding box locations together
for (pred, (x, y, w, h)) in zip(preds, boxes):
	# find the index of the label with the largest corresponding
	# probability, then extract the probability and label
	i = np.argmax(pred)
	prob = pred[i]
	label = labelNames[i]

	# draw the prediction on the image
	print("[INFO] {} - {:.2f}%".format(label, prob * 100))
	cv2.rectangle(image, (x, y), (x + w, y + h), (0, 255, 0), 2)
	cv2.putText(image, label, (x - 10, y - 10),
		cv2.FONT_HERSHEY_SIMPLEX, 1.2, (0, 255, 0), 2)

	# show the image
	cv2.imshow("Image", image)
	cv2.waitKey(0)
Wrapping up, we loop over each prediction and corresponding bounding box (Line 98).
Inside the loop, we grab the highest probability prediction resulting in the particular character’s label (Lines 101-103).
In order to visualize the results, we annotate each character with the bounding box and label text, and display the result (Lines 107-113). To cycle to the next character, just press any key.
Note: If you are an Ubuntu user who installed OpenCV 4.3.0 using the pip install method, there is a bug that prevents the proper display of our results using cv2.imshow. The workaround is to simply click your mouse into the undersized display box and press the q key, repeating for several cycles until the display enlarges to the proper size.
Congratulations! You have completed the main Python driver file to perform OCR on input images.
Let’s take a look at our results.
Handwriting recognition OCR results
Start by using the “Downloads” section of this tutorial to download the source code, pre-trained handwriting recognition model, and example images.
Open up a terminal and execute the following command:
$ python ocr_handwriting.py --model handwriting.model --image images/hello_world.png
[INFO] loading handwriting OCR model...
[INFO] H - 92.48%
[INFO] W - 54.50%
[INFO] E - 94.93%
[INFO] L - 97.58%
[INFO] 2 - 65.73%
[INFO] L - 96.56%
[INFO] R - 97.31%
[INFO] 0 - 37.92%
[INFO] L - 97.13%
[INFO] D - 97.83%

In this example, we are attempting to OCR the handwritten text “Hello World.”
Our handwriting recognition model performed well here, but made two mistakes.
First, it confused the letter “O” with the digit “0” (zero) — that’s an understandable mistake.
Second, and a bit more concerning, the handwriting recognition model confused the “O” in “World” with a “2”.
This next example contains the handwritten name and ZIP code of my alma mater, University of Maryland, Baltimore County (UMBC):
$ python ocr_handwriting.py --model handwriting.model --image images/umbc_zipcode.png
[INFO] loading handwriting OCR model...
[INFO] U - 34.76%
[INFO] 2 - 97.88%
[INFO] M - 75.04%
[INFO] 7 - 51.22%
[INFO] B - 98.63%
[INFO] 2 - 99.35%
[INFO] C - 63.28%
[INFO] 5 - 66.17%
[INFO] 0 - 66.34%
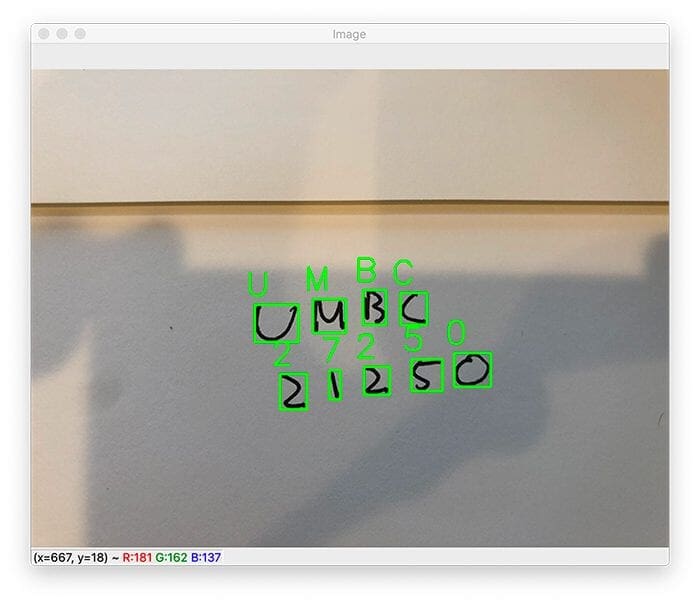
Our handwriting recognition algorithm performed almost perfectly here. We are able to correctly OCR every handwritten character in the “UMBC”; however, the ZIP code is incorrectly OCR’d — our model confuses the “1” digit with a “7”.
If we were to apply de-skewing to our character data, we might be able to improve our results.
Let’s inspect one final example. This image contains the full address of UMBC:
$ python ocr_handwriting.py --model handwriting.model --image images/umbc_address.png
[INFO] loading handwriting OCR model...
[INFO] B - 97.71%
[INFO] 1 - 95.41%
[INFO] 0 - 89.55%
[INFO] A - 87.94%
[INFO] L - 96.30%
[INFO] 0 - 71.02%
[INFO] 7 - 42.04%
[INFO] 2 - 27.84%
[INFO] 0 - 67.76%
[INFO] Q - 28.67%
[INFO] Q - 39.30%
[INFO] H - 86.53%
[INFO] Z - 61.18%
[INFO] R - 87.26%
[INFO] L - 91.07%
[INFO] E - 98.18%
[INFO] L - 84.20%
[INFO] 7 - 74.81%
[INFO] M - 74.32%
[INFO] U - 68.94%
[INFO] D - 92.87%
[INFO] P - 57.57%
[INFO] 2 - 99.66%
[INFO] C - 35.15%
[INFO] I - 67.39%
[INFO] 1 - 90.56%
[INFO] R - 65.40%
[INFO] 2 - 99.60%
[INFO] S - 42.27%
[INFO] O - 43.73%

Here is where our handwriting recognition model really struggled. As you can see, there are multiple mistakes in the words “Hilltop,” “Baltimore,” and the ZIP code.
Given that our handwriting recognition model performed so well during training and testing, shouldn’t we expect it to perform well on our own custom images as well?
To answer that question, let’s move on to the next section.
Limitations, drawbacks, and next steps
While our handwriting recognition model obtained 96% accuracy on our testing set, our handwriting recognition accuracy on our own custom images is slightly less than that.
One of the biggest issues is that we used variants of the MNIST (digits) and NIST (alphabet characters) datasets to train our handwriting recognition model.
These datasets, while interesting to study, don’t necessarily translate to real-world projects because the images have already been pre-processed and cleaned for us — real-world characters aren’t that “clean.”
Additionally, our handwriting recognition method requires characters to be individually segmented.
That may be possible for some characters, but many of us (especially cursive writers) connect characters when writing quickly. This confuses our model into thinking a group of characters is actually a single character, which ultimately leads to the incorrect results.
Finally, our model architecture is a bit too simplistic.
While our handwriting recognition model performed well on the training and testing set, the architecture — combined with the training dataset itself — is not robust enough to generalize as an “off-the-shelf” handwriting recognition model.
To improve our handwriting recognition accuracy, we should look into advances in Long Short-term Memory networks (LSTMs), which can naturally handle connected characters.
We’ll be covering how to use LSTMs in a future tutorial on the PyImageSearch, as well as in our upcoming OCR for OpenCV, Tesseract, and Python book.
New book: OCR for OpenCV, Tesseract, and Python
Optical Character Recognition (OCR) is a simple concept, but hard in practice: Create a piece of software that accepts an input image, have that software automatically recognize the text in the image, and then convert it to machine-encoded text (i.e., a “string” data type).
Despite being such an intuitive concept, OCR is incredibly hard. The field of computer vision has existed for over 50 years (with mechanical OCR machines dating back over 100 years), but we still have not “solved” OCR and created an off-the-shelf OCR system that works in nearly any situation.
And worse, trying to code custom software that can perform OCR is even harder:
- Open source OCR packages like Tesseract can be difficult to use if you are new to the world of OCR.
- Obtaining high accuracy with Tesseract typically requires that you know which options, parameters, and configurations to use — unfortunately there aren’t many high-quality Tesseract tutorials or books online.
- Computer vision and image processing libraries such as OpenCV and scikit-image can help you pre-process your images to improve OCR accuracy … but which algorithms and techniques do you use?
- Deep learning is responsible for unprecedented accuracy in nearly every area of computer science. Which deep learning models, layer types, and loss functions should you be using for OCR?
If you’ve ever found yourself struggling to apply OCR to a project, or if you’re simply interested in learning OCR, my brand-new book, Optical Character Recognition (OCR), OpenCV, and Tesseract is for you.
Regardless of your current experience level with computer vision and OCR, after reading this book, you will be armed with the knowledge necessary to tackle your own OCR projects.
If you are interested in OCR, already have OCR project ideas, or have a need for it at your company, please click the button below to reserve your copy:
What's next? We recommend PyImageSearch University.
86+ total classes • 115+ hours hours of on-demand code walkthrough videos • Last updated: July 2025
★★★★★ 4.84 (128 Ratings) • 16,000+ Students Enrolled
I strongly believe that if you had the right teacher you could master computer vision and deep learning.
Do you think learning computer vision and deep learning has to be time-consuming, overwhelming, and complicated? Or has to involve complex mathematics and equations? Or requires a degree in computer science?
That’s not the case.
All you need to master computer vision and deep learning is for someone to explain things to you in simple, intuitive terms. And that’s exactly what I do. My mission is to change education and how complex Artificial Intelligence topics are taught.
If you're serious about learning computer vision, your next stop should be PyImageSearch University, the most comprehensive computer vision, deep learning, and OpenCV course online today. Here you’ll learn how to successfully and confidently apply computer vision to your work, research, and projects. Join me in computer vision mastery.
Inside PyImageSearch University you'll find:
- ✓ 86+ courses on essential computer vision, deep learning, and OpenCV topics
- ✓ 86 Certificates of Completion
- ✓ 115+ hours hours of on-demand video
- ✓ Brand new courses released regularly, ensuring you can keep up with state-of-the-art techniques
- ✓ Pre-configured Jupyter Notebooks in Google Colab
- ✓ Run all code examples in your web browser — works on Windows, macOS, and Linux (no dev environment configuration required!)
- ✓ Access to centralized code repos for all 540+ tutorials on PyImageSearch
- ✓ Easy one-click downloads for code, datasets, pre-trained models, etc.
- ✓ Access on mobile, laptop, desktop, etc.
Summary
In this tutorial, you learned how to perform OCR handwriting recognition using Keras, TensorFlow, and OpenCV.
Our handwriting recognition system utilized basic computer vision and image processing algorithms (edge detection, contours, and contour filtering) to segment characters from an input image.
From there, we passed each individual character through our trained handwriting recognition model to recognize each character.
Our handwriting recognition model performed well, but there were some cases where results could have been improved (ideally with more training data that is representative of the handwriting we want to recognize) — the higher quality the training data, the more accurate we can make our handwriting recognition model!
Secondly, our handwriting recognition pipeline did not handle the case where characters may be connected, thereby causing multiple connected characters to be treated as a single character, thus confusing our OCR model.
Dealing with connected handwritten characters is still an open area of research in the computer vision and OCR field; however, deep learning models, specifically LSTMs, have shown significant promise in improving handwriting recognition accuracy.
I’ll be covering more advanced handwriting recognition using LSTMs in a future tutorial.
To download the source code to this post (and be notified when future tutorials are published here on PyImageSearch), simply enter your email address in the form below!

Download the Source Code and FREE 17-page Resource Guide
Enter your email address below to get a .zip of the code and a FREE 17-page Resource Guide on Computer Vision, OpenCV, and Deep Learning. Inside you'll find my hand-picked tutorials, books, courses, and libraries to help you master CV and DL!


Comment section
Hey, Adrian Rosebrock here, author and creator of PyImageSearch. While I love hearing from readers, a couple years ago I made the tough decision to no longer offer 1:1 help over blog post comments.
At the time I was receiving 200+ emails per day and another 100+ blog post comments. I simply did not have the time to moderate and respond to them all, and the sheer volume of requests was taking a toll on me.
Instead, my goal is to do the most good for the computer vision, deep learning, and OpenCV community at large by focusing my time on authoring high-quality blog posts, tutorials, and books/courses.
If you need help learning computer vision and deep learning, I suggest you refer to my full catalog of books and courses — they have helped tens of thousands of developers, students, and researchers just like yourself learn Computer Vision, Deep Learning, and OpenCV.
Click here to browse my full catalog.