Grab the tissues.
This is a tail of my MacBook Pro, a GPU, and the CUDAMat library — and it doesn’t have a happy ending.
Two weeks ago I posted a Geting Started with Deep Learning and Python guide. The guide was great and well received. I had a blast writing it. And a lot of the PyImageSearch readers really enjoyed it.
So as a natural followup to this guide, I wanted to demonstrate how the GPU could be used to speedup the training of Deep Belief Networks (previously, only the CPU had been used).
However, I had never setup my MacBook Pro to utilize the GPU for computational processing. That’s all fine and good I thought. This will make for a great tutorial, with me experimenting through trial and error — and chronicling my steps along the way with the hope that someone else would find the tutorial useful.
The short of it is this: I did succeed in installing The CUDA Toolkit, drivers, and CUDAMat.
However.
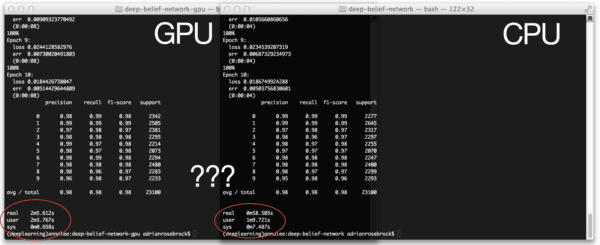
For reasons I cannot understand, training my Deep Belief Network with nolearn on my GPU takes over a full minute longer than on the CPU. Truthfully. I’ve tried every option that I can think of. And no dice.
Is it just because I’m on a MacBook Pro the performance of my GeForce GT 750m just isn’t good enough? Is there a problem with my configuration? Am I just missing a switch somewhere?
Honestly, I’m not sure.
So if anyone can shed some light on this problem, that would be great!
But in the meantime I’ll go ahead and writeup the steps that I took to install the CUDA Toolkit, drivers, and CUDAMat.
My Experience with CUDAMat, Deep Belief Networks, and Python on OSX
So before you can even think about using your graphics card to speedup your training time, you need to make sure you meet all the pre-requisites for the latest version of the CUDA Toolkit (at the time of this writing, v6.5.18 is the latest version), including:
- Mac OSX 10.8 or later
- The gcc or Clang compiler (these should already be setup and installed if you have Xcode on your system)
- A CUDA-capable GPU
- The NVIDIA CUDA Toolkit
The first two items on this checklist are trivial to check. The last item, the NVIDIA Cuda Toolkit is a simple download and install provided that you have a CUDA-capable GPU.
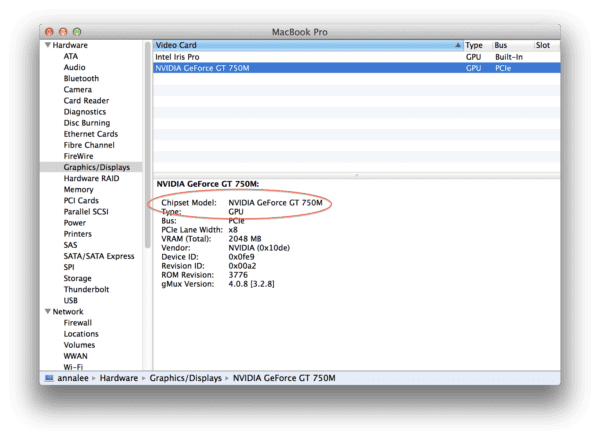
To check if you have a CUDA-capable GPU on OSX, it’s a simple process of clicking the Apple icon at the top-left portion of your screen, selecting “About this Mac”, followed by “More info…”, then “System Report…”, and lastly the “Graphics/Display” tab.
It should look something like this:
Under my “Chipset Model” I see that I am using a NVIDIA GeForce GT 750m graphics card.
Let’s go see if the CUDA Toolkit supports this model.
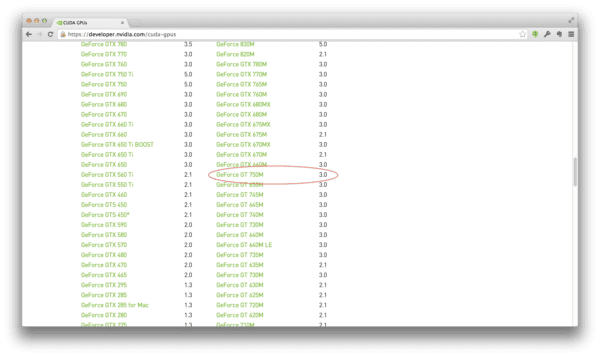
To perform the check, just click here to checkout the list of supported GPUs and see if yours is on the list.
Sure enough, my 750m is listed as supported:
Awesome. That’s a relief. At least I know that my MacBook Pro is CUDA-capable.
The next step is to download and install the CUDA Driver, Toolkit, and Samples.
To do that, just head to the CUDA downloads page, select your operating system (in my case, OSX), and download the installer:
At the time of this writing, the most recent version of the CUDA Toolkit bundle is v6.5.18. It’s also a fairly hefty download of 800mb, so be sure you have some bandwidth to spare.
Once the PKG is done downloading, start the install process:
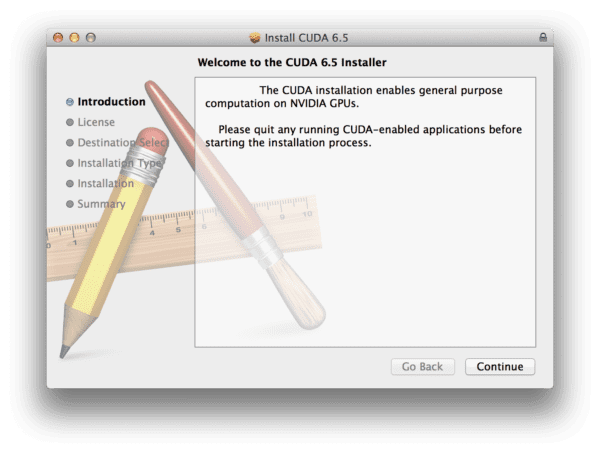
Now that the CUDA Toolkit is installed you’ll need to setup some environment variables:
export PATH=/Developer/NVIDIA/CUDA-6.5/bin:$PATH
export DYLD_LIBRARY_PATH=/Developer/NVIDIA/CUDA-6.5/lib:$DYLD_LIBRARY_PATH
I like to put these in my .bash_profile file so that my paths are set each time I open up a new terminal:
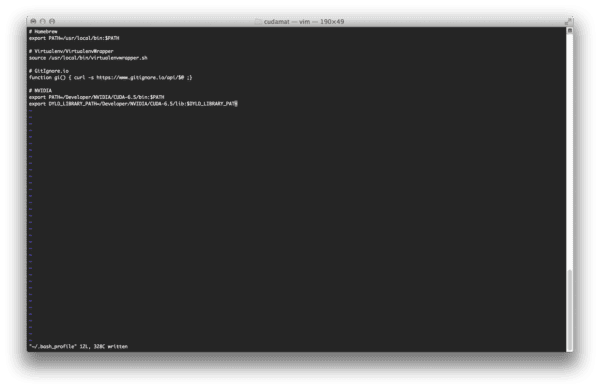
.bash_profile file, close your terminal and open up a new one so that your changes are read. Alternatively. you could execute source ~/.bash_profile to reload your settings.
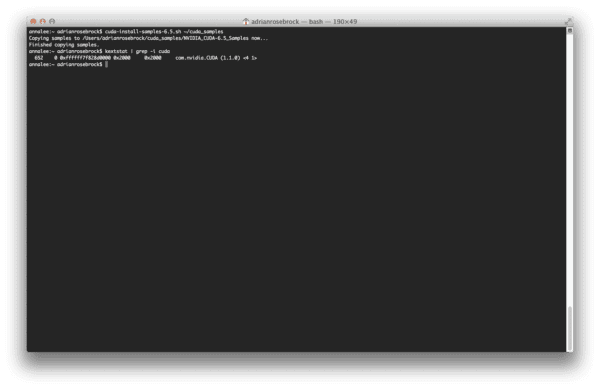
To verify that CUDA the driver was indeed installed correctly, I executed the following command:
$ kextstat | grep -i cuda
And received the following output:
Sure enough, the CUDA Driver as picked up!
According to the CUDA Getting Started Guide for OSX, you should now open up your System Preferences and go to the Energy Saver settings.
You’ll want to uncheck the Automatic Graphic Switch (which ensures that your GPU will always be utilized) and also drag your System Sleep time to Never.
Note: I honestly played around with both of these settings. Neither of them improved performance for me.
Now, let’s go ahead and install the CUDA Samples so that we can ensure that the CUDA Toolkit is functioning and that the driver is working. Installing the samples is just a simple shell script with should be available on your PATH provided that you have reloaded your .bash_profile .
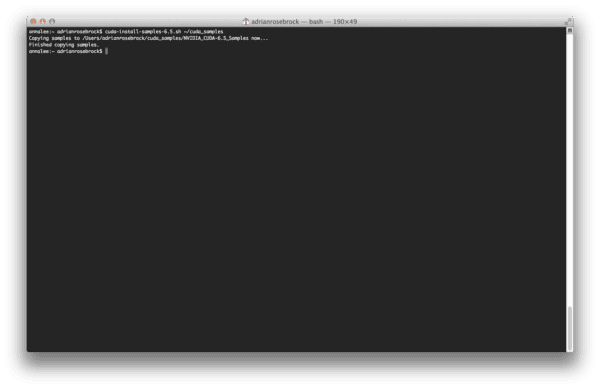
$ cuda-install-samples-6.5.sh
This script installed the CUDA samples in my home directory. The output of the script below isn’t very exciting, just proof that it succeeded:
From there, I compiled the deviceQuery and deviceBandwith examples with the following commands:
$ make -C 1_Utilities/deviceQuery
$ make -C 1_Utilities/bandwidthTest
Both examples compiled without any errors.
Running the compiled deviceQuery program I was able to confirm that the GPU was being picked up:
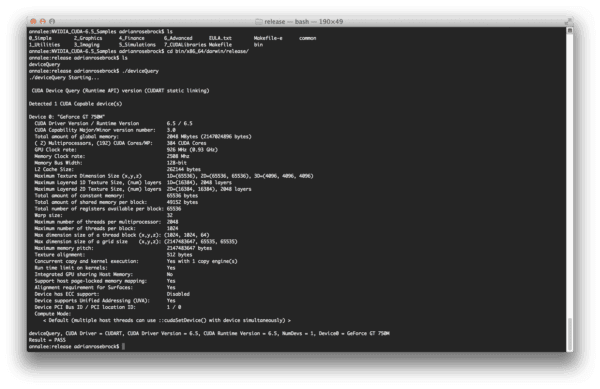
deviceBandwith demonstrates that GPU is accessible and is behaving correctly:
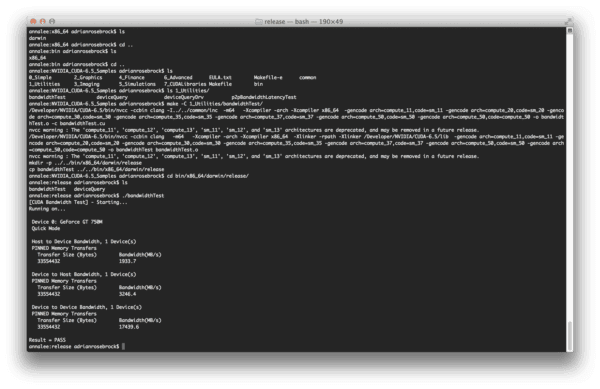
The CUDA Toolkit, drivers, and samples were installed without a problem. I was able to compile and execute the samples with no issue.
So then it was time to move on to CUDAMat, which allows matrix calculations to take place on the GPU via Python, leading to (hopefully) a dramatic speedup in training time of neural networks.
I cloned down CUDAMat to my system and compiled it without a hitch using the supplied Makefile :
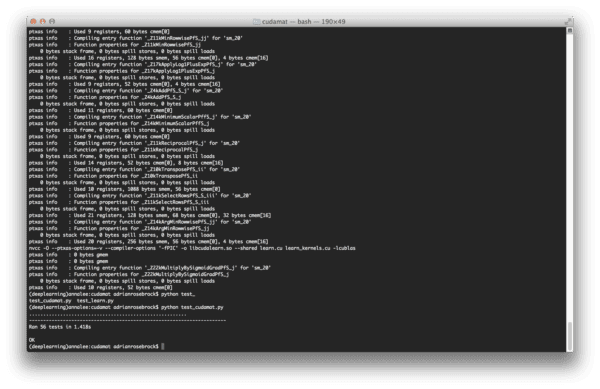
test_cudamat.py to ensure everything was working smoothly — indeed it appeared that everything was working fine.
Now I was really excited!
The CUDA Toolkit was installed, CUDAMat compiled without a hitch, and all the CUDAMat tests passed. I would be reaping the GPU speedups in no time!
Or so I thought…
The Ugly Results
So here we are. The results section.
Training my Deep Belief Network on the GPU is supposed to yield significant speedups.
However, in my case, utilizing the GPU was a minute slower than using the CPU.
In the benchmarks reported below, I was utilizing the nolearn implementation of a Deep Belief Network (DBN) trained on the MNIST dataset. My network included an input layer of 784 nodes (one for each of the input pixels of the 28 x 28 pixel image), a hidden layer of 300 nodes, and an output layer of 10 nodes, one for each of the possible digits. I allowed the network to train for 10 epochs.
I first obtained a baseline using the CPU:
(deeplearning)annalee:deep-belief-network adrianrosebrock$ time python dbn.py
gnumpy: failed to import cudamat. Using npmat instead. No GPU will be used.
[X] downloading data...
[DBN] fitting X.shape=(46900, 784)
[DBN] layers [784, 300, 10]
[DBN] Fine-tune...
100%
Epoch 1:
  loss 0.2840207848
  err  0.0822020150273
  (0:00:04)
100%
Epoch 2:
  loss 0.171618364679
  err  0.0484332308743
  (0:00:04)
100%
Epoch 3:
  loss 0.123517068572
  err  0.0357112363388
  (0:00:04)
100%
Epoch 4:
  loss 0.0954012227419
  err  0.0278133538251
  (0:00:04)
100%
Epoch 5:
  loss 0.0675616915956
  err  0.0207906420765
  (0:00:04)
100%
Epoch 6:
  loss 0.0503800100696
  err  0.0156463456284
  (0:00:04)
100%
Epoch 7:
  loss 0.0398645849321
  err  0.0122096994536
  (0:00:04)
100%
Epoch 8:
  loss 0.0268006172097
  err  0.0083674863388
  (0:00:04)
100%
Epoch 9:
  loss 0.0210037707263
  err  0.00587004781421
  (0:00:04)
100%
Epoch 10:
  loss 0.0183086322316
  err  0.00497353142077
  (0:00:04)
             precision    recall  f1-score   support

          0       0.99      0.99      0.99      2281
          1       0.99      0.99      0.99      2611
          2       0.97      0.98      0.98      2333
          3       0.98      0.97      0.97      2343
          4       0.98      0.99      0.98      2297
          5       0.96      0.97      0.97      2061
          6       0.99      0.99      0.99      2282
          7       0.99      0.97      0.98      2344
          8       0.97      0.97      0.97      2236
          9       0.97      0.97      0.97      2312

avg / total       0.98      0.98      0.98     23100


real	1m1.586s
user	1m13.888s
sys	0m7.856s
As you can see, I got a warning from gnumpy (a GPU optimized version of NumPy) indicating that CUDAMat could not be found and that the CPU would be used for training:
gnumpy: failed to import cudamat. Using npmat instead. No GPU will be used.
A training and evaluation time of just over 1 minute for 10 epochs felt pretty good.
But what about the GPU? Could it do better?
I was certainly hopeful.
But the results left me quite confused:
(deeplearning)annalee:deep-belief-network adrianrosebrock$ time python dbn.py
[X] downloading data...
[DBN] fitting X.shape=(46900, 784)
[DBN] layers [784, 300, 10]
gnumpy: failed to use gpu_lock. Using board #0 without knowing whether it is in use or not.
[DBN] Fine-tune...
100%
Epoch 1:
  loss 0.285464493333
  err  0.083674863388
  (0:00:08)
100%
Epoch 2:
  loss 0.173001268822
  err  0.0487107240437
  (0:00:08)
100%
Epoch 3:
  loss 0.125673221345
  err  0.0372054303279
  (0:00:08)
100%
Epoch 4:
  loss 0.0976806794358
  err  0.0285604508197
  (0:00:08)
100%
Epoch 5:
  loss 0.0694847570084
  err  0.0209400614754
  (0:00:08)
100%
Epoch 6:
  loss 0.0507848879893
  err  0.015881147541
  (0:00:09)
100%
Epoch 7:
  loss 0.0385255556989
  err  0.0123804644809
  (0:00:08)
100%
Epoch 8:
  loss 0.0291288460832
  err  0.00849556010929
  (0:00:08)
100%
Epoch 9:
  loss 0.0240176528952
  err  0.00766308060109
  (0:00:08)
100%
Epoch 10:
  loss 0.0197711178206
  err  0.00561390027322
  (0:00:08)
             precision    recall  f1-score   support

          0       0.99      0.99      0.99      2290
          1       0.99      0.99      0.99      2610
          2       0.98      0.98      0.98      2305
          3       0.98      0.97      0.97      2337
          4       0.97      0.98      0.98      2302
          5       0.98      0.97      0.97      2069
          6       0.98      0.99      0.98      2229
          7       0.98      0.99      0.98      2345
          8       0.97      0.97      0.97      2299
          9       0.97      0.97      0.97      2314

avg / total       0.98      0.98      0.98     23100


real	2m8.462s
user	2m7.977s
sys	0m0.505s
Over two minutes to train the network on the GPU?
That can’t be right — that’s double the amount of time it took the CPU to train!
But sure enough. That’s what the results state.
The only clue I got into the strange performance was this gnumpy message:
gnumpy: failed to use gpu_lock. Using board #0 without knowing whether it is in use or not.
I did some Googling, but I couldn’t figure out whether this message was a critical warning or not.
And more importantly, I couldn’t figure out if this message indicating that my performance was being severely damaged by not being able to obtain the gpu_lock .
Sad and defeated, I gathered up my screenshots and results, and typed this blog post up.
Though I hit the gym often, my gains clearly don’t translate to the GPU.
Hopefully someone with more expertise in utilizing the CUDA Toolkit, OSX, and the GPU can guide me in the right direction.
What's next? We recommend PyImageSearch University.
86+ total classes • 115+ hours hours of on-demand code walkthrough videos • Last updated: February 2026
★★★★★ 4.84 (128 Ratings) • 16,000+ Students Enrolled
I strongly believe that if you had the right teacher you could master computer vision and deep learning.
Do you think learning computer vision and deep learning has to be time-consuming, overwhelming, and complicated? Or has to involve complex mathematics and equations? Or requires a degree in computer science?
That’s not the case.
All you need to master computer vision and deep learning is for someone to explain things to you in simple, intuitive terms. And that’s exactly what I do. My mission is to change education and how complex Artificial Intelligence topics are taught.
If you're serious about learning computer vision, your next stop should be PyImageSearch University, the most comprehensive computer vision, deep learning, and OpenCV course online today. Here you’ll learn how to successfully and confidently apply computer vision to your work, research, and projects. Join me in computer vision mastery.
Inside PyImageSearch University you'll find:
- ✓ 86+ courses on essential computer vision, deep learning, and OpenCV topics
- ✓ 86 Certificates of Completion
- ✓ 115+ hours hours of on-demand video
- ✓ Brand new courses released regularly, ensuring you can keep up with state-of-the-art techniques
- ✓ Pre-configured Jupyter Notebooks in Google Colab
- ✓ Run all code examples in your web browser — works on Windows, macOS, and Linux (no dev environment configuration required!)
- ✓ Access to centralized code repos for all 540+ tutorials on PyImageSearch
- ✓ Easy one-click downloads for code, datasets, pre-trained models, etc.
- ✓ Access on mobile, laptop, desktop, etc.
Summary
In this blog post I attempted to demonstrate how to utilize the GPU on OSX to speedup training times for Deep Belief Networks.
Unfortunately, my results demonstrated that the GPU yielded slower training times than the CPU — this makes absolutely no sense to me and it is completely counter-intuitive.
Is there something wrong with my configuration?
Did I miss a step along the way?
Surely I made a mistake or my intuition is off.
If you’re reading this post and thinking “Hey Adrian, you’re an idiot. You forgot to do steps X, Y, and Z” then please shoot me an email with the subject You’re an idiot and set me straight. It would be much appreciated.
At the very least I hope this post is a solid chronicle of my experience and that someone, somewhere finds it helpful.
Update:
I have found my redemption! To find out how I ditched my MacBook Pro and moved to the Amazon EC2 GPU, just click here

Download the Source Code and FREE 17-page Resource Guide
Enter your email address below to get a .zip of the code and a FREE 17-page Resource Guide on Computer Vision, OpenCV, and Deep Learning. Inside you'll find my hand-picked tutorials, books, courses, and libraries to help you master CV and DL!
