Table of Contents
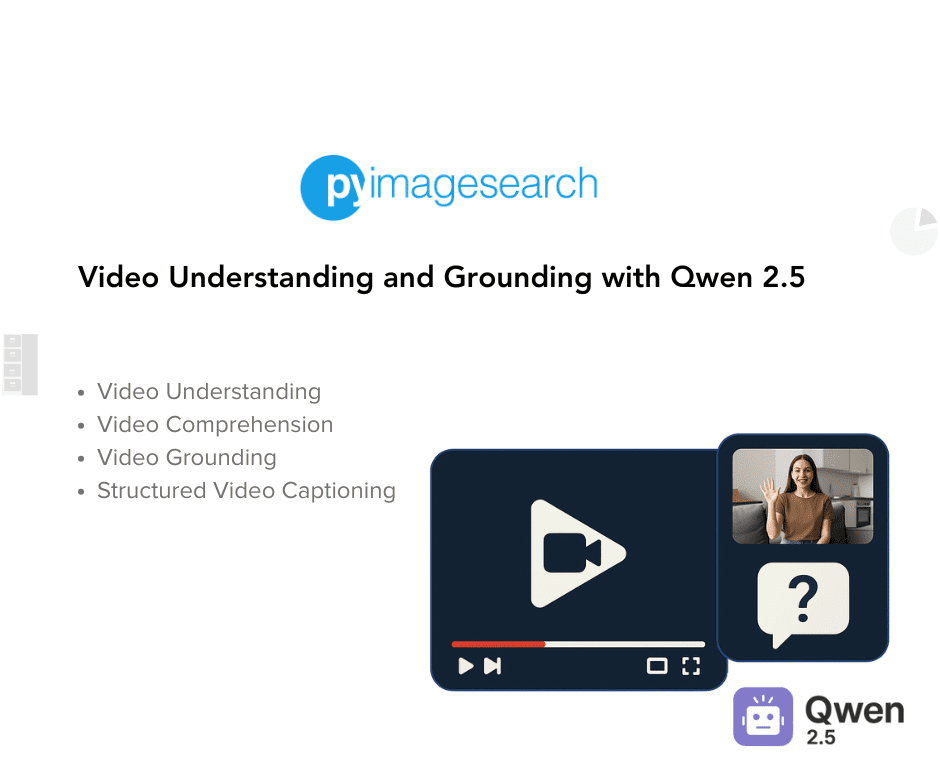
- Video Understanding and Grounding with Qwen 2.5
- Enhanced Video Comprehension Ability in Qwen 2.5 Models
- Dynamic Frame Rate (FPS) and Absolute Time Encoding
- Multimodal Rotary Position Embedding (MRoPE)
- Robustness Through Training Innovations
- Hands-On Qwen2.5 for Video Understanding Tasks
- Summary
Video Understanding and Grounding with Qwen 2.5
Building on the foundation laid by our previous explorations, this blog post dives deeper into the powerful capabilities of Qwen 2.5 Vision-Language models, shifting focus to video understanding and grounding. In our 1st blog post, we unraveled the model’s prowess in content moderation tasks through zero-shot learning, maintaining digital spaces safe and inclusive.
The 2nd blog post expanded the horizon by highlighting the model’s capabilities in object detection, visual grounding, counting, and interpreting relationships within images — pioneering advancements in spatial understanding.
This 3rd lesson in the series pushes boundaries by venturing into dynamic realms — analyzing spatial and temporal elements of videos. Here, we uncover how Qwen 2.5’s multimodal understanding extends beyond static frames to provide deep insights into video content.
Whether you’re seeking to extract textual cues from moving scenes, identify actions, or decode object interactions across frames, this blog post equips you with practical knowledge and steps for leveraging Qwen 2.5 in video analysis tasks. Prepare to explore how cutting-edge AI transforms video understanding, making it accessible, efficient, and impactful.
This lesson is the last of a 3-part series on Qwen 2.5 Unleashed: Transforming Vision Tasks with AI:
- Content Moderation via Zero Shot Learning with Qwen 2.5
- Object Detection and Visual Grounding with Qwen 2.5 Models
- Video Understanding and Grounding with Qwen 2.5 (this tutorial)
To learn how Qwen 2.5 can be used for video understanding and grounding, just keep reading.
Enhanced Video Comprehension Ability in Qwen 2.5 Models
The evolution of Qwen2.5-VL brings a significant leap in video understanding by addressing temporal dynamics with precision and efficiency. Recognizing the complexities of video data, which spans both spatial and temporal dimensions, Qwen2.5 introduces cutting-edge advancements to enhance its comprehension abilities (Figure 1). Here’s how:

Dynamic Frame Rate (FPS) and Absolute Time Encoding
To effectively analyze video content, Qwen2.5-VL incorporates dynamic frame rate training and absolute time encoding. By accommodating varying frame rates during training, the model achieves a nuanced understanding of temporal dynamics, seamlessly adapting to different speeds of video content (Figure 2).

Unlike traditional methods that rely on textual timestamps or add computational layers to enable temporal grounding, Qwen2.5 employs an innovative approach. It aligns Multimodal Rotary Position Embedding (MRoPE) IDs with timestamps, allowing the model to grasp the tempo of time directly through intervals between temporal dimension IDs. This novel strategy eliminates the need for additional overhead while maintaining high temporal accuracy.
Multimodal Rotary Position Embedding (MRoPE)
Building on the original MRoPE introduced in Qwen2-VL, Qwen2.5 extends its capabilities to handle temporal information in videos better. The MRoPE framework decomposes position embeddings into three dimensions: temporal, height, and width (Figure 3).

This segmentation allows for comprehensive modeling of multimodal inputs. For textual data, MRoPE functions akin to traditional 1D RoPE, maintaining uniformity across all components. For visual data, temporal IDs increment with each video frame while height and width IDs remain constant within spatial positions.
One key enhancement in Qwen2.5-VL is the alignment of temporal position IDs with absolute time. By leveraging intervals between temporal IDs, the model achieves consistent temporal alignment across videos, irrespective of frame rate variations. This improvement allows Qwen2.5 to capture not just sequential data but also the actual timing of events, offering a deeper understanding of video content.
Robustness Through Training Innovations
To further enhance its video comprehension abilities, Qwen2.5-VL employs innovative training techniques. Dynamic Frames Per Second (FPS) sampling during training ensures a well-distributed representation of frame rates within the dataset.
For lengthy videos, surpassing half an hour in duration, the model synthesizes multi-frame captions using a targeted pipeline, enabling a cohesive understanding of extended content. Additionally, Qwen2.5 handles video grounding data across various timestamp formats, including second-based and hour-minute-second-frame (HMSF), ensuring precise comprehension and output versatility (Table 1).

Hands-On Qwen2.5 for Video Understanding Tasks
In this section, we will see how we can prompt Qwen 2.5 to perform video understanding tasks (e.g., extracting text from video frames, video summarization, video grounding, and video captioning). We will start by installing the necessary libraries.
pip install git+https://github.com/huggingface/transformers
pip install qwen-vl-utils
pip install kagglehub
pip install decord
Setting Up the Qwen 2.5 VL Model and Inference Function
We start by loading the Qwen 2.5 VL model in memory and implementing the inference function that will be used to call the model across all types of video understanding tasks.
Loading the Model and Processor
For this hands-on, we will use "Qwen/Qwen2.5-VL-3B-Instruct", which is a 3B parameter model of the Qwen2.5 vision-language model series.
from transformers import Qwen2_5_VLForConditionalGeneration, AutoTokenizer, AutoProcessor
from qwen_vl_utils import process_vision_info

# default: Load the model on the available device(s)
model = Qwen2_5_VLForConditionalGeneration.from_pretrained(
    "Qwen/Qwen2.5-VL-3B-Instruct", torch_dtype="auto", device_map="auto"
)

processor = AutoProcessor.from_pretrained("Qwen/Qwen2.5-VL-3B-Instruct", min_pixels=min_pixels, max_pixels=max_pixels)
We first import necessary classes and functions from the transformers library and a utility function from qwen_vl_utils (Lines 1 and 2). We then load the pre-trained Qwen2_5_VLForConditionalGeneration model from the "Qwen/Qwen2.5-VL-3B-Instruct" repository using the from_pretrained method (Lines 5-7).
The torch_dtype="auto" argument ensures the appropriate data type is used for the model, and device_map="auto" ensures that the model is loaded on available devices (e.g., GPUs) to optimize performance (Line 6). We then create a processor object using the AutoProcessor class from the same repository (Line 9).
This processor will handle the pre-processing of vision-related information (e.g., resizing images to fit within the specified pixel range). The combination of the model and processor allows us to generate conditional outputs based on the input images efficiently.
Video Utility Functions
Next, we will implement some utility functions that will help us sample and visualize the video frames from a given video and also visualize them.
from IPython.display import Markdown, display
import numpy as np
from PIL import Image
import decord
from decord import VideoReader, cpu

def get_video_frames(video_file_path, num_frames=128):
    vr = VideoReader(video_file_path, ctx=cpu(0))
    total_frames = len(vr)

    indices = np.linspace(0, total_frames - 1, num=num_frames, dtype=int)
    frames = vr.get_batch(indices).asnumpy()
    timestamps = np.array([vr.get_frame_timestamp(idx) for idx in indices])

    return video_file_path, frames, timestamps
The get_video_frames function (Line 16) extracts evenly spaced frames and timestamps from a video file. Using VideoReader (Line 17), we load the video and calculate total frames (Line 18). Then, we use linspace to select frame indices (Line 20), retrieve frames (Line 21), and extract their timestamps (Line 22). Finally, the function returns the file path, frames, and timestamps (Line 24).
def create_image_grid(images, num_columns=8):
    pil_images = [Image.fromarray(image) for image in images]
    num_rows = (len(images) + num_columns - 1) // num_columns

    img_width, img_height = pil_images[0].size
    grid_width = num_columns * img_width
    grid_height = num_rows * img_height
    grid_image = Image.new('RGB', (grid_width, grid_height))

    for idx, image in enumerate(pil_images):
        row_idx = idx // num_columns
        col_idx = idx % num_columns
        position = (col_idx * img_width, row_idx * img_height)
        grid_image.paste(image, position)

    return grid_image
The create_image_grid function arranges images into a grid and returns the final combined image. We first convert each input image into a PIL image format (Line 26) and calculate the number of rows needed for the grid based on the number of columns (Line 27). The dimensions of the grid are then determined by multiplying the image width and height by the grid’s column and row counts, respectively (Lines 29-31). A blank canvas is created to hold the final grid (Line 32).
Next, we loop through the images (Line 34) to calculate each image’s row and column position (Lines 35 and 36) and paste them onto the canvas at the appropriate location (Lines 37 and 38). The function finally returns the assembled grid of images (Line 40).
Implementing the Inference Function
Now that our model is loaded, we will implement an inference() function that takes in a prompt and video path, calls the model, and returns the output. This function can then be used across different video understanding tasks, as we will see subsequently.
def inference(model, processor, video_path, prompt, max_new_tokens=1024, total_pixels=20480 * 28 * 28, min_pixels=16 * 28 * 28):
  messages = [
      {
          "role": "system",
          "content": "You are a helpful assistant."
      },

      {
          "role": "user",
          "content": [
              {"type": "text", "text": prompt},
              {"video": video_path, "total_pixels": total_pixels, "min_pixels": min_pixels}
          ]
      }
  ]

  # Preparation for inference
  text = processor.apply_chat_template(
      messages, tokenize=False, add_generation_prompt=True
  )
  image_inputs, video_inputs, video_kwargs = process_vision_info([messages], return_video_kwargs=True)
  fps_inputs = video_kwargs['fps']
  print("video input:", video_inputs[0].shape)
  num_frames, _, resized_height, resized_width = video_inputs[0].shape
  print("num of video tokens:", int(num_frames / 2 * resized_height / 28 * resized_width / 28))

  inputs = processor(text=[text], images=image_inputs, videos=video_inputs, fps=fps_inputs, padding=True, return_tensors="pt")
  inputs = inputs.to('cuda')

  output_ids = model.generate(**inputs, max_new_tokens=max_new_tokens)
  generated_ids = [output_ids[len(input_ids):] for input_ids, output_ids in zip(inputs.input_ids, output_ids)]
  output_text = processor.batch_decode(generated_ids, skip_special_tokens=True, clean_up_tokenization_spaces=True)
  return output_text[0]
First, we define messages (Lines 42-55) containing system and user instructions, including the prompt and video metadata (e.g., total_pixels and min_pixels). These values represent a token range for video frame processing that can be adjusted to balance performance and computational cost.
The text input is prepared using the processor.apply_chat_template (Lines 58-60), while process_vision_info extracts image and video inputs along with their frame rate information (Lines 61 and 62). Metadata (e.g., video dimensions and token counts) are printed (Lines 63-65) for debugging purposes.
Next, we process the inputs by combining text, images, and video data into tensors (Lines 67 and 68) and transferring them to the GPU (cuda) for efficient inference. The model generates outputs (Line 70), where new tokens beyond the initial input length are extracted (Line 71).
These generated tokens are decoded into human-readable text using processor.batch_decode (Line 72), and the final result is returned (Line 73) as the function’s output. This setup enables advanced multimodal processing for vision-language tasks.
Prompting the Qwen 2.5 VL Model
Finally, it’s time to call our model on a sample video and prompt using the inference() function and see how it performs for different video understanding tasks. Before that, let’s first download a sample video from YouTube on a breakfast recipe: One Potato & One Egg! Quick Recipe Perfect For Breakfast.
To download the video locally, simply paste the video URL into any YouTube video downloader website (e.g., Yt1z: Free YouTube Video Downloader).
Once the video is downloaded, rename it to recipe.mp4 and upload it to your Colab Notebook. The following code snippet can then be used to visualize the frames (Figure 4) of the downloaded video.
video_file_path, frames, timestamps = get_video_frames("./recipe.mp4", num_frames=64)

print(frames.shape, timestamps.shape)
image_grid = create_image_grid(frames, num_columns=8)
display(image_grid)

Extracting Text from Video Frames
The first video use case we will explore with the Qwen 2.5 models is “Extracting text from video frames”. The code snippet below shows how we can prompt the model to recognize the text in the video frames at different points in time.
For our breakfast recipe video, we want to extract the recipe steps in the order they appear in the video.
prompt = "Watch the video and list the OCR text in the video frames."
response = inference(model, processor, video_file_path, prompt)
display(Markdown(response))
The following is the output of the above snippet:
Output:

As we can see, the model is able to extract the text in the video with very high precision, making it ideal for smart OCR applications such as license plate recognition (in traffic surveillance videos), etc.
Video Understanding and Comprehension
Secondly, we will prompt the model to provide us with a comprehensive summary of the video, listing all the ingredients and recipe instructions in the correct order.
prompt = "Watch the video till end and provide the detailed recipe instructions with exact measurement of ingredients."
response = inference(model, processor, video_file_path, prompt)
display(Markdown(response))
The following is the output of the above snippet:
Output:

This demonstrates how the model can effectively process and analyze extended video content, extracting meaningful insights.
Video Grounding
In our third use case, we will see how we can prompt the model to answer specific questions about the video using natural language queries. This is commonly referred to as video grounding (similar to object grounding).
The following code snippet prompts the model to call out the time when a certain action (e.g., “adding 2 tbsp of all purpose flour”, “Brush inside the frying pan with oil”) occurs in the video.
prompt = "Give the query: 'Adding 2 tbsp of all purpose flour', when does the described content occur exactly (in seconds) in the video?"
response = inference(model, processor, video_file_path, prompt)
display(Markdown(response))
The following is the output of the above snippet:
Output:
The query "Adding 2 tbsp of all purpose flour" occurs at approximately 70.4 seconds into the video.
This showcases the model’s ability to understand exact timestamps and search the detailed queries in the video.
Note that the accuracy of understanding the exact timestamps improves with bigger versions of the Qwen 2.5 models (e.g., 7B, 13B, 72B, etc.). Smaller models such as "Qwen/Qwen2.5-VL-3B-Instruct" (used in this scenario) can sometimes fail to answer such questions accurately.
Structured Video Captioning
The last use case that we will explore in this blog post is video captioning. Video captioning refers to localizing a series of events in the video along with a caption or description of that event. This way, we can segment the whole video into multiple parts — where each part is about a specific event.
prompt = "Localize a series of activity events in the video, output the start and end timestamp for each event, and describe each event with sentences. Provide the result in json format with 'seconds' format for time depiction."
response = inference(model, processor, video_file_path, prompt)
display(Markdown(response))
The following is the output of the above snippet:
Output:
[
    {"start_time": "0.0", "end_time": "14.2", "description": "Peel 1 potato."},
    {"start_time": "15.3", "end_time": "46.8", "description": "Slice thin and shred the potatoes."},
    {"start_time": "47.9", "end_time": "123.0", "description": "Put the shredded potatoes in a bowl, add an egg, flour, salt, and water, then mix well."},
    {"start_time": "124.1", "end_time": "189.0", "description": "Cook the mixture in a pan with oil, cover it, and cook for 3 minutes under medium heat. Open and turn it over, then cover and cook for 2 minutes more under medium heat."},
    {"start_time": "190.1", "end_time": "235.0", "description": "Serve the dish and cut into pieces. Enjoy the delicious potato dish."}
]
In the output, we can see that the model identifies significant events within the video, providing start and end timestamps for each event along with descriptive sentences.
With the help of a small Python script, we can also parse the above JSON and visualize these video segments.
import json
import markdown
from bs4 import BeautifulSoup
from datetime import datetime

def parse_json(response):
    html = markdown.markdown(response, extensions=['fenced_code'])
    soup = BeautifulSoup(html, 'html.parser')
    json_text = soup.find('code').text

    data = json.loads(json_text)
    return data

data = parse_json(response)

for item in data:
    start_time = item["start_time"]
    end_time = item["end_time"]
    description = item["description"]

    display(Markdown(f"**{start_time} - {end_time}:**\t\t" + description))

    start_time = float(start_time)
    end_time = float(end_time)
    current_frames = []
    for frame, timestamp in zip(frames, timestamps):
        if timestamp[0] > start_time and timestamp[1] < end_time:
            current_frames.append(frame)

    current_frames = np.array(current_frames)
    current_image_grid = create_image_grid(current_frames, num_columns=8)

    display(current_image_grid.resize((480, (int(len(current_frames) / 8) + 1) * 60)))
This code extracts JSON data, displays segment descriptions with timestamps, and visualizes video frames for each segment. The parse_json function converts markdown JSON input into structured data (Lines 96-102).
For each segment, it retrieves timestamps and descriptions (Lines 107-109), displays them with Markdown (Line 111), filters frames within the time range (Lines 113-120), and creates a grid of frames using create_image_grid (Line 121) for easy visualization (Line 123).
Figure 5 shows the output of the above snippet:

What's next? We recommend PyImageSearch University.

86+ total classes • 115+ hours hours of on-demand code walkthrough videos • Last updated: April 2026
★★★★★ 4.84 (128 Ratings) • 16,000+ Students Enrolled
I strongly believe that if you had the right teacher you could master computer vision and deep learning.
Do you think learning computer vision and deep learning has to be time-consuming, overwhelming, and complicated? Or has to involve complex mathematics and equations? Or requires a degree in computer science?
That’s not the case.
All you need to master computer vision and deep learning is for someone to explain things to you in simple, intuitive terms. And that’s exactly what I do. My mission is to change education and how complex Artificial Intelligence topics are taught.
If you're serious about learning computer vision, your next stop should be PyImageSearch University, the most comprehensive computer vision, deep learning, and OpenCV course online today. Here you’ll learn how to successfully and confidently apply computer vision to your work, research, and projects. Join me in computer vision mastery.
Inside PyImageSearch University you'll find:
- ✓ 86+ courses on essential computer vision, deep learning, and OpenCV topics
- ✓ 86 Certificates of Completion
- ✓ 115+ hours hours of on-demand video
- ✓ Brand new courses released regularly, ensuring you can keep up with state-of-the-art techniques
- ✓ Pre-configured Jupyter Notebooks in Google Colab
- ✓ Run all code examples in your web browser — works on Windows, macOS, and Linux (no dev environment configuration required!)
- ✓ Access to centralized code repos for all 540+ tutorials on PyImageSearch
- ✓ Easy one-click downloads for code, datasets, pre-trained models, etc.
- ✓ Access on mobile, laptop, desktop, etc.
Summary
This blog post highlights the advanced capabilities of the Qwen 2.5 VL models for video understanding and grounding tasks. The model employs innovative techniques like dynamic frame rate adjustments, absolute time encoding, and Multimodal Rotary Position Embedding (MRoPE) to enhance video comprehension and align multimodal data effectively. These advancements, combined with robust training methodologies, ensure exceptional performance in processing complex video scenarios.
We provide a step-by-step guide to leveraging the Qwen 2.5 VL models for video understanding. This includes setting up the model, implementing utility functions, and prompting the inference function to extract text from frames and perform tasks like video comprehension and grounding. These practical instructions empower users to harness Qwen 2.5’s capabilities confidently.
Finally, we explore use cases such as video grounding and structured video captioning. The model excels in linking visual elements with textual inputs and generating coherent, context-rich narratives. These applications demonstrate the model’s versatility, transforming video analysis into an intelligent and efficient process for diverse scenarios.
Citation Information
Mangla, P. “Video Understanding and Grounding with Qwen 2.5,” PyImageSearch, P. Chugh, S. Huot, A. Sharma, and P. Thakur, eds., 2025, https://pyimg.co/uhtbd
@incollection{Mangla_2025_video-understanding-and-grounding-with-qwen-2-5,
  author = {Puneet Mangla},
  title = {{Video Understanding and Grounding with Qwen 2.5}},
  booktitle = {PyImageSearch},
  editor = {Puneet Chugh and Susan Huot and Aditya Sharma and Piyush Thakur},
  year = {2025},
  url = {https://pyimg.co/uhtbd},
}
To download the source code to this post (and be notified when future tutorials are published here on PyImageSearch), simply enter your email address in the form below!

Download the Source Code and FREE 17-page Resource Guide
Enter your email address below to get a .zip of the code and a FREE 17-page Resource Guide on Computer Vision, OpenCV, and Deep Learning. Inside you'll find my hand-picked tutorials, books, courses, and libraries to help you master CV and DL!

Comment section
Hey, Adrian Rosebrock here, author and creator of PyImageSearch. While I love hearing from readers, a couple years ago I made the tough decision to no longer offer 1:1 help over blog post comments.
At the time I was receiving 200+ emails per day and another 100+ blog post comments. I simply did not have the time to moderate and respond to them all, and the sheer volume of requests was taking a toll on me.
Instead, my goal is to do the most good for the computer vision, deep learning, and OpenCV community at large by focusing my time on authoring high-quality blog posts, tutorials, and books/courses.
If you need help learning computer vision and deep learning, I suggest you refer to my full catalog of books and courses — they have helped tens of thousands of developers, students, and researchers just like yourself learn Computer Vision, Deep Learning, and OpenCV.
Click here to browse my full catalog.