Table of Contents
- Building a Multimodal Gradio Chatbot with Llama 3.2 Using the Ollama API
- What Is Gradio and Why Is It Ideal for Chatbots?
- What Is Ollama and the Ollama API Functionality
- Where Ollama Store Models and How It Manages Them Locally
- Default Model Storage Location
- Managing Models Locally
- Can You Customize Storage?
- Want to Learn More About Ollama?
- Introducing Llama 3.2 and Its Multimodal Capabilities
- Configuring Your Development Environment
- Project Structure
- Implementing the Multimodal Chatbot 🧑💻
- Setting Up the Utilities (utils.py)
- Designing the Chatbot Logic (chatbot.py)
- Building the Interface (app.py)
- Summary
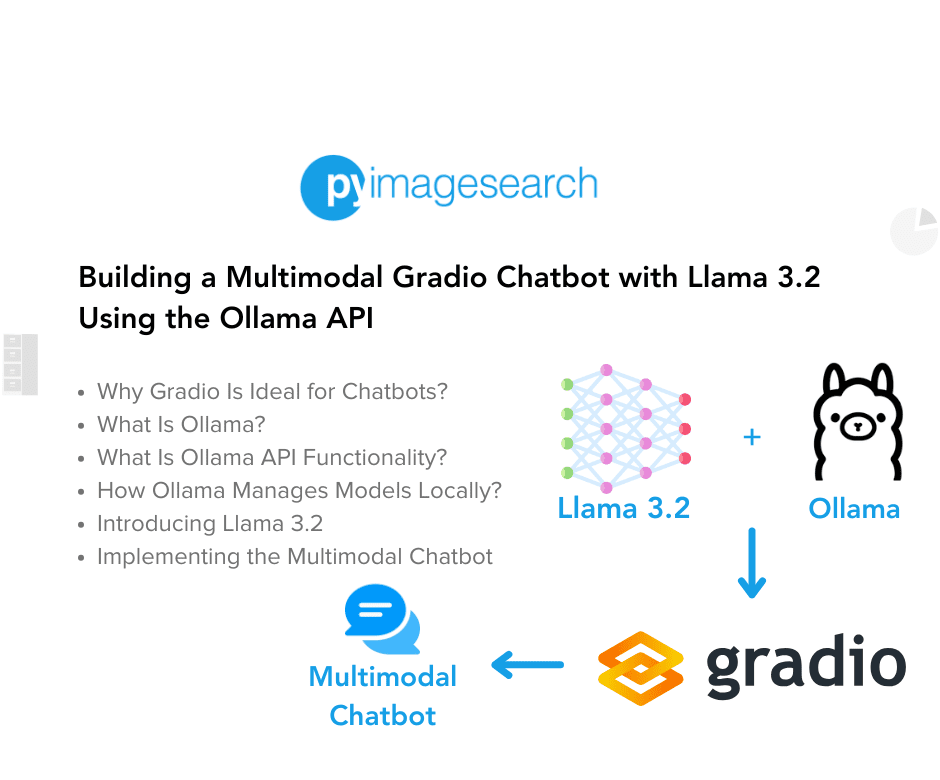
Building a Multimodal Gradio Chatbot with Llama 3.2 Using the Ollama API
In this tutorial, we will learn how to build an engaging Gradio chatbot powered by Llama 3.2 and Ollama. We’ll explore how Gradio simplifies creating interactive interfaces for text and image inputs while leveraging the powerful capabilities of the Ollama API (Application Programming Interface). Along the way, you’ll gain insights into what Ollama is, where it stores models, and how it integrates seamlessly with Gradio for multimodal applications. Whether you’re new to Gradio or looking to expand your machine learning (ML) toolkit, this guide will equip you to create versatile and impactful applications.
This lesson is the last of a 2-part series on building multimodal chatbots with Gradio:
- Introduction to Gradio for Building Interactive Applications
- Building a Multimodal Gradio Chatbot with Llama 3.2 Using the Ollama API (this tutorial)
To learn how to build a multimodal chatbot with Gradio, Llama 3.2, and the Ollama API, just keep reading.
What Is Gradio and Why Is It Ideal for Chatbots?
Gradio is an open-source Python library that enables developers to create user-friendly and interactive web applications effortlessly. Known for its simplicity and versatility, Gradio is particularly popular among machine learning practitioners for building interfaces that showcase AI (artificial intelligence) models. By allowing developers to connect their models to various interactive components, Gradio transforms complex ML workflows into accessible web applications.
In the first post of this series, Introduction to Gradio for Building Interactive Applications, we explored how Gradio simplifies building ML interfaces by offering components (e.g., TextBox, Sliders, Dropdowns) and more. We also delved into Gradio’s core classes (e.g., Blocks and Interface), highlighting its flexibility in designing both basic and advanced interfaces. If you’re new to Gradio, that post is a great starting point to understand its foundational features and setup.
When it comes to chatbots, Gradio excels due to its support for multimodal inputs and outputs (e.g., text, images, and audio). This makes it an ideal framework for creating conversational AI applications that require dynamic interactions. Gradio’s integration with powerful models like Llama 3.2 and APIs such as Ollama allows developers to design sophisticated chatbot interfaces with minimal effort.
Key reasons why Gradio is perfect for chatbot development:
- Ease of Use: Gradio’s intuitive API and built-in components (e.g., TextBox and Image Input) make setting up chatbots straightforward.
- Multimodal Support: Chatbots can handle text queries, image inputs, and generate responses seamlessly.
- Extensibility: Gradio easily integrates with external APIs (e.g., Ollama), enabling advanced conversational capabilities powered by cutting-edge models (e.g., Llama 3.2).
- Customization: Developers can tweak response styles and maintain interaction histories to provide a personalized user experience.
The Chatbot You’ll Build Today 🚀
Imagine creating a chatbot that not only responds to text prompts but also understands and reasons about images. Powered by Gradio, Llama 3.2 Vision, and the Ollama API, this multimodal chatbot combines cutting-edge AI capabilities with an intuitive, user-friendly interface. As shown below, you can ask for detailed, concise, or even creative responses tailored to your needs, all while preserving chat history for a seamless conversational experience.
Here’s a glimpse of what we’re building today — a chatbot that brings the best of multimodal AI right to your fingertips:
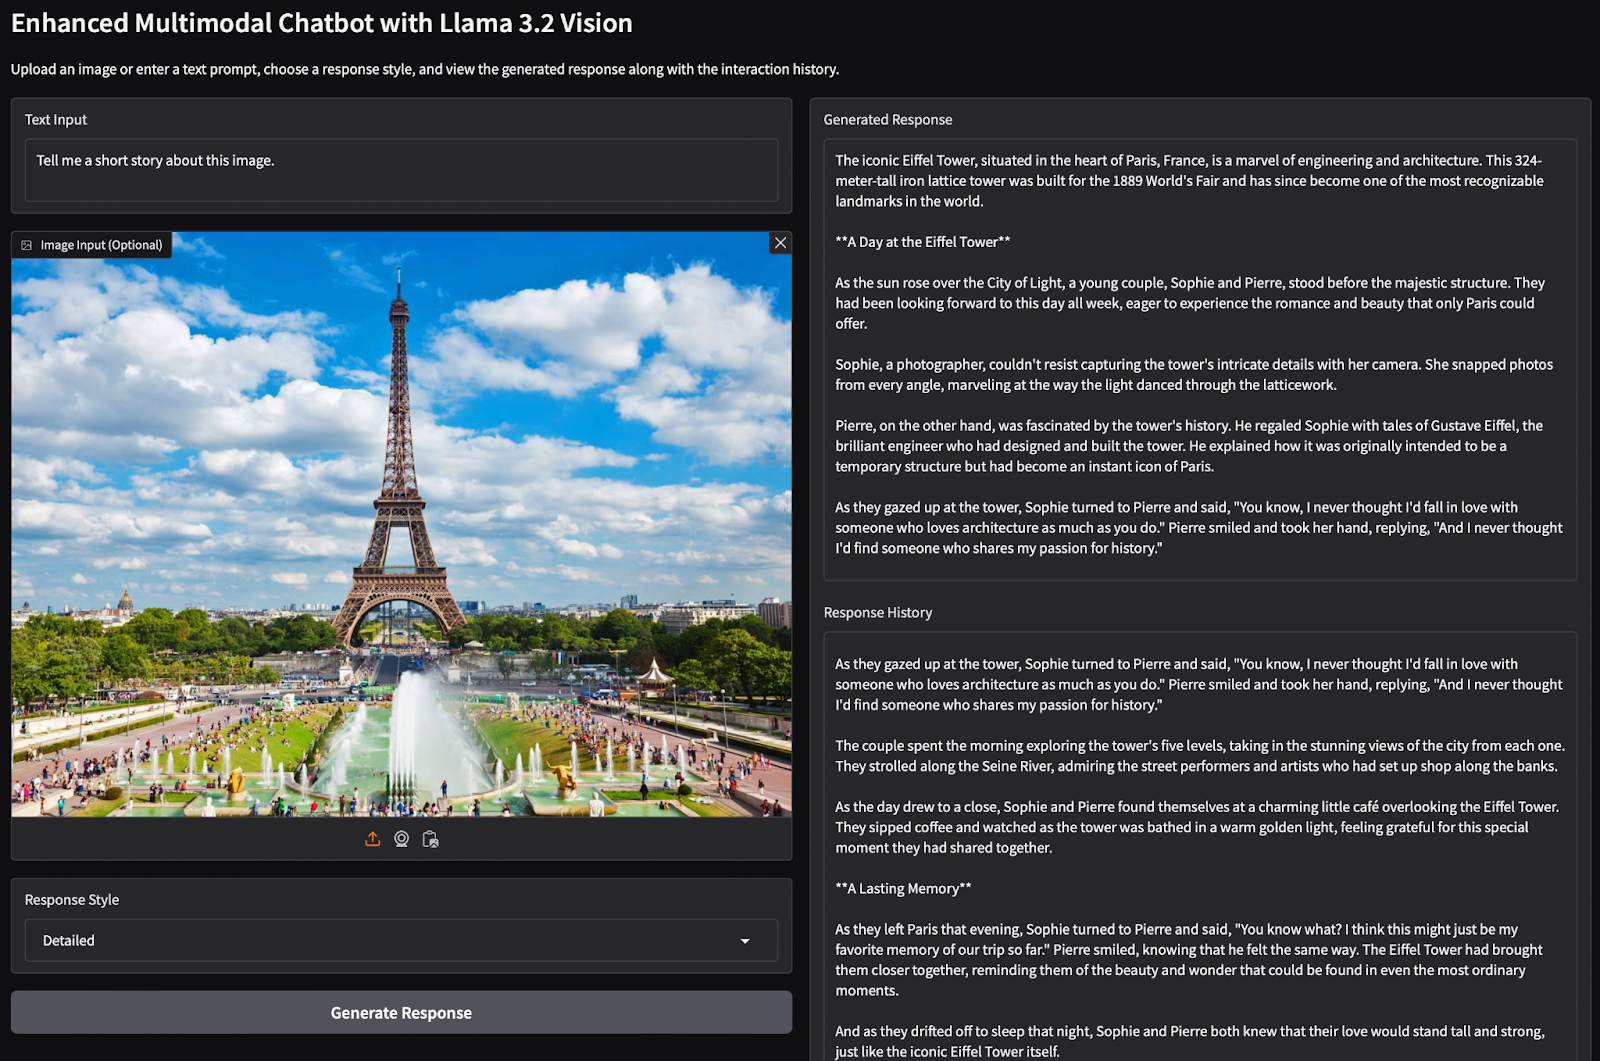
The interface of the multimodal chatbot was built using Gradio, integrating Llama 3.2 and Ollama’s API.
As you can see, the chatbot delivers stunningly accurate and dynamic responses, effortlessly blending visual and textual understanding. Let’s dive into how we can build this chatbot step by step, leveraging Gradio’s components, the Ollama API, and the immense reasoning power of Llama 3.2 Vision.
Now that we’ve explored why Gradio is an excellent choice for building chatbots, let’s delve into Ollama, another essential tool in our toolkit, and its API functionality.
What Is Ollama and the Ollama API Functionality
Ollama is an open-source framework that enables developers to run large language models (LLMs) like Llama 3.2 Vision locally on their machines. It offers a lightweight, extensible platform for building and managing language models, providing a simple API for creating, running, and managing models.
Key Features of Ollama:
- Local Execution: Run LLMs directly on your hardware, ensuring data privacy and reducing latency.
- Model Management: Easily download, run, and manage various models, including Llama 3.2 Vision.
- Extensibility: Customize and create your own models using Modelfiles, similar to Dockerfiles.
- Cross-Platform Compatibility: Available for macOS, Linux, and Windows.
Ollama API Functionality
The Ollama API provides two main ways to interact programmatically with models: through RESTful API calls (e.g., curl) and using the Python client (ollama package). Both approaches make it simple to integrate advanced LLMs into your applications.
REST API Endpoints
- Generate a Completion: Use the
/api/generateendpoint to generate a response for a given prompt with a specified model. This is a streaming endpoint, returning a series of responses. - Chat with a Model: The
/api/chatendpoint allows for conversational interactions with a model, handling a series of messages to maintain context.
Example API Request
To generate a response using the Llama 3.2 Vision model:
curl http://localhost:11434/api/generate -d '{
  "model": "llama3.2",
  "prompt": "Describe the Eiffel Tower."
}'
This request sends a prompt to the specified model and returns a generated response.
By integrating Ollama’s API with Gradio, developers can create sophisticated, multimodal chatbots that process both text and image inputs, leveraging the advanced capabilities of models like Llama 3.2 Vision.
Python Client for Ollama
The ollama Python package simplifies interacting with the API by abstracting REST (Representational State Transfer) calls into easy-to-use functions. This is the approach we use in this blog post.
Example Python Request
Here’s how you can use the Python client to interact with the Llama 3.2 model:
import ollama
# Initialize the client
client = ollama.Client()
# Send a chat request
response = client.chat(
    model="llama3.2",
    messages=[
        {"role": "user", "content": "Describe the Eiffel Tower."}
    ]
)
# Print the response
print(response['message']['content'])
This code demonstrates how to send prompts and receive detailed responses programmatically, leveraging the convenience of Python for seamless integration.
Having understood what Ollama offers and how its API works, the next logical step is to explore how Ollama stores and manages its models locally.
Where Ollama Store Models and How It Manages Them Locally
Ollama provides an efficient system for managing large language models (LLMs) like Llama 3.2 Vision directly on your local machine. This localized model storage ensures quick access, seamless execution, and privacy for developers using Ollama.
Default Model Storage Location
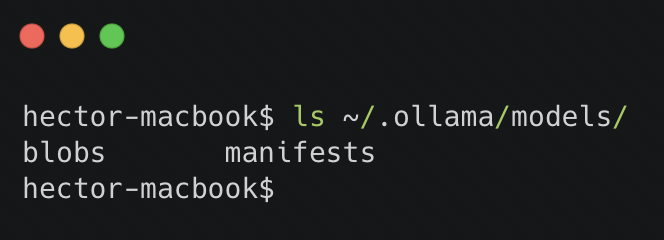
By default, Ollama stores all downloaded models in the ~/.ollama/models directory.
This directory contains:
- Model Blobs: Large binary files containing the model’s trained parameters, essential for running predictions or fine-tuning.
- Model Manifests: Metadata files describing the model’s architecture, hyperparameters, and version details, helping with integration and version tracking.
For example, when you pull the Llama 3.2 Vision model with ollama pull llama3.2-vision, Ollama downloads and stores both the model blobs and manifests in the ~/.ollama/models directory as shown below:
Managing Models Locally
Ollama simplifies the management of models through its command-line interface (CLI):
- List Installed Models: To view all the models stored locally along with their details, use
ollama list. - Delete Unused Models: Free up storage space by removing models you no longer need with
ollama remove llama3.2-vision.
Can You Customize Storage?
Yes, Ollama allows redirecting model storage to a different directory for scenarios where the default location lacks sufficient space. While this flexibility is helpful, customizing storage is beyond the scope of this lesson. For now, we recommend working with the default configuration unless specific storage needs arise.
Want to Learn More About Ollama?
If you’re interested in exploring Ollama in greater detail, including its CLI, Python library, integration with LangChain, and deploying Ollama with WebUI using Docker, check out our detailed guide: Inside Look: Exploring Ollama for On-Device AI.
This resource provides a deep dive into Ollama’s full range of features, making it a must-read for developers looking to harness the full power of on-device AI.
With Ollama’s model management sorted, it’s time to meet Llama 3.2, the star model behind our chatbot’s multimodal capabilities.
Introducing Llama 3.2 and Its Multimodal Capabilities
Llama 3.2 represents a significant advancement in large language models (LLMs), introducing multimodal capabilities that enable the processing of both text and images. Developed by Meta, Llama 3.2 is designed to enhance AI applications by integrating visual and textual information, thereby broadening the scope of tasks it can perform.

Key Features of Llama 3.2
- Multimodal Processing: Unlike its predecessors, Llama 3.2 can interpret and generate responses based on both textual and visual inputs. This capability allows it to perform tasks such as image captioning, visual question answering, and image-based reasoning.
- Model Variants: Llama 3.2 is available in multiple configurations to cater to diverse application needs:
- 11 Billion (11B) Parameters: Optimized for efficient performance, suitable for applications requiring a balance between capability and resource consumption.
- 90 Billion (90B) Parameters: Designed for more complex tasks, offering enhanced performance in understanding and generating detailed responses.
- On-Device Deployment: Smaller variants of LLaMA, such as the 1B (1 billion) and 3B (3 billion) text-only models, are optimized to run on local hardware, including mobile devices. This feature ensures data privacy, reduces latency, and enables offline functionality, making advanced AI accessible without constant internet connectivity.
Multimodal Capabilities in Detail
Llama 3.2’s ability to process both text and images opens up a wide range of applications:
- Visual Question Answering (VQA): The model can analyze an image and respond to questions about its content, demonstrating an understanding of visual context.
- Image Captioning: Llama 3.2 can generate descriptive captions for images, facilitating tasks in content creation and accessibility.
- Visual Reasoning: The model is capable of interpreting complex visual information, making inferences, and providing explanations based on image content.
By integrating Llama 3.2 into applications, developers can create sophisticated AI systems that seamlessly combine visual and textual data, leading to more intuitive and versatile user experiences.
Configuring Your Development Environment
To follow this guide, you need to have the following Python packages installed: ollama==0.3.3, pillow==11.0.0 (PIL), and gradio==5.5.0.
Luckily, these packages are pip-installable. You can install them with the following commands:
$ pip install ollama==0.3.3
$ pip install pillow==11.0.0
$ pip install gradio==5.5.0
Ensure that you have Python 3.10 or higher installed, as it is required for Gradio 5.5.0 and the Ollama integration.
Need Help Configuring Your Development Environment?

All that said, are you:
- Short on time?
- Learning on your employer’s administratively locked system?
- Wanting to skip the hassle of fighting with the command line, package managers, and virtual environments?
- Ready to run the code immediately on your Windows, macOS, or Linux system?
Then join PyImageSearch University today!
Gain access to Jupyter Notebooks for this tutorial and other PyImageSearch guides pre-configured to run on Google Colab’s ecosystem right in your web browser! No installation required.
And best of all, these Jupyter Notebooks will run on Windows, macOS, and Linux!
Project Structure
We first need to review our project directory structure.
Start by accessing this tutorial’s “Downloads” section to retrieve the source code.
From there, take a look at the directory structure:
.
├── app.py
├── output.png
├── pyimagesearch
│   ├── __init__.py
│   ├── chatbot.py
│   ├── config.py
│   └── utils.py
├── requirements.txt
└── terminal_output.txt
2 directories, 8 files
app.py: The main driver script- Sets up the Gradio UI
- Bridges the UI (user interface) and the chatbot logic by calling methods from
pyimagesearch.chatbot
pyimagesearch/chatbot.py: Contains the core chatbot logic- Manages conversation history
- Interacts with Ollama’s Python API to process text and image inputs
pyimagesearch/utils.py: Contains helper functions- Converts image inputs into bytes for compatibility with the Ollama API
Implementing the Multimodal Chatbot 🧑💻
In this section, we’ll dive into the implementation of the multimodal chatbot using Gradio, Llama 3.2 Vision, and the Ollama API. The code is modularized across three key files: utils.py, chatbot.py, and app.py. Each file has a specific purpose, making the implementation extensible and easy to understand.
Setting Up the Utilities (utils.py)
This utility script provides helper functions to streamline the chatbot implementation, focusing on logging setup and image processing.
# utils.py
import io

def image_to_bytes(image):
    buffered = io.BytesIO()
    image.save(buffered, format="JPEG")
    return buffered.getvalue()
The image_to_bytes function converts a PIL.Image object into a byte stream, which is required for sending images via APIs like Ollama. The io.BytesIO() creates an in-memory binary stream. This avoids saving the image to disk, improving efficiency for real-time applications.
Next, image.save(buffered, format="JPEG") saves the image into the binary stream (buffered) in JPEG format. Finally, buffered.getvalue() extracts the raw binary data of the image from the stream.
Why It’s Needed
- APIs like Ollama require images to be sent as byte data instead of Python objects.
- This function ensures compatibility and avoids unnecessary I/O operations.
Designing the Chatbot Logic (chatbot.py)
The chatbot.py module defines the Chatbot class, which encapsulates the core functionality for interacting with the Ollama API. It handles user input, manages conversation history, and communicates with the Llama 3.2 Vision model.
# chatbot.py
import ollama
from .utils import image_to_bytes

class Chatbot:
    def __init__(self, model_name, retries):
        self.client = ollama.Client()
        self.model_name = model_name
        self.retries = retries
        self.history = []

    def add_user_message(self, text_input, image_input, response_style):
        message = {'role': 'user', 'content': text_input.strip()}
        if response_style == "Detailed":
            message['content'] += " Please provide a detailed response."
        elif response_style == "Concise":
            message['content'] += " Keep the response concise."

    def generate_response(self):
        for attempt in range(self.retries):
            try:
                response = self.client.chat(
                    model=self.model_name, messages=history
                )
                assistant_message = {'role': 'assistant', 'content': response['message']['content']}
                return assistant_message
We start by importing ollama, which provides the client to interact with the Ollama API for AI model communication and image_to_bytes from utils.py that converts an image to byte format, making it compatible with the Ollama API.
Next, we have the Chatbot class that serves as a container for managing conversations and interactions with the model.
self.client: Initializes an Ollama client to send requests to the API.self.model_name: Stores the name of the model to interact with (e.g.,llama3.2-vision).self.retries: Specifies the number of retry attempts in case of API request failures.self.history: Maintains the conversation history as a list of messages. This allows the chatbot to maintain context across multiple interactions.
Then, we have the add_user_message that prepares a user message (text and optional image) and appends it to the conversation history.
Finally, the generate_response function sends the conversation history to the model and retrieves the assistant’s response.
Building the Interface (app.py)
The app.py script is the driver of the multimodal chatbot application. It integrates the Chatbot class from chatbot.py with the Gradio Blocks interface to provide an interactive user interface.
# app.py
import gradio as gr
from pyimagesearch.chatbot import Chatbot
from pyimagesearch.config import MODEL_NAME, API_RETRIES, RESPONSE_STYLES
We start by importing the heart of this lesson gradio library to build an interactive web-based interface. Along with that, the Chatbot class manages the chatbot’s logic (from chatbot.py) and a few configurable constants for the chatbot’s behavior (from config.py).
chatbot = Chatbot(model_name=MODEL_NAME, retries=API_RETRIES)

def handle_user_input(text_input, image_input, response_style):
    if not text_input.strip() and not image_input:
        return "Please provide either text or an image.", "\n".join(
            [f"{msg['role'].capitalize()}: {msg['content']}" for msg in chatbot.history]
        )

    try:
        # Generate a response from the chatbot
        generated_text = chatbot.generate_response()

        return generated_text, history_display
    except Exception as e:
        return f"An error occurred: {str(e)}", "\n".join(
            [f"{msg['role'].capitalize()}: {msg['content']}" for msg in chatbot.history]
        )
We then define an instance of the Chatbot class with the specified model name and retry count. This serves as the backend for handling user inputs and generating responses.
The handle_user_input function validates user input, processes it, and generates responses. If neither text nor image is provided, the function returns an error message along with the chatbot’s conversation history.
# Create the Gradio Blocks-based interface
with gr.Blocks() as demo:
    gr.Markdown("# Enhanced Multimodal Chatbot with Llama 3.2 Vision")
    gr.Markdown("Upload an image or enter a text prompt, choose a response style, and view the generated response along with the interaction history.")

    with gr.Row():
            text_input = gr.Textbox(lines=2, placeholder="Enter your question here...", label="Text Input")
            image_input = gr.Image(type="pil", label="Image Input (Optional)")
            response_style = gr.Dropdown(["Detailed", "Concise", "Creative"], label="Response Style", value="Detailed")

        with gr.Column():
            generated_response = gr.Textbox(label="Generated Response")

    # Set button click event
    submit_button.click(
        fn=handle_user_input,
        inputs=[text_input, image_input, response_style],
        outputs=[history_display]
    )

demo.launch(share=True)
To bring the chatbot interface to life, we use Gradio’s powerful Blocks API, enabling us to design a clean, responsive, and user-friendly interface. The application starts with two Markdown blocks: one introduces the chatbot’s functionality, and the other provides instructions for interaction. The interface is then divided into two primary sections using Gradio Rows and Columns.
On the left side of the UI, we have the input components:
- A Textbox for entering text prompts, equipped with a placeholder to guide users.
- An optional Image Input allowing users to upload images for multimodal queries.
- A Dropdown for selecting the desired response style, offering options such as
"Detailed","Concise", or"Creative".
On the right side of the UI, the interface displays the output:
- A Textbox to show the generated response from the chatbot.
The submit_button is linked to the core function, handle_user_input, using Gradio’s click event binding. This function processes user inputs, generates responses using the chatbot, and updates the outputs dynamically.
Finally, the demo.launch(share=True) command launches the Gradio application, providing a public link for users to test the chatbot in real-time. This modular and intuitive design ensures an engaging user experience while showcasing the advanced capabilities of Llama 3.2 Vision integrated with Gradio.
What's next? We recommend PyImageSearch University.

86+ total classes • 115+ hours hours of on-demand code walkthrough videos • Last updated: March 2026
★★★★★ 4.84 (128 Ratings) • 16,000+ Students Enrolled
I strongly believe that if you had the right teacher you could master computer vision and deep learning.
Do you think learning computer vision and deep learning has to be time-consuming, overwhelming, and complicated? Or has to involve complex mathematics and equations? Or requires a degree in computer science?
That’s not the case.
All you need to master computer vision and deep learning is for someone to explain things to you in simple, intuitive terms. And that’s exactly what I do. My mission is to change education and how complex Artificial Intelligence topics are taught.
If you're serious about learning computer vision, your next stop should be PyImageSearch University, the most comprehensive computer vision, deep learning, and OpenCV course online today. Here you’ll learn how to successfully and confidently apply computer vision to your work, research, and projects. Join me in computer vision mastery.
Inside PyImageSearch University you'll find:
- ✓ 86+ courses on essential computer vision, deep learning, and OpenCV topics
- ✓ 86 Certificates of Completion
- ✓ 115+ hours hours of on-demand video
- ✓ Brand new courses released regularly, ensuring you can keep up with state-of-the-art techniques
- ✓ Pre-configured Jupyter Notebooks in Google Colab
- ✓ Run all code examples in your web browser — works on Windows, macOS, and Linux (no dev environment configuration required!)
- ✓ Access to centralized code repos for all 540+ tutorials on PyImageSearch
- ✓ Easy one-click downloads for code, datasets, pre-trained models, etc.
- ✓ Access on mobile, laptop, desktop, etc.
Summary
In this tutorial, we walked through the process of building a multimodal chatbot using Gradio, Llama 3.2 Vision, and the Ollama API. We began by understanding why Gradio is an ideal framework for chatbot development, followed by exploring Ollama’s API functionality and how it manages models locally. This provided us with a strong foundation for integrating these tools effectively.
Next, we introduced Llama 3.2, emphasizing its multimodal capabilities, which enable the model to handle both text and image-based inputs. This step highlighted the advanced reasoning capabilities of Llama 3.2 Vision, making it a perfect choice for our chatbot.
We then delved into implementation, starting with setting up our development environment and outlining the project structure. We created utility functions for tasks like image processing, built the chatbot logic to manage conversations and API interactions, and designed a Gradio-based user interface to tie everything together.
The result was a sophisticated chatbot capable of generating detailed, concise, or creative responses based on user preferences while maintaining conversation history. This project showcased the seamless integration of Gradio, Llama 3.2 Vision, and Ollama’s API, offering developers a practical framework for creating advanced multimodal AI applications.
Citation Information
Martinez, H. “Building a Multimodal Gradio Chatbot with Llama 3.2 Using the Ollama API,” PyImageSearch, P. Chugh, S. Huot, A. Sharma, and P. Thakur, eds., 2025, https://pyimg.co/djwzr
@incollection{Martinez_2025_building-multimodal-gradio-chatbot-w-llama-3-2-using-ollama-api,
  author = {Hector Martinez},
  title = {{Building a Multimodal Gradio Chatbot with Llama 3.2 Using the Ollama API}},
  booktitle = {PyImageSearch},
  editor = {Puneet Chugh and Susan Huot and Aditya Sharma and Piyush Thakur},
  year = {2025},
  url = {https://pyimg.co/djwzr},
}
To download the source code to this post (and be notified when future tutorials are published here on PyImageSearch), simply enter your email address in the form below!

Download the Source Code and FREE 17-page Resource Guide
Enter your email address below to get a .zip of the code and a FREE 17-page Resource Guide on Computer Vision, OpenCV, and Deep Learning. Inside you'll find my hand-picked tutorials, books, courses, and libraries to help you master CV and DL!

Comment section
Hey, Adrian Rosebrock here, author and creator of PyImageSearch. While I love hearing from readers, a couple years ago I made the tough decision to no longer offer 1:1 help over blog post comments.
At the time I was receiving 200+ emails per day and another 100+ blog post comments. I simply did not have the time to moderate and respond to them all, and the sheer volume of requests was taking a toll on me.
Instead, my goal is to do the most good for the computer vision, deep learning, and OpenCV community at large by focusing my time on authoring high-quality blog posts, tutorials, and books/courses.
If you need help learning computer vision and deep learning, I suggest you refer to my full catalog of books and courses — they have helped tens of thousands of developers, students, and researchers just like yourself learn Computer Vision, Deep Learning, and OpenCV.
Click here to browse my full catalog.