In today’s tutorial, I’ll demonstrate how you can configure your macOS system for deep learning using Python, TensorFlow, and Keras.
This tutorial is the final part of a series on configuring your development environment for deep learning. I created these tutorials to accompany my new book, Deep Learning for Computer Vision with Python; however, you can use these instructions to configure your system regardless if you bought my book or not.
In case you’re on the wrong page (or you don’t have macOS), take a look at the other deep learning development environment tutorials in this series:
- Your deep learning + Python Ubuntu virtual machine
- Pre-configured Amazon AWS deep learning AMI with Python
- Configuring Ubuntu for deep learning with Python (CPU only)
- Setting up Ubuntu 16.04 + CUDA + GPU for deep learning with Python
- macOS for deep learning with Python, TensorFlow, and Keras (this post)
To learn how to configure macOS for deep learning and computer vision with Python, just keep reading.
macOS for deep learning with Python, TensorFlow, and Keras
As you get acclimated in the deep learning domain, you’ll want to perform many experiments to hone your skills and even to solve real-world problems.
You’ll find that for experiments in the most chapters inside the Starter Bundle and half the chapters in the Practitioner Bundle can be executed on your CPU. Readers of the ImageNet Bundle will need a GPU machine in order to perform the more advanced experiments.
I definitely don’t recommend churning through large datasets and deep neural networks on your laptop, but like I said, for small experiments it is just fine.
Today, I’ll walk you through the steps to configure your Mac for deep learning.
First, we’ll install Xcode and Homebrew (a package manager). From there we will create a virtual environment called dl4cv
and install OpenCV, TensorFlow, and Keras into the environment.
Let’s get started.
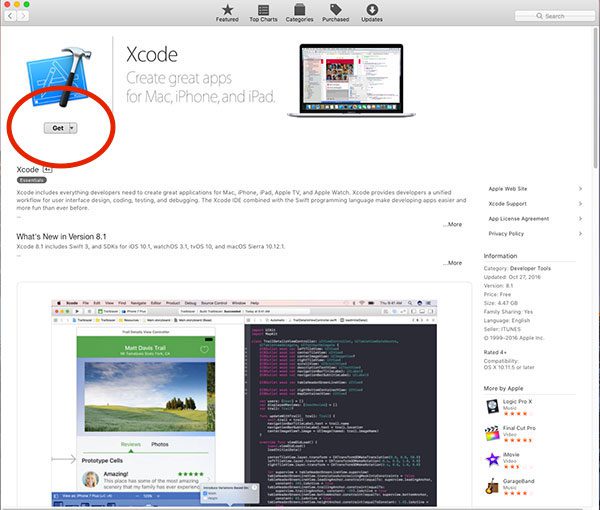
Step #1: Install Xcode
For starters, you’ll need to get Xcode from the Apple App Store and install it. Don’t worry, it is 100% free.
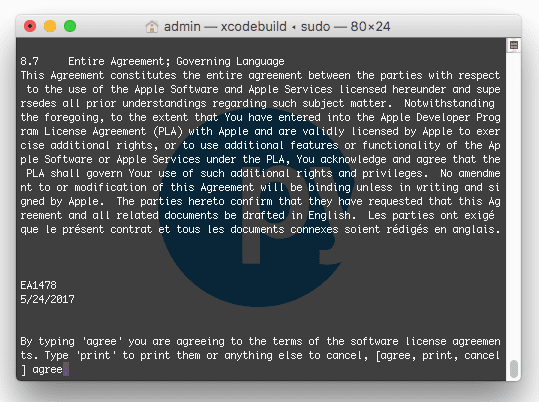
From there, open a terminal and execute the following command to accept the developer license:
$ sudo xcodebuild -license
The next step is to install Apple command line tools:
$ sudo xcode-select --install
Step #2: Install Homebrew
Homebrew (also known as Brew), is a package manager for macOS. You may already have it on your system, but if you don’t you will want to perform the actions in this section.
First we’ll install Homebrew by copying and pasting the entire command into your terminal:
$ /usr/bin/ruby -e "$(curl -fsSL https://raw.githubusercontent.com/Homebrew/install/master/install)"
Next we’ll update our package definitions:
$ brew update
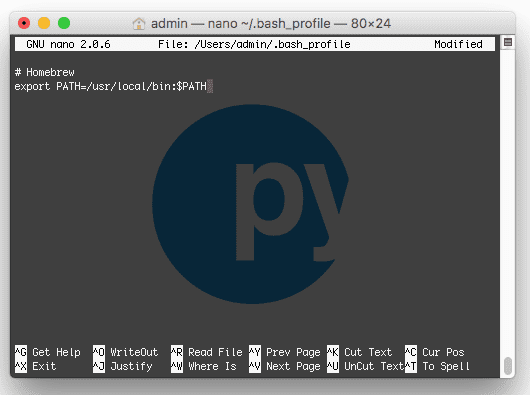
Followed by updating your ~/.bash_profile
using the nano
terminal editor (any other editor should do the trick as well):
$ nano ~/.bash_profile
Add the following lines to the file:
# Homebrew export PATH=/usr/local/bin:$PATH
Next, simply reload your ~/.bash_profile
(this happens automatically when a new terminal is opened):
$ source ~/.bash_profile
Now that Brew is ready to go, let’s get Python 3 installed.
Step #3: Install Homebrew Python 3 for macOS
This step is actually very easy, but I want to clear up some possible confusion first.
macOS comes with Python installed; however we will be installing a non-system Python using Brew. While you could use your system Python, it is actually strongly discouraged. Therefore, don’t skip this step — it is very important to your successful install.
To install Python 3 with Homebrew, simply execute this command:
$ brew install python3
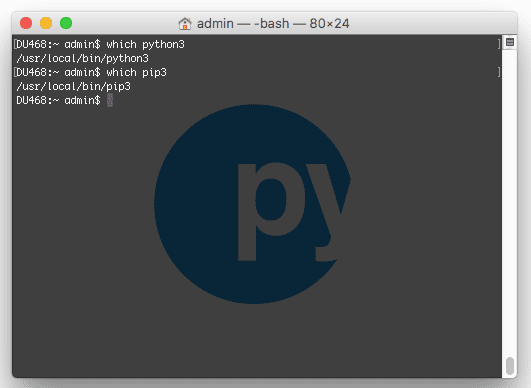
Before continuing you’ll want to verify that your Python 3 installation is Homebrew’s rather than the macOS system’s:
$ which python3 /usr/local/bin/python3 $ which pip3 /usr/local/bin/pip3
Ensure that you see “local
” in each path. If you don’t see this output, then you aren’t using Homebrew’s install of Python 3.
Assuming your Python 3 install worked, let’s continue on to Step #4.
Step #4: Create your Python virtual environment
As I’ve stated in other install guides on this site, virtual environments are definitely the way to go when working with Python, enabling you to accommodate different versions in sandboxed environments.
In other words, there is less of a chance that you’ll do something that is a pain in the ass to fix. If you mess up an environment, you can simply delete the environment and rebuild it.
Let’s install virtualenv and virtualenvwrapper via pip
:
$ pip3 install virtualenv virtualenvwrapper
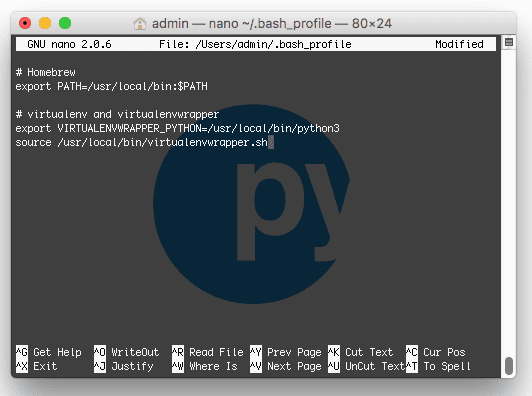
From there, we’ll update our ~/.bash_profile
again:
$ nano ~/.bash_profile
Where we’ll add the following lines to the file:
# virtualenv and virtualenvwrapper export VIRTUALENVWRAPPER_PYTHON=/usr/local/bin/python3 source /usr/local/bin/virtualenvwrapper.sh
Followed by reloading the file:
$ source ~/.bash_profile
Creating the ‘dl4cv’ environment
The dl4cv
environment will house all of our software for performing experiments associated with my book. You can easily name the environment whatever you want, but from here on we’ll be referring to it as dl4cv
.
To create the dl4cv environment with Python 3 simply enter the following command:
$ mkvirtualenv dl4cv -p python3
After Python 3 and supporting scripts are installed into the new environment, you should actually be inside the environment. This is denoted by a ‘(dl4cv)
‘ at the beginning of your bash prompt as shown in the figure below:
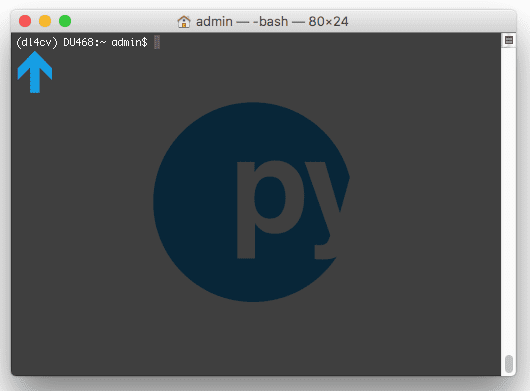
If you do not see the modified bash prompt then you can enter the following command at any time to enter the environment at any time:
$ workon dl4cv
The only Python dependency required by OpenCV is NumPy, which we can install below:
$ pip install numpy
That’s it as far as creating a virtual environment and installing NumPy. Let’s continue to Step #5.
Step #5: Install OpenCV prerequisites using Homebrew
The following tools need to be installed for compilation, image I/O, and optimization:
$ brew install cmake pkg-config wget $ brew install jpeg libpng libtiff openexr $ brew install eigen tbb
After those packages are installed we’re ready to install OpenCV.
Step #6: Compile and Install OpenCV
First, let’s download the source code:
$ cd ~ $ wget -O opencv.zip https://github.com/opencv/opencv/archive/3.3.0.zip $ wget -O opencv_contrib.zip https://github.com/opencv/opencv_contrib/archive/3.3.0.zip
Then unpack the archives:
$ unzip opencv.zip $ unzip opencv_contrib.zip
Followed by configuring the build with CMake (it is very important that you copy the CMake command exactly as it appears here, taking care to copy and past the entire command; I would suggest clicking the “<=>” button in the toolbar below to expand the entire command):
$ cd ~/opencv-3.3.0/ $ mkdir build $ cd build $ cmake -D CMAKE_BUILD_TYPE=RELEASE \ -D CMAKE_INSTALL_PREFIX=/usr/local \ -D OPENCV_EXTRA_MODULES_PATH=~/opencv_contrib-3.3.0/modules \ -D PYTHON3_LIBRARY=`python -c 'import subprocess ; import sys ; s = subprocess.check_output("python-config --configdir", shell=True).decode("utf-8").strip() ; (M, m) = sys.version_info[:2] ; print("{}/libpython{}.{}.dylib".format(s, M, m))'` \ -D PYTHON3_INCLUDE_DIR=`python -c 'import distutils.sysconfig as s; print(s.get_python_inc())'` \ -D PYTHON3_EXECUTABLE=$VIRTUAL_ENV/bin/python \ -D BUILD_opencv_python2=OFF \ -D BUILD_opencv_python3=ON \ -D INSTALL_PYTHON_EXAMPLES=ON \ -D INSTALL_C_EXAMPLES=OFF \ -D BUILD_EXAMPLES=ON ..
Note: For the above CMake command, I spent considerable time creating, testing, and refactoring it. I’m confident that it will save you time and frustration if you use it exactly as it appears. Make sure you click the “<=>” button in the toolbar of the code block above to expand the code block. This will enable you to copy and paste the entire command.
Your output should be similar to the screenshot below which ensures that the correct Python 3 binary/library and NumPy version are utilized:
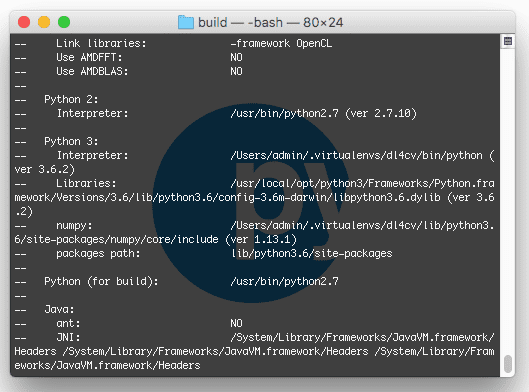
Then we’re ready to perform the compilation compile OpenCV:
$ make -j4
Note: The number ‘4’ above specifies that we have 4 cores/processors for compiling. If you have a different number of processors you can update the -j
switch. For only one core/processor simply just use the make
command (from the build directory enter make clean
prior to retrying if your build failed or got stuck).
From there you can install OpenCV:
$ sudo make install
After installing it is necessary to sym-link the cv2.so
file into the dl4cv
virtual environment:
$ cd ~/.virtualenvs/dl4cv/lib/python3.6/site-packages/ $ ln -s /usr/local/lib/python3.6/site-packages/cv2.cpython-36m-darwin.so cv2.so $ cd ~
Finally, we can test out the install:
$ python >>> import cv2 >>> cv2.__version__ '3.3.0'
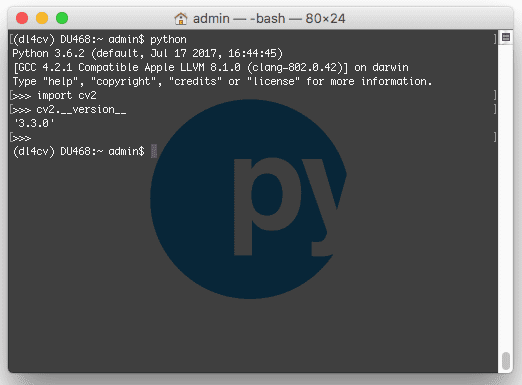
If your output properly shows the version of OpenCV that you installed, then you’re ready to go on to Step #7 where we will install the Keras deep learning library.
Step #7: Install Keras
Before beginning this step, ensure you have activated the dl4cv
virtualenv. If you aren’t in the environment, simply execute:
$ workon dl4cv
Then, using pip
, install the required Python computer vision, image processing, and machine learning libraries:
$ pip install scipy pillow $ pip install imutils h5py requests progressbar2 $ pip install scikit-learn scikit-image
Next install matplotlib and update the rendering backend:
$ pip install matplotlib $ touch ~/.matplotlib/matplotlibrc $ echo "backend: TkAgg" >> ~/.matplotlib/matplotlibrc
Then, install TensorFlow:
$ pip install tensorflow
Followed by keras:
$ pip install keras
To verify that Keras is installed properly we can import it and check for errors:
$ python >>> import keras Using TensorFlow backend. >>>
Keras should be imported with no errors, while stating that TensorFlow is being utilized as the backend.
At this point, you can familiarize yourself with the ~/.keras/keras.json
file:
{ "image_data_format": "channels_last", "backend": "tensorflow", "epsilon": 1e-07, "floatx": "float32" }
Ensure that the image_data_format
is set to channels_last
and that the backend
is set to tensorflow
.
Congratulations! You’re now ready to go. If you didn’t open up a beer or coffee during the installation process, now is the time. It’s also the time to find a comfortable spot to read Deep Learning for Computer Vision with Python.
What's next? We recommend PyImageSearch University.
86+ total classes • 115+ hours hours of on-demand code walkthrough videos • Last updated: February 2025
★★★★★ 4.84 (128 Ratings) • 16,000+ Students Enrolled
I strongly believe that if you had the right teacher you could master computer vision and deep learning.
Do you think learning computer vision and deep learning has to be time-consuming, overwhelming, and complicated? Or has to involve complex mathematics and equations? Or requires a degree in computer science?
That’s not the case.
All you need to master computer vision and deep learning is for someone to explain things to you in simple, intuitive terms. And that’s exactly what I do. My mission is to change education and how complex Artificial Intelligence topics are taught.
If you're serious about learning computer vision, your next stop should be PyImageSearch University, the most comprehensive computer vision, deep learning, and OpenCV course online today. Here you’ll learn how to successfully and confidently apply computer vision to your work, research, and projects. Join me in computer vision mastery.
Inside PyImageSearch University you'll find:
- ✓ 86+ courses on essential computer vision, deep learning, and OpenCV topics
- ✓ 86 Certificates of Completion
- ✓ 115+ hours hours of on-demand video
- ✓ Brand new courses released regularly, ensuring you can keep up with state-of-the-art techniques
- ✓ Pre-configured Jupyter Notebooks in Google Colab
- ✓ Run all code examples in your web browser — works on Windows, macOS, and Linux (no dev environment configuration required!)
- ✓ Access to centralized code repos for all 540+ tutorials on PyImageSearch
- ✓ Easy one-click downloads for code, datasets, pre-trained models, etc.
- ✓ Access on mobile, laptop, desktop, etc.
Summary
In today’s post, we configured our macOS box for computer vision and deep learning. The main pieces of software included Python 3, OpenCV, TensorFlow, and Keras accompanied by dependencies and installation/compilation tools.
As you can see, utilizing Homebrew, pip, and virtualenv + virtualenvwrapper made this install rather easy. I spent quite a bit of time creating and testing the CMake command which should work easily on your computer. Be sure to give it a try.
If you encountered any problems along the way, leave a comment in the form below.
If you would like to put your newly configured macOS deep learning environment to good use, I would highly suggest you take a look at my new book, Deep Learning for Computer Vision with Python.
Regardless if you’re new to deep learning or already a seasoned practitioner, the book has content to help you reach deep learning mastery — take a look here.
Join the PyImageSearch Newsletter and Grab My FREE 17-page Resource Guide PDF
Enter your email address below to join the PyImageSearch Newsletter and download my FREE 17-page Resource Guide PDF on Computer Vision, OpenCV, and Deep Learning.
Thanks Adrian, these tutorials are great. Really looking forward to the rest of the Kickstarter deliverables coming out over the next few months.
Question regarding setup: you used brew + virtualenv to set up and configure the dl4cv environment. Would it be possible to instead use conda environments? I suppose the one potential hiccup that comes to mind would be linking the OpenCV 3.3.0 build with the environment.
You can use conda environments if you wish, but please note that I cannot provide any suggestions/support if you deviate from the instructions here.
Probably would need to replace -D PYTHON3_EXECUTABLE=$VIRTUAL_ENV/bin/python \ with -D PYTHON3_EXECUTABLE=$CONDA_PREFIX/bin/python \
I’m trying it now to see if it works – otherwise Ubuntu VM.
Nah, there is obviously more to just that for the makefile using conda. Libraries and possibly packages path (PYTHON3_LIBRARY and PYTHON3_INCLUDE_DIR) need repointing.
— Python 3:
— Interpreter: /Users/stgreszc/anaconda/envs/python3/bin/python (ver 3.6.2)
— Libraries: /usr/lib/libpython2.7.dylib (ver 3.6.2)
— numpy: /Users/stgreszc/anaconda/envs/python3/lib/python3.6/site-packages/numpy/core/include (ver 1.12.1)
— packages path: lib/python3.6/site-packages
Very timely tutorial, very grateful.
Any plans to try CoreML?
No plans at the moment, but I will consider it for the future.
Your install guide worked perfectly on my Macbook Pro (10.12.6). Thank you!
Awesome, I’m glad to hear it Jeff! Congrats on getting your macOS machine configured for deep learning!
I cannot run make -j4, the error said make:*** No targets specified and no makefile found. someone can help me?
Double-check your output from CMake. It is very likely that CMake exited with an error, hence there it did not generate a Makefile. Secondly, ensure you are in the “build” directory before executing “make”.
Hi Adrian, I have 3 virtual envs, with opencv 3.0 and I want to upgrade all of them to ver 3.3. If I download and compile opencv 3.3 outside of a virtual env, should my envs be informed about the upgrade?
If not, how can I do that?
Are all three of your virtual environments the same Python version? Or different?
If they are the same you can simply compile OpenCV 3.3 once, install it, and ensure the
cv2.so
sym-links are correct for each Python virtual environment.Does not work with the latest XCode 9.0.
nvcc warning : The ‘compute_20’, ‘sm_20’, and ‘sm_21’ architectures are deprecated, and may be removed in a future release (Use -Wno-deprecated-gpu-targets to suppress warning).
nvcc fatal : The version (‘90000’) of the host compiler (‘Apple clang’) is not supported
CMake Error at cuda_compile_generated_gpu_mat.cu.o.cmake:208 (message):
I went back to 8.1. It worked.
Apple LLVM version 8.0.0 (clang-800.0.42.1)
Target: x86_64-apple-darwin16.7.0
Thread model: posix
InstalledDir: /Library/Developer/CommandLineTools/usr/bin
Thanks, Adrian, really great tutorial !
I made the installation on an iMac (Retina 5K, 27-inch, late 2014) with macOS High Sierra and Xcode 9.0. I got a problem with make -j4: “fatal error tesseract/baseapi.h file not found.
After adding “-D BUILD_opencv_text = off” it worked.
Awesome, thank you for sharing Joachim!
Thanks, Adrian, for yet another, most excellent tutorial!
I was able to successfully install on High Sierra(10.13) using a late 2013 Mac Pro. The only hitch I had was a conflict when running one of your dl4cv scripts that imports ‘matplotlib.pyplot.’ Seems there was some sore of OSX back-end-renderer conflict. I found a fix here:
https://stackoverflow.com/questions/21784641/installation-issue-with-matplotlib-python
Do you have any suggestions for editing the Cmake so that tensor flow can be compiled to use SSE4.2?
Thanks for sharing the matplotlib solution, Chris!
I have not compiled TensorFlow by hand (I’ve only used the pip install) but I’ll consider looking into this and doing a future blog post on it.
Hi Adrian, thanks for the great tutorial.
I am trying to install on a 2017 imac with high sierra. I have managed to get as far as the cMake command for opencv. When I check the build both numpy and libraries say NO next to them. Do I need to change something to make cmake find them?
Many thanks
Hi Gavin — can you please confirm whether or not you are in the “dl4cv” Python virtual environment when executing CMake? Also, can you confirm the full Python version?
Thanks Adrian,
I can confirm I am in the “dl4cv” and the python version is 3.6.3
I have made a video of the install skip to the last 30 secs or so to see the cmake script running and the results.
https://youtu.be/6Tqq_fbmzxc
Thanks again
Gavin
Its working, just installed all osx updates and deleted the build dir and tried again. Build success.
Thanks again
Gavin
Congrats on getting your deep learning environment configured, Gavin! Nice job!
I couldn’t get the cmake file to generate properly. At the end I received the following CMake Error:
The following variables are used in this project, but they are set to NOTFOUND. Please set them or make sure they are set and tested correctly in the CMake files:
CUDA_nppi_LIBRARY (ADVANCED)
linked by target “opencv_cudev” in directory /Users/andrewbaker/opencv-3.3.0/modules/cudev …… there are many more linked by target lines which follow.
My configuration:
macOS Version 10.12.6
CUDA 9.0
XCode 9.0
clang-900.0.38
I tried going back to Xcode 8.1. That produced the same result. Maybe I should try going back to CUDA 8.0?
Hi Andrew — CUDA likely won’t work on your Mac unless you indeed have a capable NVIDIA GPU. Do you have an NVIDIA GPU?
Yes I do. I went back to XCode 8.1, clang-800.0.42.1 and CUDA 8.0.61. All complied fine and installed. However now when I try to do the simlink I am getting cv2.so: No such file or directory.
Ok I figured it out. No issues all is well.
Congrats on figuring out the issue, Andrew!
Hi Adrian,
Thanks for the tutorial.
I had a successful installation.
When I pip installed matplotlib – it mentioned it is already installed but the next command “touch” failed as there was no .matplotlib . I proceeded by created one. Hope this is not a big issue when it comes to rendering.
Hi Murthy — this shouldn’t be an issue.
Found that when installing and compiling OpenCV (Step #6), numpy wasn’t utilised on the build list for some reason.
I need to manually add this line to the CMake list for it to include numpy’s directory:
-D PYTHON_NUMPY_INCLUDE_DIR=python -c ‘import numpy as np; print(np.__path__)’ \
Hope this helps anyone out there with the same issue 🙂
I’m using:
macOS 10.13.1 on MacBook Pro 13 Mid 2014
OpenCV 3.3.0
Numpy 1.3.3
Thank you for sharing! I’ll make note of this as well 🙂
Adrian,
Possibly a stupid question, but I previously installed opencv using one of your tutorials. Do I need to set it up again in this new environment, or can I use the one I previously installed?
Thanks
You can use your previous install of OpenCV. I would recommend creating a new Python virtual environment and then sym-linking in your OpenCV bindings, but that’s entirely up to you.
Today the new iMac Pro was introduced by Apple. The most expensive configuration came in at $13,348.00. That was with a 2.3GHz 18 core Intel Xeon W processor, 128GB RAM, 4 TB SSD and Radeon Pro Vega 64 16 GB video card. Being that most of the Deep Learning frameworks are dependent on CUDA and the NVIDIA architecture, I wonder what Apple’s thinking was for using this machine for Deep Learning? For $13k one could build a very nice multiGPU capable Ubuntu machine.
I haven’t watched the announcement video or looked at the specs yet (I certainly will though) — but were they mentioning in the announcement that they expected the new iMac to be used for deep learning?
Adrian,
I do not really use mac. however, I wanted to try it out on Mac high sierra (10.13) and ran into two issues and wanted to share the solutions (save ppls time).
1. Issues with jpeg 8 and 9 when importing cv2 (brew repo issue)
solution from link:
https://stackoverflow.com/questions/32703296/dyld-library-not-loaded-usr-local-lib-libjpeg-8-dylib-homebrew-php
2. Runtime issue for 3.5 and 3.6 versions when importing tensorflow (first seen when importing keras)
solution: download the proper build, remove tensorflow and keras (“`pip uninstall tensorflow“` and “`pip uninstall keras“`), reinstall using downloaded wheel “`pip install /path/to/binary/file.whl“`. More details and builds on the link:
https://github.com/lakshayg/tensorflow-build
I’ll have to look into the JPEG issue, but TensorFlow does not yet support Python 3.6. You’ll need to install Python 3.5 and use Python 3.5 for the install.
I have the same issue. Is is possible to use homebrew to downgrade to 3.5, and if so, is it best to try this, or just start again with a new virtual environment using python 3.5? Thank you
I would suggest creating a new environment using Python 3.5. This is likely the best approach.
Great tutorial. But I am stuck with the same issue. How do I uninstall Python 3.6 and install 3.5? Thanks.
I haven’t been able to test this to see if it works — but you should be able to download Python 3.5 from the official Python + macOS release and then install it. The paths to the Python 3.5 libraries, interpreter, etc. will be different so you’ll need to investigate that. Once installed, you should be able to create a Python 3.5 virtual environment via:
$ mkvirtualenv dl4cv -p python35
But again, that’s speculation off the top of my head based on what I think should work. I have not personally tried this.
I haven’t encountered the issues “Carlos” (the OP of this thread) described regarding TensorFlow and I haven’t been able to replicate them so unfortunately I’m shooting in the dark a bit here.
Pete, Adrian – I’ve managed to install Python 3.5 using the link Adrian kindly provided, and I have managed to install everything using this article. Will be moving on to the image classification article next: /2017/12/11/image-classification-with-keras-and-deep-learning/)
Thank you for letting us know Alex, I’m glad that worked 🙂
Adrian, thank you again for another thorough and excellent article. I have got most of the way through here, but when running “pip install matplotlib” it came back with “Requirement already satisfied: matplotlib in /Users/Alex/.virtualenvs/dl4cv/lib/python3.6/site-packages”. There also wasn’t a “~/.matplotlib/matplotlibrc” directory or file so I created these manually (although I fear this may not be correct). I tried the pip command with –update –force-reinstall and I can see this is now in my ~/.virtualenvs/dl4cv/lib/python3.6/site-packages directory.
Secondly, when I run python and import keras, I get the error “AttributeError: module ‘enum’ has no attribute ‘IntFlag'”. I made sure I was running on the dl4cv environment and am running Python 3.6.4
Apologies for the number of comments recently, but I hope you can please help.
Hm, that’s hard for me to say without having direct access to your environment. Can you try uninstalling and re-installing? I would also suggest trying to install an older version of matplotlib and see if that resolves the issue:
Fantastic, thank you. This has fixed the problem but I now have the same issue as Carlos (I’ve replied to his comment to keep the discussion organised)
Hi Adrian,
Similar to Michael’s post on Dec 12, I already had a previous instance of opencv. So I followed your idea and symlinked to it from the dl4cv virtualenv. After testing, it seems to be ok – I get ver 3.3.1. Then I proceeded to install Tensorflow and Keras in the dl4cv virtual env. Everything seems to go fine, but when I try to import keras I get a bunch of errors, the final one being –
AttributeError: module ‘enum’ has no attribute ‘IntFlag’
I am stuck on that one, before I can move forward. Any suggestions?
Hi Adrian,
Ignore my previous post. My symlink to cv2.so was broken. That’s what caused the error to show up as it was not able to pull up the correct python version I believe. Fixed that and it is up and running.
Thanks!
Congrats on resolving the issue, Arindam! Nice job.
Hi Adrian, thanks for your great tutorial! This is the most complete tutorial I have ever seen. Appreciated!
However I do have the same Mac High Sierra problem…now I realize I need to install Python 3.5. I downloaded Python3.5 and installed but now “workon dl4cv” doesn’t run anymore. I think the best way might be deleting everything and reinstall from beginning. In this case what would you recommend..would pip, brew uninstall work? Anything else I need to pay attention to? Many thanks Ying
Hey Ying! Thanks for the comment. I’m glad you have found the tutorial helpful. It’s hard for me to provide a concrete recommendation as (1) I do not know what previous commands you executed and (2) I do not have direct access to your system.
It sounds like the only issue right now is related to virtualenv/virtualenvwrapper. Try using:
$ pip3 install virtualenv virtualenvwrapper
And then updating your
~/.bash_profile
as I discuss in this post.Try to debug and get the
workon
command to work. From there you should be able to proceed.Hi Adrian,
i’m having a recurrent problem with make command.
It always breaks at 17% of compilation.
Could you help me ?
Hey Guilherme — I’m sorry to hear about the OpenCV compile; however, I would need to see the error message to provide any suggestion as to what the problem could be.
Hey Adrian,
I’m really excited about getting into DL4CV but I’m struggling to get the setup outlined above. Altering my path and creating virtual environments is all brand new to me – so forgive me if I have very basic questions, or if I include information that isn’t useful.
I’ve followed the above, but things broke at the cmake command. In particular, I think I ended up installing python 3.6. As per your recommendation above, I’ve installed python 3.5(.4). But, I’m now struggling to create a new environment.
I am running:
OSX 10.13.3
iMac (Retina 5K, 27-inch, Late 2015)
In terminal:
which python gives /usr/bin/python
which python3 gives /Library/Frameworks/Python.framework/Versions/3.5/bin/python3
In terminal when I try:
mkvirtualenv dl4cv -p python35
I get “The path python35 (from –python=python35) does not exist”
My .bash_profile is:
# Homebrew
export PATH=/usr/local/bin:$PATH
# Setting PATH for Python 3.5
# The original version is saved in .bash_profile.pysave
PATH=”/Library/Frameworks/Python.framework/Versions/3.5/bin:${PATH}”
export PATH
# virtualenv and virtualenvwrapper
export VIRTUALENVWRAPPER_PYTHON=/usr/local/bin/python3
source /usr/local/bin/virtualenvwrapper.sh
# added by Anaconda2 4.3.0 installer
# export PATH=”/Users/davidrtfraser/anaconda/bin:$PATH”
When I open terminal I also get this error:
”
/usr/local/bin/python3: Error while finding module specification for ‘virtualenvwrapper.hook_loader’ (ImportError: No module named ‘virtualenvwrapper’)
virtualenvwrapper.sh: There was a problem running the initialization hooks.
If Python could not import the module virtualenvwrapper.hook_loader,
check that virtualenvwrapper has been installed for
VIRTUALENVWRAPPER_PYTHON=/usr/local/bin/python3 and that PATH is
set properly.
”
Again- I’m very new to all of this, so would appreciate any help you’re able to give!
Thanks in advance!
Also, as you can see from my .bash_profile I’ve previously had anaconda installed
Hey Tim — I think there are a few issues here. The first is that Anaconda may be causing an issue with your Python path. However, it looks like you have Anaconda commented out in your file. I’m not an expert with Anaconda so I’m not entirely sure if the uninstall procedure would have created any issues. Some installers will still leave sym-links to paths that do not exist anymore (a common problem you may encounter with MacPorts).
Without direct access to your machine it’s hard to give concrete advice on the best path to try as I cannot run commands/tests myself. However, I have a few suggestions:
1. What is your output for “which pip” and “which pip3”? And what is the output of “pip –version” and “pip3 –version”? Do you recall which one you used to install virtualenv and virtualenvwrapper?
2. Skip using Python 3.5 and use your Python 3.6 install. The latest TensorFlow (1.6) is compatible with Python 3.6 on macOS so the install procedure will work.
3. Skip using Python virtual environments all together and install globally via
sudo pip install your_package
. While Python virtual environments are a best practice they can create a little bit of additional complexity if you haven’t used Unix PATH variables before.4. I agree with you that getting started with DL4CV as soon as possible is really important. While you continue working with your development environment I would suggest using the pre-configured virtual machine included with your purchase of DL4CV. This VM is pre-configured with all the packages you need for the book. You can use the VM to get started immediately then continue to diagnose the macOS install issue in your free time.
One of the hardest steps can be getting started (I know this from experience) so I would recommend a combination of my suggestions above. Use the VM included with the book right now to start working through the book. This will help you get your hands dirty immediately and study deep learning. When you have additional time, try my suggestions for Python 3.6.
I hope that helps and certainly let me know how it goes!
Thanks Adrian,
I’ll be sure to use the virtual machine till I can work out the rest. In terms of answers:
1) which pip returns nothing, while which pip3 returns “/Library/Frameworks/Python.framework/Versions/3.5/bin/pip3”
I believe that I used pip3 (but may have previously tried and failed to install virtual environments).
In terms of skipping virtual environments, and installing globally. I take it that in terms of your directions then I would install numpy and open cv with sudo pip install, and then pick things up from step 7 (ignoring the dl4cv environment) and modifying pip install commands accordingly?
Thanks again!
The output of pip3 should read “/usr/local/bin/pip3” which seems to be that the Homebrew + Python install might have failed. Could you try that again?
You are correct, you would use “sudo pip install numpy” and then continue to the “Cmake” step, ignoring the Python virtual environment. Your understanding is 100% on point, great job!
Hi Adrian,
(1) I use python 3.6
(2) Following your mention, “3. Skip using Python virtual environments all together and install globally via sudo pip install your_package. While Python virtual environments are a best practice they can create a little bit of additional complexity if you haven’t used Unix PATH variables before.”
What does “your_package” mean? I tried to run this command but I’m not sure.
Could you please show the example? how to run sudo pip install your_package
You replace “your_packages” with the name of the Python package you want to install. For example, if you wanted to install NumPy:
$ pip install numpy
You would need to use “sudo” if you wanted to install the package globally on your system.
Hello,
i’ve run into the same issue.
It seems that this tutorial is missing one command: After “brew install python” you should run “brew link python” also. After that the error message was gone away.
Regards,
Maik
Hi Maik — I’m in the process of updating this guide now that OpenCV 4 was just released. On macOS I would recommend a pip install of OpenCV. From there you’ll be up and running.
Hello Adrian,
I’m getting the following error: “Illegal instruction: 4” when using “import tensorflow” in python.
I’ve already tried installing Tensorflow in a virtualenv and without it. I’ve tried with “sudo” and with the “tfBinaryURL” option as recommend on their website.
I have python 3.6.4 with High Sierra 10.13.3
Thank you for the great tutorial!
Hey Nunes, I’m sorry to hear about the error getting TensorFlow installed. I haven’t encountered this error before but a quick search turns up multiple TensorFlow GitHub Issue reports such as this one. The threads report that it’s normally a dev environment issue so I would suggest creating a new thread on the TensorFlow GitHub and share your system information with the developers.
Thank you for your reply Adrian!
For anyone who is having the same problem, I’ve solved the error by installing a previous version of TensorFlow, specifically the version 1.5.0
I am using a MacBook pro High Sierra 10.13 with 16GB RAM
What are the pros and cons doing the experiment in OSX, compared with running with linux in a virtual machine? Besides, I have a NVIDIA GPU, I wonder if I should install CUDA now or later.
Thanks.
A VM is slower than running on “bare metal”. Additionally, A VM cannot access peripherals such as your GPU.
If you install locally, rather than a VM, you can use your GPU. The problem is that it’s often harder to configure macOS machines vs. Ubuntu or Debian-based machines.
Thanks for your advice. I will choose to install under MacOs.
When I import cv2, I get No module named ‘cv2’. This is after the make install step. I’m using a mac. Not sure how to proceed. I can’t find the cv2.so file either.. The make install did not throw any error
Make sure you check the output of your “cmake” command and ensure your “Python 3” section matches mine. It sounds like your Python 3 section for cmake was not properly configured. OpenCV will not throw an error if this happens, it will just skip compiling the Python binaries.
i had problem with tensorflow as backend. so i did 2 steps to correct it.
pip3 uninstall h5py
pip3 install h5py=2.8.1rc
if you see a some command change after importing keras in final step its not fault of your installation but its due to old version of h5py. install new rc version and “alles gut”.
Hello Adrian,
I am whit a virtualenv called “dl” activated, Python 3.6.5.
The problem is that after installing OpenCV, there is no file at /usr/local/lib/python3.6/site-packages/cv2.cpython-36m-darwin.so
I searched for the file and found it as /usr/local/lib/python3.5/site-packages/cv2.cpython-35m-darwin.so
As you can see, the OpenCV is installing for Python 3.5. I tried a lot of things, did all process again, but canon get cv2.cpython-36m-darwin.so, just the cv2.cpython-35m-darwin.so file.
🙁
Hey Carlos, I’m sorry to hear about the OpenCV issues. There are a few options here:
1. Create a “dl” Python virtual environment for Python 3.5 and use it instead of Python 3.6.
2. If you want to use Python 3.6 check your output of the “cmake” command ensure the “Python 3” section is filled out correctly. I get the impression that it’s pointing to Python 3.5.
Another data point:
macOS: v10.13.5, MacBook Pro (Mid 2014), NVIDIA GeForce GT 750M 2048 MB
OpenCV: 3.4.1
Imutils: 0.4.6
Python: 3.6.5_1
CUDA Driver Version: 396.64
CPU Driver Version: 387.10.10.10.35.106
I was able to build OpenCV 3.4.1 successfully with CUDA enabled. However some of my programs which ran fine under OpenCV 3.3.0 are not under 3.4.1. The video reading I’m doing with Imutils whether it be from a video file or webcam is definitely slower. Right now .avi files crash when trying to read them with OpenCV 3.4.1. There is a known Assertion error being thrown. Details are here:
https://stackoverflow.com/questions/49746279/opencv-3-4-1-error-assertion-failed-chunk-m-size-0xffff-in-readframe
i have got a ton of errors… 🙁
What errors have you gotten? Without knowing what your errors are it’s impossible to diagnose or provide a suggestion or solution.
hi Adrian,
I have already installed Anaconda version on my Mac,, do I need to drop before going through the above setup ?? or can they coexist ?? if so, will there be any issues I can expect ??
thanks,
chai
If you’re an experienced Python user who is comfortable debugging potential Python Path issues it shouldn’t be a problem. If you’re new to Python and debugging I would suggest sticking clear of combining the two. The other solution would be to skip Python virtual environments and just create a new virtual environment via Anaconda.
I am dr RGS Asthana. . I tried the environment you suggested in this paper. Since I had Mac with two cores so i wrote $ make -j2. I wrote to u about 5 days bak with a copy of output. I GET TWO ERRORS.
I replied to your question over email. Be sure to check your inbox. Please do not include large amounts of code/terminal output in the comment form. It breaks the formatting and I cannot approve the comment.
HI Adrien
While compiling opencv I am having following error, not much help I see except https://github.com/opencv/opencv/issues/11908
I use the same version of packages you referred above
error: cannot initialize a variable of type ‘char *’ with an rvalue of type ‘const char *’
char* str = PyString_AsString(obj);
can you suggest how to go fwd please?
Instead of installing OpenCV 3.3, instead download OpenCV 3.4.2. From there the error should be resolved 🙂
Is it okay to use “pip install opencv-python” I just tried it ,and it got installed with 3.4.2 version. Please let me know if there if there are any disadvantages of doing so becasue in my mac i’m facing problems while running the make command for opencv installation.
Thanks in advance and really thank you for your wonderful tutorial.
There are. Mainly, you should be doing
pip install opencv-contrib-python
. Refer to my pip install opencv post for more details.or you can add const before char*, even that will solve the issue
Great tutorial! I was following another guide which did not specified to look for the “local” in the path, so I actually could not make it work because my system was trying to launch the older version of python included in macOS. Very helpful and I like your style a lot!
Unfortunately my MacBook Pro mid 2010, while still very good at coding with various languages, is too old for Keras because of the Intel Processor which is not using AVX ! So I will start with AWS and AMIs. Very excited!
Congrats on getting started with deep learning, Laurence!
“pip install tensorflow” reports that “No matching distribution found for tensorflow”
My virtualenv defaulted to python 3.7.1. Could that be the issue and if so, do I have to start from scratch with python 3.6?
TensorFlow doesn’t yet support Python 3.7. You can either:
1. Build TensorFlow from source for Python 3.7 (recommended only if you have a fair amount of Unix experience)
2. Downgrade to Python 3.6
I got the problem at Make too, I am on Apple Mac w 2 cores, even tried to go back to 1 core.
was working well till Make command
Hey Carl — what was the error you received?
I want to install Tensorflow from source so that I can make use of all SSE on my MacBook 2.2 GHz Intel Core i7, Intel Iris Pro 1536 MB.
Should I follow the procedure on official website inside (dl4cv) virtual environment?
Yes, make sure you follow this guide.
An alternative on macOS, and what worked for me, is:
$ touch ~/.matplotlib/matplotlibrc
$ echo “backend: MacOSX” >> ~/.matplotlib/matplotlibrc
Hope this helps someone.
Thanks for sharing!
Two notes from installing OpenCV on macOS Mojave today (9/2/2019):
1. I was unable to compile OpenCV2 unless I added this compiler flag to get the “cmake” command to get OpenCV2:
-D ENABLE_CXX11=ON \
However the link of cv2.so did not work, so although OpenCV 3.3.0 and 3.4.7 could compile, they were not available in python 3.6.
2. I tried a simple solution of installing a pre-compiled OpenCV instead, and this worked:
$ sudo pip install opencv-contrib-python
including installing the other llibrary (tensorflow, keras) via pip. This worked, but installed OpenCV 4.1.1. This may cause problems later – I don’t really know.
WARNING: I no longer match the versions, so I may run into trouble with code samples later.
The good news is that the cv2.so file is now in the Python package folder, so I can override it with the earlier library from the locally-compiled OpenCV 3.3.0 or 3.4.7 if I get into trouble.
These instructions don’t work for OS Catalina as we have moved to zsh instead of bash.
What changes should we make here?
Hey Yash — next week (Monday, December 9th) I’ll be publishing a tutorial dedicated to installing TensorFlow 2.0 on macOS Catalina. Stay tuned for it!