
Table of Contents
- Running Gemma 4 Locally: Ollama, llama.cpp, MLX, and More
- Running Gemma 4 with Ollama for Local AI Inference
- Running Gemma 4 with llama.cpp and GGUF Models
- Running Gemma 4 with MLX on Apple Silicon Macs
- Running Gemma 4 with LM Studio’s Desktop App
- Running Gemma 4 Locally with Transformers.js
- Choosing the Right Runtime for Running Gemma 4 Locally
- Summary
Running Gemma 4 Locally: Ollama, llama.cpp, MLX, and More
In the first part of this series, we explored the architecture behind Gemma 4, including its multimodal design, long-context capabilities, Mixture-of-Experts routing, Per-Layer Embeddings, and the engineering decisions that allow the model family to scale from lightweight on-device deployments to large production systems. We also examined the different Gemma 4 variants, their hardware requirements, and the reasoning capabilities that make the model family one of the most compelling open-weight releases available today.
In the second part, we moved from theory to practice. Using Hugging Face Transformers, we built multimodal applications capable of processing images, videos, audio, and structured outputs. Along the way, we saw how Gemma 4 handles tasks such as screenshot-to-code generation, object detection, image captioning, multimodal function calling, and audio understanding from a single unified interface.
But there is still an important question left unanswered:
How do we actually run Gemma 4 outside of a Python notebook?
For many developers, deploying and interacting with a model is just as important as understanding its architecture or capabilities. A model that performs well inside a notebook is useful, but a model that can run locally on a laptop, power desktop applications, expose APIs, or operate entirely offline opens up an entirely different set of possibilities.
Fortunately, Gemma 4 has quickly gained support across the local AI ecosystem. Whether you prefer a simple one-command setup, a graphical desktop interface, a highly optimized C++ inference engine, a runtime specifically designed for Apple Silicon, or even JavaScript-based local inference, there is already a mature deployment path available.
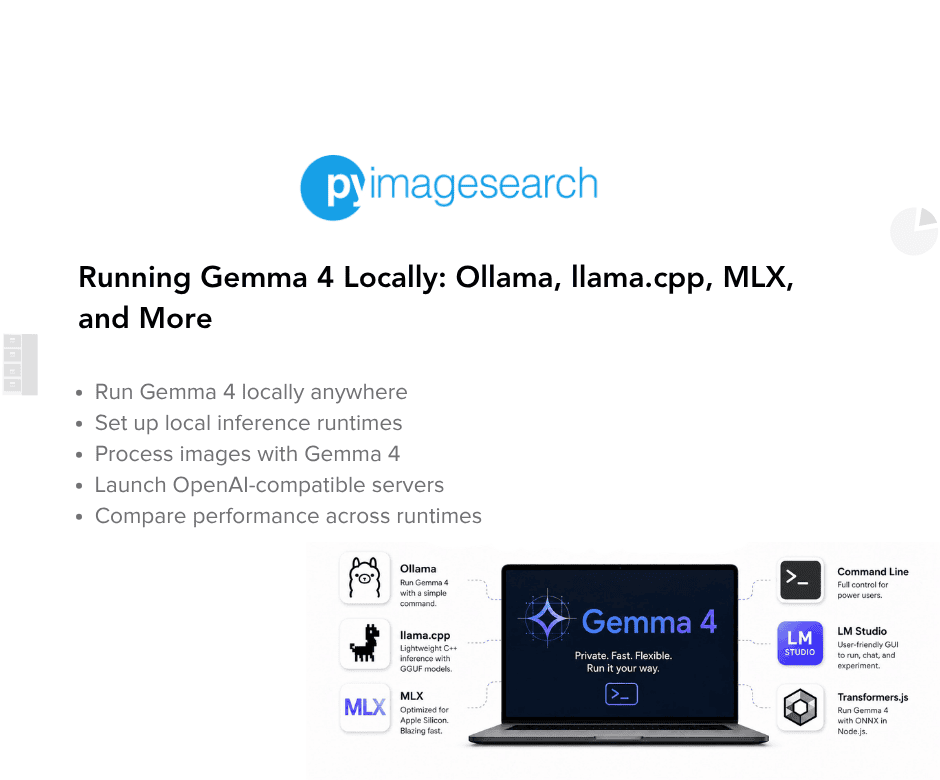
In this lesson, we will explore five of the most popular ways to run Gemma 4 locally:
Ollama: fast setup and developer-friendly APIsLM Studio: a graphical desktop experiencellama.cpp: efficient GGUF (GPT-Generated Unified Format)-based inference and maximum controlMLX: optimized performance on Apple Silicon devicesTransformers.js: running Gemma 4 directly fromNode.jsusing ONNX models
By the end of this guide, you will know how to download Gemma 4, perform local text and multimodal inference, expose OpenAI-compatible APIs, and choose the deployment runtime that best fits your workflow.
In the next lesson, we will build upon the Transformers.js foundation introduced here and take things one step further by running Gemma 4 entirely inside the browser, enabling fully client-side AI applications without requiring a Python backend or native inference runtime.
This lesson is the 3rd in a 5-part series on Google DeepMind’s Gemma 4:
- Google DeepMind’s Gemma 4: MoE, Efficiency Tricks, and Benchmarks
- Building Multimodal AI Applications with Gemma 4 and Transformers
- Running Gemma 4 Locally: Ollama, llama.cpp, MLX, and More (this tutorial)
- Lesson 4
- Lesson 5
To learn how to run Gemma 4 entirely on your own hardware, just keep reading.

Running Gemma 4 with Ollama for Local AI Inference
Among all the local inference solutions available today, Ollama is arguably the fastest and easiest way to get started with Gemma 4. With just a few terminal commands, it can download the model, manage different versions, launch a local inference server, and expose an OpenAI-compatible API (Application Programming Interface), all without requiring any manual configuration.
Instead of downloading model weights, setting up inference backends, or configuring server endpoints yourself, Ollama automates the entire deployment process behind a simple command-line interface. This makes it an excellent choice for developers who want to start experimenting with Gemma 4 immediately while still having access to production-friendly APIs.
In this section, we will install Ollama, download the Gemma 4 model, perform both text and vision inference from the terminal, and interact with the model through its built-in REST API.
Installing Ollama
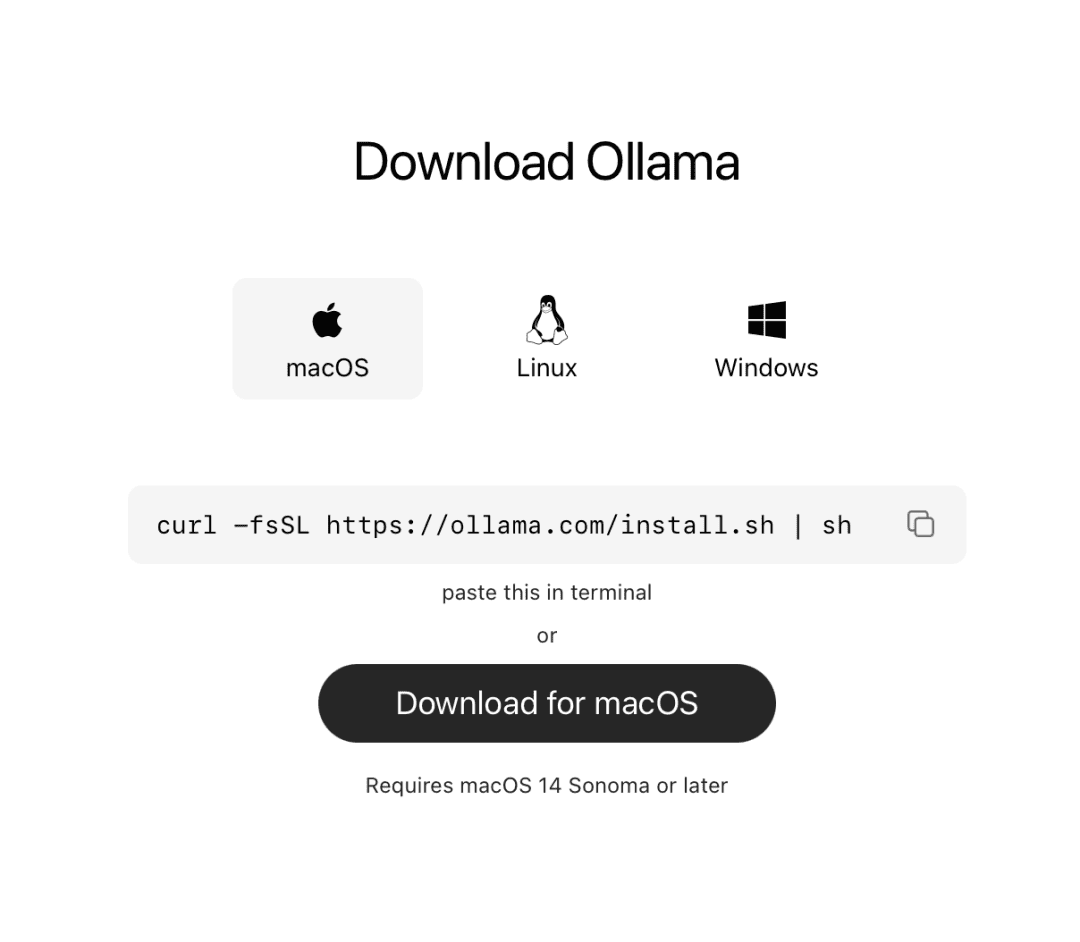
Ollama Download Page (source: Ollama website)The first step is installing Ollama on your machine.
curl -fsSL https://ollama.com/install.sh | sh
This command downloads the official installation script directly from the Ollama website and executes it locally.

Ollama (source: author)After the installation completes, we can verify that Ollama was installed successfully:
ollama --version
If the command prints a version number, the installation is working correctly and we are ready to download Gemma 4.

Ollama version (source: author)Downloading the Gemma 4 Model
Ollama stores models locally and downloads them on demand.
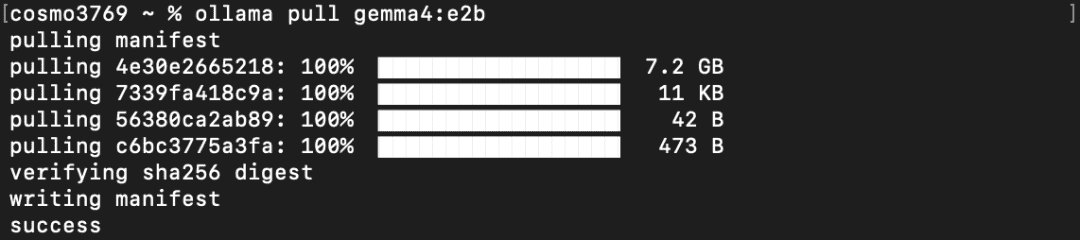
To pull the Gemma 4 E2B model, run:
ollama pull gemma4:e2b
The pull command downloads the model weights and stores them inside Ollama’s local model registry.
Here:
gemma4: specifies the model familye2b: refers to the Gemma 4 E2B variant
Once the download finishes, the model becomes available for local inference without requiring any additional configuration.
Running Gemma 4 Interactively
With the model downloaded, we can launch an interactive chat session:
ollama run gemma4:e2b
This command starts Gemma 4 and opens a terminal-based conversation interface.
You can now enter prompts directly into the terminal and receive responses from the model in real time.
>>> explain the mixture-of-experts architecture.
Thinking...
Here's a thinking process that leads to the suggested explanation:
1.  **Deconstruct the Request:** The user wants an explanation of the "Mixture-of-Experts (MoE) architecture."
2.  **Determine the Core Context (Where does MoE live?):** MoE is primarily a model architecture, most famously applied to Large Language Models (LLMs) like those from Google (GLaM/PaLM/Gemini)
and Meta.
3.  **Establish the Problem MoE Solves (Why MoE?):** Standard dense models (like a traditional Transformer) are computationally expensive. They require massive parameter counts and massive
computations for *every* input, even for simple tasks.
    *   *Goal:* Make models larger (more capable) without increasing the computational cost per inference/training step proportionally.
….
….
To exit the session, type:
/bye
or press:
Ctrl + D
This interactive mode is useful when experimenting with prompts, testing reasoning capabilities, or quickly validating model behavior before integrating it into an application.
Image Understanding with Gemma 4
Gemma 4 is a multimodal model, meaning it can process both text and images.
Ollama exposes this capability through a simple command:
ollama run gemma4:e2b "caption this image /Users/cosmo3769/Desktop/venice.jpg"
In this example, Gemma 4 receives an image and generates a textual description of its contents.

Behind the scenes, Ollama loads the image, converts it into visual embeddings using Gemma 4’s vision encoder, and passes those embeddings into the language model alongside the text prompt.
From the user’s perspective, image understanding works exactly like a standard text prompt.
Added image '/Users/cosmo3769/Desktop/venice.jpg'
Thinking...
Here's a thinking process for generating the caption:
1.  **Analyze the Image:**
    *   **Subject:** A large, classical-style building (a temple/fascia) situated over water.
    *   **Setting:** A canal/river scene. There are wooden pilings in the water, suggesting a waterfront or mooring area.
    *   **Architecture:** The building is ornate, stone, and features columns and pediments. It looks like a palazzo or a significant public structure.
    *   **Context/Location Clues (Inferred):** The architecture style strongly suggests Italy, likely Venice or a similar canal city.
    *   **Foreground/Background:** Wooden waterboats/barges are visible. There are old European buildings lining the far bank. A bridge/structure is visible on the right. The light suggests a
sunny day.
2.  **Identify Key Themes & Mood:**
    *   History/Antiquity
    *   Waterways/Canals
    *   European Charm
    *   Architecture/Grandeur
3.  **Determine the Goal:** Create a compelling caption for this scenic, historical photo.
4.  **Draft Caption Options (Categorized):**
    *   *Descriptive/Literal:* Focus on what is seen.
    *   *Evocative/Poetic:* Focus on the feeling and atmosphere.
    *   *Location-Specific (If known):* If we assume Venice/Italy.
    *   *Travel/Wanderlust Focused:* Encouraging travel.
5.  **Refine and Select the Best Options (Adding specific details):**
    *   *Focus on the contrast:* The grandeur of the building vs. the water.
    *   *Focus on the atmosphere:* Serene, timeless.
    *   *Focus on the setting:* Venetian/Italian canals.
6.  **Final Polish (Generating a variety of styles):** (This leads to the suggested captions below.)
...done thinking.
Here are several options for captioning this beautiful image, depending on the tone you want to convey:
**1. Descriptive & Historical:**
*   "A glimpse of timeless elegance and history along the canals. The grandeur of the architecture reflected in the calm waters."
*   "Ancient beauty meets the waterways. Exploring the historic facades and hidden corners of this European city."
*   "The stunning architecture overlooking the tranquil waters. A true masterpiece of history."
**2. Evocative & Poetic:**
*   "Where history flows on water. Serenity and splendor in every frame."
*   "Lost in the charm of the canals, where old stones whisper tales of the past."
*   "Golden light on ancient waters. A perfect moment of European serenity."
**3. Travel & Wanderlust Focused:**
*   "Dreaming of Italian canals and timeless beauty. 🇮🇹"
*   "Wanderlust activated! Finding magic in the waterways of Europe."
*   "Exploring the hidden gems of a historic city by the water."
**4. Short & Punchy (Good for Instagram):**
*   "Canal views and classical charm."
*   "Waterways of wonder."
*   "Historic beauty afloat."
*   "Venetian dreams."
***
**✨ Pro-Tip: Add Relevant Hashtags**
#Venice #Italy #Canals #History #Architecture #Travel #Europe #HistoricCity #WaterViews #TravelGram
Using the OpenAI-Compatible API
One of Ollama’s most useful features is its OpenAI-compatible API.
When Ollama is running, it automatically exposes an HTTP endpoint that mimics the OpenAI Chat Completions API. This means existing applications built for OpenAI often require only a single URL change to work with local models.
We can send a request using cURL:
curl http://localhost:11434/v1/chat/completions \
 -H "Content-Type: application/json" \
 -d '{
   "model": "gemma4:e2b",
   "messages": [
     {"role": "user", "content": "Explain how transformers work in two sentences."}
   ]
 }'
Let us break down the request:
model: specifies which local model should handle the requestmessages: contains the conversation historyrole: identifies whether a message comes from the user, assistant, or systemcontent: contains the actual prompt
The response format mirrors OpenAI’s API structure, making it straightforward to integrate Ollama into existing AI applications.

Sending Images via the Ollama API
Ollama also supports multimodal requests through its native API.
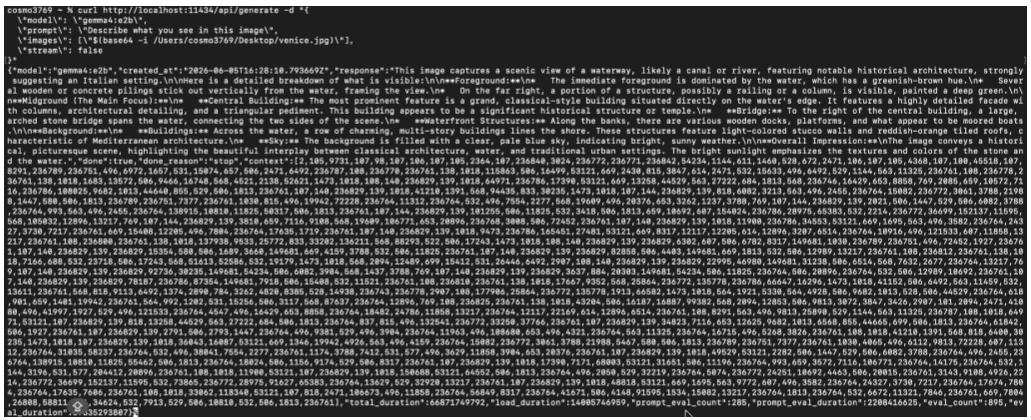
The following example sends an image directly to Gemma 4:

curl http://localhost:11434/api/generate -d "{
 \"model\": \"gemma4:e2b\",
 \"prompt\": \"Describe what you see in this image\",
 \"images\": [\"$(base64 -i /Users/cosmo3769/Desktop/venice.jpg)\"],
 \"stream\": false
}"
Unlike the OpenAI-compatible endpoint, this API accepts image data directly.
Notice the use of:
base64 -i image.jpg
Images cannot be transmitted directly inside JSON payloads, so we first encode the image as a Base64 string. Ollama then decodes the image, processes it through Gemma 4’s vision encoder, and generates a textual response describing what it sees.
The "stream": false parameter tells Ollama to return the complete response in a single payload instead of streaming tokens incrementally.
At this point, we have already covered the majority of day-to-day Gemma 4 workflows:
- Interactive chat
- Text generation
- Multimodal image understanding
- OpenAI-compatible APIs
- Programmatic image inference
For many developers, Ollama is all that is needed to begin building local Gemma 4 applications.
Ollama API (source: author)To learn more about Ollama, you can refer to this blog from PyImageSearch.
Running Gemma 4 with llama.cpp and GGUF Models
While Ollama prioritizes simplicity and ease of use, llama.cpp is built for performance, flexibility, and fine-grained control. It is one of the most popular inference engines for running large language models locally, offering efficient CPU execution, hardware acceleration, and native support for GGUF models.
Unlike Ollama, which abstracts away much of the deployment process, llama.cpp gives us direct control over every aspect of inference. We explicitly choose the model file, configure hardware acceleration, launch inference servers, and customize runtime parameters to suit our hardware and workload. This level of control makes llama.cpp an excellent choice for developers who want to optimize performance or integrate local models into custom applications.
In this section, we will build llama.cpp from source, download a Gemma 4 GGUF model, run inference from the command line, launch an OpenAI-compatible API server, and finally enable multimodal image understanding using Gemma 4’s MMProj (multimodal projector) model.
Installing Build Dependencies
Before building llama.cpp, we first need to install the required development tools.
xcode-select --install
clang --version
The first command installs Apple’s Command Line Tools, which include the Clang compiler and other utilities required for compiling C++ projects.
After the installation completes, we can verify that Clang is available by checking its version.

brew install git cmake
git --version
cmake --version
Next, install Git and CMake using Homebrew.
Here:
- Git: is used to clone the
llama.cppsource code. - CMake: generates platform-specific build files and manages the compilation process.
Running the version commands confirms that both tools were installed successfully.
Cloning the Repository
git clone https://github.com/ggerganov/llama.cpp
cd llama.cpp
Once the required tools are installed, we can download the llama.cpp source code directly from GitHub.
The git clone command downloads the latest version of the repository to your local machine.
We then change into the project directory, where all remaining build and inference commands will be executed.
Building llama.cpp
Next, we compile llama.cpp from source.
mkdir build
cd build
cmake ..
Let us briefly examine these commands.
First, we create a separate build directory. Keeping compiled files separate from the source code makes it easier to rebuild or clean the project later.
The command: cmake .. configures the project and generates the appropriate build files for your system.
After configuration completes, we compile the project using:
cmake --build . --config Release
The Release configuration enables compiler optimizations, resulting in faster inference performance than a debug build.
Once the compilation finishes, the generated executables can be found inside the build/bin directory.
This directory contains utilities such as:
llama-clillama-server- model conversion tools
- quantization utilities
These binaries form the core of the llama.cpp inference ecosystem.
Enabling Apple Metal Acceleration
If you are using an Apple Silicon Mac, llama.cpp can offload model computation to the GPU through Apple’s Metal framework.
To enable Metal support, rebuild llama.cpp with the following configuration:
cmake -B build -DGGML_METAL=ON
cmake --build build --config Release
The GGML_METAL=ON flag enables GPU acceleration during compilation.
Compared to CPU-only inference, Metal acceleration can significantly improve generation speed, particularly for larger Gemma 4 models.
Verifying the Installation
Before downloading a model, it is a good idea to verify that the build completed successfully.
./build/bin/llama-cli --help
If the installation is successful, llama.cpp prints the available command-line options for llama-cli.
This confirms that the executable was built correctly and is ready to load Gemma 4.
Downloading and Locating a Gemma GGUF Model
Unlike Ollama, llama.cpp works directly with GGUF model files.
GGUF is a binary model format optimized for fast local inference and supports multiple quantization levels, allowing models to run efficiently on CPUs and consumer GPUs while reducing memory usage.
python3 -m venv .venv
source .venv/bin/activate
We first create a Python virtual environment:
./build/bin/llama-server -hf ggml-org/gemma-4-E2B-it-GGUF
Next, download the Gemma 4 GGUF model directly from Hugging Face:
The -hf option downloads the specified repository automatically and stores the model locally.
find ~ -name "*gemma*.gguf" 2>/dev/null
If you already have the model on your machine, you can locate it using:
This searches your home directory for all GGUF files containing “gemma” in their filename.

GGUF model in local system (source: author)Running Gemma 4 from the Command Line
Once the model has been downloaded, we can perform inference directly from the terminal.
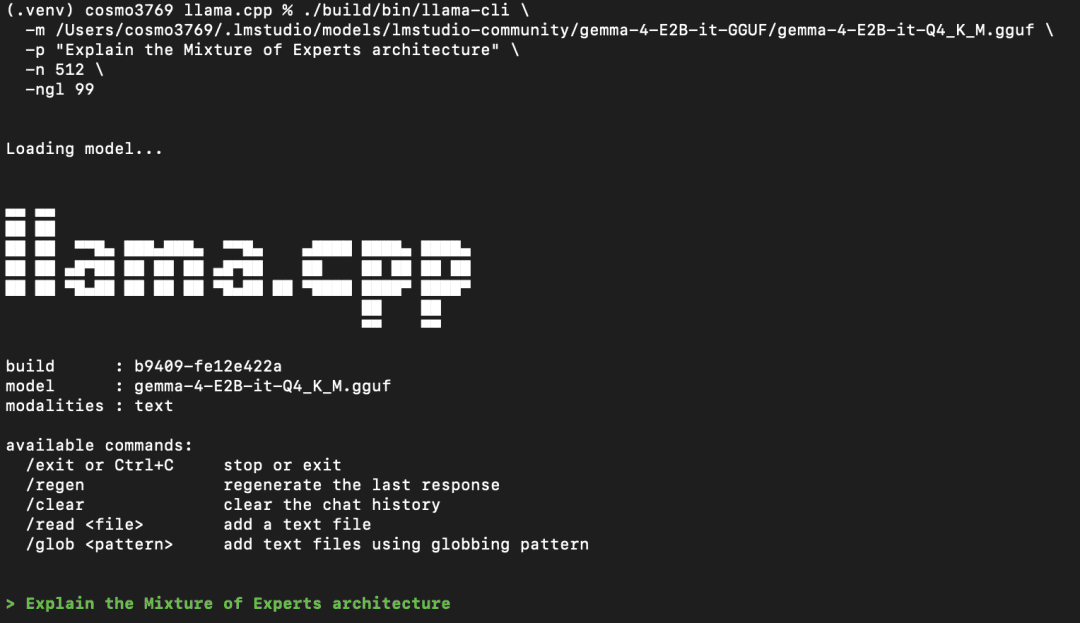
./build/bin/llama-cli \
 -m /Users/cosmo3769/.lmstudio/models/lmstudio-community/gemma-4-E2B-it-GGUF/gemma-4-E2B-it-Q4_K_M.gguf \
 -p "Explain the Mixture of Experts architecture" \
 -n 512 \
 -ngl 99
Here:
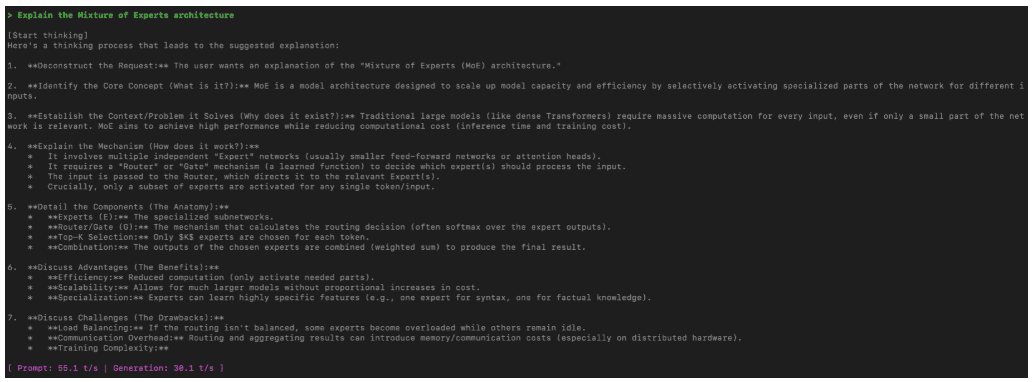
-m: specifies the path to theGGUFmodel.-p: provides the prompt sent to Gemma 4.-n 512: allows the model to generate up to 512 new tokens.-ngl 99: offloads supported transformer layers to the GPU for faster inference. The exact value depends on your available GPU memory and hardware configuration.
NOTE: We are using the GGUF model from LM Studio which we downloaded earlier. We can also use it from hf but it will be the same.
After executing the command, Gemma 4 generates a response directly inside the terminal without requiring a separate inference server.
Starting a Local API Server
Instead of running one prompt at a time, we can expose Gemma 4 through a local HTTP server.
./build/bin/llama-server \
 -m /Users/cosmo3769/.lmstudio/models/lmstudio-community/gemma-4-E2B-it-GGUF/gemma-4-E2B-it-Q4_K_M.gguf \
 --host 0.0.0.0 \
 --port 8080 \
 -n 512
Here:
--host 0.0.0.0: makes the server accessible on all network interfaces--port 8080: specifies the port used for incoming requests-n 512: sets the default maximum number of generated tokens
Once the server starts successfully, it can be accessed at: http://127.0.0.1:8080.
This allows other applications, scripts, or web interfaces to communicate with Gemma 4 through a local API instead of launching a new inference process for every request.
llama.cpp Web Interface (source: author)
Enabling Vision Support with MMProj
Although Gemma 4 is a multimodal model, image understanding requires an additional MMProj model when running through llama.cpp.
The MMProj model converts visual features produced by the vision encoder into the embedding space expected by the language model, allowing Gemma 4 to reason jointly over images and text.
To enable vision support, launch the server with the additional --mmproj argument.
./build/bin/llama-server \
 -m /Users/cosmo3769/.lmstudio/models/lmstudio-community/gemma-4-E2B-it-GGUF/gemma-4-E2B-it-Q4_K_M.gguf \
 --mmproj /Users/cosmo3769/.lmstudio/models/lmstudio-community/gemma-4-E2B-it-GGUF/mmproj-gemma-4-E2B-it-BF16.gguf \
 --host 0.0.0.0 \
 --port 8080 \
 -n 512
Once the MMProj model is loaded, the server can process multimodal requests containing both text and images, enabling tasks such as image captioning, visual question answering, and general image understanding while continuing to use the same GGUF language model.
To learn more about llama.cpp, you can refer to this blog from PyImageSearch.
Running Gemma 4 with MLX on Apple Silicon Macs
If you are using an Apple Silicon Mac, MLX is one of the most efficient ways to run Gemma 4 locally. Developed by Apple, MLX is a machine learning framework built specifically for Apple Silicon, enabling models to take full advantage of the unified memory architecture and GPU acceleration available on M-series chips.
Building on top of MLX, MLX-VLM extends the framework with support for vision-language models, making it straightforward to run multimodal models such as Gemma 4 with just a few commands. It also provides an OpenAI-compatible server, allowing locally hosted models to integrate seamlessly with existing applications and tools that already support the OpenAI API.
In this section, we will install MLX-VLM, perform multimodal inference from the command line, launch a local OpenAI-compatible server, and interact with Gemma 4 using both cURL and the official OpenAI Python SDK (Software Development Kit).
Creating a Python Environment
We begin by creating a dedicated Python virtual environment.
python3 -m venv .venv
source .venv/bin/activate
The first command creates an isolated Python environment named .venv, while the second activates it.
Using a virtual environment keeps project dependencies separate from the system-wide Python installation and helps avoid version conflicts between different machine learning projects.
Installing MLX-VLM
Next, install the MLX-VLM package.
pip install mlx-vlm
The mlx-vlm package includes everything needed to download, load, and run multimodal vision-language models on Apple Silicon devices.
Once installed, we can immediately begin running Gemma 4 without manually downloading model files or compiling inference engines.
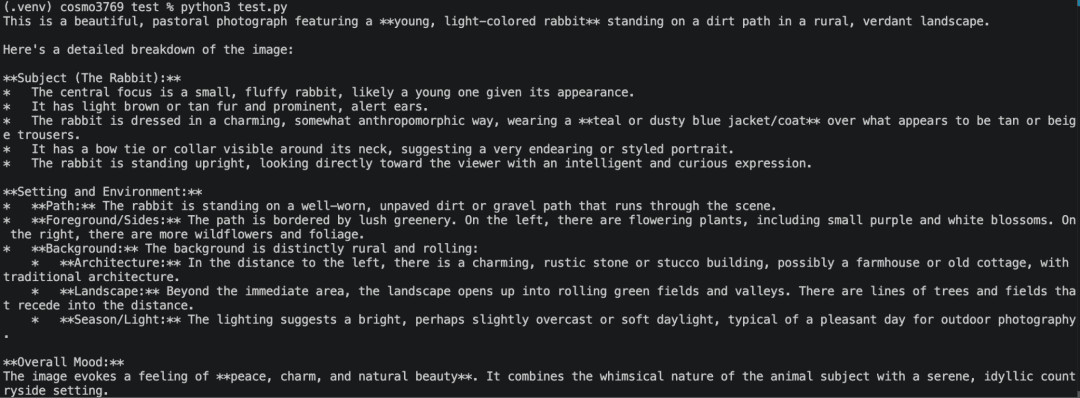
Running Single-Image Inference
MLX-VLM provides a convenient command-line interface for performing multimodal inference.
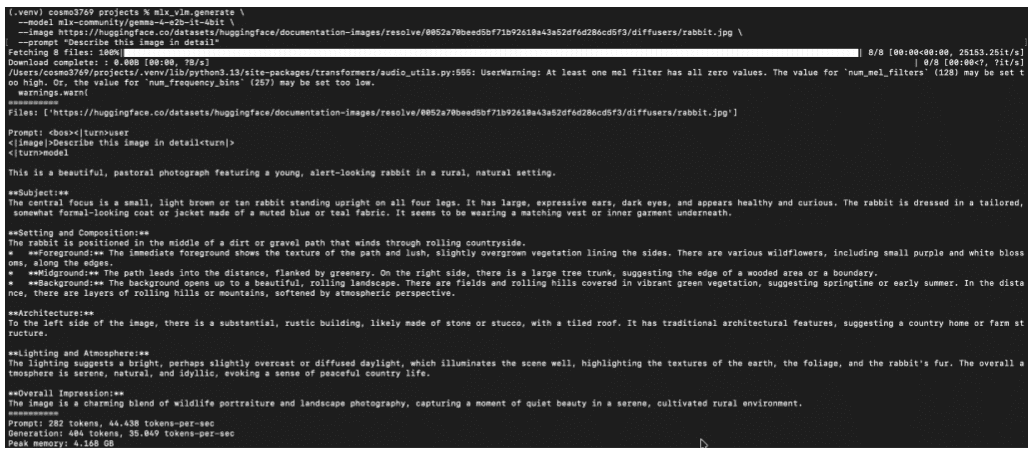
mlx_vlm.generate \
 --model mlx-community/gemma-4-e2b-it-4bit \
 --image https://huggingface.co/datasets/huggingface/documentation-images/resolve/0052a70beed5bf71b92610a43a52df6d286cd5f3/diffusers/rabbit.jpg \
 --prompt "Describe this image in detail"
Let us examine the command:
--model: specifies the Gemma 4 checkpoint to load--image: points to the image that will be analyzed--prompt: provides the accompanying text instruction for the model
If the model is not already available locally, MLX automatically downloads it from Hugging Face before performing inference.
After loading the image and prompt, Gemma 4 processes both inputs together and generates a detailed textual description of the image.
MLX-VLM (source: author)Launching an OpenAI-Compatible Server
Instead of running one inference at a time, we can launch a local server that exposes an OpenAI-compatible API.
mlx_vlm.server \
 --model mlx-community/gemma-4-e2b-it-4bit \
 --port 8080
This command loads the model into memory and starts a local inference server listening on port 8080.
Once running, any application capable of communicating with the OpenAI Chat Completions API can send requests directly to the local server without requiring changes to the overall application logic.

Querying the Server with cURL
With the server running, we can send requests using standard HTTP calls.
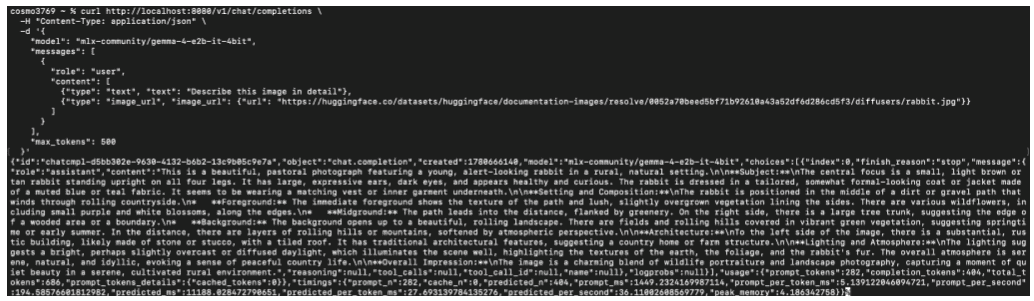
curl http://localhost:8080/v1/chat/completions \
 -H "Content-Type: application/json" \
 -d '{
   "model": "mlx-community/gemma-4-e2b-it-4bit",
   "messages": [
     {
       "role": "user",
       "content": [
         {"type": "text", "text": "Describe this image in detail"},
         {"type": "image_url", "image_url": {"url": "https://huggingface.co/datasets/huggingface/documentation-images/resolve/0052a70beed5bf71b92610a43a52df6d286cd5f3/diffusers/rabbit.jpg"}}
       ]
     }
   ],
   "max_tokens": 500
 }'
The request closely mirrors the OpenAI Chat Completions API.
Unlike text-only requests, the content field now contains a list consisting of both:
- a text instruction
- an image URL
Gemma 4 processes the image and prompt together before generating a multimodal response.
The max_tokens parameter specifies the maximum number of tokens the model may generate.
Querying the Server with Python and OpenAI SDK
Since MLX-VLM exposes an OpenAI-compatible endpoint, we can also interact with it using the official OpenAI Python SDK.
First, install the SDK:
pip install openai --break-system-packages
Next, create an OpenAI client that points to the locally running server.
from openai import OpenAI

client = OpenAI(base_url="http://localhost:8080/v1", api_key="fake")
Notice that the API key is simply a placeholder. Authentication is not required because the server is running locally on our machine.
Once the client has been initialized, sending multimodal requests is almost identical to interacting with OpenAI-hosted models.
response = client.chat.completions.create(
   model="mlx-community/gemma-4-e2b-it-4bit",
   messages=[
       {
           "role": "user",
           "content": [
               {"type": "text", "text": "Describe this image"},
               {"type": "image_url", "image_url": {"url": "https://huggingface.co/datasets/huggingface/documentation-images/resolve/0052a70beed5bf71b92610a43a52df6d286cd5f3/diffusers/rabbit.jpg
"}}
           ]
       }
   ],
   max_tokens=500
)
The request contains both text and image inputs inside the messages field, following the same structure used by the OpenAI Vision API.
After the request is sent, Gemma 4 analyzes the image, combines it with the accompanying prompt, and returns a textual response, which we print using:
print(response.choices[0].message.content)
One of the biggest advantages of MLX-VLM is that developers already using the OpenAI SDK can switch to a fully local Gemma 4 deployment with minimal code changes. In many cases, updating the base_url to point to the local server is all that is required, making it straightforward to move between cloud-hosted and on-device inference while keeping the rest of the application unchanged.
Running Gemma 4 with LM Studio’s Desktop App
If you are looking for the easiest way to run Gemma 4 locally without using the command line, LM Studio is an excellent choice. It provides an intuitive graphical interface for downloading, managing, and interacting with local language models, while handling much of the underlying configuration automatically.
Behind the scenes, LM Studio uses llama.cpp as its inference engine for GGUF models, allowing you to benefit from efficient CPU and GPU inference without manually compiling the runtime or configuring model files. This makes it an ideal option for developers who want a streamlined setup while still taking advantage of the performance offered by llama.cpp.
In this section, we will install LM Studio, download a Gemma 4 model, configure the local runtime, and begin interacting with Gemma 4 through its built-in chat interface.
Installing LM Studio
Begin by downloading and installing LM Studio from its official website. Once the installation is complete, launch the application.
On the first launch, you will be greeted with the welcome screen shown in Figure 18.
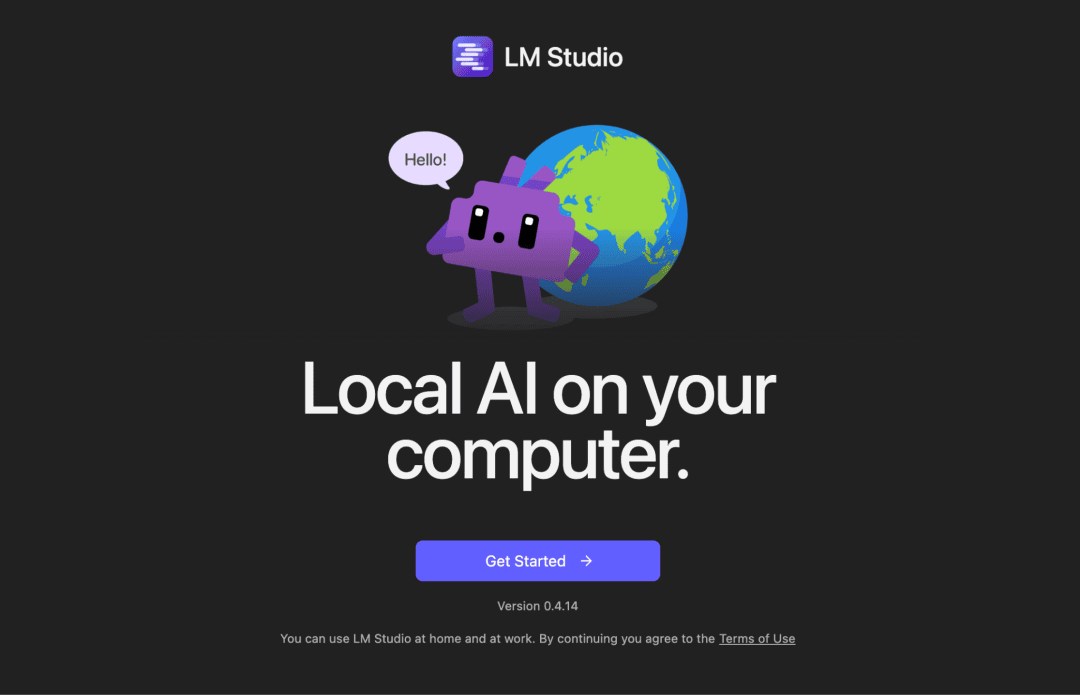
LM Studio for the first time (source: LM Studio Application)Click Get Started to begin the setup process.
Downloading Your First Model
LM Studio guides you through downloading your first local model.
As shown in Figure 19, it recommends downloading a Gemma 4 model directly from within the application.
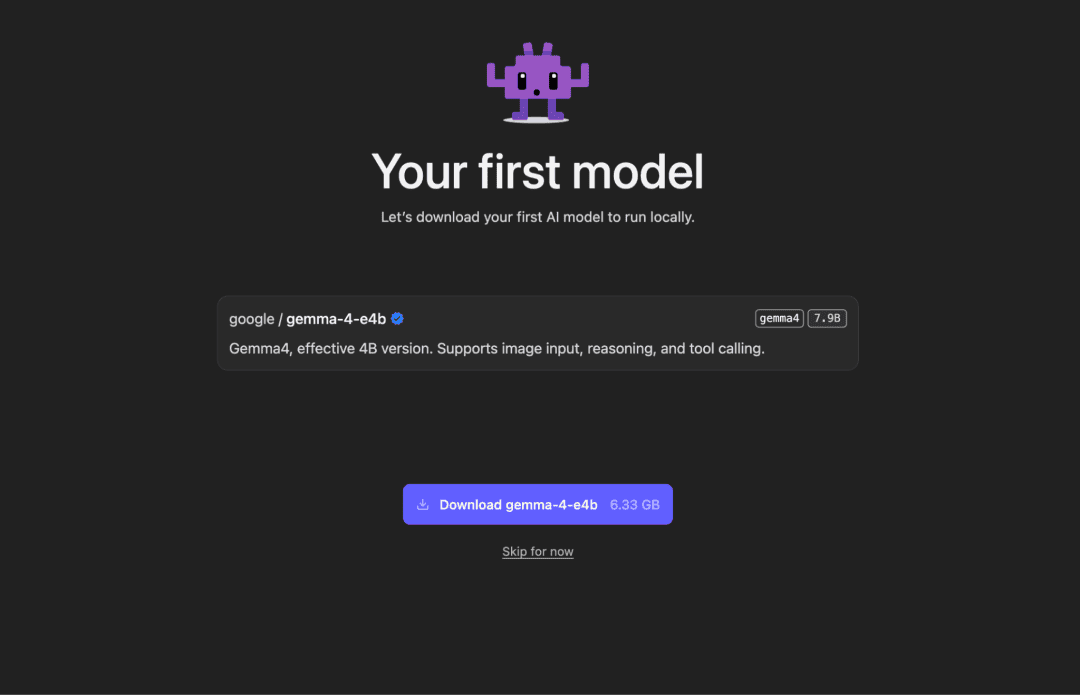
LM Studio recommends downloading a Gemma 4 model during the initial setup (source: LM Studio Application)Click Download gemma-4-e4b to begin downloading the model. During the download, LM Studio displays the current progress while allowing you to continue using the application.
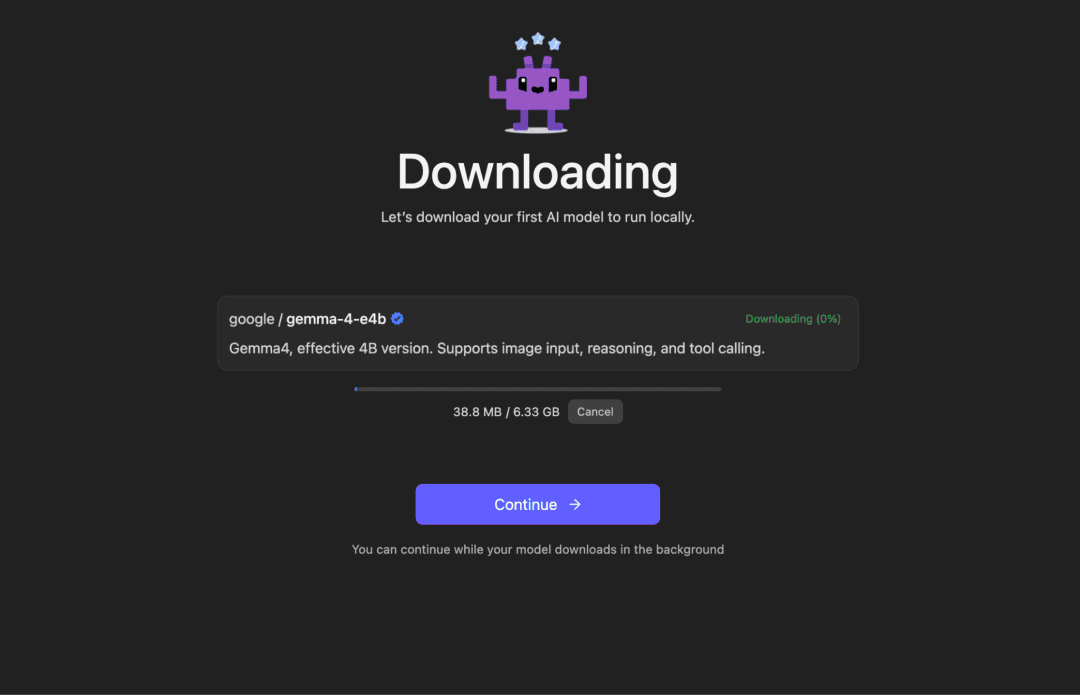
Once the download finishes, you will see a confirmation screen indicating that the model is ready for use.
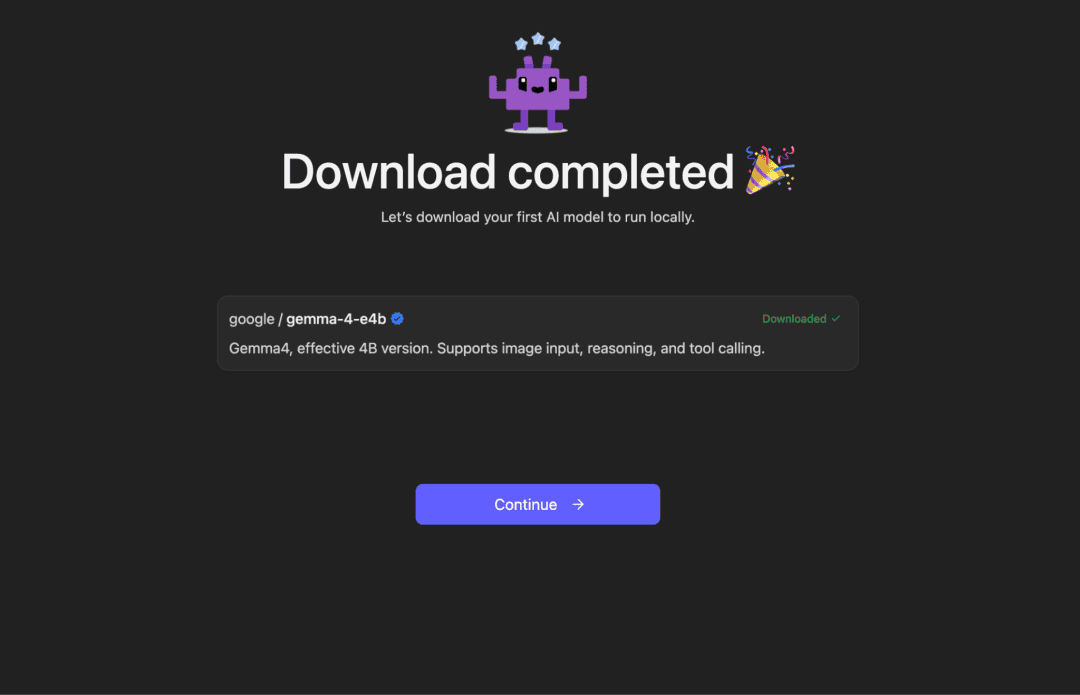
Click Continue to proceed to the final setup step.
Enabling Developer Mode
Before entering the main interface, LM Studio presents several optional developer settings.
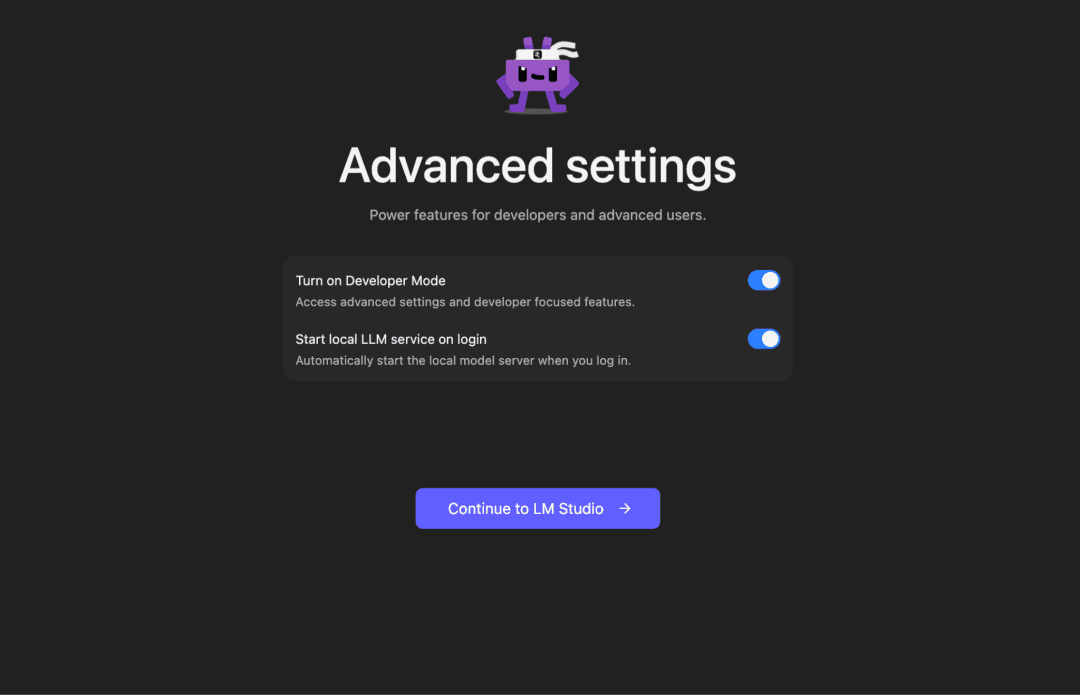
For this lesson, enable both options:
- Turn on Developer Mode
- Start local LLM service on login
Developer Mode exposes additional features useful for developers, while automatically starting the local server makes it easier to access your models from external applications through an OpenAI-compatible API.
After enabling these options, click Continue to LM Studio.
Loading Gemma 4
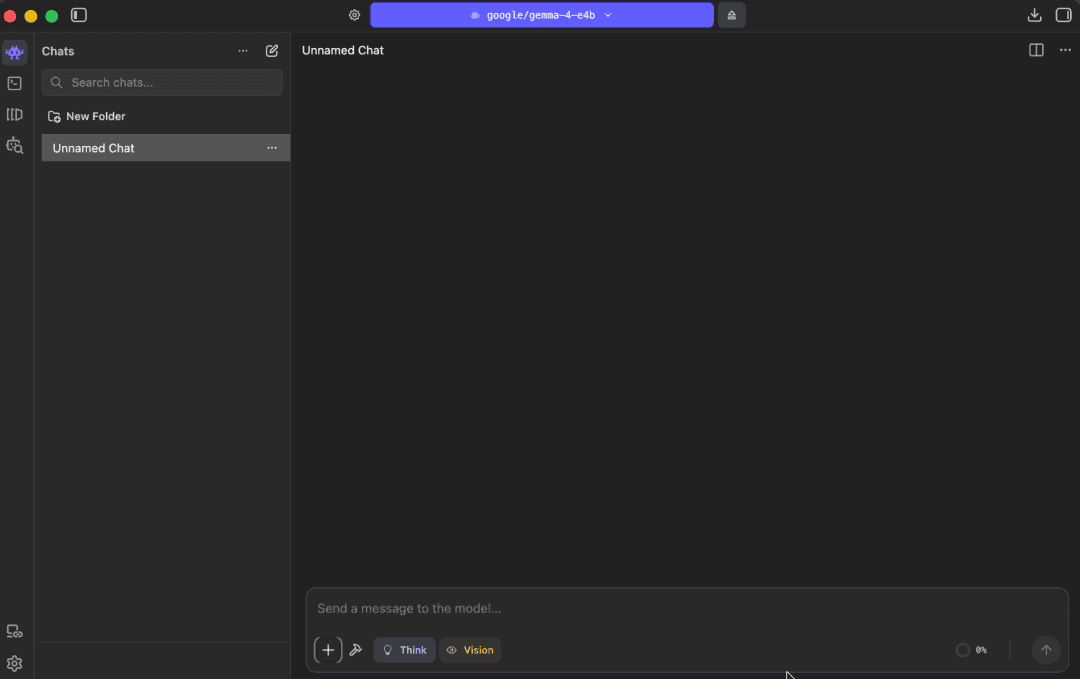
Once LM Studio opens, you will see an empty workspace similar to Figure 23.
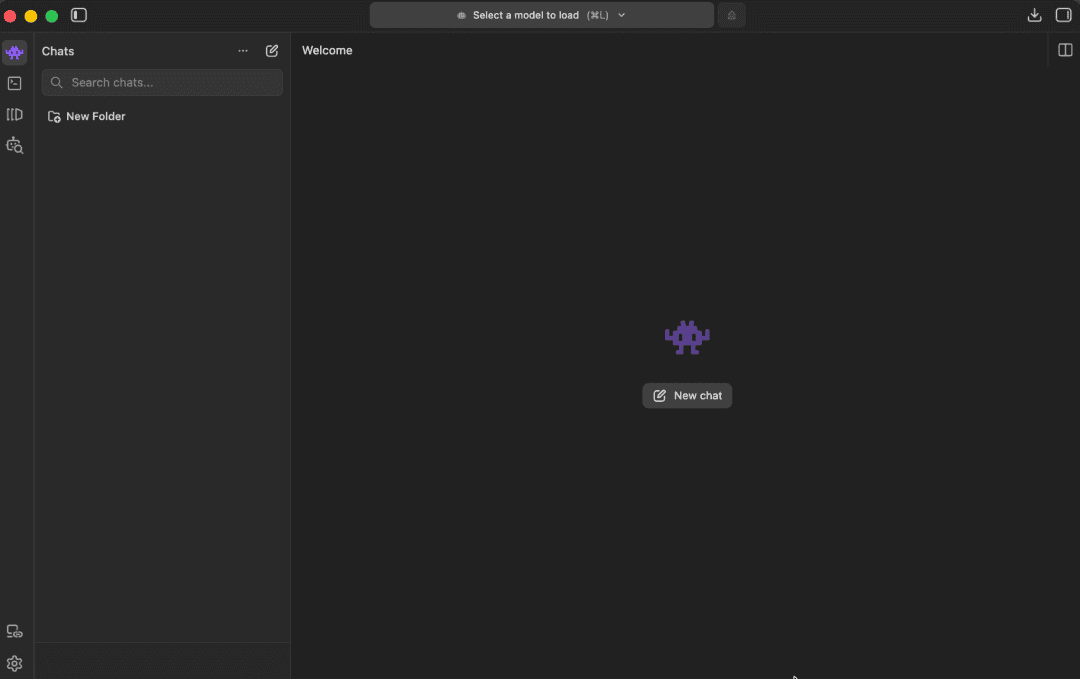
LM Studio interface after completing the setup (source: LM Studio Application)To begin chatting with Gemma 4, create a new conversation by clicking New Chat.
Next, click Select a model to load at the top of the window.
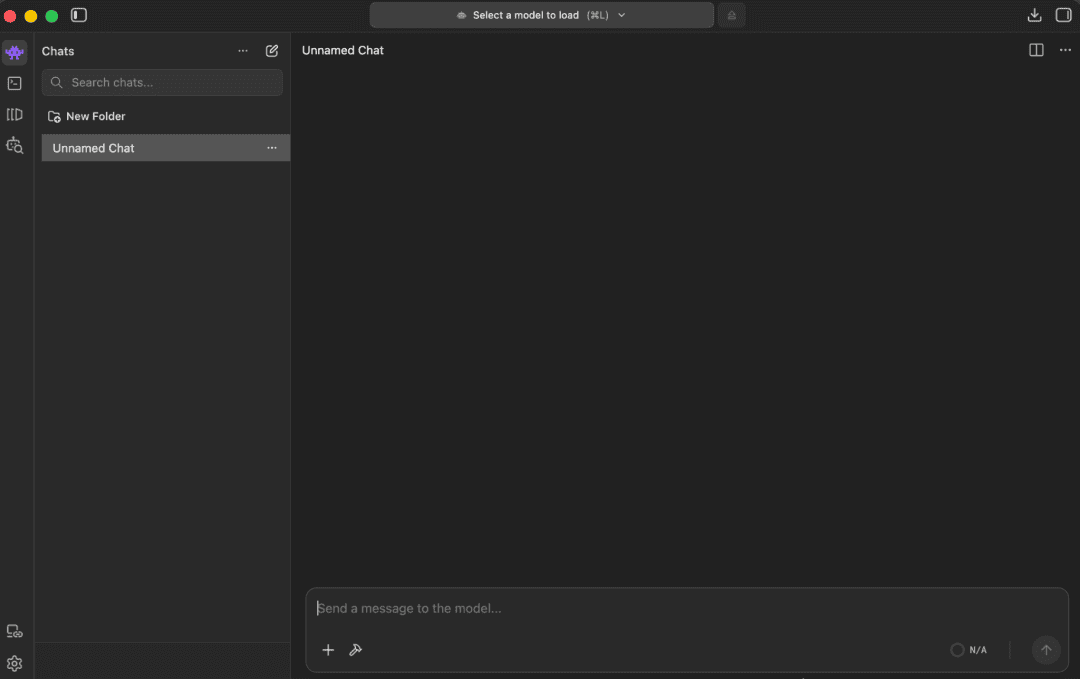
If you have already downloaded Gemma 4 during setup, you can simply select it from the available models.
Otherwise, use the search bar to search for gemma-4-e2b. LM Studio displays several compatible model variants, including GGUF and MLX versions.
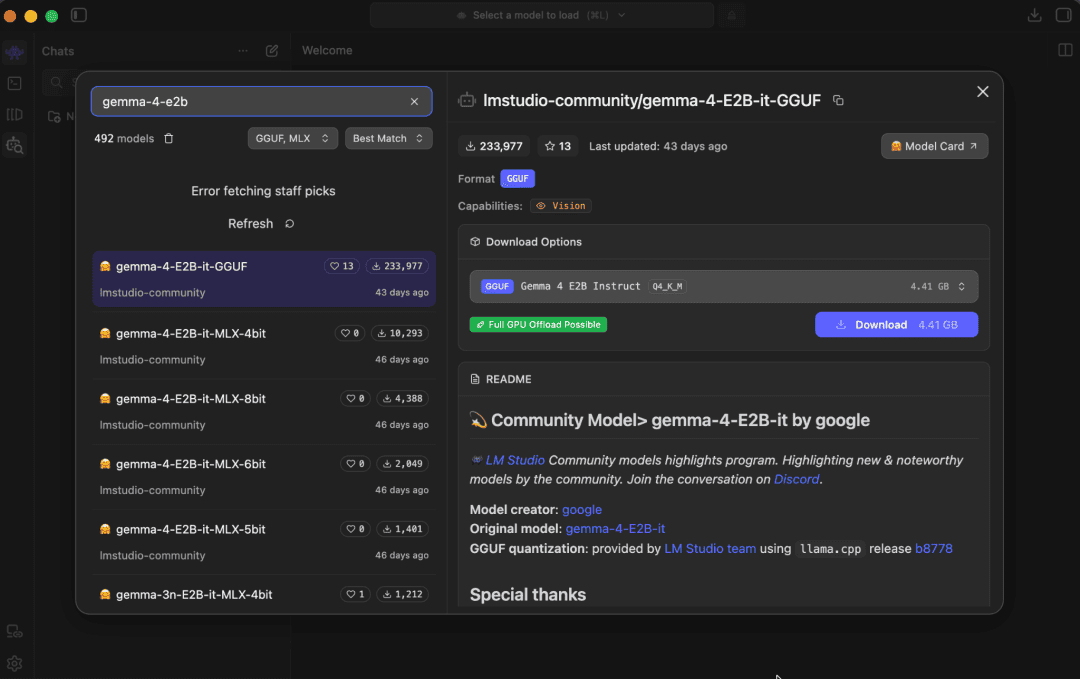
LM Studio (source: LM Studio Application)For this lesson, select the gemma-4-E2B-it-GGUF model and click Download. LM Studio automatically downloads the model and stores it in its local model library.
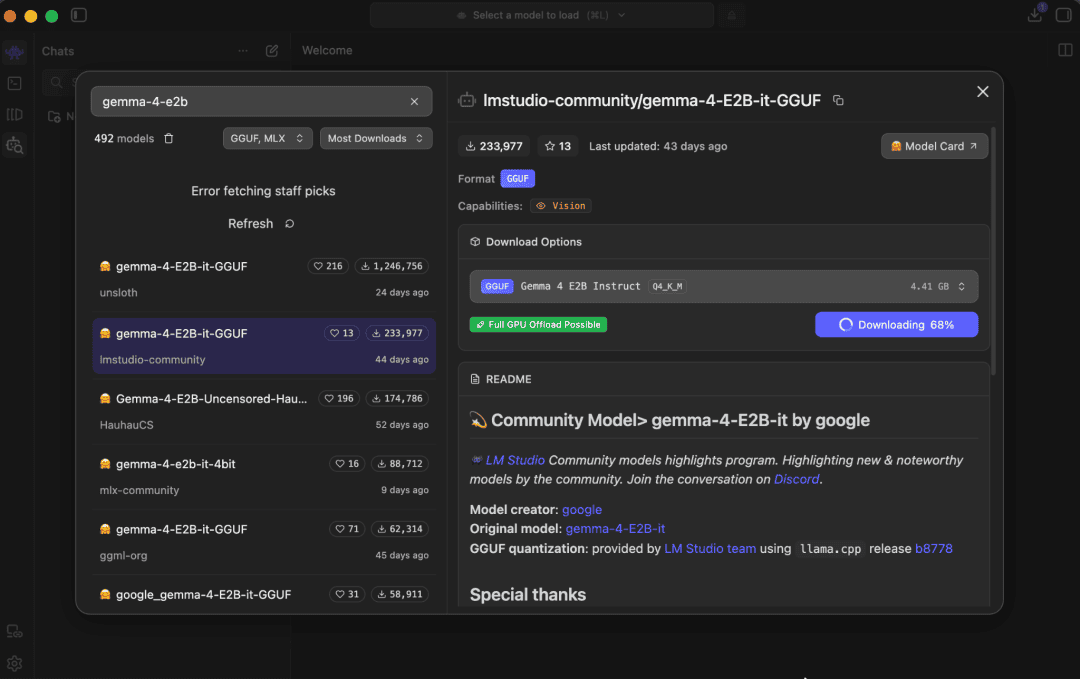
After the download completes, load the model into memory by selecting it from the model picker.
Once loaded successfully, the model name appears at the top of the interface, and the chat window becomes active.
Running Inference
You can now interact with Gemma 4 just like any other chat assistant. Simply enter your prompt into the message box and press Enter to generate a response.
For example, asking:
What is an LLM?
produces the response shown in Figure 28.
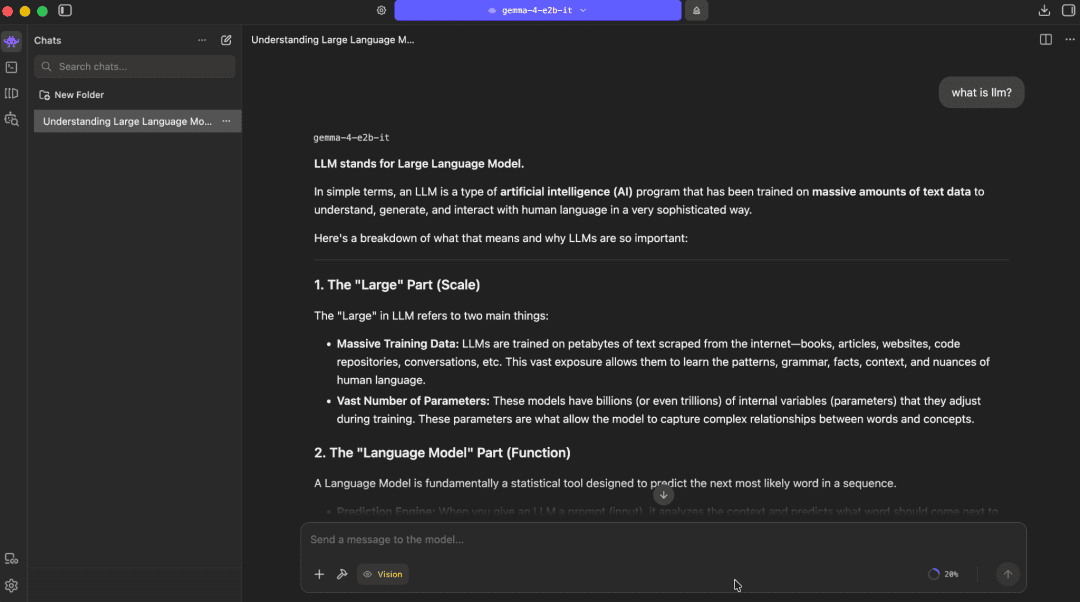
In Figure 29, we can also see that we can input an image and prompt together to generate a response.
LM Studio (source: LM Studio Application)
At this point, we have a fully functional local Gemma 4 environment capable of running entirely on our own machine, without relying on external APIs or cloud services.
To learn more about LM Studio, you can refer to this blog from PyImageSearch.
Running Gemma 4 Locally with Transformers.js
Unlike the deployment options we have explored so far, Transformers.js allows us to run Gemma 4 entirely from JavaScript. Instead of relying on Python or a native inference engine, it enables developers to load and run Hugging Face models directly within Node.js applications using familiar JavaScript APIs.
Under the hood, Transformers.js executes ONNX versions of Hugging Face models through ONNX Runtime, making it possible to perform local inference without leaving the JavaScript ecosystem. This makes it an excellent choice for JavaScript developers who want to build AI-powered applications without introducing a separate Python backend or external inference service.
In this section, we will install Transformers.js, download an ONNX version of Gemma 4, load the model locally, process both image and audio inputs, and perform multimodal inference entirely from JavaScript.
Setting Up the Project
We begin by creating a new Node.js project.
npm init -y
This command initializes a new Node.js project and creates a package.json file containing the project’s metadata, dependencies, and configuration.
npm install @huggingface/transformers wavefile
Next, install the required packages.
This installs 2 packages that our application depends on:
@huggingface/transformers: provides theTransformers.jslibrary for downloading, loading, and running Hugging Face models directly from JavaScript.wavefile: is a lightweight library for reading and preprocessing WAV audio files before they are passed to Gemma 4.
Once the installation completes, create a file named index.mjs. This file will contain our entire multimodal inference pipeline, including model loading, input preprocessing, and response generation.
Importing the Required Libraries
We begin by importing the libraries needed throughout the application.
import {
 AutoProcessor,
 Gemma4ForConditionalGeneration,
 TextStreamer,
 load_image,
} from "@huggingface/transformers";
import pkg from "wavefile";
const { WaveFile } = pkg;
import { readFileSync, existsSync, createWriteStream } from "fs";
import { pipeline } from "stream/promises";
import { tmpdir } from "os";
import { join } from "path";
Let us understand the purpose of each import.
The first group of imports comes from Transformers.js.
AutoProcessor: loads the preprocessing pipeline associated with Gemma 4. It prepares text, images, and audio before they are passed to the model.Gemma4ForConditionalGeneration: loads the Gemma 4 ONNX model and provides the generation API that we will use for multimodal inference.TextStreamer: streams generated tokens to the terminal as they are produced instead of waiting for the entire response to finish. This creates a more interactive experience, especially for longer generations.load_image: simplifies loading images from either local files or remote URLs.
Next, we import the wavefile package.
Unlike images, audio inputs require additional preprocessing before they can be passed to Gemma 4. The WaveFile class allows us to read WAV (Waveform Audio File Format) files, convert them to the required bit depth, resample them to the appropriate sampling rate, and extract the raw audio samples expected by the model.
Finally, we import several built-in Node.js modules. These utilities help us manage files and temporary resources during inference.
Here:
fs: provides functions for reading files from disk and creating temporary filespipeline: enables efficient streaming of downloaded data, such as audio files, directly into a filetmpdir: returns the operating system’s temporary directory, which we use for storing downloaded files during preprocessingjoin: constructs platform-independent file paths, ensuring the script works consistently across different operating systems
Together, these libraries provide everything needed to load Gemma 4, preprocess multimodal inputs, and perform inference entirely from a JavaScript application.
Creating Helper Functions
Before loading the model, let us define a few helper functions that make our script easier to read and improve the overall user experience.
These functions are not directly involved in running Gemma 4. Instead, they provide utilities for formatting terminal output, displaying download progress, measuring execution time, and preprocessing audio before it is passed to the model.
Formatting Console Output
We begin by defining several ANSI (American National Standards Institute) escape codes.
const RESET  = "\x1b[0m";
const BOLD   = "\x1b[1m";
const GREEN  = "\x1b[32m";
const CYAN   = "\x1b[36m";
const YELLOW = "\x1b[33m";
const DIM    = "\x1b[2m";
ANSI escape codes allow us to style text printed to the terminal. Throughout the script, we use them to distinguish different types of messages by applying colors and formatting.
For example:
- Cyan: is used for informational messages.
- Green: indicates successful operations.
- Yellow: highlights warnings.
- Bold: makes important messages easier to identify.
- Dim: is used when displaying elapsed execution times.
Although optional, these formatting codes make the script much easier to follow, especially since downloading and loading large language models can take several minutes.
Logging Progress
Next, we define 3 small helper functions.
function log(label, msg = "") {
 console.log(`${BOLD}${CYAN}[${label}]${RESET} ${msg}`);
}

function success(label, msg = "") {
 console.log(`${BOLD}${GREEN}[${label}]${RESET} ${msg}`);
}

function warn(msg) {
 console.log(`${BOLD}${YELLOW}[WARN]${RESET} ${msg}`);
}
Rather than repeatedly writing lengthy console.log() statements throughout the program, these helper functions provide a consistent way to display messages.
For example:
log(): prints general progress updatessuccess(): indicates that a step completed successfullywarn(): displays warning messages that the user should be aware of
Using dedicated helper functions also keeps the main inference pipeline much cleaner and easier to read.
Measuring Execution Time
The next helper measures how long each stage of the pipeline takes to execute.
function elapsed(start) {
 return `${DIM}(${((Date.now() - start) / 1000).toFixed(1)}s)${RESET}`;
}
This function accepts a starting timestamp, computes the elapsed time using Date.now(), converts the result to seconds, and formats it for display.
We will use this helper throughout the script to report how long it takes to load the processor, initialize the model, preprocess inputs, and generate responses.
Displaying Model Download Progress
The first time the script runs, Transformers.js must download the ONNX (Open Neural Network Exchange) model files from Hugging Face. Depending on your network connection and the model size, this process may take several minutes.
To provide better feedback during the download, we define a helper function that renders a progress bar inside the terminal.
// Single overall progress bar that updates in place
let progressStarted = false;
function renderOverallProgress(pct) {
 const clamped = Math.min(Math.round(pct ?? 0), 100);
 const filled = Math.round(clamped / 2);
 const bar = "█".repeat(filled) + "░".repeat(50 - filled);
 if (!progressStarted) {
   process.stdout.write("\n");
   progressStarted = true;
 }
 process.stdout.write(`\r  Downloading  [${CYAN}${bar}${RESET}] ${clamped.toString().padStart(3)}%`);
 if (clamped >= 100) process.stdout.write(`  ${GREEN}✓${RESET}\n`);
}
The function receives the current download percentage, converts it into a visual progress bar, and continuously updates the same terminal line as the download progresses.
Instead of printing hundreds of individual progress messages, the user sees a single progress bar that gradually fills until the download completes.
This provides a much cleaner and more user-friendly experience while large model files are being retrieved.
Loading and Preprocessing Audio
Finally, we define the loadAudioNode() helper.
// Load WAV audio manually for Node.js (no AudioContext needed)
async function loadAudioNode(url) {
 const tmpPath = join(tmpdir(), "audio_input.wav");
 const res = await fetch(url);
 if (!res.ok) throw new Error(`Failed to fetch audio: ${res.statusText}`);
 const dest = createWriteStream(tmpPath);
 await pipeline(res.body, dest);
 const wav = new WaveFile(readFileSync(tmpPath));
 wav.toBitDepth("32f");
 wav.toSampleRate(16000);
 let samples = wav.getSamples();
 // If stereo, use only the first channel
 if (Array.isArray(samples)) samples = samples[0];
 return new Float32Array(samples);
}
Unlike images, audio requires several preprocessing steps before it can be passed into Gemma 4.
This helper performs the entire pipeline automatically.
Specifically, it:
- downloads the audio file from the provided URL
- saves it to a temporary location on disk
- opens the WAV file using the
WaveFilelibrary - converts the audio to 32-bit floating-point samples
- resamples the audio to 16 kHz, which is the sampling rate expected by Gemma 4
- If the audio contains multiple channels (e.g., stereo), it keeps only the first channel and converts the result into a
Float32Array.
The returned Float32Array contains the raw waveform samples that will later be passed to the processor alongside the text prompt and image.
By moving all of this logic into a dedicated helper function, the main inference pipeline remains concise and focused on the high-level workflow rather than the details of audio preprocessing.
Loading the Gemma 4 Processor
With the helper functions in place, we are ready to load the processor and the Gemma 4 model.
We begin by specifying the model that we will use throughout this lesson.
const model_id = "onnx-community/gemma-4-E2B-it-ONNX";
Unlike the previous lessons that used Hugging Face Transformers in Python, Transformers.js works with ONNX models. Here, we are loading the Gemma 4 E2B Instruct model that has been converted to the ONNX format and published by the Hugging Face community.
Using a single model_id variable also makes it easy to switch to another compatible model later by changing just one line of code.
// 1. Processor
log("1/5", `Loading processor from ${BOLD}${model_id}${RESET} ...`);
let t = Date.now();
const processor = await AutoProcessor.from_pretrained(model_id);
success("1/5", `Processor ready ${elapsed(t)}`);
Next, we load the processor.
The processor is responsible for converting our multimodal inputs into the format expected by Gemma 4.
Depending on the task, it handles operations such as:
- tokenizing text
- preprocessing images
- extracting audio features
- packaging all modalities into tensors that can be passed directly to the model
Calling AutoProcessor.from_pretrained() automatically downloads the processor configuration (if it is not already available locally) and initializes the preprocessing pipeline associated with the selected model.
We also record the start time using Date.now() so that our helper function can report how long the processor takes to load.
Loading the Gemma 4 Model
After the processor has been initialized, we can load the Gemma 4 model itself.
// 2. Model
log("2/5", `Loading model (dtype=q4f16, device=cpu) — this may take several minutes on first run ...`);
warn("The ONNX model files are large. Progress bar will appear below as files download/load.");
t = Date.now();

const model = await Gemma4ForConditionalGeneration.from_pretrained(model_id, {
 dtype: "q4f16",
 device: "cpu",
 progress_callback: (info) => {
   if (info.status === "progress_total") {
     renderOverallProgress(info.progress);
   }
   // suppress all other per-file noise
 },
});
success("2/5", `Model loaded ${elapsed(t)}`);
Unlike the processor, loading the model can take noticeably longer because Transformers.js may need to download several large ONNX weight files before inference can begin.
Let us look at the most important arguments passed to from_pretrained():
dtype: "q4f16": loads a 4-bit quantized version of the model. Quantization significantly reduces memory usage and improves inference speed while maintaining good generation quality.device: "cpu": instructsTransformers.jsto execute the model on the CPU. Depending on your environment, other execution backends may also be available.progress_callback: receives updates while the model files are being downloaded and loaded. Instead of displaying numerous progress messages, we pass the overall download percentage to ourrenderOverallProgress()helper, which renders a clean progress bar in the terminal.
Once the model has been downloaded, subsequent executions become much faster because Transformers.js reuses the locally cached files.
Building the Multimodal Prompt
With both the processor and model loaded, the next step is defining the conversation that will be sent to Gemma 4.
// 3. Prompt
log("3/5", "Building chat prompt ...");
const messages = [
 {
   role: "user",
   content: [
     { type: "image" },
     { type: "audio" },
     {
       type: "text",
       text: "Describe this image in detail and transcribe this audio verbatim.",
     },
   ],
 },
];
Just like the Python Transformers library, Transformers.js represents conversations as a list of chat messages.
Here, the user message contains 3 different modalities:
- an image
- an audio clip
- a text instruction
The text prompt asks Gemma 4 to perform 2 tasks simultaneously:
- describe the contents of the image
- transcribe the accompanying audio
Notice that the image and audio are represented using placeholder objects. The actual image and audio data will be loaded and attached in the next step.
Next, we convert these messages into the format expected by Gemma 4.
const prompt = processor.apply_chat_template(messages, {
 enable_thinking: false,
 add_generation_prompt: true,
});
success("3/5", "Prompt ready");
The apply_chat_template() method formats the conversation according to Gemma 4’s chat template.
Here:
enable_thinking: false: disables the model’s thinking mode so that only the final response is generated.add_generation_prompt: true: appends the appropriate assistant generation token, indicating where the model should begin generating its response.
Using the model’s built-in chat template ensures that prompts follow the exact conversational format expected during training.
Loading and Processing the Inputs
Next, we load the image and audio that will be provided to the model.
// 4. Inputs
log("4/5", "Fetching image and audio, then processing inputs ...");
t = Date.now();

const imageUrl = "https://huggingface.co/datasets/Xenova/transformers.js-docs/resolve/main/artemis.jpeg";
const audioUrl = "https://huggingface.co/datasets/Xenova/transformers.js-docs/resolve/main/jfk.wav";
For this example, both inputs are hosted remotely and downloaded at runtime.
We first load the image.
log("4/5", `  Image → ${imageUrl}`);
const image = await load_image(imageUrl);
success("4/5", "  Image loaded");
The load_image() helper downloads the image and prepares it for the processor.
Next, we load the audio.
log("4/5", `  Audio → ${audioUrl}`);
const audio = await loadAudioNode(audioUrl);
success("4/5", `  Audio loaded — ${audio.length} samples @ 16kHz`);
As discussed earlier, loadAudioNode() downloads the WAV file, converts it to 32-bit floating-point samples, resamples it to 16 kHz, and returns a Float32Array containing the waveform.
With both inputs available, we can prepare the model inputs.
const inputs = await processor(prompt, image, audio, { add_special_tokens: false });
success("4/5", `Inputs ready ${elapsed(t)}`);
The processor combines the formatted prompt, image, and audio into a single set of tensors suitable for Gemma 4.
Notice that all 3 modalities are processed together through a single API call. This is one of the advantages of Transformers.js, where the same processor handles text, images, and audio without requiring separate preprocessing pipelines.
Running Inference
With the inputs prepared, we can finally generate a response.
// 5. Generate
log("5/5", "Running inference (CPU can be slow — please wait) ...");
warn("Token generation will stream below as it completes:\n");
t = Date.now();

let tokenCount = 0;
const outputs = await model.generate({
 ...inputs,
 max_new_tokens: 512,
 do_sample: false,
 streamer: new TextStreamer(processor.tokenizer, {
   skip_prompt: true,
   skip_special_tokens: false,
   callback_function: (text) => {
     tokenCount++;
     process.stdout.write(text);
   },
 }),
});

process.stdout.write("\n\n");
success("5/5", `Generation done — ${tokenCount} tokens ${elapsed(t)}`);
The generate() method performs autoregressive text generation using the prepared multimodal inputs.
Some of the most important parameters are:
max_new_tokens: 512: limits the maximum length of the generated response.do_sample: false: disables random sampling, producing deterministic outputs for identical inputs.streamer: enables token streaming so that text appears in the terminal as soon as it is generated.
Without a streamer, the program would wait until generation finishes before displaying the complete response. By using TextStreamer, users receive immediate feedback as Gemma 4 produces each token, resulting in a much more interactive experience.
Decoding the Generated Output
The output returned by generate() consists of token IDs rather than human-readable text.
To convert those tokens back into natural language, we decode the generated sequence.
// Final decoded output
const decoded = processor.batch_decode(
 outputs.slice(null, [inputs.input_ids.dims.at(-1), null]),
 { skip_special_tokens: true },
);

console.log(`\n${BOLD}── Final Output ──────────────────────────────────${RESET}`);
console.log(decoded[0]);
console.log(`${BOLD}──────────────────────────────────────────────────${RESET}\n`);
Here, we first remove the original prompt tokens, keeping only the newly generated portion of the sequence. We then call batch_decode() to transform the token IDs into readable text while removing any special control tokens.
Finally, we print the generated response to the terminal.
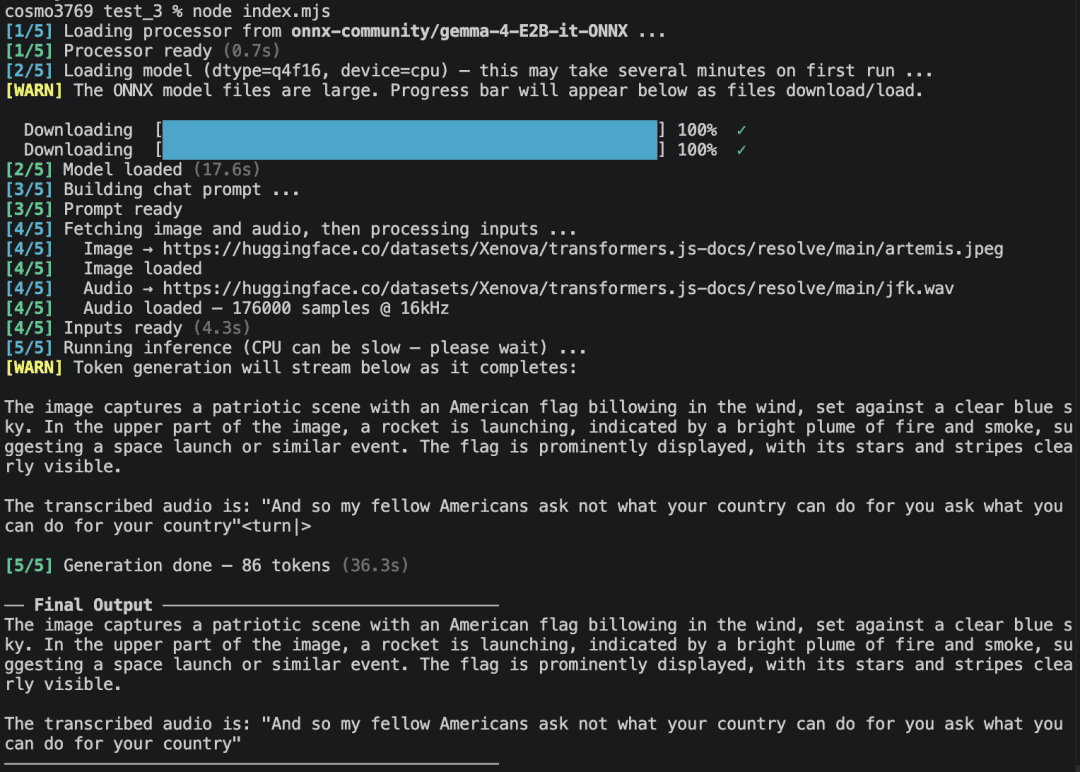
At this point, Gemma 4 has successfully processed the text prompt, image, and audio inputs, producing a unified multimodal response, all from a single JavaScript application running locally through Transformers.js.
Output
In your terminal, run node index.mjs to run inference using Gemma 4 and Transformers.js.
Transformers.js (source: author)Choosing the Right Runtime for Running Gemma 4 Locally
Throughout this lesson, we have explored five different ways to run Gemma 4 locally. While each runtime supports local inference, they target different workflows and use cases. The right choice depends on your goals, preferred development environment, and hardware.
Choose Ollama if…
Use Ollama when you want the quickest way to get started with Gemma 4.
It is ideal for developers who:
- want a simple installation process
- prefer a command-line interface with minimal configuration
- need an OpenAI-compatible API for existing applications
- want to experiment with local models in just a few commands
For most developers getting started with local LLMs, Ollama is the easiest recommendation.
Choose llama.cpp if…
Use llama.cpp when you need maximum control and performance.
It is a good fit if you:
- want to work directly with
GGUFmodels - need fine-grained control over inference settings
- plan to optimize CPU or GPU performance
- want to build custom local inference pipelines
Although it requires more setup than Ollama or LM Studio, llama.cpp offers the greatest flexibility.
Choose MLX if…
Use MLX if you are working on an Apple Silicon Mac.
It is particularly useful when you:
- own an M-series Mac
- want native Apple Silicon performance
- need efficient multimodal inference
- prefer using an OpenAI-compatible local server
For Apple users, MLX typically provides the best performance with the least amount of configuration.
Choose LM Studio if…
Use LM Studio when you prefer a graphical user interface over the command line.
It is well suited for users who:
- want to download and manage models visually
- prefer chatting with models through a desktop application
- need a local API server without compiling or configuring runtimes
- are new to local AI and want the simplest desktop experience
LM Studio is an excellent choice for beginners or anyone who prefers a GUI-based workflow.
Choose Transformers.js if…
Use Transformers.js when you are building JavaScript applications.
It is the best option if you:
- develop with
Node.js - want to perform inference without Python
- need to integrate Gemma 4 directly into a JavaScript project
- plan to eventually deploy models inside the browser
Since Transformers.js powers both Node.js and browser-based inference, it provides a natural path from local development to fully client-side AI applications.
At a Glance
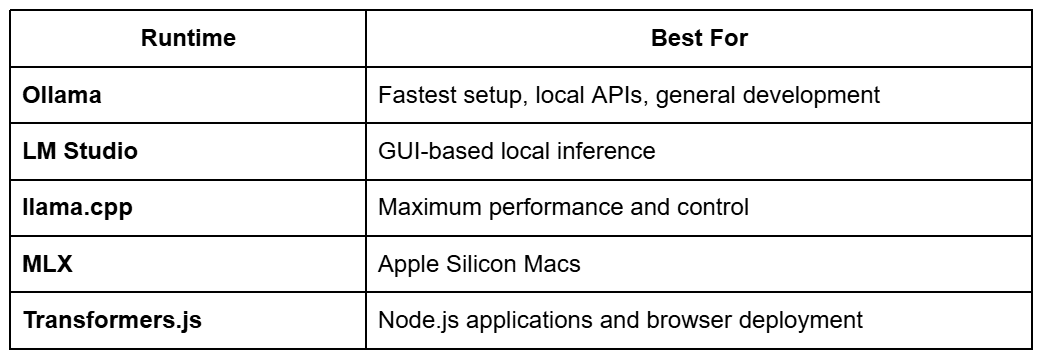
Ultimately, there is no single “best” runtime. Each excels in different scenarios. If you are just getting started, Ollama or LM Studio are excellent entry points. If you need maximum flexibility, llama.cpp is hard to beat. Apple Silicon users should strongly consider MLX, while JavaScript developers will likely feel most at home with Transformers.js.
What's next? We recommend PyImageSearch University.
120+ total classes • 115+ hours of on-demand code walkthrough videos • Last updated: September 2026
★★★★★ 4.84 (128 Ratings) • 16,000+ Students Enrolled
I strongly believe that if you had the right teacher you could master computer vision and deep learning.
Do you think learning computer vision and deep learning has to be time-consuming, overwhelming, and complicated? Or has to involve complex mathematics and equations? Or requires a degree in computer science?
That’s not the case.
All you need to master computer vision and deep learning is for someone to explain things to you in simple, intuitive terms. And that’s exactly what I do. My mission is to change education and how complex Artificial Intelligence topics are taught.
If you're serious about learning computer vision, your next stop should be PyImageSearch University, the most comprehensive computer vision, deep learning, and OpenCV course online today. Here you’ll learn how to successfully and confidently apply computer vision to your work, research, and projects. Join me in computer vision mastery.
Inside PyImageSearch University you'll find:
- ✓ 120+ courses on essential computer vision, deep learning, and OpenCV topics
- ✓ 94+ Certificates of Completion
- ✓ 115+ hours of on-demand video
- ✓ Brand new courses released regularly, ensuring you can keep up with state-of-the-art techniques
- ✓ Pre-configured Jupyter Notebooks in Google Colab
- ✓ Run all code examples in your web browser — works on Windows, macOS, and Linux (no dev environment configuration required!)
- ✓ Access to centralized code repos for all 540+ tutorials on PyImageSearch
- ✓ Easy one-click downloads for code, datasets, pre-trained models, etc.
- ✓ Access on mobile, laptop, desktop, etc.
Summary
In this lesson, we explored 5 ways to run Gemma 4 locally, each designed to support a different development workflow.
We started with Ollama, the quickest way to download models, launch local inference, and expose an OpenAI-compatible API using just a few commands. We then moved to llama.cpp, where we built the runtime from source, downloaded GGUF models, enabled hardware acceleration, and launched both command-line and API-based inference.
Next, we explored MLX, Apple’s machine learning framework for Apple Silicon, and used MLX-VLM to perform multimodal inference while exposing an OpenAI-compatible server. We then looked at LM Studio, which provides a user-friendly graphical interface for downloading, managing, and interacting with Gemma 4 without requiring any command-line configuration.
Finally, we stepped into the JavaScript ecosystem with Transformers.js, demonstrating how to load an ONNX version of Gemma 4, process text, images, and audio, and perform multimodal inference entirely from a Node.js application without relying on Python.
As we have seen throughout this lesson, there is no single “best” way to run Gemma 4. The ideal runtime depends on your workflow, hardware, and application requirements. Ollama offers the fastest path to getting started, llama.cpp delivers maximum flexibility and performance, MLX is an excellent choice for Apple Silicon devices, LM Studio provides an intuitive desktop experience, and Transformers.js enables JavaScript developers to integrate Gemma 4 directly into their applications.
While all of these approaches run Gemma 4 locally, they still execute as traditional desktop or server-side applications. But what if we could eliminate even that requirement and run Gemma 4 entirely inside a web browser?
In the next lesson, we will build on the Transformers.js foundation introduced here and take the next step by running Gemma 4 directly in the browser. We will learn how to load ONNX models with Transformers.js, leverage browser technologies such as WebGPU and WebAssembly for local inference, and build fully client-side multimodal AI applications that require no Python backend or dedicated inference server.
See you in the next lesson!
Citation Information
Thakur, P. “Running Gemma 4 Locally: Ollama, llama.cpp, MLX, and More,” PyImageSearch, S. Huot, G. Kudriavtsev,and A. Sharma, eds., 2026, https://pyimg.co/1rpad
@incollection{Thakur_2026_running-gemma-4-locally-ollama-llama-cpp-mlx,
  author = {Piyush Thakur},
  title = {{Running Gemma 4 Locally: Ollama, llama.cpp, MLX, and More}},
  booktitle = {PyImageSearch},
  editor = {Susan Huot and Georgii Kudriavtsev and Aditya Sharma},
  year = {2026},
  url = {https://pyimg.co/1rpad},
}
To download the source code to this post (and be notified when future tutorials are published here on PyImageSearch), simply enter your email address in the form below!

Download the Source Code and FREE 17-page Resource Guide
Enter your email address below to get a .zip of the code and a FREE 17-page Resource Guide on Computer Vision, OpenCV, and Deep Learning. Inside you'll find my hand-picked tutorials, books, courses, and libraries to help you master CV and DL!


Comment section
Hey, Adrian Rosebrock here, author and creator of PyImageSearch. While I love hearing from readers, a couple years ago I made the tough decision to no longer offer 1:1 help over blog post comments.
At the time I was receiving 200+ emails per day and another 100+ blog post comments. I simply did not have the time to moderate and respond to them all, and the sheer volume of requests was taking a toll on me.
Instead, my goal is to do the most good for the computer vision, deep learning, and OpenCV community at large by focusing my time on authoring high-quality blog posts, tutorials, and books/courses.
If you need help learning computer vision and deep learning, I suggest you refer to my full catalog of books and courses — they have helped tens of thousands of developers, students, and researchers just like yourself learn Computer Vision, Deep Learning, and OpenCV.
Click here to browse my full catalog.