
Table of Contents
- Running Gemma 4 in the Browser with Transformers.js and WebGPU
- Building a Browser-Based Gemma 4 AI Application
- Creating the HTML Document and Styling the Interface
- Creating the Application Layout
- Loading Transformers.js for Browser-Based Gemma 4 Inference
- Checking for WebGPU Support
- Referencing the User Interface
- Creating Helper Functions
- Previewing Images from a URL
- Processing Local Image and Audio Inputs for Gemma 4 Multimodal AI
- Processing Audio Inputs in the Browser with Web Audio API
- Loading the Processor and Gemma 4 Model
- Initializing the Gemma 4 Multimodal Processor
- Loading the Gemma 4 ONNX Model for WebGPU Inference
- Updating the Browser Interface During Gemma 4 Model Loading
- Running Gemma 4 Multimodal Inference Directly in the Browser
- Output
- Summary
Running Gemma 4 in the Browser with Transformers.js and WebGPU
In the first part of this series, we explored the architecture behind Gemma 4, including its multimodal design, Mixture-of-Experts routing, long-context capabilities, and the innovations that make it one of Google’s most capable open-weight model families.
In the second part, we put those capabilities into practice using Hugging Face Transformers, building multimodal applications that processed images, videos, audio, and structured outputs from a unified Python interface.
Next, we shifted our focus to deployment. In the previous tutorial, we explored multiple ways to run Gemma 4 locally using Ollama, llama.cpp, MLX, LM Studio, and Transformers.js. Along the way, we learned how to download models, perform local multimodal inference, and expose OpenAI-compatible APIs without relying on cloud-hosted services.
But there is one final step that takes local AI even further:
Can we run Gemma 4 entirely inside a web browser?
Until recently, running multimodal large language models required native applications, Python environments, or dedicated inference servers. Modern browser technologies, however, have changed that. With Transformers.js, ONNX Runtime, and hardware acceleration through WebGPU and WebAssembly, we can now execute state-of-the-art models directly inside modern web browsers without sending data to external servers.
Running models entirely in the browser offers several advantages. It improves user privacy by keeping data on the client device, reduces infrastructure costs by eliminating backend inference servers, enables offline AI experiences, and simplifies deployment by allowing applications to run anywhere a modern browser is available.
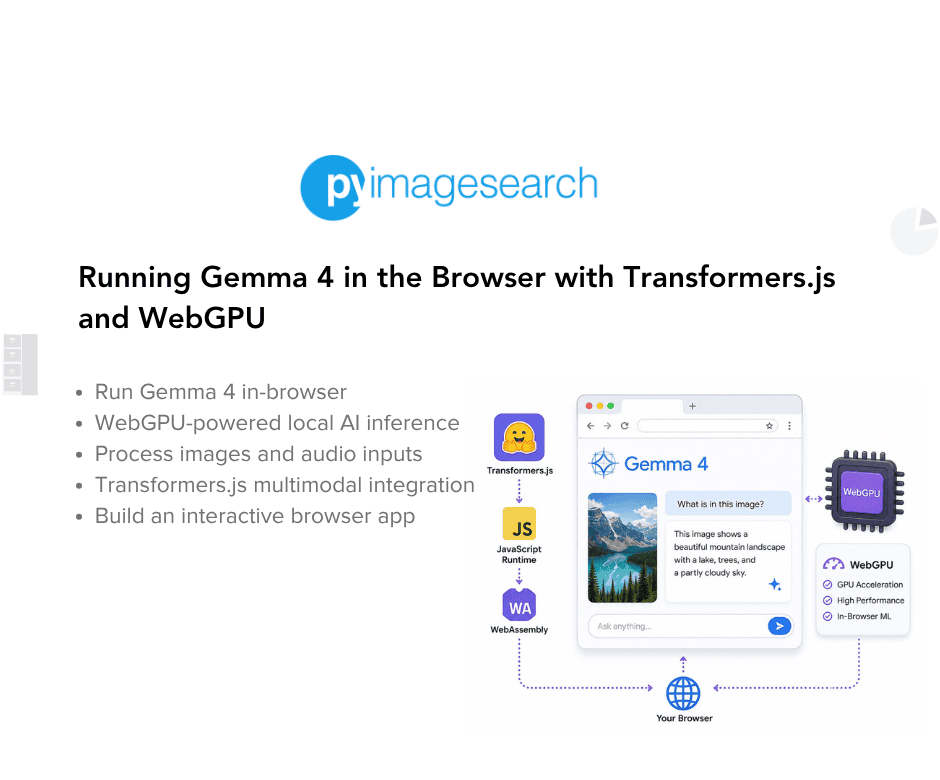
In this tutorial, we will build a fully client-side multimodal application using Transformers.js. We will learn how to load an ONNX version of Gemma 4 inside the browser, process image inputs, perform local inference using browser hardware acceleration, and build an interactive web application that runs entirely on the user’s machine.
By the end of this guide, you will understand how to deploy Gemma 4 as a browser-native AI application without Python, without a backend inference server, and without sacrificing the multimodal capabilities we’ve explored throughout this series.
This lesson is the 4th in a 5-part series on Google DeepMind’s Gemma 4:
- Google DeepMind’s Gemma 4: MoE, Efficiency Tricks, and Benchmarks
- Building Multimodal AI Applications with Gemma 4 and Transformers
- Running Gemma 4 Locally: Ollama, llama.cpp, MLX, and More
- Running Gemma 4 in the Browser with Transformers.js and WebGPU (this tutorial)
- Lesson 5
To learn how to build fully client-side multimodal AI applications with Gemma 4, just keep reading.

Building a Browser-Based Gemma 4 AI Application
Unlike the previous tutorial, where we interacted with Gemma 4 through the terminal, we will build a browser-based application that allows users to provide multimodal inputs and run inference directly from a web page.
The application consists of 3 primary components:
- An input panel for entering image and audio URLs, uploading local files, and specifying the text prompt.
- A status panel that displays the current stage of the inference pipeline, download progress, and elapsed execution time.
- An output panel where Gemma 4 streams its response as it is generated.
Creating the HTML Document and Styling the Interface
We begin by creating a standard HTML5 document that serves as the foundation for our browser application.
<!DOCTYPE html>
<html lang="en">
<head>
<meta charset="UTF-8"/>
<meta name="viewport" content="width=device-width, initial-scale=1.0"/>
<title>Gemma 4 · WebGPU</title>
<style>/* CSS styling */</style>
</head>
<body>

<header>
 <h1>Gemma 4 · E2B</h1>
 <span class="badge">WebGPU</span>
</header>
Here, <!DOCTYPE html> declares an HTML5 document, while the <html> element serves as the root of the page. The <head> section contains metadata such as the character encoding, viewport configuration, page title, and CSS styles that define the application’s appearance. The <body> section contains the visible content displayed in the browser, and the <header> provides a simple title and badge identifying the application.
The <style> section defines the application’s layout, typography, color palette, progress indicators, animations, and responsive behavior. Since the focus of this tutorial is browser-based AI inference rather than frontend development, we won’t discuss the styling in detail. Instead, we will concentrate on the JavaScript code that loads Gemma 4 and performs multimodal inference directly in the browser.
Creating the Application Layout
Next, we create the main layout of our browser application.
<div class="main">...</div>
The interface is divided into 3 primary sections that guide users through the entire inference workflow:
- Input Panel: Allows users to provide an image and audio either by entering a URL or uploading local files. It also includes a text area for entering the prompt and a button for loading the model and starting inference.
- Status Panel: Displays the progress of the inference pipeline, including processor initialization, model loading, input preprocessing, token generation, and download progress.
- Output Panel: Displays the response generated by Gemma 4 as it is streamed to the browser in real time.
This layout separates user inputs, model status, and generated outputs into dedicated sections, making the application easier to navigate while providing clear feedback throughout the inference process.
With the user interface in place, we can now implement the JavaScript code responsible for loading Gemma 4 and running multimodal inference directly inside the browser.
Loading Transformers.js for Browser-Based Gemma 4 Inference
With the user interface in place, we can begin implementing the browser-based inference pipeline. We start by importing the components required from Transformers.js and specifying the Gemma 4 model that will be loaded throughout the application.
<script type="module">
import {
 AutoProcessor,
 Gemma4ForConditionalGeneration,
 TextStreamer,
 load_image,
} from "https://cdn.jsdelivr.net/npm/@huggingface/transformers@4/dist/transformers.min.js";

const MODEL_ID = "onnx-community/gemma-4-E2B-it-ONNX";
Unlike the previous tutorial, where we installed Transformers.js locally using npm, the browser version imports the library directly from the jsDelivr CDN. This allows the application to download the required JavaScript modules automatically when the page loads, eliminating the need for a local Node.js environment or build process.
The imported classes serve the same purpose as before:
AutoProcessor: loads the preprocessing pipeline for Gemma 4, preparing text, images, and audio before they are passed to the model.Gemma4ForConditionalGeneration: loads the ONNX version of Gemma 4 and provides the API used for multimodal generation.TextStreamer: streams generated tokens to the browser as they are produced, enabling real-time output instead of waiting for the entire response.load_image: downloads and preprocesses images from either URLs or user-uploaded files.
Finally, we define the MODEL_ID, which points to the Gemma 4 E2B Instruct ONNX model hosted on the Hugging Face Hub. This is the same model used in the previous tutorial, ensuring consistent behavior across both the Node.js and browser implementations.
Checking for WebGPU Support
Before loading Gemma 4, we first verify that the user’s browser supports WebGPU. Unlike the Node.js implementation, which executes the model on the CPU, browser-based inference relies on WebGPU to accelerate model execution using the client’s GPU.
// ── WebGPU check ──
if (!navigator.gpu) {
 document.getElementById("error-msg").textContent = "WebGPU is not supported in this browser. Please use Chrome 113+ or Edge 113+.";
 document.getElementById("error-msg").classList.add("visible");
 document.getElementById("run-btn").disabled = true;
 document.getElementById("run-btn").textContent = "WebGPU not available";
}
The browser exposes WebGPU support through the navigator.gpu property. If this property is unavailable, the application assumes that the browser or hardware does not support GPU-accelerated inference.
Rather than allowing the application to continue and fail later when loading the model, we perform this check upfront. If WebGPU is unavailable, the application:
- displays an informative error message
- disables the Run Inference button
- prevents the user from attempting to load Gemma 4 on an unsupported browser
This early validation provides a better user experience by clearly communicating the requirements for running the application.
Note: At the time of writing, WebGPU is supported by modern Chromium-based browsers such as Google Chrome and Microsoft Edge. If your browser does not support WebGPU, consider updating to the latest version or enabling the appropriate experimental features.
Referencing the User Interface
Next, we create references to the HTML elements that we will interact with throughout the application.
// ── UI refs ──
const runBtn       = document.getElementById("run-btn");
const outputEl     = document.getElementById("output-text");
const errorEl      = document.getElementById("error-msg");
const progressWrap = document.getElementById("progress-wrap");
const progressFill = document.getElementById("progress-fill");
const progressPct  = document.getElementById("progress-pct");
const progressLbl  = document.getElementById("progress-label-text");
const elapsedEl    = document.getElementById("elapsed-text");
const imgPreview   = document.getElementById("img-preview");
const imgUrlInput  = document.getElementById("image-url");
These variables store references to the application’s user interface elements, including the Run Inference button, output panel, progress bar, status indicators, image preview, and input fields.
By retrieving these elements once at the beginning of the script, we can efficiently update the interface during model loading and inference without repeatedly querying the Document Object Model (DOM). This keeps the code cleaner, improves readability, and avoids unnecessary DOM lookups throughout the application.
Creating Helper Functions
Next, we define a few helper functions that simplify updating the application’s user interface during model loading and inference.
// ── Step helpers ──
function setStep(n, state) { // state: 'active' | 'done' | ''
 const el = document.getElementById(`step-${n}`);
 el.className = "step" + (state ? ` ${state}` : "");
}
function setProgress(pct, label) {
 progressWrap.classList.add("visible");
 progressFill.style.width = `${pct}%`;
 progressPct.textContent = `${Math.round(pct)}%`;
 if (label) progressLbl.textContent = label;
}
function showError(msg) {
 errorEl.textContent = msg;
 errorEl.classList.add("visible");
}
function clearError() { errorEl.classList.remove("visible"); }
Each helper is responsible for a specific aspect of the interface:
setStep(): updates the status indicator for each stage of the inference pipeline, allowing users to see whether a step is currently running or has completedsetProgress(): updates the model download progress bar and percentage value while the ONNX model is being downloaded and initializedshowError(): displays error messages whenever model loading or inference failsclearError(): removes any previously displayed error messages before a new operation begins
Although these functions are not directly involved in running Gemma 4, they provide real-time feedback throughout the application’s execution, making it easier for users to monitor model loading and inference progress.
Previewing Images from a URL
To provide immediate visual feedback, we update the image preview whenever the user enters a new image URL.
// ── Image preview from URL ──
imgUrlInput.addEventListener("input", () => {
 const url = imgUrlInput.value.trim();
 if (url) { imgPreview.src = url; imgPreview.classList.add("visible"); }
 else imgPreview.classList.remove("visible");
});
// show default on load
imgPreview.src = imgUrlInput.value;
imgPreview.classList.add("visible");
This event listener monitors changes to the Image URL input field. Whenever the user enters a valid URL, the application updates the preview image so that the selected input can be verified before running inference. If the input is cleared, the preview is automatically hidden.
When the page first loads, the script also displays the default sample image specified in the input field, allowing users to run the application immediately without providing their own image.
Processing Local Image and Audio Inputs for Gemma 4 Multimodal AI
In addition to accepting image and audio URLs, our application also allows users to upload local files directly from their computer. This provides greater flexibility by supporting both online resources and locally stored media.
// ── File upload handling ──
let uploadedImageData = null; // base64 data URL
let uploadedAudioBuffer = null; // Float32Array

document.getElementById("img-file").addEventListener("change", (e) => {
 const file = e.target.files[0];
 if (!file) return;
 const reader = new FileReader();
 reader.onload = (ev) => {
   uploadedImageData = ev.target.result;
   imgPreview.src = uploadedImageData;
   imgPreview.classList.add("visible");
   imgUrlInput.value = "";
 };
 reader.readAsDataURL(file);
});
When an image is uploaded, the browser reads the selected file using the FileReader API and converts it into a Base64-encoded data URL. The resulting image is stored in uploadedImageData, displayed in the preview panel, and later passed to Transformers.js for inference.
document.getElementById("audio-file").addEventListener("change", async (e) => {
 const file = e.target.files[0];
 if (!file) return;
 const arrayBuffer = await file.arrayBuffer();
 const audioCtx = new AudioContext({ sampleRate: 16000 });
 const decoded = await audioCtx.decodeAudioData(arrayBuffer);
 uploadedAudioBuffer = decoded.getChannelData(0);
 document.getElementById("audio-url").value = "";
});
For audio files, the preprocessing pipeline is slightly different.
Instead of using FileReader, the browser loads the audio into an ArrayBuffer and decodes it using the Web Audio API (AudioContext). The decoded waveform is then extracted as a Float32Array using getChannelData(0) and stored in uploadedAudioBuffer.
This preprocessing step converts the uploaded audio into the numerical waveform representation expected by Gemma 4. By handling image and audio uploads within the browser, users can perform multimodal inference on their own files without relying on external servers or additional preprocessing tools.
Processing Audio Inputs in the Browser with Web Audio API
Earlier, we implemented a helper function for loading audio in a Node.js environment. In the browser, however, we can leverage the Web Audio API, which provides native support for decoding and processing audio files.
// ── Load audio via AudioContext (browser-native) ──
async function loadAudioBrowser(url) {
 const res = await fetch(url);
 const arrayBuffer = await res.arrayBuffer();
 const audioCtx = new AudioContext({ sampleRate: 16000 });
 const decoded = await audioCtx.decodeAudioData(arrayBuffer);
 return decoded.getChannelData(0); // Float32Array @ 16kHz
}
This helper first downloads the audio file using the Fetch API and stores it as an ArrayBuffer. The browser’s AudioContext then decodes the audio and resamples it to 16 kHz, matching the sampling rate expected by Gemma 4. Finally, getChannelData(0) extracts the waveform as a Float32Array, which is passed directly to the processor during inference.
Using the browser’s native audio processing capabilities eliminates the need for external libraries while providing the model with audio in the format required for multimodal inference.
Loading the Processor and Gemma 4 Model
With the user interface and helper functions in place, we can now load the processor and Gemma 4 model. Since downloading and initializing a large multimodal model can take some time, the application also displays a progress bar and status updates throughout the loading process.
// State
let processor, model;
let modelLoaded = false;

async function loadModel() {
    ...
}
We begin by defining three variables that manage the model’s state. The processor and model variables store the initialized processor and Gemma 4 model, while the modelLoaded flag tracks whether the model has already been loaded. This prevents the application from downloading and initializing the model multiple times during a single browser session.
The loadModel() function is responsible for downloading, initializing, and preparing Gemma 4 for inference.
Initializing the Gemma 4 Multimodal Processor
The first step is loading the processor.
setStep(1, "active");

processor = await AutoProcessor.from_pretrained(MODEL_ID);

setStep(1, "done");
As in the previous tutorial, AutoProcessor.from_pretrained() downloads the preprocessing pipeline associated with Gemma 4. The processor prepares text, images, and audio before they are passed to the model, ensuring that all three modalities are converted into the format expected during inference.
The status panel is updated before and after loading so users can track the application’s progress.
Loading the Gemma 4 ONNX Model for WebGPU Inference
Once the processor is ready, we initialize the Gemma 4 model.
model = await Gemma4ForConditionalGeneration.from_pretrained(
    MODEL_ID,
    {
        dtype: "q4f16",
        device: "webgpu",
        progress_callback: (info) => {
            ...
        },
    }
);
Here, Gemma4ForConditionalGeneration.from_pretrained() downloads the ONNX model and initializes it for browser-based inference.
Several important parameters are specified:
dtype: "q4f16": loads a 4-bit floating-point quantized version of Gemma 4, reducing memory consumption while maintaining strong inference performance.device: "webgpu": instructs Transformers.js to execute the model using the browser’s WebGPU backend. Instead of performing inference on the CPU, computations are offloaded to the client’s GPU, resulting in significantly faster execution on supported hardware.progress_callback: receives download progress updates as the model files are fetched from the Hugging Face Hub. We use these updates to drive the application’s progress bar, allowing users to monitor the download in real time.
Since Gemma 4 consists of multiple ONNX weight files, the first execution may take several minutes depending on the user’s internet connection. Once downloaded, however, the browser caches these files, allowing subsequent executions to start much more quickly.
Updating the Browser Interface During Gemma 4 Model Loading
While the model is loading, the application continuously updates the elapsed time and download progress, giving users immediate feedback throughout the initialization process.
Once the download completes successfully, the progress indicator is updated, the Run Inference button is enabled, and the modelLoaded flag is set to true, indicating that Gemma 4 is ready to process user inputs.
If any step fails (e.g., due to a network issue or an unsupported browser), the exception is caught, an informative error message is displayed, and the application is reset so that the user can safely retry loading the model.
Running Gemma 4 Multimodal Inference Directly in the Browser
With the processor and model loaded, we are ready to perform multimodal inference. The application waits for the user to click the Run Inference button before preparing the inputs, generating a response, and streaming the output back to the browser.
// Run inference
runBtn.addEventListener("click", async () => {
    ...
});
The event listener serves as the entry point for the inference pipeline. Before performing any computation, it first checks whether Gemma 4 has already been loaded. If the model has not been initialized, the application automatically downloads and loads it. Otherwise, it immediately begins processing the user’s inputs.
Building the Prompt
The first stage constructs the multimodal conversation that will be passed to Gemma 4.
const prompt_text = document.getElementById("prompt-input").value.trim();

const messages = [{
    role: "user",
    content: [
        { type: "image" },
        { type: "audio" },
        { type: "text", text: prompt_text },
    ],
}];

const prompt = processor.apply_chat_template(
    messages,
    {
        enable_thinking: false,
        add_generation_prompt: true,
    }
);
As in the previous tutorial, we represent the input as a chat conversation. The user message contains placeholders for an image and an audio clip, along with the text instruction entered through the interface.
The conversation is then passed to apply_chat_template(), which formats the prompt according to Gemma 4’s expected conversational template. Setting enable_thinking to false disables thinking mode, while add_generation_prompt appends the appropriate generation token, indicating where the model should begin producing its response.
Processing Image and Audio Inputs with Transformers.js
Next, the application prepares the multimodal inputs.
// Load image
...

// Load audio
...

const inputs = await processor(
    prompt,
    image,
    audio,
    {
        add_special_tokens: false,
    }
);
The application supports both URLs and locally uploaded files. If the user has uploaded an image or audio clip, those inputs are used directly. Otherwise, the application downloads the resources from the URLs provided in the input fields.
Once the image, audio, and prompt are available, the processor converts them into the tensor representations expected by Gemma 4. This preprocessing step combines all three modalities into a unified set of model inputs, allowing the model to reason over text, images, and audio simultaneously.
Generating the Response
With the inputs prepared, we can finally generate a response.
const outputs = await model.generate({
    ...inputs,
    max_new_tokens: 512,
    do_sample: false,
    streamer: new TextStreamer(
        processor.tokenizer,
        {
            skip_prompt: true,
            skip_special_tokens: true,
            callback_function: (text) => {
                ...
            },
        }
    ),
});
The generate() method performs autoregressive text generation using the processed multimodal inputs.
Several parameters control the generation process:
max_new_tokens: 512: limits the maximum number of tokens that Gemma 4 can generate.do_sample: false: disables stochastic sampling, producing deterministic responses for identical inputs.TextStreamer: streams generated tokens to the browser as soon as they are produced instead of waiting for the entire response to complete.
Inside the streamer’s callback function, each newly generated token is appended to the output panel, allowing users to watch the response appear in real time. This creates a significantly more interactive experience, particularly when generating longer responses.
Once generation completes, the application removes the animated cursor, updates the elapsed execution time, reports the total number of generated tokens, and re-enables the Run Inference button for the next request.
If an error occurs at any point during preprocessing or generation, the exception is caught, an informative error message is displayed, and the application is reset so that inference can be attempted again.
Output
After opening the HTML file in a WebGPU-enabled browser, you will see an interface similar to the one shown in Figure 1. The left panel allows you to provide an image and audio either by entering their URLs or by uploading local files. You can also customize the prompt that will be sent to Gemma 4.
Click Load Model to download the ONNX version of Gemma 4 into the browser. During the first run, the application displays the download progress along with the status of each stage in the inference pipeline. Once the model has been loaded, the button changes to Run Inference.
Clicking Run Inference processes the image, audio, and prompt entirely within the browser using WebGPU acceleration. As Gemma 4 generates its response, the output is streamed token by token into the output panel, allowing you to see the answer appear in real time rather than waiting for the entire generation to finish.
The first execution may take a few minutes because the model weights must be downloaded and initialized. Subsequent runs are significantly faster since the model is already cached by the browser, requiring only the preprocessing and inference steps to complete.
What's next? We recommend PyImageSearch University.
120+ total classes • 115+ hours of on-demand code walkthrough videos • Last updated: October 2026
★★★★★ 4.84 (128 Ratings) • 16,000+ Students Enrolled
I strongly believe that if you had the right teacher you could master computer vision and deep learning.
Do you think learning computer vision and deep learning has to be time-consuming, overwhelming, and complicated? Or has to involve complex mathematics and equations? Or requires a degree in computer science?
That’s not the case.
All you need to master computer vision and deep learning is for someone to explain things to you in simple, intuitive terms. And that’s exactly what I do. My mission is to change education and how complex Artificial Intelligence topics are taught.
If you're serious about learning computer vision, your next stop should be PyImageSearch University, the most comprehensive computer vision, deep learning, and OpenCV course online today. Here you’ll learn how to successfully and confidently apply computer vision to your work, research, and projects. Join me in computer vision mastery.
Inside PyImageSearch University you'll find:
- ✓ 120+ courses on essential computer vision, deep learning, and OpenCV topics
- ✓ 94+ Certificates of Completion
- ✓ 115+ hours of on-demand video
- ✓ Brand new courses released regularly, ensuring you can keep up with state-of-the-art techniques
- ✓ Pre-configured Jupyter Notebooks in Google Colab
- ✓ Run all code examples in your web browser — works on Windows, macOS, and Linux (no dev environment configuration required!)
- ✓ Access to centralized code repos for all 540+ tutorials on PyImageSearch
- ✓ Easy one-click downloads for code, datasets, pre-trained models, etc.
- ✓ Access on mobile, laptop, desktop, etc.
Summary
In this tutorial, we explored how to run Gemma 4 entirely inside a web browser using Transformers.js and WebGPU, without relying on Python, Node.js, or any external inference server. Starting from a simple HTML page, we built a complete multimodal application capable of loading an ONNX version of Gemma 4, accepting image and audio inputs, tracking model download progress, and streaming responses directly in the browser.
Along the way, we learned how to initialize the model with AutoProcessor and Gemma4ForConditionalGeneration, verify WebGPU support, preprocess multimodal inputs, construct prompts using the chat template, and perform real-time token streaming with TextStreamer. By leveraging ONNX Runtime Web and the browser’s GPU, we were able to execute the entire inference pipeline locally while keeping all data on the user’s device.
With this tutorial, we have now covered the complete Gemma 4 deployment landscape, from Python applications using Hugging Face Transformers to local inference with Ollama, llama.cpp, MLX, LM Studio, Transformers.js for Node.js, and finally Transformers.js running directly in the browser. Together, these tutorials demonstrate how the same Gemma 4 model can be deployed across a wide range of environments, from research notebooks and desktop applications to fully client-side web experiences.
Citation Information
Thakur, P. “Running Gemma 4 in the Browser with Transformers.js and WebGPU,” PyImageSearch, S. Huot, G. Kudriavtsev, and A. Sharma, eds., 2026, https://pyimg.co/gx0fr
@incollection{Thakur_2026_running-gemma-4-in-browser-transformers-js-webgpu,
  author = {Piyush Thakur},
  title = {{Running Gemma 4 in the Browser with Transformers.js and WebGPU}},
  booktitle = {PyImageSearch},
  editor = {Susan Huot and Georgii Kudriavtsev and Aditya Sharma},
  year = {2026},
  url = {https://pyimg.co/gx0fr},
}
To download the source code to this post (and be notified when future tutorials are published here on PyImageSearch), simply enter your email address in the form below!

Download the Source Code and FREE 17-page Resource Guide
Enter your email address below to get a .zip of the code and a FREE 17-page Resource Guide on Computer Vision, OpenCV, and Deep Learning. Inside you'll find my hand-picked tutorials, books, courses, and libraries to help you master CV and DL!


Comment section
Hey, Adrian Rosebrock here, author and creator of PyImageSearch. While I love hearing from readers, a couple years ago I made the tough decision to no longer offer 1:1 help over blog post comments.
At the time I was receiving 200+ emails per day and another 100+ blog post comments. I simply did not have the time to moderate and respond to them all, and the sheer volume of requests was taking a toll on me.
Instead, my goal is to do the most good for the computer vision, deep learning, and OpenCV community at large by focusing my time on authoring high-quality blog posts, tutorials, and books/courses.
If you need help learning computer vision and deep learning, I suggest you refer to my full catalog of books and courses — they have helped tens of thousands of developers, students, and researchers just like yourself learn Computer Vision, Deep Learning, and OpenCV.
Click here to browse my full catalog.