If you’re serious about doing any type of deep learning, you should be utilizing your GPU rather than your CPU. And the more GPUs you have, the better off you are.
If you already have an NVIDIA supported GPU, then the next logical step is to install two important libraries:
- The NVIDIA CUDA Toolkit: A development environment for building GPU-accelerated applications. This toolkit includes a compiler specifically designed for NVIDIA GPUs and associated math libraries + optimization routines.
- The cuDNN library: A GPU-accelerated library of primitives for deep neural networks. Using the cuDNN package, you can increase training speeds by upwards of 44%, with over 6x speedups in Torch and Caffe.
In the remainder of this blog post, I’ll demonstrate how to install both the NVIDIA CUDA Toolkit and the cuDNN library for deep learning.
Specifically, I’ll be using an Amazon EC2 g2.2xlarge machine running Ubuntu 14.04. Feel free to spin up an instance of your own and follow along.
By the time you’re finished this tutorial, you’ll have a brand new system ready for deep learning.
How to install CUDA Toolkit and cuDNN for deep learning
As I mentioned in an earlier blog post, Amazon offers an EC2 instance that provides access to the GPU for computation purposes.
This instance is named the g2.2xlarge instance and costs approximately $0.65 per hour. The GPU included on the system is a K520 with 4GB of memory and 1,536 cores.
You can also upgrade to the g2.8xlarge instance ($2.60 per hour) to obtain four K520 GPUs (for a grand total of 16GB of memory).
For most of us, the g2.8xlarge is a bit expensive, especially if you’re only doing deep learning as a hobby. On the other hand, the g2.2xlarge instance is a totally reasonable option, allowing you to forgo your afternoon Starbucks coffee and trade a caffeine jolt for a bit of deep learning fun and education.
Insider the remainder of this blog post, I’ll detail how to install the NVIDIA CUDA Toolkit v7.5 along with cuDNN v5 in a g2.2xlarge GPU instance on Amazon EC2.
If you’re interested in deep learning, I highly encourage you to setup your own EC2 system using the instructions detailed in this blog post — you’ll be able to use your GPU instance to follow along with future deep learning tutorials on the PyImageSearch blog (and trust me, there will be a lot of them).
Note: Are you new to Amazon AWS and EC2? You might want to read Deep learning on Amazon EC2 GPU with Python and nolearn before continuing. This blog post provides step-by-step instructions (with tons of screenshots) on how to spin up your first EC2 instance and use it for deep learning.
Installing the CUDA Toolkit
Assuming you have either (1) an EC2 system spun up with GPU support or (2) your own NVIDIA-enabled GPU hardware, the next step is to install the CUDA Toolkit.
But before we can do that, we need to install a few required packages first:
$ sudo apt-get update
$ sudo apt-get upgrade
$ sudo apt-get install build-essential cmake git unzip pkg-config
$ sudo apt-get install libopenblas-dev liblapack-dev
$ sudo apt-get install linux-image-generic linux-image-extra-virtual
$ sudo apt-get install linux-source linux-headers-generic
One issue that I’ve encountered on Amazon EC2 GPU instances is that we need to disable the Nouveau kernel driver since it conflicts with the NVIDIA kernel module that we’re about to install.
Note: I’ve only had to disable the Nouveau kernel driver on Amazon EC2 GPU instances — I’m not sure if this needs to be done on standard, desktop installations of Ubuntu. Depending on your own hardware and setup, you can potentially skip this step.
To disable the Nouveau kernel driver, first create a new file:
$ sudo nano /etc/modprobe.d/blacklist-nouveau.conf
And then add the following lines to the file:
blacklist nouveau
blacklist lbm-nouveau
options nouveau modeset=0
alias nouveau off
alias lbm-nouveau off
Save this file, exit your editor, and then update the initial RAM filesystem, followed by rebooting your machine:
$ echo options nouveau modeset=0 | sudo tee -a /etc/modprobe.d/nouveau-kms.conf
$ sudo update-initramfs -u
$ sudo reboot
After reboot, the Nouveau kernel driver should be disabled.
The next step is to install the CUDA Toolkit. We’ll be installing CUDA Toolkit v7.5 for Ubuntu 14.04. Installing CUDA is actually a fairly simple process:
- Download the installation archive and unpack it.
- Run the associated scripts.
- Select the default options/install directories when prompted.
To start, let’s first download the .run file for CUDA 7.5:
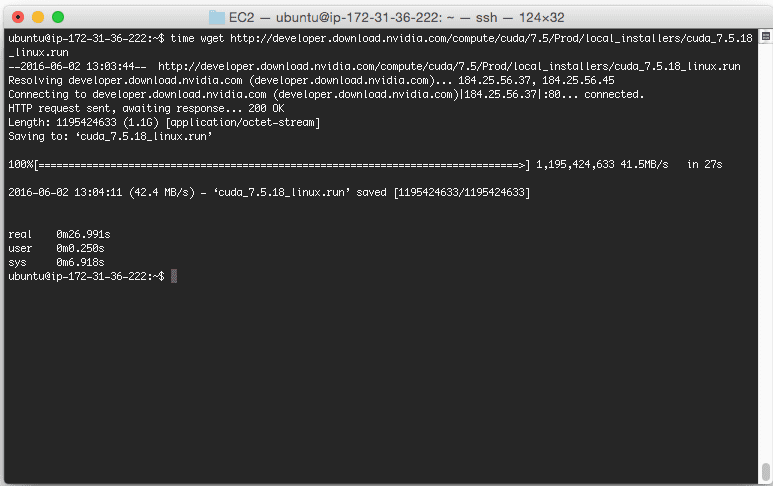
$ wget http://developer.download.nvidia.com/compute/cuda/7.5/Prod/local_installers/cuda_7.5.18_linux.run
With the super fast EC2 connection, I was able to download the entire 1.1GB file in less than 30 seconds:
Next, we need to make the .run file executable:
$ chmod +x cuda_7.5.18_linux.run
Followed by extracting the individual installation scripts into an installers directory:
$ mkdir installers
$ sudo ./cuda_7.5.18_linux.run -extract=`pwd`/installers
Your installers directory should now look like this:
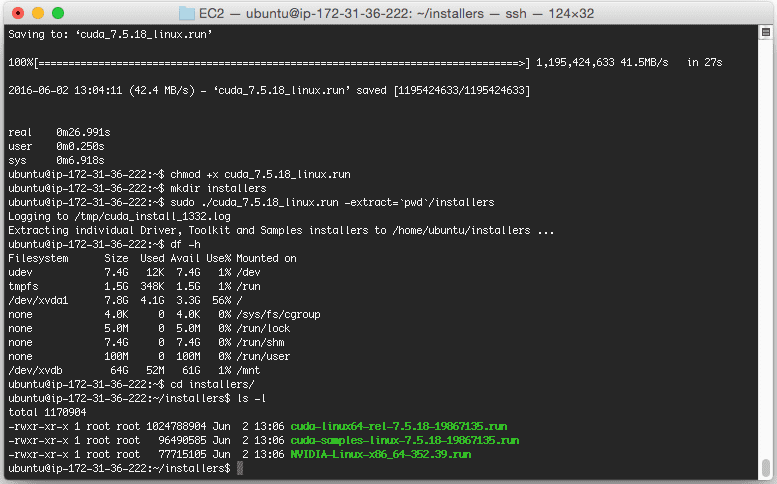
Notice how we have three separate .run files — we’ll need to execute each of these individually and in the correct order:
NVIDIA-Linux-x86_64-352.39.runcuda-linux64-rel-7.5.18-19867135.runcuda-samples-linux-7.5.18-19867135.run
The following set of commands will take care of actually installing the CUDA Toolkit:
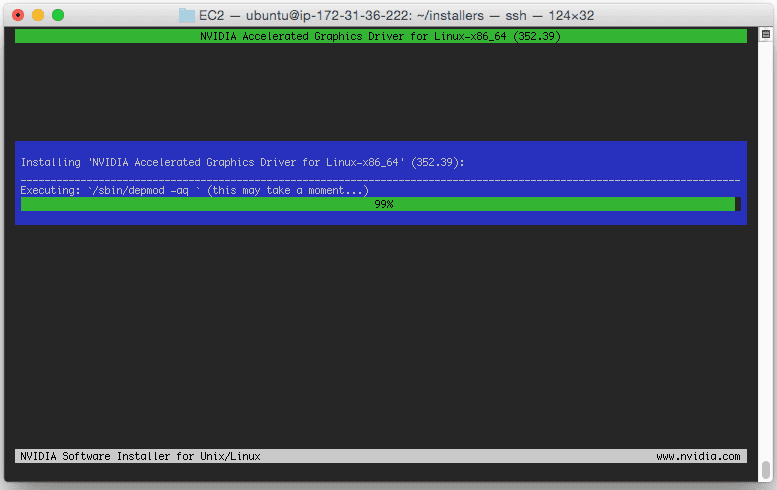
$ sudo ./NVIDIA-Linux-x86_64-352.39.run
$ modprobe nvidia
$ sudo ./cuda-linux64-rel-7.5.18-19867135.run
$ sudo ./cuda-samples-linux-7.5.18-19867135.run
Again, make sure you select the default options and directories when prompted.
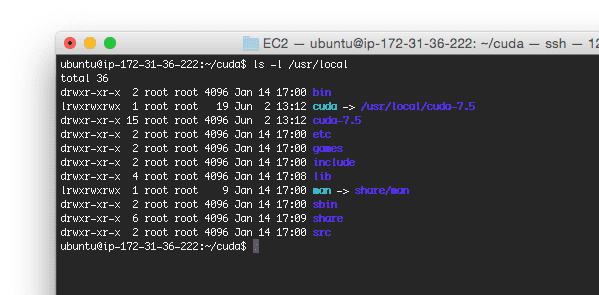
To verify that the CUDA Toolkit is installed, you should examine your /usr/local directory which should contain a sub-directory named cuda-7.5 , followed by a sym-link named cuda which points to it:
Now that the CUDA Toolkit is installed, we need to update our ~/.bashrc configuration:
$ nano ~/.bashrc
And then append the following lines to define the CUDA Toolkit PATH variables:
# CUDA Toolkit
export CUDA_HOME=/usr/local/cuda-7.5
export LD_LIBRARY_PATH=${CUDA_HOME}/lib64:$LD_LIBRARY_PATH
export PATH=${CUDA_HOME}/bin:${PATH}
Your .bashrc file is automatically source ‘d each time you login or open up a new terminal, but since we just modified it, we need to manually source it:
$ source ~/.bashrc
Next, let’s install cuDNN!
Installing cuDNN
We are now ready to install the NVIDIA CUDA Deep Neural Network library, a GPU-accelerated library for deep neural networks. Packages such as Caffe and Keras (and at a lower level, Theano) use cuDNN to dramatically speedup the networking training process.
To obtain the cuDNN library, you first need to create a (free) account with NVIDIA. From there, you can download cuDNN.
For this tutorial, we’ll be using cuDNN v5:
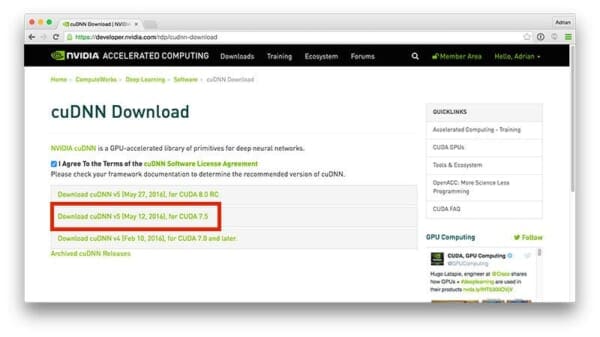
Make sure you download the cuDNN v5 Library for Linux:
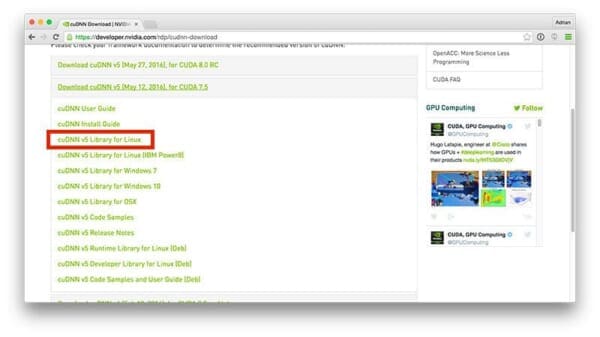
This is a small, 75MB download which you should save to your local machine (i.e., the laptop/desktop you are using to read this tutorial) and then upload to your EC2 instance. To accomplish this, simply use scp , replacing the paths and IP address as necessary:
$ scp -i EC2KeyPair.pem ~/Downloads/cudnn-7.5-linux-x64-v5.0-ga.tgz ubuntu@<ip_address>:~
Installing cuDNN is quite simple — all we need to do is copy the files in the lib64 and include directories to their appropriate locations on our EC2 machine:
$ cd ~
$ tar -zxf cudnn-7.5-linux-x64-v5.0-ga.tgz
$ cd cuda
$ sudo cp lib64/* /usr/local/cuda/lib64/
$ sudo cp include/* /usr/local/cuda/include/
Congratulations, cuDNN is now installed!
Doing a bit of cleanup
Now that we have (1) installed the NVIDIA CUDA Toolkit and (2) installed cuDNN, let’s do a bit of cleanup to reclaim disk space:
$ cd ~
$ rm -rf cuda installers
$ rm -f cuda_7.5.18_linux.run cudnn-7.5-linux-x64-v5.0-ga.tgz
In future tutorials, I’ll be demonstrating how to use both CUDA and cuDNN to facilitate faster training of deep neural networks.
What's next? We recommend PyImageSearch University.
86+ total classes • 115+ hours hours of on-demand code walkthrough videos • Last updated: January 2026
★★★★★ 4.84 (128 Ratings) • 16,000+ Students Enrolled
I strongly believe that if you had the right teacher you could master computer vision and deep learning.
Do you think learning computer vision and deep learning has to be time-consuming, overwhelming, and complicated? Or has to involve complex mathematics and equations? Or requires a degree in computer science?
That’s not the case.
All you need to master computer vision and deep learning is for someone to explain things to you in simple, intuitive terms. And that’s exactly what I do. My mission is to change education and how complex Artificial Intelligence topics are taught.
If you're serious about learning computer vision, your next stop should be PyImageSearch University, the most comprehensive computer vision, deep learning, and OpenCV course online today. Here you’ll learn how to successfully and confidently apply computer vision to your work, research, and projects. Join me in computer vision mastery.
Inside PyImageSearch University you'll find:
- ✓ 86+ courses on essential computer vision, deep learning, and OpenCV topics
- ✓ 86 Certificates of Completion
- ✓ 115+ hours hours of on-demand video
- ✓ Brand new courses released regularly, ensuring you can keep up with state-of-the-art techniques
- ✓ Pre-configured Jupyter Notebooks in Google Colab
- ✓ Run all code examples in your web browser — works on Windows, macOS, and Linux (no dev environment configuration required!)
- ✓ Access to centralized code repos for all 540+ tutorials on PyImageSearch
- ✓ Easy one-click downloads for code, datasets, pre-trained models, etc.
- ✓ Access on mobile, laptop, desktop, etc.
Summary
In today’s blog post, I demonstrated how to install the CUDA Toolkit and the cuDNN library for deep learning. If you’re interested in working with deep learning, I highly recommend that you setup a GPU-enabled machine.
If you don’t already have an NVIDIA-compatible GPU, no worries — Amazon EC2 offers the g2.2xlarge ($0.65/hour) and the g2.8xlarge ($2.60/hour) instances, both of which can be used for deep learning.
The steps detailed in this blog post will work on both the g2.2xlarge and g2.8xlarge instances for Ubuntu 14.04 — feel free to choose an instance and setup your own deep learning development environment (in fact, I encourage you to do just that!)
The entire process should only take you 1-2 hours to complete if you are familiar with the command line and Linux systems (and have a small amount of experience in the EC2 ecosystem).
Best of all, you can use this EC2 instance to follow along with future deep learning tutorials on the PyImageSearch blog.
Be sure to signup for the PyImageSearch Newsletter using the form below to be notified when new deep learning articles are published!

Join the PyImageSearch Newsletter and Grab My FREE 17-page Resource Guide PDF
Enter your email address below to join the PyImageSearch Newsletter and download my FREE 17-page Resource Guide PDF on Computer Vision, OpenCV, and Deep Learning.
