Table of Contents
- DVC Pipelines for MLOps: Build a Reproducible ML Pipeline
- Introduction
- Project Setup
- Understanding the Pipeline Architecture
- Stage 1: Dataset Preprocessing
- Stage 2: Model Training and Versioning with DVC
- Stage 3: Model Evaluation and Metrics Tracking with DVC
- Running and Reproducing the Pipeline
- Visualizing and Inspecting Pipelines
- Extending the Pipeline (Optional Enhancements)
- Summary
DVC Pipelines for MLOps: Build a Reproducible ML Pipeline
In this lesson you will learn how to build a fully reproducible machine learning pipeline using DVC, starting from raw data and moving through preprocessing, model training, and evaluation, all connected inside a clean and automated workflow that you can run with a single command.
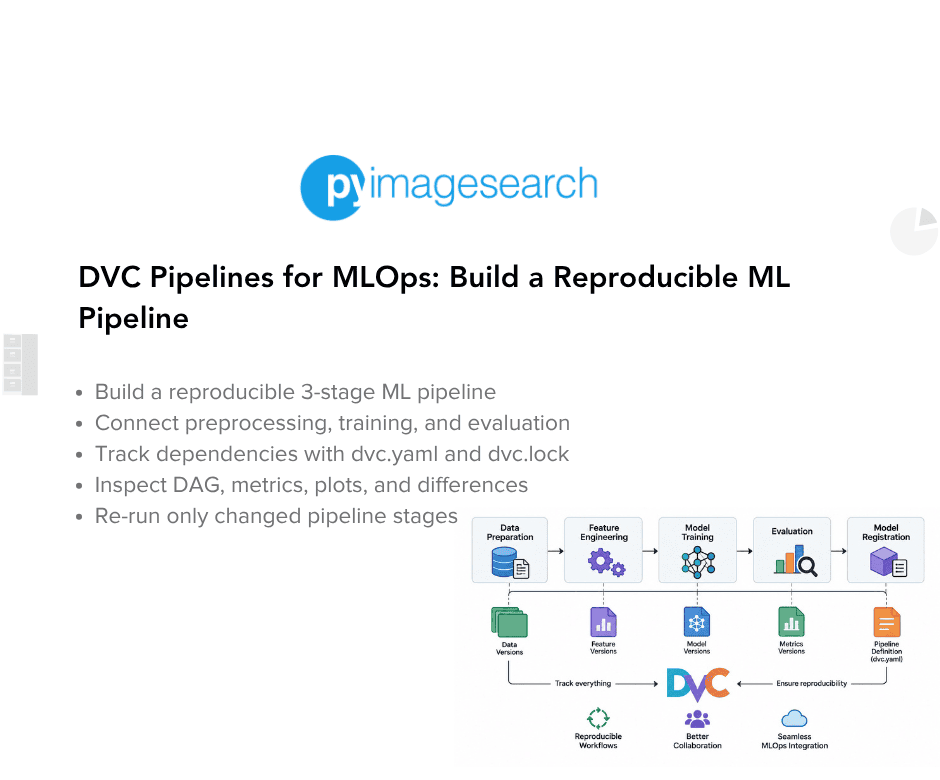
This lesson is the last in a 2-part series on Data and Model Versioning with DVC:
- DVC for MLOps: Versioning Your Data and Models the Right Way
- DVC Pipelines for MLOps: Build a Reproducible ML Pipeline (this tutorial)
To learn how to design, run, and reproduce a multi-stage pipeline using DVC’s powerful workflow engine, just keep reading.

Introduction
What We Did in Lesson 1
In the previous lesson, we learned how to use DVC to version datasets and model artifacts without polluting Git with large files.
You tracked a raw IMDb dataset, generated a dummy checkpoint, and pushed everything to a remote using DVC metadata files instead of storing actual data in Git.
We also covered how DVC caches files, how .dvc metadata files point to real data in the cache, and why this workflow makes ML projects easier to share, update, and reproduce.
By the end of Lesson 1, you had a clean, Git-friendly approach to managing raw data and model outputs across a team.
Why Pipelines Matter in MLOps
Versioning data is useful, but real machine learning (ML) systems need reproducibility across entire workflows, not just individual files.
Once you have preprocessing scripts, training code, and evaluation logic, you need a way to connect them so they run in the right order and re-run only when necessary.
This is where DVC pipelines come in.
Pipelines let you define each step of your ML workflow as a stage with its own inputs, outputs, and logic, so DVC can trace dependencies and rebuild only the stages affected by changes.
In production teams, pipelines enforce repeatability, traceability, and automation. This structure allows any teammate or continuous integration (CI) job to rebuild your results exactly, even months later.
Put simply, pipelines transform ad hoc scripts into deterministic ML systems.
What We Will Build in This Lesson (3-Stage Iris Pipeline)
In this lesson, you will build a fully reproducible, 3-stage ML pipeline for the classic Iris dataset.
Each stage will be defined in dvc.yaml and orchestrated with dvc repro, making it easy to rebuild the workflow from scratch.
Here is the exact pipeline we will construct:
- Preprocess: load
iris.csv, split into train/test, and save processed data - Train: train a logistic regression classifier using the processed training data
- Evaluate: compute accuracy, generate a classification report, and save metrics and a human-readable report
By the end of this lesson, you will have a production-style pipeline where any team member (or CI server) can:
git clone <repo>
pip install -r requirements.txt
dvc pull
dvc repro
You can then reproduce the outputs, metrics, and model without running each stage manually.
Would you like immediate access to 3,457 images curated and labeled with hand gestures to train, explore, and experiment with … for free? Head over to Roboflow and get a free account to grab these hand gesture images.
Project Setup
Reviewing the Lesson 2 Repository Structure
Before writing any pipeline logic, let us quickly walk through the repository so you know where every component lives.
This project uses a simple, production-friendly layout that separates raw data, scripts, outputs, and reports.
dvc-lesson2/
├── data/
│   └── raw/
│       └── iris.csv                  # Raw dataset
├── src/
│   ├── preprocess.py                 # Stage 1: Preprocessing
│   ├── train.py                      # Stage 2: Training
│   └── evaluate.py                   # Stage 3: Evaluation
├── outputs/
│   ├── processed/                    # Stage 1 output
│   ├── model/                        # Stage 2 output
│   └── metrics.json                  # Stage 3 output
├── reports/
│   └── accuracy.txt                  # Human-readable evaluation report
├── dvc.yaml                          # Pipeline definition
├── requirements.txt                  # Python dependencies
├── .gitignore                        # Files ignored by Git
└── .dvcignore                        # Files ignored by DVC
The structure mirrors real ML projects. Every stage writes outputs that become inputs for the next stage, and DVC tracks these relationships automatically through dvc.yaml.
Installing Dependencies
This lesson uses only 3 core packages: DVC, pandas, and scikit-learn.
Everything is lightweight so you can focus on learning pipelines, not juggling toolchains.
Install dependencies:
pip install -r requirements.txt
requirements.txt contains:
dvc==3.48.4
pandas==2.1.4
scikit-learn==1.3.2
Once installed, you have everything needed to preprocess data, train a model, evaluate it, and let DVC orchestrate the entire workflow.
Initializing Git and DVC
Just like Lesson 1, the pipeline project begins with Git and DVC initialization.
If this repository is fresh on your machine, run:
git init
Now initialize DVC:
dvc init
This will create:
.dvc/: internal DVC configuration.dvcignore: paths ignored by DVC- Git hooks for DVC tracking
Commit the setup:
git add .dvc .dvcignore
git commit -m "Initialize DVC for pipeline project"
At this point, the repository is ready for multi-stage pipelines, and DVC is prepared to track every dependency, output, and command we define in dvc.yaml.
Need Help Configuring Your Development Environment?

All that said, are you:
- Short on time?
- Learning on your employer’s administratively locked system?
- Wanting to skip the hassle of fighting with the command line, package managers, and virtual environments?
- Ready to run the code immediately on your Windows, macOS, or Linux system?
Then join PyImageSearch University today!
Gain access to Jupyter Notebooks for this tutorial and other PyImageSearch guides pre-configured to run on Google Colab’s ecosystem right in your web browser! No installation required.
And best of all, these Jupyter Notebooks will run on Windows, macOS, and Linux!
Understanding the Pipeline Architecture
A DVC pipeline is simply a series of stages that depend on each other. Each stage has a script, inputs, outputs, and a command. DVC connects those stages into a reproducible workflow that can be re-run automatically whenever something changes.
Our project implements a classic 3-stage ML workflow: preprocess → train → evaluate.
Let us break down how this works.
The 3-Stage Iris Pipeline
The Iris workflow in this project consists of 3 connected stages, each defined in dvc.yaml.
Stage 1: preprocess
Script: src/preprocess.py
- Loads the raw
iris.csv - Splits it into train/test sets
- Saves cleaned data to
outputs/processed/
data/raw/iris.csv → outputs/processed/
Stage 2: train
Script: src/train.py
- Reads processed training data
- Fits a logistic regression model
- Saves the model and label encoder to
outputs/model/
outputs/processed/ → outputs/model/
Stage 3: evaluate
Script: src/evaluate.py
- Loads the trained model and test data
- Computes metrics (accuracy and classification report)
- Saves results to
outputs/metrics.jsonandreports/accuracy.txt
outputs/model/ → outputs/metrics.json, reports/accuracy.txt
These 3 stages form a clean, linear ML pipeline. Data flows from the raw dataset to the processed dataset, model, and evaluation metrics.
How DVC Uses dvc.yaml
DVC connects all 3 stages through a single file: dvc.yaml.
This file tells DVC:
- What command to run (
cmd) - Which files a stage depends on (
deps) - What outputs it produces (
outs)
Your project’s dvc.yaml looks like this:
stages:
  preprocess:
    cmd: python src/preprocess.py
    deps:
      - data/raw/iris.csv
      - src/preprocess.py
    outs:
      - outputs/processed/

  train:
    cmd: python src/train.py
    deps:
      - outputs/processed/
      - src/train.py
    outs:
      - outputs/model/

  evaluate:
    cmd: python src/evaluate.py
    deps:
      - outputs/model/
      - src/evaluate.py
    outs:
      - outputs/metrics.json
      - reports/accuracy.txt
In one place, DVC now knows:
- Changing
iris.csvforces the entire pipeline to re-run - Changing
preprocess.pyforces preprocess → train → evaluate to re-run - Changing
train.pyforces only train → evaluate to re-run - Changing
evaluate.pyforces only evaluate to re-run
This is what makes ML pipelines reproducible and efficient.
Reading the Directed Acyclic Graph
DVC can visualize the workflow as a Directed Acyclic Graph (DAG):
dvc dag
You will see an ASCII diagram like this:
          +-------------+
          | data/raw/... |
          +-------------+
                 *
                 *
                 *
          +-------------+
          | preprocess  |
          +-------------+
                 *
                 *
                 *
             +--------+
             | train  |
             +--------+
                 *
                 *
                 *
           +-------------+
           |  evaluate   |
           +-------------+
This DAG tells you:
- The pipeline begins with
iris.csv - Every stage depends on the previous one
- Training will not run until preprocessing finishes
- Evaluation will not run until a model exists
It is a perfect, linear end-to-end representation of your ML system.
Stage 1: Dataset Preprocessing
The first stage in our pipeline handles dataset preparation. This includes loading the raw Iris comma-separated values (CSV) file, splitting it into training and test sets, and writing clean structured files into a dedicated output directory. DVC uses this stage as the foundation for all downstream work. If preprocessing changes, every downstream stage automatically reruns.
Reviewing preprocess.py
Your preprocessing script is located at:
src/preprocess.py
Here is what it does, step by step:
df = pd.read_csv("data/raw/iris.csv")
It loads the raw Iris dataset from data/raw/iris.csv.
X = df.drop("species", axis=1)
y = df["species"]
It separates features and target labels.
X_train, X_test, y_train, y_test = train_test_split(
    X, y, test_size=0.2, random_state=42, stratify=y
)
It creates an 80/20 train-test split while preserving class proportions (stratify=y).
output_dir = "outputs/processed"
os.makedirs(output_dir, exist_ok=True)
It prepares the output directory where DVC will store processed datasets.
train_df.to_csv(os.path.join(output_dir, "train.csv"), index=False)
test_df.to_csv(os.path.join(output_dir, "test.csv"), index=False)
Finally, the preprocessed data is saved as:
outputs/processed/train.csvoutputs/processed/test.csv
These are the cleaned, structured files the rest of the ML pipeline depends on.
Inputs and Outputs
Inputs (DVC Dependencies)
Listed under deps in dvc.yaml:
deps:
  - data/raw/iris.csv
  - src/preprocess.py
Meaning:
- Changing the raw dataset reruns Stage 1
- Changing the script itself reruns Stage 1
Outputs (DVC Tracked Artifacts)
Listed under outs:
outs:
  - outputs/processed/
This directory contains 2 files:
train.csvtest.csv
DVC tracks the entire directory as a single output artifact.
How DVC Tracks Directory Outputs (outputs/processed/)
DVC treats outputs/processed/ as one logical output, not just a folder.
When you run:
dvc repro
DVC:
- Computes hashes of the directory contents
- Stores processed files in
.dvc/cache/ - Creates a reference entry in
dvc.lock - Recreates (or updates) the directory when needed
DVC does not version each individual CSV separately. Instead, it versions the directory state, making preprocessing reproducible and lightweight.
If you open dvc.lock, you will see a section such as the following:
outs:
  - path: outputs/processed
    md5: <hash>
    size: <bytes>
This hash represents the exact combination of train.csv and test.csv.
What Changes Trigger Re-Runs
DVC re-runs the preprocessing stage only when necessary.
The following changes trigger Stage 1 to run again:
Modify the raw dataset
Example: editing data/raw/iris.csv
Modify the preprocessing script
Example: changing the test split from 0.2 to 0.3:
test_size=0.3
This triggers:
preprocess → train → evaluate
because downstream stages depend on processed data.
Running dvc repro again without changes
DVC outputs:
Stage 'preprocess' didn't change, skipping
This shows why DVC pipelines are efficient: no unnecessary computation.
Stage 2: Model Training and Versioning with DVC
The training stage consumes the preprocessed dataset from Stage 1, fits a model, and writes all model artifacts into a DVC-tracked output directory. This stage represents the “learning” portion of the pipeline, and any upstream change automatically forces retraining.
Reviewing train.py
Your training script lives at:
src/train.py
Here is what it does:
Load processed training data
train_path = "outputs/processed/train.csv"
train_df = pd.read_csv(train_path)
It reads the output from Stage 1, meaning preprocessing must complete successfully before training can run.
Split Features and Labels
X_train = train_df.drop("species", axis=1)
y_train = train_df["species"]
Encode Target Labels
label_encoder = LabelEncoder()
y_train_encoded = label_encoder.fit_transform(y_train)
The Iris dataset uses string labels (setosa, versicolor, and virginica).
The model expects numeric classes, so they are encoded.
Train a Logistic Regression Model
model = LogisticRegression(
    max_iter=200,
    random_state=42,
    solver='lbfgs',
    multi_class='multinomial'
)
model.fit(X_train, y_train_encoded)
This is a simple, lightweight model suitable for demonstrating pipelines, dependencies, and reproducibility.
Report Training Accuracy
train_accuracy = model.score(X_train, y_train_encoded)
print(f"📈 Training accuracy: {train_accuracy:.4f}")
This provides quick feedback but is not saved as a metric because evaluation happens later.
How It Loads Stage 1 Output
The key detail in this stage is the direct dependency on Stage 1’s output directory:
train_path = "outputs/processed/train.csv"
That file is generated by the preprocessing step.
In dvc.yaml:
deps:
  - outputs/processed/
This means:
- If any file inside
outputs/processed/changes - If the preprocessing script changes
- If the raw data changes
Stage 2 then automatically reruns when you run the following command:
dvc repro
This ensures reproducibility and tightly coupled data lineage.
Saving the Model and Label Encoder
After training, the script saves 2 artifacts:
- The trained model
- The label encoder
This is important because predictions on new data would not map to the correct class names without the encoder.
Create output directory
output_dir = "outputs/model"
os.makedirs(output_dir, exist_ok=True)
Write the model and encoder
model_path = os.path.join(output_dir, "model.pkl")
encoder_path = os.path.join(output_dir, "label_encoder.pkl")

with open(model_path, "wb") as f:
    pickle.dump(model, f)

with open(encoder_path, "wb") as f:
    pickle.dump(label_encoder, f)
These artifacts drive the evaluation stage and are vital for any downstream inference.
Why Model Outputs Are Tracked as DVC Artifacts
In dvc.yaml, Stage 2 defines:
outs:
  - outputs/model/
This ensures DVC:
- Versions your model files deterministically
- Treats the entire
outputs/model/directory as an artifact - Stores the model in
.dvc/cache/using content hashing - Adds reproducibility guarantees (via
dvc.lock) - Re-runs Stage 3 only if the model changes
DVC tracks only metadata in Git rather than the .pkl files. This approach keeps your repository lightweight while preserving reproducibility.
This setup also mirrors real production workflows:
- Lightning or PyTorch generates checkpoints
- DVC versions them
- Teams share them without pushing binaries to Git
Stage 3: Model Evaluation and Metrics Tracking with DVC
The evaluation stage is the final step in the pipeline. It loads the trained model and label encoder from Stage 2, evaluates performance on the test dataset from Stage 1, generates structured metrics, produces a human-readable report, and writes both outputs to DVC-tracked locations.
This stage demonstrates how DVC can treat metrics as first-class citizens in a reproducible ML workflow.
Reviewing evaluate.py
This script lives at:
src/evaluate.py
Here is a walkthrough of what it does.
Load Test Data
test_path = "outputs/processed/test.csv"
test_df = pd.read_csv(test_path)
Just as training depends on processed training data, evaluation depends on processed test data from Stage 1.
Split Features and Labels
X_test = test_df.drop("species", axis=1)
y_test = test_df["species"]
Load the Trained Model and Label Encoder
model_path = "outputs/model/model.pkl"
encoder_path = "outputs/model/label_encoder.pkl"

with open(model_path, "rb") as f:
    model = pickle.load(f)

with open(encoder_path, "rb") as f:
    label_encoder = pickle.load(f)
This is where pipeline dependency chaining becomes visible:
- Stage 1: generates processed data
- Stage 2: generates the model and encoder
- Stage 3: loads output from both
Encode Labels and Run Predictions
y_test_encoded = label_encoder.transform(y_test)
y_pred = model.predict(X_test)
Compute Primary Metric (Accuracy)
accuracy = accuracy_score(y_test_encoded, y_pred)
print(f"📈 Test Accuracy: {accuracy:.4f}")
The script also prints a classification report and confusion matrix to help users understand model behavior.
Create Output Directories
os.makedirs("reports", exist_ok=True)
This sets the stage for saving the structured and human-readable results.
Generating Metrics (metrics.json)
The evaluation script produces a machine-readable metrics file:
metrics = {
    "accuracy": float(accuracy),
    "test_samples": len(X_test),
    "classification_report": report
}

metrics_path = "outputs/metrics.json"
with open(metrics_path, "w") as f:
    json.dump(metrics, f, indent=2)
Why this matters
- DVC can compare metrics across runs (e.g., before and after hyperparameter tuning)
- Continuous integration and continuous delivery (CI/CD) pipelines can read this JavaScript Object Notation (JSON) file automatically
- You can integrate these metrics into dashboards or experiment tracking tools
In dvc.yaml, this file appears under:
outs:
  - outputs/metrics.json
(You may optionally move this to the metrics: section for metric-specific behavior.)
Generating Human-Readable Reports (accuracy.txt)
While metrics.json is for machines, humans often want plain text.
The script generates:
accuracy_report_path = "reports/accuracy.txt"
with open(accuracy_report_path, "w") as f:
    f.write("Model Evaluation Report\n")
    f.write(f"{'='*50}\n\n")
    f.write(f"Test Accuracy: {accuracy:.4f}\n")
    f.write(f"Test Samples: {len(X_test)}\n\n")
    f.write(f"Classification Report:\n")
    f.write(f"{'-'*50}\n")
    f.write(classification_report(...))
    f.write("\nConfusion Matrix:\n")
    f.write(f"{'-'*50}\n")
    f.write(f"{cm}\n")
This produces:
- Header
- Accuracy summary
- Classification report
- Confusion matrix
It stores the report in the following location:
reports/accuracy.txt
Because this is listed under outs in dvc.yaml, DVC automatically tracks it.
Marking Metrics and Plots in DVC (optional but recommended)
DVC has special sections for:
metrics: numeric evaluation valuesplots: visualizations such as confusion matrices
You can enhance the evaluate stage with the following configuration:
Example configuration
stages:
  evaluate:
    cmd: python src/evaluate.py
    deps:
      - outputs/model/
      - src/evaluate.py
    metrics:
      - outputs/metrics.json:
          cache: false
    outs:
      - reports/accuracy.txt
Benefits
dvc metrics show: displays the current metricsdvc metrics diff: compares accuracy between commitscache: false:metrics.jsonis not stored in the DVC cache because metrics files are lightweight and can be tracked directly by Git
Optional: Track Plots
If you ever generate confusion_matrix.png or similar:
plots:
  - outputs/confusion_matrix.png
Then run:
dvc plots show
Running and Reproducing the Pipeline
Once your pipeline is defined in dvc.yaml, everything else becomes beautifully simple.
Instead of manually running preprocess.py, train.py, and evaluate.py, you can let DVC orchestrate the entire workflow. DVC reruns only the stages that need to run.
This is where DVC starts feeling like magic.
Running the Full Pipeline (dvc repro)
Your pipeline has 3 stages:
preprocess → train → evaluate
To run all of them in the correct order, execute:
dvc repro
The first run always executes all stages because no cached outputs exist yet.
Expected output
Running stage 'preprocess':
> python src/preprocess.py
📊 Starting data preprocessing...
...
💾 Saved train data to: outputs/processed/train.csv
💾 Saved test data to: outputs/processed/test.csv
✅ Preprocessing complete!

Running stage 'train':
> python src/train.py
🚀 Starting model training...
...
💾 Saved model to: outputs/model/model.pkl
💾 Saved label encoder to: outputs/model/label_encoder.pkl
✅ Training complete!

Running stage 'evaluate':
> python src/evaluate.py
📊 Starting model evaluation...
...
📈 Test Accuracy: 0.9333
📄 Saved report to: reports/accuracy.txt
✅ Evaluation complete!
Behind the scenes, DVC is:
- hashing each dependency
- hashing each output
- saving everything in
.dvc/cache/ - writing a reproducible lock file
That brings us to the next part.
Understanding dvc.lock
After your first dvc repro run, DVC generates:
dvc.lock
This file records the exact state of the pipeline when it ran, similar to package-lock.json or poetry.lock.
Open it, and you will see entries such as the following:
stages:
  preprocess:
    cmd: python src/preprocess.py
    deps:
      - path: data/raw/iris.csv
        md5: <hash>
      - path: src/preprocess.py
        md5: <hash>
    outs:
      - path: outputs/processed
        md5: <hash>
        size: <int>

  train:
    cmd: python src/train.py
    deps:
      - path: outputs/processed
        md5: <hash>
      - path: src/train.py
        md5: <hash>
    outs:
      - path: outputs/model
        md5: <hash>

  evaluate:
    cmd: python src/evaluate.py
    deps:
      - path: outputs/model
        md5: <hash>
      - path: src/evaluate.py
        md5: <hash>
    outs:
      - path: outputs/metrics.json
      - path: reports/accuracy.txt
Why This File Matters
- It guarantees reproducibility across machines.
- It tells DVC which outputs match which inputs.
- It allows DVC to detect when nothing changed.
- It must be committed to Git.
Anyone pulling your repository can run:
dvc repro
They can then reproduce the pipeline.
Incremental Re-Runs (Partial Pipeline Rebuild)
DVC’s biggest advantage is incrementality.
It runs only the stages affected by changes.
Let us walk through real examples.
Example 1: You Change src/preprocess.py
# Change test split from 0.2 → 0.3
dvc repro
DVC will detect the following changes:
preprocesschanged: must runoutputs/processed/changed:trainmust run- model changed:
evaluatemust run
Console output:
Running stage 'preprocess' (changed deps):
Running stage 'train' (changed deps):
Running stage 'evaluate' (changed deps):
Example 2: You Change Only src/train.py
dvc repro
DVC will detect the following:
preprocessunchanged: skiptrainchanged: run- model changed:
evaluatemust run
Console output:
Stage 'preprocess' didn't change, skipping
Running stage 'train'
Running stage 'evaluate'
Example 3: Nothing Changed
dvc repro
Output:
Stage 'preprocess' didn't change, skipping
Stage 'train' didn't change, skipping
Stage 'evaluate' didn't change, skipping
Data and pipelines are up to date.
This means DVC checked all dependencies, hashes, and outputs. Everything matches the lock file.
Zero wasted compute. Zero unnecessary runs.
Visualizing and Inspecting Pipelines
Once your pipeline is running, you will want ways to inspect, debug, understand, and compare different runs.
DVC includes a suite of visualization and inspection tools that help you answer questions such as the following:
- What stages are in my pipeline?
- Which files changed since the last run?
- Do I need to re-run anything?
- What metrics improved or regressed?
This section walks you through the most useful tools for pipeline introspection.
Visualizing the Pipeline DAG (dvc dag)
The fastest way to understand your ML workflow is to visualize it as a DAG (Directed Acyclic Graph).
DVC generates a clean ASCII graph of your pipeline:
dvc dag
Expected output for your exact pipeline:
        +----------------------+
        |   data/raw/iris.csv |
        +----------------------+
                    *
                    *
             +------------+
             | preprocess |
             +------------+
                    *
                    *
                +-------+
                | train |
                +-------+
                    *
                    *
              +----------+
              | evaluate |
              +----------+
This confirms the 3-stage flow:
raw data → preprocess → train → evaluate
Use cases:
- Quickly verify pipeline structure
- Check whether a stage is connected properly
- Ensure there are no missing dependencies
Bonus: Mermaid DAG Output
For documentation, slides, or PyImageSearch blog posts:
dvc dag --mermaid
Produces a Mermaid flowchart:
flowchart TD
    preprocess --> train
    train --> evaluate
Paste this output into a Markdown renderer that supports Mermaid to produce a visual diagram.
Checking the Pipeline Status (dvc status)
dvc status tells you whether any dependency or output has changed since the last dvc repro run.
Run it anytime:
dvc status
If nothing changed:
Data and pipelines are up to date.
If something changed (e.g., you modified src/preprocess.py):
preprocess:
    changed deps:
        modified: src/preprocess.py
This means the following:
preprocessmust rerun- which triggers reruns for downstream stages (
trainandevaluate)
If the dataset changed:
preprocess:
    changed deps:
        modified: data/raw/iris.csv
Use this before running large pipelines; it tells you what will execute.
Comparing Pipeline Versions (dvc diff)
dvc diff helps you inspect changes between 2 Git commits or between the current workspace and a Git commit.
It is especially useful when you are debugging why metrics changed.
To compare your current workspace to the last committed run:
dvc diff
Example 1: Preprocessing Logic Changed
Modified outs:
  outputs/processed:
    size: 4.2KB -> 4.5KB
Example 2: Model Weights Changed (e.g., parameter update)
Modified outs:
  outputs/model:
    size: 12KB -> 15KB
Example 3: Metrics Improved or Regressed
Modified outs:
  outputs/metrics.json:
    diff:
      accuracy: 0.9333 -> 0.9666
This is the easiest way to track performance shifts after code or data changes.
Inspecting Metrics (dvc metrics show, metrics diff)
In your pipeline:
outputs/metrics.json: contains structured evaluation metricsreports/accuracy.txt: contains the human-readable report
DVC can read JSON metrics directly.
Show metrics from the latest run
dvc metrics show
Expected output:
Path: outputs/metrics.json
accuracy: 0.9333
test_samples: 30
Compare Metrics Between Commits
dvc metrics diff
Example output:
Path: outputs/metrics.json
metric: accuracy
    old: 0.9333
    new: 0.9666
    diff: +0.0333
This is extremely powerful during model development:
- See whether your model improved
- Detect regressions immediately
- Track hyperparameter sensitivity
- Log performance across experiments
Note: Your pipeline currently lists outputs/metrics.json as a regular output in dvc.yaml. You can move it to the metrics section to mark it explicitly as a metrics file.
If you want to tag them explicitly:
stages:
  evaluate:
    metrics:
      - outputs/metrics.json:
          cache: false
Extending the Pipeline (Optional Enhancements)
Your current DVC pipeline already handles a clean 3-stage workflow: preprocess, train, and evaluate.
However, real-world ML pipelines rarely stay this small. As projects grow, you will need hyperparameter tuning, metrics tracking, and new stages like feature engineering or postprocessing.
This section shows how to evolve your pipeline without breaking its reproducibility, using DVC’s extensibility features.
Using params.yaml for Hyperparameters
Right now, your training script (src/train.py) has hyperparameters hardcoded:
model = LogisticRegression(
    max_iter=200,
    random_state=42,
    solver='lbfgs',
    multi_class='multinomial'
)
To make these configurable through DVC, create a params.yaml file:
train:
  max_iter: 200
  solver: lbfgs
  multi_class: multinomial
  random_state: 42

split:
  test_size: 0.2
  random_state: 42
Step 1: Modify train.py to read params
import yaml

params = yaml.safe_load(open("params.yaml"))

cfg = params["train"]

model = LogisticRegression(
    max_iter=cfg["max_iter"],
    random_state=cfg["random_state"],
    solver=cfg["solver"],
    multi_class=cfg["multi_class"]
)
Step 2: Update dvc.yaml to declare params
stages:
  train:
    cmd: python src/train.py
    deps:
      - outputs/processed/
      - src/train.py
    params:
      - train.max_iter
      - train.solver
      - train.multi_class
      - train.random_state
    outs:
      - outputs/model/
Result:
- Changing any value in
params.yamltriggers only thetrainandevaluatestages. - You get clean, reproducible hyperparameter experiments.
Adding Metrics and Plots Tracking
Your pipeline already produces:
outputs/metrics.json: machine-readable metricsreports/accuracy.txt: human-readable report
But DVC can track these outputs as first-class metrics.
Mark metrics in dvc.yaml
stages:
  evaluate:
    cmd: python src/evaluate.py
    deps:
      - outputs/model/
      - src/evaluate.py
    metrics:
      - outputs/metrics.json:
          cache: false
    outs:
      - reports/accuracy.txt
Now try:
dvc metrics show
dvc metrics diff
DVC displays accuracy differences across commits, which makes the command useful for comparing experiments.
Optional: Track Plots
If you add visualization code to evaluate.py:
import matplotlib.pyplot as plt
from sklearn.metrics import ConfusionMatrixDisplay

disp = ConfusionMatrixDisplay(confusion_matrix=cm)
disp.plot()
plt.savefig("outputs/confusion_matrix.png")
Update dvc.yaml:
plots:
  - outputs/confusion_matrix.png
Now you can compare model performance visually:
dvc plots show
dvc plots diff
Adding More Pipeline Stages
Your pipeline is intentionally simple, but DVC makes it easy to scale.
Here are 3 realistic extension patterns:
Option A: Feature Engineering Stage
Create src/feature_engineering.py:
def engineer():
    df = pd.read_csv("outputs/processed/train.csv")
    df["sepal_ratio"] = df["sepal_length"] / df["sepal_width"]
    df.to_csv("outputs/features/train_fe.csv", index=False)
Add to dvc.yaml:
stages:
  feature_engineering:
    cmd: python src/feature_engineering.py
    deps:
      - outputs/processed/train.csv
      - src/feature_engineering.py
    outs:
      - outputs/features/
Update train dependencies:
train:
  deps:
    - outputs/features/
DVC automatically inserts the new stage in the DAG.
Option B: Hyperparameter Search Stage
You can add a Python script that runs multiple training configurations.
For example, src/hpt.py can invoke the equivalent of the following Shell commands:
python src/train.py --max_iter=100
python src/train.py --max_iter=200
python src/train.py --max_iter=500
Add a stage:
stages:
  hpt:
    cmd: python src/hpt.py
    deps:
      - src/hpt.py
      - src/train.py
      - params.yaml
    outs:
      - outputs/hpt_results/
Option C: Postprocessing Stage
Example: Generate a final report that combines the metrics and confusion matrix.
stages:
  report:
    cmd: python src/final_report.py
    deps:
      - outputs/metrics.json
      - reports/accuracy.txt
      - src/final_report.py
    outs:
      - reports/final_report.md
What's next? We recommend PyImageSearch University.

120+ total classes • 115+ hours of on-demand code walkthrough videos • Last updated: September 2026
★★★★★ 4.84 (128 Ratings) • 16,000+ Students Enrolled
I strongly believe that if you had the right teacher you could master computer vision and deep learning.
Do you think learning computer vision and deep learning has to be time-consuming, overwhelming, and complicated? Or has to involve complex mathematics and equations? Or requires a degree in computer science?
That’s not the case.
All you need to master computer vision and deep learning is for someone to explain things to you in simple, intuitive terms. And that’s exactly what I do. My mission is to change education and how complex Artificial Intelligence topics are taught.
If you're serious about learning computer vision, your next stop should be PyImageSearch University, the most comprehensive computer vision, deep learning, and OpenCV course online today. Here you’ll learn how to successfully and confidently apply computer vision to your work, research, and projects. Join me in computer vision mastery.
Inside PyImageSearch University you'll find:
- ✓ 120+ courses on essential computer vision, deep learning, and OpenCV topics
- ✓ 94+ Certificates of Completion
- ✓ 115+ hours of on-demand video
- ✓ Brand new courses released regularly, ensuring you can keep up with state-of-the-art techniques
- ✓ Pre-configured Jupyter Notebooks in Google Colab
- ✓ Run all code examples in your web browser — works on Windows, macOS, and Linux (no dev environment configuration required!)
- ✓ Access to centralized code repos for all 540+ tutorials on PyImageSearch
- ✓ Easy one-click downloads for code, datasets, pre-trained models, etc.
- ✓ Access on mobile, laptop, desktop, etc.
Summary
In this lesson, you learned how to turn a simple training workflow into a fully reproducible, multi-stage ML pipeline using DVC. Instead of running scripts manually and hoping results remain consistent, you now have a system that captures every dependency, data transformation, and output in a transparent, version-controlled workflow.
We began by breaking the Iris example into 3 stages: preprocessing, training, and evaluation. We then saw how DVC connects them using dvc.yaml, dvc.lock, and a DAG. You ran the pipeline end-to-end with dvc repro, inspected which stages changed, and watched DVC rebuild only the parts affected by modifications. This is the cornerstone of reproducible, efficient ML engineering.
You also learned how to inspect pipelines visually, track metrics across runs, and optionally extend the workflow with hyperparameters, plots, and new stages. These enhancements prepare your pipelines for real-world growth, where experiments evolve and projects become more complex.
By the end, you should have a clear understanding of how DVC pipelines bring structure, repeatability, and discipline to ML projects. They turn ad hoc experimentation into a maintainable engineering process that scales with your team and codebase.
Citation Information
Singh, V. “DVC Pipelines for MLOps: Build a Reproducible ML Pipeline,” PyImageSearch, S. Huot, A. Sharma, and P. Thakur, eds., 2026, https://pyimg.co/v78x4
@incollection{Singh_2026_dvc-pipelines-mlops-build-reproducible-ml-pipeline,
  author = {Vikram Singh},
  title = {{DVC Pipelines for MLOps: Build a Reproducible ML Pipeline}},
  booktitle = {PyImageSearch},
  editor = {Susan Huot and Aditya Sharma and Piyush Thakur},
  year = {2026},
  url = {https://pyimg.co/v78x4},
}
To download the source code to this post (and be notified when future tutorials are published here on PyImageSearch), simply enter your email address in the form below!

Download the Source Code and FREE 17-page Resource Guide
Enter your email address below to get a .zip of the code and a FREE 17-page Resource Guide on Computer Vision, OpenCV, and Deep Learning. Inside you'll find my hand-picked tutorials, books, courses, and libraries to help you master CV and DL!


Comment section
Hey, Adrian Rosebrock here, author and creator of PyImageSearch. While I love hearing from readers, a couple years ago I made the tough decision to no longer offer 1:1 help over blog post comments.
At the time I was receiving 200+ emails per day and another 100+ blog post comments. I simply did not have the time to moderate and respond to them all, and the sheer volume of requests was taking a toll on me.
Instead, my goal is to do the most good for the computer vision, deep learning, and OpenCV community at large by focusing my time on authoring high-quality blog posts, tutorials, and books/courses.
If you need help learning computer vision and deep learning, I suggest you refer to my full catalog of books and courses — they have helped tens of thousands of developers, students, and researchers just like yourself learn Computer Vision, Deep Learning, and OpenCV.
Click here to browse my full catalog.