Continuing our series of blog posts on facial landmarks, today we are going to discuss face alignment, the process of:
- Identifying the geometric structure of faces in digital images.
- Attempting to obtain a canonical alignment of the face based on translation, scale, and rotation.
There are many forms of face alignment.
Some methods try to impose a (pre-defined) 3D model and then apply a transform to the input image such that the landmarks on the input face match the landmarks on the 3D model.
Other, more simplistic methods (like the one discussed in this blog post), rely only on the facial landmarks themselves (in particular, the eye regions) to obtain a normalized rotation, translation, and scale representation of the face.
The reason we perform this normalization is due to the fact that many facial recognition algorithms, including Eigenfaces, LBPs for face recognition, Fisherfaces, and deep learning/metric methods can all benefit from applying facial alignment before trying to identify the face.
Thus, face alignment can be seen as a form of “data normalization”. Just as you may normalize a set of feature vectors via zero centering or scaling to unit norm prior to training a machine learning model, it’s very common to align the faces in your dataset before training a face recognizer.
By performing this process, you’ll enjoy higher accuracy from your face recognition models.
Note: If you’re interested in learning more about creating your own custom face recognizers, be sure to refer to the PyImageSearch Gurus course where I provide detailed tutorials on face recognition.
To learn more about face alignment and normalization, just keep reading.
Face alignment with OpenCV and Python
The purpose of this blog post is to demonstrate how to align a face using OpenCV, Python, and facial landmarks.
Given a set of facial landmarks (the input coordinates) our goal is to warp and transform the image to an output coordinate space.
In this output coordinate space, all faces across an entire dataset should:
- Be centered in the image.
- Be rotated that such the eyes lie on a horizontal line (i.e., the face is rotated such that the eyes lie along the same y-coordinates).
- Be scaled such that the size of the faces are approximately identical.
To accomplish this, we’ll first implement a dedicated Python class to align faces using an affine transformation. I’ve already implemented this FaceAligner class in imutils.
Note: Affine transformations are used for rotating, scaling, translating, etc. We can pack all three of the above requirements into a single cv2.warpAffine call; the trick is creating the rotation matrix, M .
We’ll then create an example driver Python script to accept an input image, detect faces, and align them.
Finally, we’ll review the results from our face alignment with OpenCV process.
Implementing our face aligner
The face alignment algorithm itself is based on Chapter 8 of Mastering OpenCV with Practical Computer Vision Projects (Baggio, 2012), which I highly recommend if you have a C++ background or interest. The book provides open-access code samples on GitHub.
Let’s get started by examining our FaceAligner implementation and understanding what’s going on under the hood.
# import the necessary packages
from .helpers import FACIAL_LANDMARKS_IDXS
from .helpers import shape_to_np
import numpy as np
import cv2

class FaceAligner:
    def __init__(self, predictor, desiredLeftEye=(0.35, 0.35),
        desiredFaceWidth=256, desiredFaceHeight=None):
        # store the facial landmark predictor, desired output left
        # eye position, and desired output face width + height
        self.predictor = predictor
        self.desiredLeftEye = desiredLeftEye
        self.desiredFaceWidth = desiredFaceWidth
        self.desiredFaceHeight = desiredFaceHeight

        # if the desired face height is None, set it to be the
        # desired face width (normal behavior)
        if self.desiredFaceHeight is None:
            self.desiredFaceHeight = self.desiredFaceWidth
Lines 2-5 handle our imports. To read about facial landmarks and our associated helper functions, be sure to check out this previous post.
On Line 7, we begin our FaceAligner class with our constructor being defined on Lines 8-20.
Our constructor has 4 parameters:
predictor: The facial landmark predictor model.desiredLeftEye: An optional (x, y) tuple with the default shown, specifying the desired output left eye position. For this variable, it is common to see percentages within the range of 20-40%. These percentages control how much of the face is visible after alignment. The exact percentages used will vary on an application-to-application basis. With 20% you’ll basically be getting a “zoomed in” view of the face, whereas with larger values the face will appear more “zoomed out.”desiredFaceWidth: Another optional parameter that defines our desired face with in pixels. We default this value to 256 pixels.desiredFaceHeight: The final optional parameter specifying our desired face height value in pixels.
Each of these parameters is set to a corresponding instance variable on Lines 12-15.
Next, let’s decide whether we want a square image of a face, or something rectangular. Lines 19 and 20 check if the desiredFaceHeight is None , and if so, we set it to the desiredFaceWidth , meaning that the face is square. A square image is the typical case. Alternatively, we can specify different values for both desiredFaceWidth and desiredFaceHeight to obtain a rectangular region of interest.
Now that we have constructed our FaceAligner object, we will next define a function which aligns the face.
This function is a bit long, so I’ve broken it up into 5 code blocks to make it more digestible:
    def align(self, image, gray, rect):
        # convert the landmark (x, y)-coordinates to a NumPy array
        shape = self.predictor(gray, rect)
        shape = shape_to_np(shape)

        # extract the left and right eye (x, y)-coordinates
        (lStart, lEnd) = FACIAL_LANDMARKS_IDXS["left_eye"]
        (rStart, rEnd) = FACIAL_LANDMARKS_IDXS["right_eye"]
        leftEyePts = shape[lStart:lEnd]
        rightEyePts = shape[rStart:rEnd]
Beginning on Line 22, we define the align function which accepts three parameters:
image: The RGB input image.gray: The grayscale input image.rect: The bounding box rectangle produced by dlib’s HOG face detector.
On Lines 24 and 25, we apply dlib’s facial landmark predictor and convert the landmarks into (x, y)-coordinates in NumPy format.
Next, on Lines 28 and 29 we read the left_eye and right_eye regions from the FACIAL_LANDMARK_IDXS dictionary, found in the helpers.py script. These 2-tuple values are stored in left/right eye starting and ending indices.
The leftEyePts and rightEyePts are extracted from the shape list using the starting and ending indices on Lines 30 and 31.
Next, let’s will compute the center of each eye as well as the angle between the eye centroids.
This angle serves as the key component for aligning our image.
The angle of the green line between the eyes, shown in Figure 1 below, is the one that we are concerned about.
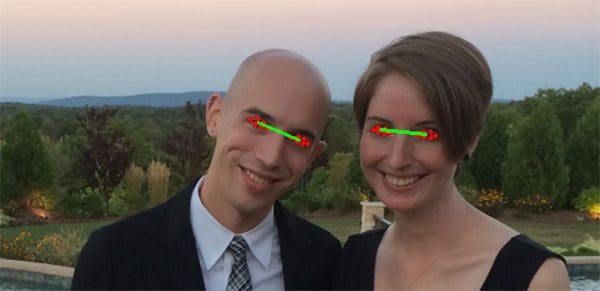
To see how the angle is computed, refer to the code block below:
        # compute the center of mass for each eye
        leftEyeCenter = leftEyePts.mean(axis=0).astype("int")
        rightEyeCenter = rightEyePts.mean(axis=0).astype("int")

        # compute the angle between the eye centroids
        dY = rightEyeCenter[1] - leftEyeCenter[1]
        dX = rightEyeCenter[0] - leftEyeCenter[0]
        angle = np.degrees(np.arctan2(dY, dX)) - 180
On Lines 34 and 35 we compute the centroid, also known as the center of mass, of each eye by averaging all (x, y) points of each eye, respectively.
Given the eye centers, we can compute differences in (x, y)-coordinates and take the arc-tangent to obtain angle of rotation between eyes.
This angle will allow us to correct for rotation.
To determine the angle, we start by computing the delta in the y-direction, dY . This is done by finding the difference between the rightEyeCenter and the leftEyeCenter on Line 38.
Similarly, we compute dX , the delta in the x-direction on Line 39.
Next, on Line 40, we compute the angle of the face rotation. We use NumPy’s arctan2 function with arguments dY and dX , followed by converting to degrees while subtracting 180 to obtain the angle.
In the following code block we compute the desired right eye coordinate (as a function of the left eye placement) as well as calculating the scale of the new resulting image.
        # compute the desired right eye x-coordinate based on the
        # desired x-coordinate of the left eye
        desiredRightEyeX = 1.0 - self.desiredLeftEye[0]

        # determine the scale of the new resulting image by taking
        # the ratio of the distance between eyes in the *current*
        # image to the ratio of distance between eyes in the
        # *desired* image
        dist = np.sqrt((dX ** 2) + (dY ** 2))
        desiredDist = (desiredRightEyeX - self.desiredLeftEye[0])
        desiredDist *= self.desiredFaceWidth
        scale = desiredDist / dist
On Line 44, we calculate the desired right eye based upon the desired left eye x-coordinate. We subtract self.desiredLeftEye[0] from 1.0 because the desiredRightEyeX value should be equidistant from the right edge of the image as the corresponding left eye x-coordinate is from its left edge.
We can then determine the scale of the face by taking the ratio of the distance between the eyes in the current image to the distance between eyes in the desired image
First, we compute the Euclidean distance ratio, dist , on Line 50.
Next, on Line 51, using the difference between the right and left eye x-values we compute the desired distance, desiredDist .
We update the desiredDist by multiplying it by the desiredFaceWidth on Line 52. This essentially scales our eye distance based on the desired width.
Finally, our scale is computed by dividing desiredDist by our previously calculated dist .
Now that we have our rotation angle and scale , we will need to take a few steps before we compute the affine transformation. This includes finding the midpoint between the eyes as well as calculating the rotation matrix and updating its translation component:
        # compute center (x, y)-coordinates (i.e., the median point)
        # between the two eyes in the input image
        eyesCenter = ((leftEyeCenter[0] + rightEyeCenter[0]) // 2,
            (leftEyeCenter[1] + rightEyeCenter[1]) // 2)

        # grab the rotation matrix for rotating and scaling the face
        M = cv2.getRotationMatrix2D(eyesCenter, angle, scale)

        # update the translation component of the matrix
        tX = self.desiredFaceWidth * 0.5
        tY = self.desiredFaceHeight * self.desiredLeftEye[1]
        M[0, 2] += (tX - eyesCenter[0])
        M[1, 2] += (tY - eyesCenter[1])
On Lines 57 and 58, we compute eyesCenter , the midpoint between the left and right eyes. This will be used in our rotation matrix calculation. In essence, this midpoint is at the top of the nose and is the point at which we will rotate the face around:
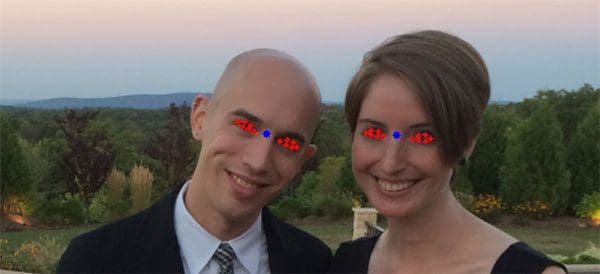
To compute our rotation matrix, M , we utilize cv2.getRotationMatrix2D specifying eyesCenter , angle , and scale (Line 61). Each of these three values have been previously computed, so refer back to Line 40, Line 53, and Line 57 as needed.
A description of the parameters to cv2.getRotationMatrix2D follow:
eyesCenter: The midpoint between the eyes is the point at which we will rotate the face around.angle: The angle we will rotate the face to to ensure the eyes lie along the same horizontal line.scale: The percentage that we will scale up or down the image, ensuring that the image scales to the desired size.
Now we must update the translation component of the matrix so that the face is still in the image after the affine transform.
On Line 64, we take half of the desiredFaceWidth and store the value as tX , the translation in the x-direction.
To compute tY , the translation in the y-direction, we multiply the desiredFaceHeight by the desired left eye y-value, desiredLeftEye[1] .
Using tX and tY , we update the translation component of the matrix by subtracting each value from their corresponding eyes midpoint value, eyesCenter (Lines 66 and 67).
We can now apply our affine transformation to align the face:
        # apply the affine transformation
        (w, h) = (self.desiredFaceWidth, self.desiredFaceHeight)
        output = cv2.warpAffine(image, M, (w, h),
            flags=cv2.INTER_CUBIC)

        # return the aligned face
        return output
For convenience we store the desiredFaceWidth and desiredFaceHeight into w and h respectively (Line 70).
Then we perform our last step on Lines 70 and 71 by making a call to cv2.warpAffine . This function call requires 3 parameters and 1 optional parameter:
image: The face image.M: The translation, rotation, and scaling matrix.(w, h): The desired width and height of the output face.flags: The interpolation algorithm to use for the warp, in this caseINTER_CUBIC. To read about the other possible flags and image transformations, please consult the OpenCV documentation.
Finally, we return the aligned face on Line 75.
Aligning faces with OpenCV and Python
Now let’s put this alignment class to work with a simple driver script. Open up a new file, name it align_faces.py , and let’s get to coding.
# import the necessary packages
from imutils.face_utils import FaceAligner
from imutils.face_utils import rect_to_bb
import argparse
import imutils
import dlib
import cv2

# construct the argument parser and parse the arguments
ap = argparse.ArgumentParser()
ap.add_argument("-p", "--shape-predictor", required=True,
help="path to facial landmark predictor")
ap.add_argument("-i", "--image", required=True,
help="path to input image")
args = vars(ap.parse_args())
On Lines 2-7 we import required packages.
If you do not have imutils and/or dlib installed on your system, then make sure you install/upgrade them via pip :
$ pip install --upgrade imutils
$ pip install --upgrade dlib
Note: If you are using Python virtual environments (as all of my OpenCV install tutorials do), make sure you use the workon command to access your virtual environment first, and then install/upgrade imutils and dlib .
Using argparse on Lines 10-15, we specify 2 required command line arguments:
--shape-predictor: The dlib facial landmark predictor.--image: The image containing faces.
In the next block of code we initialize our HOG-based detector (Histogram of Oriented Gradients), our facial landmark predictor, and our face aligner:
# initialize dlib's face detector (HOG-based) and then create
# the facial landmark predictor and the face aligner
detector = dlib.get_frontal_face_detector()
predictor = dlib.shape_predictor(args["shape_predictor"])
fa = FaceAligner(predictor, desiredFaceWidth=256)
Line 19 initializes our detector object using dlib’s get_frontal_face_detector .
On Line 20 we instantiate our facial landmark predictor using, --shape-predictor , the path to dlib’s pre-trained predictor.
We make use of the FaceAligner class that we just built in the previous section by initializing a an object, fa , on Line 21. We specify a face width of 256 pixels.
Next, let’s load our image and prepare it for face detection:
# load the input image, resize it, and convert it to grayscale
image = cv2.imread(args["image"])
image = imutils.resize(image, width=800)
gray = cv2.cvtColor(image, cv2.COLOR_BGR2GRAY)

# show the original input image and detect faces in the grayscale
# image
cv2.imshow("Input", image)
rects = detector(gray, 2)
On Line 24, we load our image specified by the command line argument –-image . We resize the image maintaining the aspect ratio on Line 25 to have a width of 800 pixels. We then convert the image to grayscale on Line 26.
Detecting faces in the input image is handled on Line 31 where we apply dlib’s face detector. This function returns rects , a list of bounding boxes around the faces our detector has found.
In the next block, we iterate through rects , align each face, and display the original and aligned images.
# loop over the face detections
for rect in rects:
	# extract the ROI of the *original* face, then align the face
	# using facial landmarks
	(x, y, w, h) = rect_to_bb(rect)
	faceOrig = imutils.resize(image[y:y + h, x:x + w], width=256)
	faceAligned = fa.align(image, gray, rect)

	# display the output images
	cv2.imshow("Original", faceOrig)
	cv2.imshow("Aligned", faceAligned)
	cv2.waitKey(0)
We begin our loop on Line 34.
For each bounding box rect predicted by dlib we convert it to the format (x, y, w, h) (Line 37).
Subsequently, we resize the box to a width of 256 pixels, maintaining the aspect ratio, on Line 38. We store this original, but resized image, as faceOrig .
On Line 39, we align the image, specifying our image, grayscale image, and rectangle.
Finally, Lines 42 and 43 display the original and corresponding aligned face image to the screen in respective windows.
On Line 44, we wait for the user to press a key with either window in focus, before displaying the next original/aligned image pair.
The process on Lines 35-44 is repeated for all faces detected, then the script exits.
To see our face aligner in action, head to next section.
Face alignment results
Let’s go ahead and apply our face aligner to some example images. Make sure you use the “Downloads” section of this blog post to download the source code + example images.
After unpacking the archive, execute the following command:
$ python align_faces.py \
	--shape-predictor shape_predictor_68_face_landmarks.dat \
	--image images/example_01.jpg
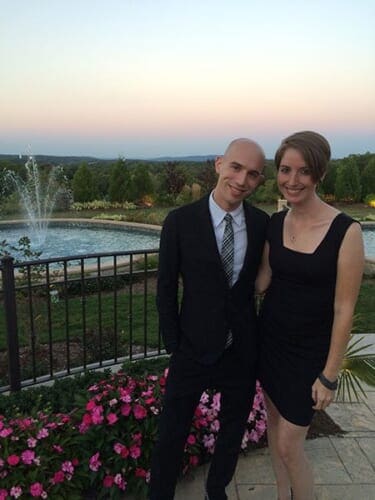
From there you’ll see the following input image, a photo of myself and my financée, Trisha:
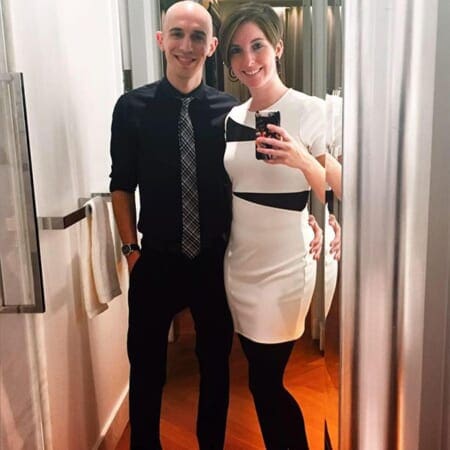
This image contains two faces, therefore we’ll be performing two facial alignments.
The first is seen below:
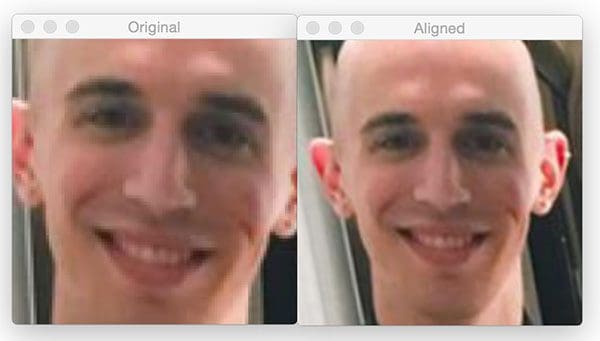
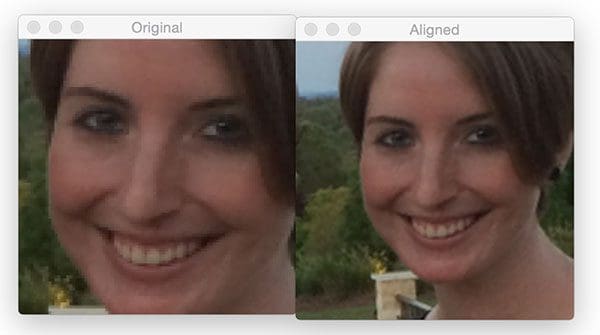
On the left we have the original detected face. The aligned face is then displayed on the right.
Now for Trisha’s face:
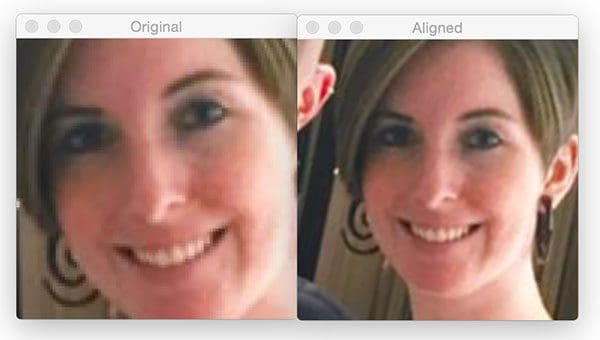
Notice how after facial alignment both of our faces are the same scale and the eyes appear in the same output (x, y)-coordinates.
Let’s try a second example:
$ python align_faces.py \
	--shape-predictor shape_predictor_68_face_landmarks.dat \
	--image images/example_02.jpg
Here I am enjoying a glass of wine on Thanksgiving morning:
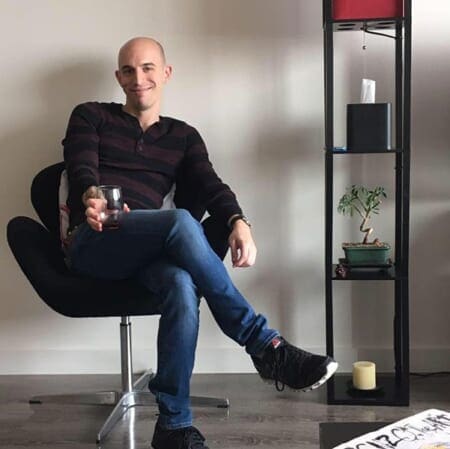
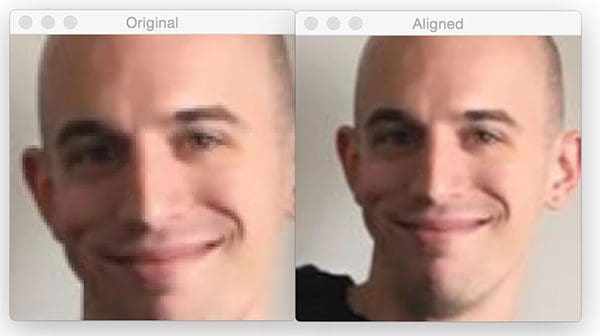
After detecting my face, it is then aligned as the following figure demonstrates:
Here is a third example, this one of myself and my father last spring after cooking up a batch of soft shell crabs:
$ python align_faces.py \
	--shape-predictor shape_predictor_68_face_landmarks.dat \
	--image images/example_03.jpg

My father’s face is first aligned:
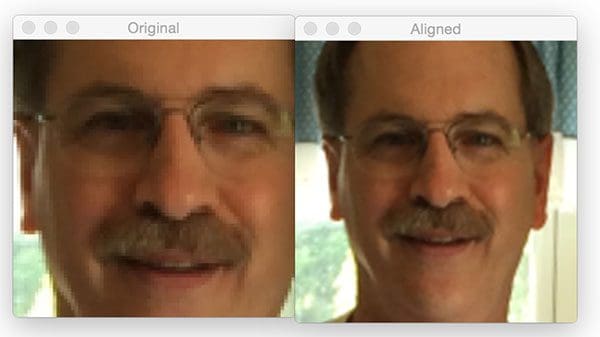
Followed by my own:
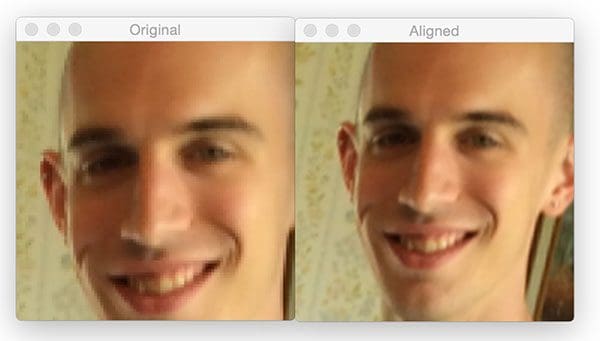
The fourth example is a photo of my grandparents the last time they visited North Carolina:
$ python align_faces.py \
	--shape-predictor shape_predictor_68_face_landmarks.dat \
	--image images/example_04.jpg
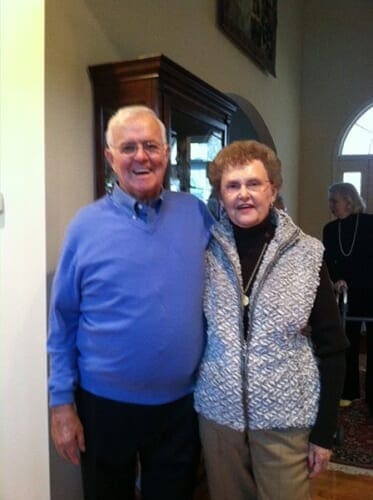
My grandmother’s face is aligned first:
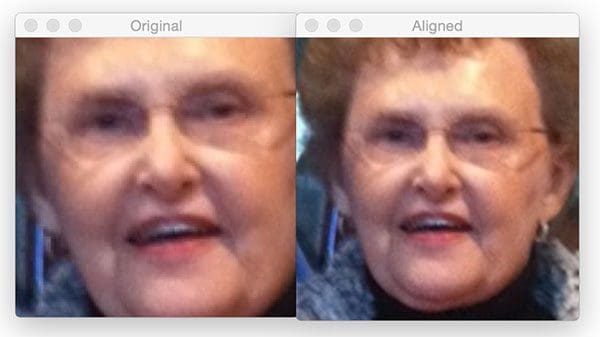
And then my grandfather’s:
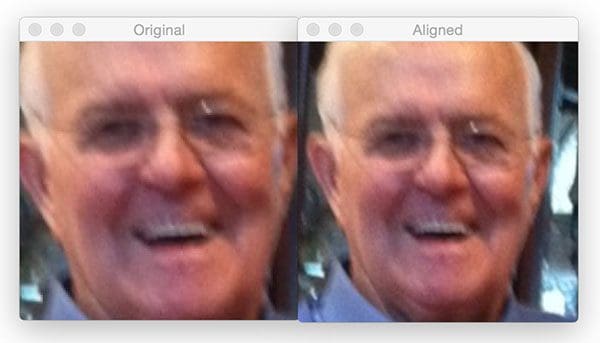
Despite both of them wearing glasses the faces are correctly aligned.
Let’s do one final example:
$ python align_faces.py \
	--shape-predictor shape_predictor_68_face_landmarks.dat \
	--image images/example_05.jpg
After applying face detection, Trisha’s face is aligned first:
And then my own:
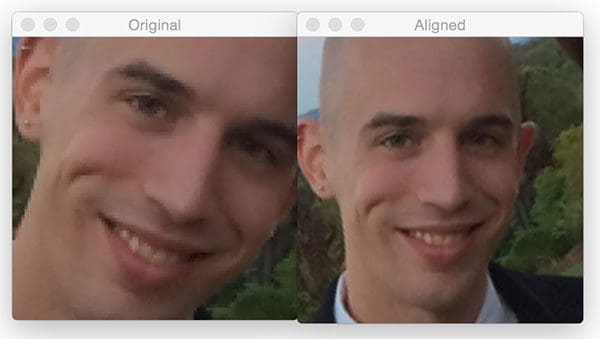
The rotation angle of my face is detected and corrected, followed by being scaled to the appropriate size.
To demonstrate that this face alignment method does indeed (1) center the face, (2) rotate the face such that the eyes lie along a horizontal line, and (3) scale the faces such that they are approximately identical in size, I’ve put together a GIF animation that you can see below:
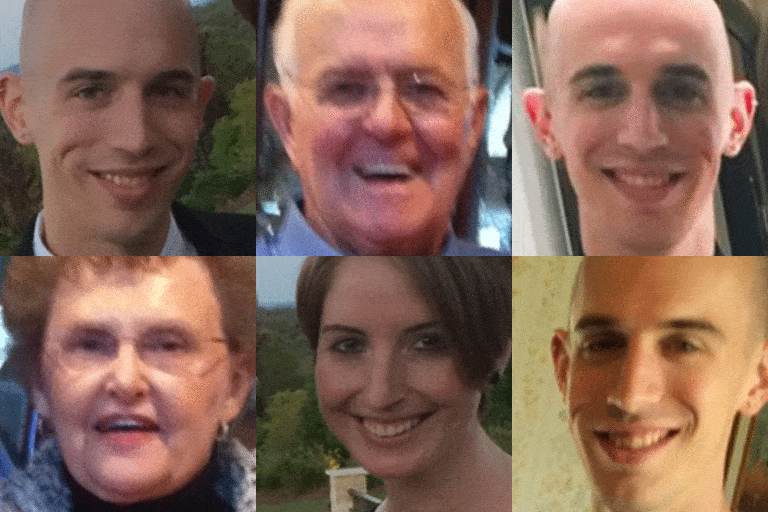
As you can see, the eye locations and face sizes are near identical for every input image.
What's next? We recommend PyImageSearch University.
86+ total classes • 115+ hours hours of on-demand code walkthrough videos • Last updated: January 2026
★★★★★ 4.84 (128 Ratings) • 16,000+ Students Enrolled
I strongly believe that if you had the right teacher you could master computer vision and deep learning.
Do you think learning computer vision and deep learning has to be time-consuming, overwhelming, and complicated? Or has to involve complex mathematics and equations? Or requires a degree in computer science?
That’s not the case.
All you need to master computer vision and deep learning is for someone to explain things to you in simple, intuitive terms. And that’s exactly what I do. My mission is to change education and how complex Artificial Intelligence topics are taught.
If you're serious about learning computer vision, your next stop should be PyImageSearch University, the most comprehensive computer vision, deep learning, and OpenCV course online today. Here you’ll learn how to successfully and confidently apply computer vision to your work, research, and projects. Join me in computer vision mastery.
Inside PyImageSearch University you'll find:
- ✓ 86+ courses on essential computer vision, deep learning, and OpenCV topics
- ✓ 86 Certificates of Completion
- ✓ 115+ hours hours of on-demand video
- ✓ Brand new courses released regularly, ensuring you can keep up with state-of-the-art techniques
- ✓ Pre-configured Jupyter Notebooks in Google Colab
- ✓ Run all code examples in your web browser — works on Windows, macOS, and Linux (no dev environment configuration required!)
- ✓ Access to centralized code repos for all 540+ tutorials on PyImageSearch
- ✓ Easy one-click downloads for code, datasets, pre-trained models, etc.
- ✓ Access on mobile, laptop, desktop, etc.
Summary
In today’s post, we learned how to apply facial alignment with OpenCV and Python. Facial alignment is a normalization technique, often used to improve the accuracy of face recognition algorithms, including deep learning models.
The goal of facial alignment is to transform an input coordinate space to output coordinate space, such that all faces across an entire dataset should:
- Be centered in the image.
- Be rotated that such the eyes lie on a horizontal line (i.e., the face is rotated such that the eyes lie along the same y-coordinates).
- Be scaled such that the size of the faces are approximately identical.
All three goals can be accomplished using an affine transformation. The trick is determining the components of the transformation matrix, M .
Our facial alignment algorithm hinges on knowing the (x, y)-coordinates of the eyes. In this blog post we used dlib, but you can use other facial landmark libraries as well — the same techniques apply.
Facial landmarks tend to work better than Haar cascades or HOG detectors for facial alignment since we obtain a more precise estimation to eye location (rather than just a bounding box).
If you’re interested in learning more about face recognition and object detection, be sure to take a look at the PyImageSearch Gurus course where I have over 25+ lessons on these topics.

Download the Source Code and FREE 17-page Resource Guide
Enter your email address below to get a .zip of the code and a FREE 17-page Resource Guide on Computer Vision, OpenCV, and Deep Learning. Inside you'll find my hand-picked tutorials, books, courses, and libraries to help you master CV and DL!

