Two weeks ago I interviewed Davis King, the creator and chief maintainer of the dlib library.
Today I am going to demonstrate how to install dlib with Python bindings on both macOS and Ubuntu.
I highly encourage you to take the time to install dlib on your system over the next couple of days.
Starting next week we’ll be diving head first into one of dlib’s core computer vision implementations — facial landmark detection.
I’ll be demonstrating how to use facial landmarks for:
- Face part (i.e., eyes, nose, mouth, etc.) extraction
- Facial alignment
- Blink detection
- …and much more.
But it all starts with getting dlib installed!
To learn how to install dlib with Python bindings on your system, just keep reading.
How to install dlib
Developed by Davis King, the dlib C++ library is a cross-platform package for threading, networking, numerical operations, machine learning, computer vision, and compression, placing a strong emphasis on extremely high-quality and portable code. The documentation for dlib is also quite fantastic.
From a computer vision perspective, dlib has a number of state-of-the-art implementations, including:
- Facial landmark detection
- Correlation tracking
- Deep metric learning
Over the next few weeks we’ll be exploring some of these techniques (especially facial landmark detection), so definitely take the time now to get dlib configured and installed on your system.
Step #1: Install dlib prerequisites
The dlib library only has four primary prerequisites:
- Boost: Boost is a collection of peer-reviewed (i.e., very high quality) C++ libraries that help programmers not get caught up in reinventing the wheel. Boost provides implementations for linear algebra, multithreading, basic image processing, and unit testing, just to name a few.
- Boost.Python: As the name of this library suggests, Boost.Python provides interoperability between the C++ and Python programming language.
- CMake: CMake is an open-source, cross-platform set of tools used to build, test, and package software. You might already be familiar with CMake if you have used it to compile OpenCV on your system.
- X11/XQuartx: Short for “X Window System”, X11 provides a basic framework for GUI development, common on Unix-like operating systems. The macOS/OSX version of X11 is called XQuartz.
I’ll show you how to install each of these prerequisites on your Ubuntu or macOS machine below.
Ubuntu
Installing CMake, Boost, Boost.Python, and X11 can be accomplished easily with apt-get :
$ sudo apt-get install build-essential cmake
$ sudo apt-get install libgtk-3-dev
$ sudo apt-get install libboost-all-dev
I assume you already have pip (for managing, installing, and upgrading Python packages) installed on your machine, but if not, you can install pip via:
$ wget https://bootstrap.pypa.io/get-pip.py
$ sudo python get-pip.py
After completing these steps, continue to Step #2.
macOS
In order to install Boost, Boost.Python, and CMake on macOS, you’ll be using the Homebrew package manager. Think of Homebrew as a similar equivalent of Ubuntu’s apt-get only for macOS.
If you haven’t already installed Homebrew, you can do so by executing the following commands:
$ /usr/bin/ruby -e "$(curl -fsSL https://raw.githubusercontent.com/Homebrew/install/master/install)"
$ brew update
Hint: You can check if Homebrew is already installed on your machine by executing the brew command in your terminal. If you get a brew: command not found error, then Homebrew is not installed on your machine.
Now that Homebrew is installed, open up your ~/.bash_profile file (create it if it doesn’t exist):
$ nano ~/.bash_profile
And update your PATH variable to check for packages installed by Homebrew before checking the rest of your system:
# Homebrew
export PATH=/usr/local/bin:$PATH
After updating your ~/.bash_profile file, it should look similar to mine:
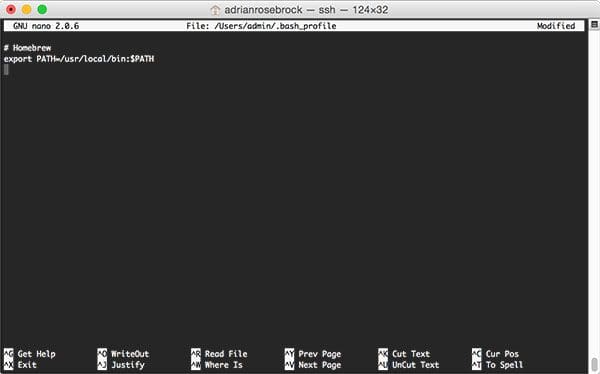
We now need to reload the contents of the ~/.bash_profile file via the source command:
$ source ~/.bash_profile
This command only needs to be executed once. Alternatively, you can open up a new terminal window which will automatically source the ~/.bash_profile for you.
Next, let’s install Python 2.7 and Python 3:
$ brew install python
$ brew install python3
We can then install CMake, Boost, and Boost.Python:
$ brew install cmake
$ brew install boost
$ brew install boost-python --with-python3
The --with-python3 flag ensures that Python 3 bindings for Boost.Python are compiled as well — Python 2.7 bindings are compiled by default.
Once you start the boost-python install, consider going for a nice walk as the build can take a bit of time (10-15 minutes).
As a sanity check, I would suggest validating that you have both boost and boost-python installed before proceeding:
$ brew list | grep 'boost'
boost
boost-python
As you can see from my terminal output, both Boost and Boost.Python have been successfully installed.
The last step is to install the XQuartz window manager so we can have access to X11. XQuartz is easy to install — just download the .dmg and run the install wizard. After installing, make sure you logout and log back in!
Fun Fact: XQuartz used to be installed by default on OSX 10.5-10.7. We now need to manually install it.
Now that we have our prerequisites installed, let’s continue to our next (optional) step.
Step #2: Access your Python virtual environment (optional)
If you have followed any of my PyImageSearch tutorials on installing OpenCV, then you are likely using Python virtual environments.
Using Python’s virtualenv and virtualenvwrapper libraries, we can create separate, independent Python environments for each project we are working on — this is considered a best practice when developing software in the Python programming language.
Note: I’ve already discussed Python virtual environments many times before on the PyImageSearch blog so I won’t spend any more time discussing them here today — if you would like to read more about them, please see any of my installing OpenCV tutorials.
If you would like to install dlib into a pre-existing Python virtual environment, use the workon command:
$ workon <your virtualenv name>
For example, if I wanted to access a Python virtual environment named cv , I would use the command:
$ workon cv
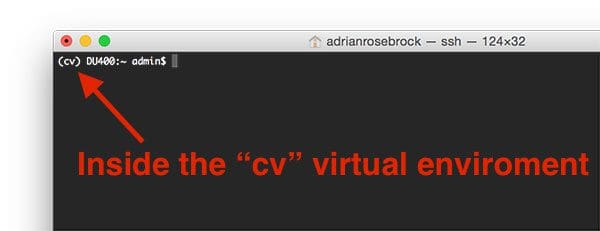
Notice how my terminal window has changed — the text (cv) now appears before my prompt, indicating that I am in the cv Python virtual environment:
Otherwise, I can create an entirely separate virtual environment using the mkvirtualenv command — the command below creates a Python 2.7 virtual environment named py2_dlib :
$ mkvirtualenv py2_dlib
While this command will create a Python 3 virtual environment named py3_dlib :
$ mkvirtualenv py3_dlib -p python3
Again, please keep in mind that using Python virtual environments are optional, but highly recommended if you are doing any type of Python development.
For readers that have followed my previous OpenCV install tutorials here on the PyImageSearch blog, please make sure you access your Python virtual environment before proceeding to Step #3 (as you’ll need to install the Python prerequisites + dlib into your virtual environment).
Step #3: Install dlib with Python bindings
The dlib library doesn’t have any real Python prerequisites, but if you plan on using dlib for any type of computer vision or image processing, I would recommend installing:
These packages can be installed via pip :
$ pip install numpy
$ pip install scipy
$ pip install scikit-image
Years ago, we had to compile dlib manually from source (similar to how we install OpenCV). However, we can now use pip to install dlib as well:
$ pip install dlib
This command will download the dlib package from PyPI, automatically configure it via CMake, and then compile and install it on your system.
Provided you have the CMake, Boost, Boost.Python, and X11/XQuartz installed on your system, the command should exit without error (leaving you with a successful dlib install).
I would suggest going out for a nice cup of coffee as this step can take 5-10 minutes for the compile to finish.
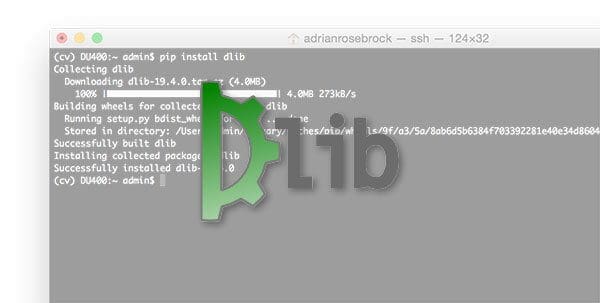
After coming back, you should see that dlib has been successfully installed:
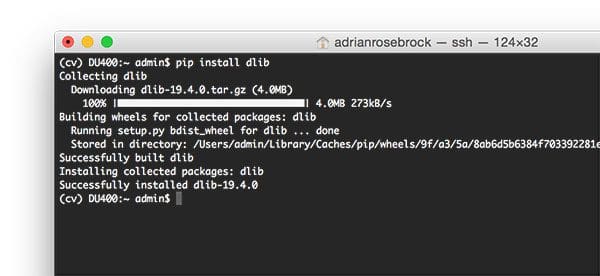
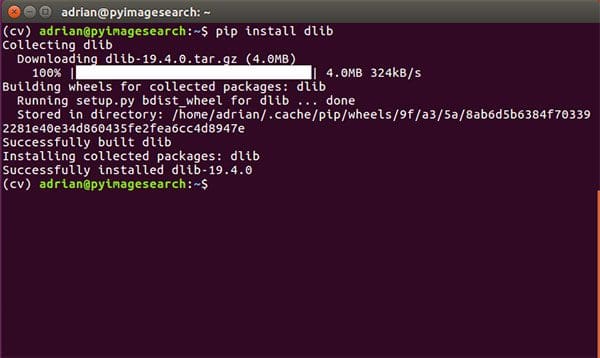
The same goes for my Ubuntu install as well:
Step #4: Test out your dlib install
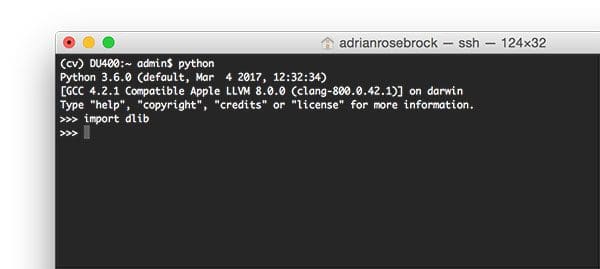
To test out your dlib installation, just open up a Python shell (making sure to access your virtual environment if you used them), and try to import the dlib library:
$ python
Python 3.6.0 (default, Mar  4 2017, 12:32:34)
[GCC 4.2.1 Compatible Apple LLVM 8.0.0 (clang-800.0.42.1)] on darwin
Type "help", "copyright", "credits" or "license" for more information.
>>> import dlib
>>>
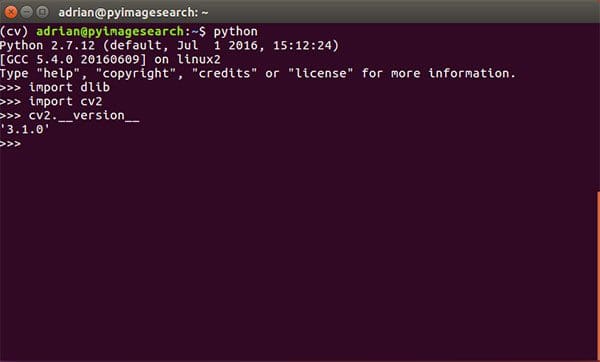
If you’ve installed dlib into the same Python virtual environment that you installed OpenCV, you can access OpenCV as well via your cv2 bindings. Here is an example on my Ubuntu machine:
$ python
Python 2.7.12 (default, Jul  1 2016, 15:12:24)
[GCC 5.4.0 20160609] on linux2
Type "help", "copyright", "credits" or "license" for more information.
>>> import dlib
>>> import cv2
>>> cv2.__version__
'3.1.0'
>>>
Congratulations, you now have dlib installed on your system!
What's next? We recommend PyImageSearch University.
86+ total classes • 115+ hours hours of on-demand code walkthrough videos • Last updated: February 2026
★★★★★ 4.84 (128 Ratings) • 16,000+ Students Enrolled
I strongly believe that if you had the right teacher you could master computer vision and deep learning.
Do you think learning computer vision and deep learning has to be time-consuming, overwhelming, and complicated? Or has to involve complex mathematics and equations? Or requires a degree in computer science?
That’s not the case.
All you need to master computer vision and deep learning is for someone to explain things to you in simple, intuitive terms. And that’s exactly what I do. My mission is to change education and how complex Artificial Intelligence topics are taught.
If you're serious about learning computer vision, your next stop should be PyImageSearch University, the most comprehensive computer vision, deep learning, and OpenCV course online today. Here you’ll learn how to successfully and confidently apply computer vision to your work, research, and projects. Join me in computer vision mastery.
Inside PyImageSearch University you'll find:
- ✓ 86+ courses on essential computer vision, deep learning, and OpenCV topics
- ✓ 86 Certificates of Completion
- ✓ 115+ hours hours of on-demand video
- ✓ Brand new courses released regularly, ensuring you can keep up with state-of-the-art techniques
- ✓ Pre-configured Jupyter Notebooks in Google Colab
- ✓ Run all code examples in your web browser — works on Windows, macOS, and Linux (no dev environment configuration required!)
- ✓ Access to centralized code repos for all 540+ tutorials on PyImageSearch
- ✓ Easy one-click downloads for code, datasets, pre-trained models, etc.
- ✓ Access on mobile, laptop, desktop, etc.
Summary
In today’s blog post I demonstrated how to install the dlib library with Python bindings on Ubuntu and macOS.
Next week we’ll start exploring how to use dlib; specifically, facial landmark detection.
You won’t want to miss this tutorial, so to be notified when the next post is published, be sure to enter your email address in the form below!
See you next week!

Join the PyImageSearch Newsletter and Grab My FREE 17-page Resource Guide PDF
Enter your email address below to join the PyImageSearch Newsletter and download my FREE 17-page Resource Guide PDF on Computer Vision, OpenCV, and Deep Learning.


Can you install dlib on Windows? If so, how?
Please see my reply “Anoynmous” below.
How to install dlib on windows10 for python 3.7,
is it necessary to install anaconda and visual studio in order to install dlib? if so please guide how to install them.
I have python 3.7.1 and pycharm installed .
Hey Manasa — I do not support Windows on the PyImageSearch blog. I would suggest you use a Unix-based machine such as Linux or macOS for computer vision/deep learning.
Download the latest ” .whl ” file from ” https://pypi.org/simple/dlib/ ” and just do ” pip install filename.whl “
Hello Adrian,
Thanks for sharing this amazing and exciting C++ library. Kindly advice the right/stable version of Ubuntu to install.
I’ve personally tested these instructions with both Ubuntu 14.04 and 16.04. Both work.
Hi Adrian,
Will pip also install the tool for bounding box annotation?
If anyone’s interested in installing dlib the compile or pip way on Raspberry Pi, remember to increase your swap memory in “/etc/dphys-swapfile”
Cheers,
Tom
Unfortunately, no. For that you will need to compile dlib from source.
Hi
How much you recommend to increase the memory? it doesn’t work on default
(I have your built raspberry pi image)
You can increase memory on the Raspberry Pi by decreasing memory allocated to the GPU via
raspi-config.I also had the MemoryError problem installing scipy on my Pi 3.
Using pip’s –no-cache-dir switch allowed the install to complete 0k.
It might be worth adding that to your excellent instructions.
Hey Brian — I’m actually doing an entirely separate tutorial for installing dlib on the Raspberry Pi next week (1 May 2017). It will include a few additional tips to help get dlib installed on the Pi.
You might want to look at my post today about getting dlib to install. It has taken me about 3 days to get openCV and dlib installed but I’m there now.
Is it possible to install this on a Raspberry Pi?
Yes, absolutely. Ubuntu and Raspbian are Debian-based so you can actually use the Ubuntu instructions to install dlib on your Raspberry Pi.
Adrian, I keep getting errors when I try to install scikit-image on my Raspbian. How to fix?
What is the error you are getting? Without knowing the error, it’s impossible to provide any help or insight.
Thanks a lot. Was having trouble installing. looking forward to some tutorials with dlib
Thanks Simba — and congrats on getting dlib installed.
Can we have a same installation process for windows also please.. Struggling a lot for it.
I do not have any plans to create a Windows install tutorial nor support Windows on the PyImageSearch blog. Please refer to dlib official site for Windows instructions. When it comes to learning computer vision (or most advanced science techniques), I would encourage you to use a Unix-based system.
Wow, that’s not exactly helpful. I guess now ‘I do not have any plans’, either…to spend my money on your products.
I wish I could offer Windows support, but there are honestly too many logistical issues. I offer almost 200 free tutorials here on the PyImageSearch blog. I hope you enjoy them. If you don’t want to purchase any of the teaching products here on PyImageSearch, you don’t have to — no one is asking you to or forcing you to. Enjoy the content and I hope it helps you on your computer vision journey. But please keep in mind that I am just one person and there are limitations to what I can provide. I’ve found that Unix-based environments are the most useful when building computer vision applications (the exception being if you want to build a Windows app, of course). If you have a Windows-specific question, I am not the right person to ask.
How did you find it in yourself to reply so politely to that comment?
I assume that everyone, including myself, has a bad day from time-to-time. I’m not sure what is going on in their life and what other pressures outside of computer vision (work, school, family, etc.) could be happening with them. I could be rude/mean in return but there is already enough of that in the world. I let it slide and move on with my day. If that person was being a “hater”, okay, I can’t change their mind. Otherwise, they could be having a bad day and who am I to judge 🙂
Have you concidered adding an extra HD to your system and making it dual bootable with Ubuntu nstalled aside your windows installation ?
This is what I did…
Hello, why don’t you work on a virtual machine ? I am doing so on my Mac, all the Python stuff works much better on a Linux 16.04 LTS VM on VirtualBox. Both products are free, you can get VirtualBox from https://www.virtualbox.org/wiki/Downloads.
Just install it on your Windows system, create or download (http://www.osboxes.org/ubuntu/) the Ubuntu VM and than follow the directions given by Adrian. Everything is described step by step, its a breeze.
You don’t know tech then. Windows != “tech”. So, no one really develops tutorials for Windows. Half broken, ill matched binaries aren’t exactly dev friendly. You not only made the wrong choice with Windows, but you are also abusive to Adrian. I personally have spoken to him on several occasions, he’s very helpful and doesn’t deserve your statements.
Hi Adrian,
Great post!
I have a nice idea for you.
Why don’t you show how to use DLib to learn the 194 Facial Landmarks of the HELEN database (Remember to augment the database by mirroring the images)?
It would be great and will create a new trained predictor for the users of DLib.
Thank You.
The dlib library ships with a facial landmark detector? Are you asking me to demonstrate how to train that detector from scratch? Keep in mind that most of the dlib functionality doesn’t have Python bindings, only C++.
Hi Adrian,
Yes, I was talking about training it for a new job.
My idea was 194 Points of the HELEN database.
Thank You.
Thanks for a great post again!
I had installed dlib a few days back. I am working in a virtual environment using Anaconda and my experience was that there were a few incompatibilities between the boost in anaconda repository and dlib from pip.
After toiling for a few days, was able to get dlib working with Anaconda. Had to setup dlib and boost from source.
So if any one is facing difficulty in working with Anaconda and dlib, I might be able to help.
Adrian, I am eagerly waiting for your future posts on dlib. Thanks!
Congrats on getting dlib installed Michael. And thank you for being willing to help Anaconda users.
Good to know. I had Anaconda and couldn’t get dlib going due to a boost problem. Finally, simply re-installed Ubuntu from scratch; after that dlib installed OK per instructions here.
Hi Michael
Can you please help me in installing dlib in anaconda environment in windows.
I am getting error after trying every option – “Could NOT find Boost”. please help.
hey man, i do have a problem installing dlib on anaconda 3 , what did you do?
when i try to install dlib on anaconda its showing some conda http error …could ypu please just me some solution.
Double-check that you are indeed connected to the internet before trying to download and install the package. Also validate that your DNS is working properly.
Thanks Adrian. I installed dlib – on Linux 16.04 – no issues at all.
Look for ward to facial landmark detection
Congrats on getting dlib installed Murthy, nice job!
Dear Adrian,
Thanks a ton man. Just struck the Ubuntu + OpenCV + Python + Dlib installation and configuration in one go. It’s just because of you.
Regards
Neeraj Kumar
Thank you for the kind words Neeraj — and congratulations on getting dlib installed.
Straightforward install due to the very clear instructions, also on Ubuntu 16.04. Thanks Adrian
Thank you Tony!
Great post!!
Very well explained!!
Thanks Yash! 🙂
I’m getting “Segmentation fault: 11” when importing dlib in python3 in my Mac =/
99.9% of the time you’ll see a segmentation fault error when you try to import dlib into a different version of Python than it was compiled against. I would suggest compiling dlib from source rather than using pip.
Hello Adrian,
I am trying to install dlib library on raspberry pi 3.
The commands in step 3 to install three packages were failed; installed them using sudo apt-get command.
In the last step “pip install dlib”, it is stuck there (It was also happened with the three packages installation commands) like:
$ pip install dlib
Collecting dlib
Using cached dlib-19.4.0.tar.gz
Building wheels for collected packages: dlib
Running setup.py bdist_wheel for dlib … /
please guide us
The install is likely not “stuck”. It can take 10 minutes to install dlib on a standard laptop/desktop. On a Raspberry Pi this number can jump to an hour. If you run
topyou’ll see that your system is busy compiling dlib.i am working on raspberry pi too. It took about 4-5 hours to finish
Hello Adrian,
I followed this tutorial to install dlib in python. Everything was going smoothly until the time of installing dlib. When i ran the command “pip install dlib” it gives two error “Failed building wheel for dlib” and “error: cmake configuration failed!”.
What could be the reason behind this?
Thanks in advance.
It sounds like the internal CMake script could not configure dlib correctly. Did you install all the dependencies without error? You have might to resort to compiling dlib from source.
i tried over and over , while install dlib it failed at %79 building cxx…..
cmake build failed.
Which operating system are you trying to compile dlib on?
raspi 2 – raspian 4.4.50-v7+ – python 2.7.x – opencv 3 – virtualenv cv
i tried on your pre-installed package for raspi and i get same error again.
I’m writing a tutorial dedicated to installing dlib on the Raspberry Pi. It will go live at the end of this month. The tutorial will resolve any issues installing dlib on the Raspberry Pi.
Hello, Adrian Rosebrock
your blog help me a lot, thanks, and let me help others
for how to install dlib on windows
1. install python 3.5 32bit, can be download here
https://www.python.org/downloads/release/python-353/
2.download dlib from here
https://pypi.python.org/pypi/dlib/18.17.100
select “dlib-18.17.100-cp35-none-win32.whl (md5)”
last, run pip install dlib-18.17.100-cp35-none-win32.whl
it success from my 32bit win7
Thanks for sharing!
Installing DLIB was hanging my RPi 3 (1Gb ram).
I’ve been struggling with this for a couple of days trying to play catchup with your emails. I’d love to know your config which allows it to install in 10 minutes. I’m sure it’s to do with swap size or zRAM (I haven’t tried this)
Today I increased the size of the dphys-swapfile to 1Gb and moved it (temporarily) onto a USB hard drive. The Raspian default is 100Mb on the SD card! Of course a 100Mb swap file on an SD card is going to ‘wear out’ the SD card if a lot of swapping takes place.
Anyway, whilst running the ‘pip install dlib’ command I also fired off top – ‘swap used’ peaked at 500Mb so far – no wonder it hung with the default swap setting. I noted that my Pi is a lot more responsive to user input during the install having done this (previously I had to pull the plug to get it back)
.
Yay, the install has just this second completed without error – and probably in less than 20 minutes (I didn’t time it exactly)- now to follow your blog.
Having done that I’ll now restore the original swapfile and reboot.
For others with similar hanging issues this is what I did (after a few hours of web searching).
1 find a USB powered hard drive (I had a Philips 300Gb not doiung anything) and plug it in.
2 note mount path (something like /media/pi/philips in my case)
3 sudo nano /etc/dphys-swapfile
set the following values :-
CONF_SWAPFILE=/media/pi/philips/swap (use your own values)
CONF_SWAP_SIZE=1024
save and exit
4 issue these commands
sudo /etc/init.d/dphys-swapfile stop
sudo /etc/init.d/dphys-swapfile start
5 install dlib with the ‘pip install dlib’ command
6 when completed restore your /etc/dphys-swapfile settings
7 re-run the commands at step 4
Now you can dismount the usb drive and use it for some other purpose.
Note I also made another post about using –no-cache-dir when installing scipy
When my Pi camera turns up I can get now on with facial feature recognition.
Oh, and one last recommendation. Having suffered so many hiccups on the route I took the precaution of imaging my SD card after each major stage. I use Win32DiskImager for that.
Hi Brian — I’m actually detailing an entire blog post dedicated to installing dlib on the Raspberry Pi. It’s already written and set to publish on Monday, May 1st at 10AM EST. It makes use of swap settings similar to yours. You actually don’t even need the external drive if you increase your swap file size.
I installed dlib but how can I install Sym-link with in OpenCV and with in Keras_tf. I mean I installed
1. dlib (virtual environment)
2. keras_tf (virtual environment)
3. OpenCV
It would be nice to have Sym-link with all of them.
You would need to find the location to your
cv2.sofirst. Normally it would be in/usr/local/lib/python2.7/site-packages/cv2.so, but you’ll want to check on your own machine first.From there, change directory to your
site-packagesdirectory of the virtual environment and then sym-link in OpenCV:How to implement the paper “Max-Margin Object Detection” based on Structured SVM by Python, which is written by Davis King? Can you give a example in your blog?Maybe, it is a good topic for your course!
The method is already implemented inside the dlib library. I would suggest looking at the dlib source code if you’re interested in the algorithm itself.
I am using Raspberry Pi 3 and when i installed dlib it only worked on Python 3.4 and it doesn’t work on Python 2.7.
I want it to work on Python 2.7 because when i type “import cv” on Python 3.4 i get an error because there is no module named ‘cv’, while on 2.7 i can import cv.
Thank you!
This sounds like an issue with your Python virtual environments. Please refer to this blog post where I provide instructions on how to install dlib on the Raspberry Pi.
Hi Adrian,
Appreciate your blog on installing the dlib library. I do wish to ask you of an error as when I am installing the dlib it gets stuck while compiling the trainer.cpp as a result the installation of the dlib freezes.
I read on stackoverflow that we have to manually compile the cpp examples? I am running on py2.7.9 virtual env. Any suggestions would be helpful.
Which operating system/hardware are you trying to compile dlib on?
I am running it on raspberry pi 3 : Raspbian GNU/ Linux 8 (jessie).
Please use this tutorial to install dlib on your Raspberry Pi.
I installed dlib in Ubuntu 16.04 following this guide and it works perfectly. Thanks for that!
My problem is that face detection is a really slow process and I want to speed-it up by activating the support for AVX extensions but I don’t know how to modify the cmake in order to recompile it as initially I just did it through pip(pip install dlib).
Congrats on getting OpenCV installed Ampharos, nice job!
As far as face detection goes, you’ll want to compile dlib from source rather than a
pipinstall. I’ll be covering how to speedup the dlib library for face detection and facial landmarks in a future blog post.Hi,
I perfromed all the steps but it is not mapping to cv environment like No module cv2 in the python dlib can you please suggest me
Please see the other comments in this post. You need to sym-link your
cv2.sobindings into the Python virtual environment you used for dlib.My raspberry frezzee when installing dlib :((
Hey Damian — please use this blog post to install dlib on your Raspberry Pi.
Can I install dlib using anaconda? I am using conda environment variable but running into many issues one after another.
this: http://dlib.net/faq.html#Whywon'tthePythonbindingscompilework
says to uninstall , but anaconda has many things. Is it wise to uninstall it?
I have never used Anaconda to install dlib, I am not sure. I would suggest asking on the official dlib forums.
hi Ardian,
thanks for your great tutorials. I followed this one on my macbook on Sierra, and succeeded in compiling without errors. However, when I import dlib in python3.6, I get an error: illegal instruction: 4. Could it be my processor is not up yo this?
It sounds like you compiled dlib against a different Python version than you imported it into. Double-check your Python versions and ensure you use the same Python and pip for both install and import.
Hello,
Thank you for this great work. These are the great tutorials to start with.
However, reading the comments made it clear you have less idea to install dlib on Windows.
I’ve installed cmake, boost using pip and installed boost-python using gohlke’s libraries ( http://www.lfd.uci.edu/~gohlke/pythonlibs/#boost.python ) but cannot figure out about X11.
Can you help me with this one only.
Would be a great help as a beginner.
I’m using Win 10 and Python 2.7
Hi Arpit — thanks for the comment; however, I do not support Windows here on the PyImageSearch blog. I highly recommend that you a Unix-based environment such as Linux or macOS to study computer vision.
Great tutorials Adrain! I’ve installed dlib for ubuntu 14.04 as described above but run into the following error when I try to import the module: ImportError: libpng16.so.16: cannot open shared object file: No such file or directory. The package is not on my system (dpkg -L libpng16-16, returns an error) but I can’t seem to install the package (sudo apt-get install libpng16-16, is unable to locate the package). I’m new to ubuntu but I feel like I’m missing something very basic. Thanks!
Hi Andy — I’m sorry to hear about the issues installing dlib. The issue is related to your libpng library not being found. I would search your system install for any libpng library install. You may need to install it via “apt-get”. Then re-install dlib.
Hey Adrian,
Great content and awesome course. I’m trying to install dlib to test drive CV before enrolling in your course. However, it has been more than a week trying to install dlib with no luck. I followed the instructions in this blog and it looks like everything has been installed successfully. However, when I try to import dlib I get this error: https://udemy-images.s3.amazonaws.com/redactor/raw/2017-09-06_07-12-54-98f753ccbf8d8d562631b72afadb4417.png
Any help is really appreciated. I really want to enjoy your awesome course after fixing this blocker.
Hi Mohamed — this seems like it might be an Anaconda-related issue. I have not used Anaconda in awhile so I unfortunately cannot replicate the error. Can you please try on a different system that uses the instructions I’ve detailed in this post (i.e., without Anaconda)?
Secondly, you’re default Python is Python 3, but your error is due to a mismatch in versions. Again, I think this is an Anaconda issue messing up your Python PATH. If you’re using Homebrew on top of this as well it would only further make the issue as well.
For what it’s worth I offer pre-configured VMs with dlib pre-installed inside my courses, so definitely don’t let this blocker hold you back!
Thanks for your reply, Adrian!
Do you think if I use virtual environment and go through the instructions this could solve the problem?
If you were to skip using Anaconda and use virtualenv/virtualenvwrapper as I suggest in this tutorial I think it would resolve the issue you are having.
Hi Adrian,
Thanks for this amazing tutorial. I followed this tutorial for Ubuntu 16.04 and Python 3.5 without any errors. However when I try to “$ pip install dlib” I get following error –
Cmake build failed!
Here is the complete error list – https://pastebin.com/VbM6yHJN
Can you please help me?
Based on your output it seems that your system killed the compile, likely due to running out of memory. How much RAM does your system have?
I’m using it on VM Ware 2012 and my system have 8 GB of RAM.
How much RAM did you allocate to your virtual machine?
Hi Adrian.
Do we need to do any extra setup for GPU support of dlib?
You need to have the cuDNN and CUDA dev kit installed. To quote Davis King, the creator and maintainer of dlib: “When you compile it will print messages saying what it’s doing. It will say something like “Using CUDA” or that it’s not using CUDA because you are missing cuDNN or the CUDA dev kit.
So, by default, it will use the GPU unless you don’t have the CUDA tooling installed. If that’s the case it will print out messages that clearly indicate that’s happening and tell you what to do fix it.”
Hi,
I am trying to install opencv and dlib on my macbook using homebrew. However, I am facing the following error with dlib and I struggle to find a solution to this. Does anyone know how to fix this? Thanks.
David
>>> import dlib
Traceback (most recent call last):
…
from .dlib import *
ImportError: dlopen(/usr/local/lib/python2.7/site-packages/dlib/dlib.so, 2): Library not loaded: @rpath/libmkl_rt.dylib
Referenced from: /usr/local/lib/python2.7/site-packages/dlib/dlib.so
Reason: image not found
I’d recommend that you install
dlibwith pip (not brew):pip install dlib.hi adrian,
thanks for running such an excellent blog. it is quite useful for college like students like me.
I use an ubuntu system (16.04.3) and my query is not exactly related to dlib, but another problem I am facing during its installation, which I hope you can clarify.
i have a problem of unmet dependencies when installing libboost-all-dev. hope you can you help me resolve that issue
Thanks a lot.
Hey Akash — have you installed libboost on your system yet? Make sure you run:
$ sudo apt-get install libboost-all-devHi Adrian
I am Valentin
Thank you for this useful tutorial, mostly for students like me who are doing differents school or DIY projects…
I have bee able to install Open CV 3.0.0 successfully in my Raspberry Pi 3 Model B just by following the steps you gave in the other tutorial and now I’m working one the face and eyes recognition and I’m stuck in the installation of dlib: when I try to enter the command “pip install scipy” it does not download and give an error “memory error” And then when I try to enter the command with “pip –no-cache-dir install scipy” then it downloads the scipy-1.0.0.tar.gz (15.2MB) and it gets stuck at “Running setup.py install for scipy …\ ” for hours and hours, over 8 hours…
I hope you acn help me to solve this issue.
Thank you
Hey Valentin — I don’t think your Pi is “stuck”, it’s just compiling SciPy. Take a look at the output of
topto validate that the compile is running.Hi adrian
Great tutorial!! thumbs up ..
I am having a problem in installing dlib on Mac OS x
i am getting following error:
error: cmake configuration failed!
i have installed everything correctly but still getting error!! need help!!
If CMake is reporting “configuration failed” then there was a problem configuring the build. Scroll up through the CMake output and find where the error occurred as it will give you more information.
Hi Adrian:
after so many try error
i finally install dlib success!!
environment:
ASUS laptop
vmware workstation 14 player
ubuntu 16.04
vm guest (mem 1024mb install dlib so many strange issue)
vm guest (mem 2048mb install dlib success!)
vmware workstation player vm guest create default 1024MB , i change set to 2048MB
all strange issue gone install dlib succes
Congrats on getting dlib installed, Alex! 🙂
I am getting an import error while importing dlib in some python script as -ImportError: No module named dlib. Can you help me solve this.
Hey Pranesh — I’m not sure what the exact error is in this case but I would recommend following this updated guide on installing dlib.
Hi Adrian, I tried to work with dlib on your virtual machine, and tried to install it via this post and also tried the updated post on installing dlib. But I’m still getting “No modile named dlib” when trying to import dlib. I’ll appreciate if you can help me. Thanks
Hey Mojtaba — did you install dlib into the Python virtual environment included with the VM? Additionally, I just published a brand new dlib install tutorial that may be easier to follow and get up and running.
Hi Adrian, Thanks very much. Yes I’m trying these on py3cv3 virtual environment with your VM. And I have also followed that post as well but still couldn’t import dlib and get “No module named dlib”
That is indeed quite strange. Can you confirm that “pip install dlib” finished with an error? In these situations the pip install could have errored out and then the dlib library would not be installed.
Hello. I found a link that installs Dlib (on Windows) without going through the installation of prerequisites and previous steps. Here is the link :
The installation was successful for me and I managed to do ” import dlib ” without error. But I wanted to know if this installation on Windows is correct or if I absolutely have to go through all the steps described above?
https://github.com/charlielito/install-dlib-python-windows
I also have another question. I use Python 2.7 and OpenCV version 2.4.13.3 and I saw on your screenshots that you use other versions of Python and OpenCV. I wanted to know if my versions allow to work later for the detection of the eyes and the face.
Thank you
It’s been a long time since I’ve used Windows so I’m not sure on the answer to your first question. Hopefully another PyImageSearch reader can chime in here.
As for detecting eyes and faces, OpenCV 2.4 will work provided you’re using Haar cascades. If you want to use pre-trained deep neural network for face detection you’ll need at least OpenCV 3.3.
Hi Adrian,
Thanks for such great tutorial.
I got error after installation of dlib.
dlib was compiled to use SSE41 instructions, but these arent available on your machine.
That sounds like a warning rather than an error. Can you still import dlib into your shell/Python scripts and execute the code?
Hi Adrian how time will taken to install Dlib on rasberry pi3
I don’t have the exact timings on me but the last time I installed dlib on a Pi 3B+ it did take a few hours.
please how install dlib in fedora server ?
Sorry, I don’t have any tutorials for Fedora.
Hi adrian, so my quuestion is about how can i install dblib on a Jupyter Notebook or a Google Collaboratory. Thanks
Hi Adrian, during these days (…) I found time to learn some Linux with Ubuntu and I could remember about dlib. I had Windows at that time and so, pretty impossible to access.
I have on my Ubuntu the cv4, is there any problem with dlib or it is ok? I would like to avoid to waste time and find then some problems related to the version of cv. Thank you for you feedback.
“brew install boost-python –with-python3” is not working anymore. Consider updating to: “brew install boost-python3” as stated here: https://github.com/Homebrew/homebrew-core/issues/24369