Updated: September 16th, 2019
Ever since I wrote the first PyImageSearch tutorial on installing OpenCV + Python on the Raspberry Pi B+ back in February 2015 it has been my dream to offer a downloadable, pre-configured Raspbian .img file with OpenCV pre-installed.
Since November 2016 (the original publish date of this post), this dream has been a reality.
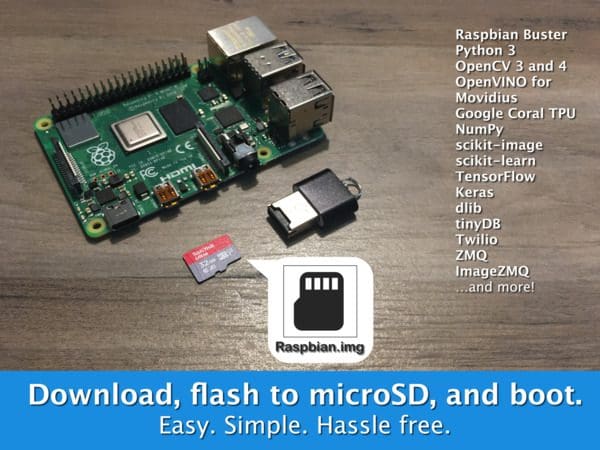
I am pleased to announce that the following products ship with my downloadable Raspbian .img files pre-configured and pre-installed:
- Practical Python and OpenCV (Quickstart and Hardcopy Bundles)
- Raspberry Pi for Computer Vision (Hobbyist, Hacker, and Complete Bundles)
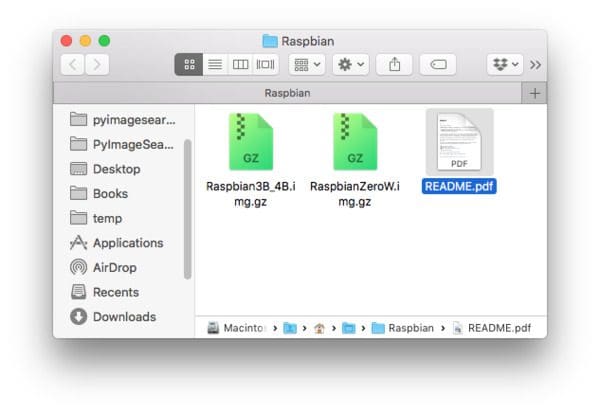
There are two files included:
Raspbian3B_4B.img.gz(compatible with RPi 3B, 3B+, 4B [1GB, 2GB, and 4GB models])RaspbianZeroW.img.gz(compatible with Pi Zero W)
All you have to do is download the .img files, flash the appropriate one to your SD card using BalenaEtcher, and boot your Pi.
From there, you’ll have a complete Python + OpenCV development environment at your fingertips, all without the hassle of configuring, compiling, and installing OpenCV.
To learn more about the Raspbian .img files, keep reading.
Raspbian Buster + OpenCV 4 out-of-the-box
I went back to my recent tutorials on installing OpenCV on the Raspberry Pi and computed the amount of time it takes to perform each step.
You know what I found?
Even if you know exactly what you are doing it can take significant time to compile and install OpenCV on your Raspberry Pi:
- Over 55 minutes on the Raspberry Pi 4B
- Over 2.2 hours to compile the Raspberry Pi 3B+.
- Over 14 hours to compile on the Raspberry Pi Zero W
In the past, I’ve emailed a sample of novice readers who successfully installed OpenCV on their Pi and asked how long it took them to complete the compile and installation process.
Perhaps not surprisingly I found the amount of time for novice readers to install OpenCV on their Raspberry Pi 3B+jumped nearly 4x to over 8.7 hours (even longer for the Zero W). I haven’t conducted a similar survey for the Raspberry Pi 4, but my guess is that it would take most people about 4 hours to configure their Raspberry Pi 4.
Clearly, the barrier to entry for many PyImageSearch readers trying to learn OpenCV and computer vision is getting OpenCV itself installed on their Raspberry Pi.
In an effort to help these readers get the most out of their Raspberry Pi, I have decided to release my own personal Raspbian .img files that have OpenCV pre-configured and pre-installed.
By bundling the pre-configured Raspbian .img together with either (1) Practical Python and OpenCV, and/or (2) Raspberry Pi for Computer Vision my goal is to:
- Jumpstart your computer vision education by skipping the tedious process of installing OpenCV + Python on your Raspberry Pi.
- Provide you with a book with the best introduction to the world of computer vision and image processing that you can possibly get.
Of course, I will continue to create, support, and provide help to any PyImageSearch reader who is using the many free tutorials I offer on installing OpenCV + Python on the Raspberry Pi.
Again, this pre-configured Raspbian .img is intended for PyImageSearch readers who want to save time and jumpstart their computer vision education.
If this doesn’t sound like you, no worries, I totally understand — I’ll be still be providing free tutorials to help you get OpenCV up and running on your Raspberry Pi. Just keep in mind that customers of mine receive priority support from me (while you’re on that page be sure to check out my other FAQs).
Raspbian Buster + OpenCV 4 pre-configured and pre-installed
The rest of this document describes how to install and use the Raspbian pre-configured .img file included in your purchase of either:
- Practical Python and OpenCV (Quickstart and Hardcopy Bundles)
- Raspberry Pi for Computer Vision (Hobbyist, Hacker, and Complete Bundles)
At the end of this guide, you’ll also find answers to frequently asked questions regarding the Raspbian + OpenCV .img file. If you have a question that is not covered in FAQ, please send me a message.
Download and unpack the archive
When you receive the link to your purchase, be sure to download the book, code, videos, and Raspbian. Each file is in the form of a .zip. The Raspbian.zip contains the preconfigured images and a README.txt file.
Go ahead and unzip the files using your favorite unarchiving utility (7zip, Keka, etc.). There is no need to extract the included .gz files since we will flash with them directly.
After you unzip Raspbian.zip your folder should look like this:
Write OS image to a 32GB microSD card using BalenaEtcher
This Raspbian .img will work only on 32GB microSD cards. The .imgs are too large for 8GB or 16GB cards. To my knowledge, the Raspberry Pi does not support 64GB+ microSD cards.
I recommend the high quality Sandisk 32GB 98MB/s cards. They are available at Amazon and many online distributors.
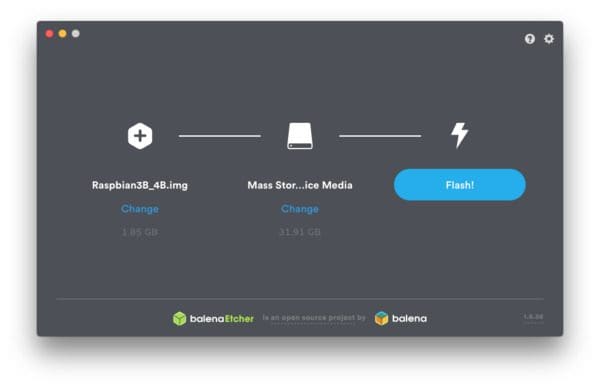
To write the pre-configured Raspbian .img to your card simply follow the official Raspberry Pi documentation. The recommended tool is BalenaEtcher (compatible with Mac, Linux, and Windows).
BalenaEtcher can handle compressed files such as .gz (no need to extract the .img.gz before loading into Etcher).
Booting your Pi for the first time
After writing the the Raspbian .img to your card, insert the card into your Pi and boot it up.
The username is pi and the password is raspberry.
On the first boot, your Raspbian filesystem needs to be expanded to fit the SD card.
This means that you have to run raspi-config => Advanced => Expand Filesystem manually.
After the expansion has completed your Pi will reboot and you will be able to use it as normal (the expansion of the filesystem is only necessary on the first boot).
Here is a screenshot of the disk utilization on my Pi after it has been auto-expanded:
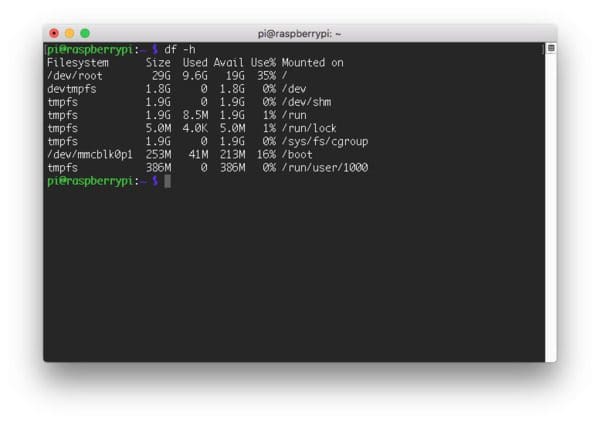
Notice that my entire 32GB card is available and 35% is in use.
Default WiFi
By default, your Raspberry Pi will attempt to connect to a network named pyimagesearch with passphrase computervision .
This is useful if you are in a pickle:
- Maybe you just flashed your microSD and you need to get connected quickly.
- Perhaps you aren’t near your typical wireless and you want to hotspot your phone so that your Pi and laptop connect through your phone’s wireless network. Works with iPhone and Android.
- Maybe you forgot your keyboard/mouse/HDMI screen and you need to do everything via SSH and VNC, but you can’t easily connect to your Pi at the moment. Refer to this tutorial about remote development and connectivity with your Raspberry Pi.
We’ve used this method to get connected many times in the field. It is convenient, but it is a security risk. While we do not recommend using this wireless network long term since this password is public (in nearly all deployment applications you should delete the network + password from your Pi), it is a great way to get connected if you just flashed a microSD. We also recommend changing the default password associated with the username of your Raspberry Pi.
Using Python and OpenCV on your Raspberry Pi
In order to gain access to OpenCV 4 (and OpenCV 3) with Python 3 bindings we leverage Python virtual environments. Each Python virtual environment is totally independent from one another ensuring there are no dependency or versioning issues.
In the remainder of this section, I explain (1) what Python virtual environments are and (2) how to access the Python 3 + OpenCV 3/4 environments.
What are Python virtual environments?
At the very core, Python virtual environments allow us to create isolated, independent environments for each of our Python projects. This implies that each project can have its own set of dependencies, regardless of which dependencies another project has.
In the context of OpenCV, this allows us to have one virtual environment for OpenCV 4 and then another virtual environment for OpenCV 3. Furthermore, we can have Intel OpenVINO and Google Coral virtual environments.
For a detailed look at Python virtual environments please refer to this tutorial.
Python 2.7 support is deprecated
On January 1, 2020, Python.org will no longer be updating Python 2.7 (that goes for security updates too). Read Python 2.7’s sunset announcement here.
PyImageSearch officially no longer supports Python 2.7. All future code is Python 3-compatible only.
What virtual environments are on the .imgs?
The Raspberry Pi 3B/3B+/4B .img contains the following environments:
py3cv4: Python 3.7 and OpenCV 4.1.1py3cv3: Python 3.7 and OpenCV 3.4.7openvino: Python 3.7 and OpenCV 4.1.1-openvino (OpenVINO is an Intel deep learning + hardware-optimized toolkit by Intel)coral: Python 3.7 and OpenCV 4.1.1gopigo: Python 3.7 and OpenCV 4.1.1
The Raspberry Pi Zero W .img contains the following environments:
py3cv4: Python 3.7 and OpenCV 4.1.1py3cv3: Python 3.7 and OpenCV 3.4.7
Accessing a virtual environment
There are two ways to access our virtual environments on the Raspbian .imgs.
Option 1: Use the workon command
If, for example, you desire to use the Python 3 + OpenCV 4.1.1 environment simply use the workon command and the environment name:
$ workon py3cv4
(py3cv4) $
Notice that the bash prompt is then preceded with the environment name in parentheses.
Note: The OpenVINO environment requires that you use the Option 2 method below.
Option 2: Use the source command
You can also just use the following command with the start scripts located in your home directory:
$ source ~/start_py3cv4.sh
Starting Python 3.7 with OpenCV 4.1.1 bindings...
(py3cv4) $
If you use OpenVINO, an additional Intel-provided script will be called automatically via the “start” script:
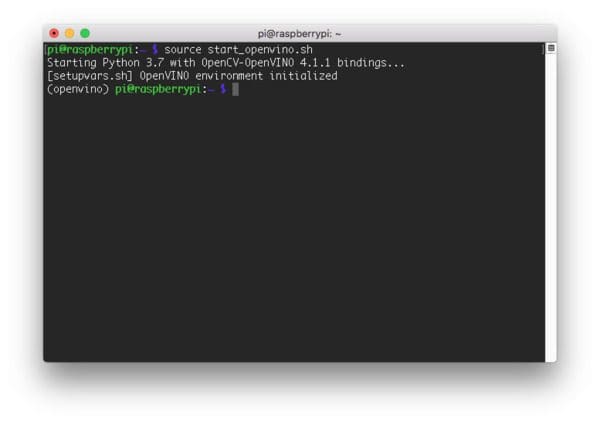
$ source ~/start_openvino.sh
Starting Python 3.7 with OpenCV-OpenVINO 4.1.1 bindings...
[setupvars.sh] OpenVINO environment initialized
(py3cv4) $
Your terminal will look like similar to this (I’m SSH’ed into my Raspberry Pi from macOS):
Executing code from my books on your Raspberry Pi
There are multiple methods to access the source code for Practical Python and OpenCV or Raspberry Pi for Computer Vision on your Pi. The first is to use Chromium, Raspbian’s built-in web browser to download the .zip archive(s):
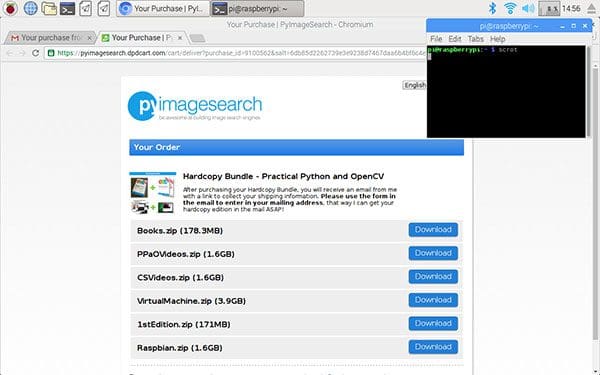
Simply download the .zip directly to your Pi.
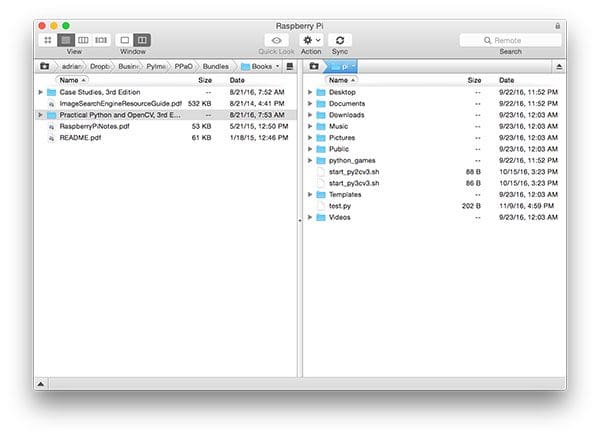
If the code currently resides on your laptop/desktop, you may also use your favorite SFTP/FTP client and transfer the code from your system to your Pi:
Or you may want to manually write the code on the Pi using the built-in text editor as you follow along with the book:
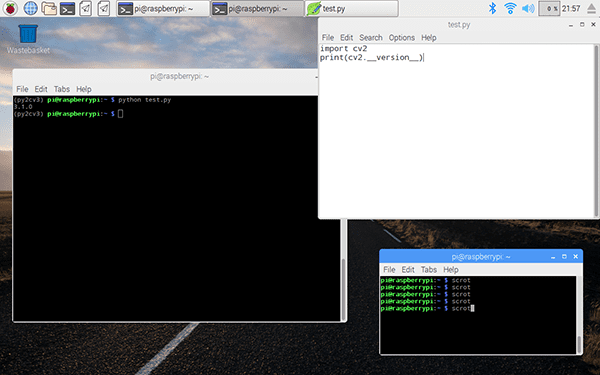
I would suggest either downloading the book’s source code via web browser or using SFTP/FTP as this also includes the datasets utilized in the book as well. However, manually coding along is a great way to learn and I highly recommend it as well!
For more tips on how to work remotely with your Raspberry Pi, be sure to read my Remote development on the Raspberry Pi blog post.
Frequently Asked Questions (FAQ)
In this section, I detail the answers to frequently asked questions regarding the Raspberry Pi .img file.
Which Raspbian images are compatible with which respective hardware?
Here is the compatibility listing:
Raspbian3B_4B.img.gz:- Raspberry Pi 4B (1GB, 2GB, and 4GB models)
- Raspberry Pi 3B+
- Raspberry Pi 3B
RaspbianZeroW.img.gz:- Raspberry Pi Zero W
What if I want to install OpenCV + Python on my Raspberry Pi by myself?
By all means, I encourage you to do so. It’s a great exercise and you’ll learn a lot about the Linux environment. I would suggest you follow one of my many free tutorials on installing OpenCV + Python your Raspberry Pi.
Again, this pre-configured Raspbian image is intended for readers who want to skip the install process and jumpstart their education.
How long will it take to install Python + OpenCV by hand?
I’ve ran the numbers and even if you know exactly what you are doing it will take a bare minimum of 55 minutes to compile and install OpenCV on a Raspberry Pi 4 and approximately 14 hours on the Raspberry Pi Zero W.
If you have never installed OpenCV before or you are not familiar with Linux-based environments that number can easily jump to many times those numbers based on my survey of novice readers who successfully installed OpenCV on their Raspberry Pi.
In fact, to install everything on the Raspberry Pi Zero W including 2 environments (2 compiles of OpenCV) it took approximately 6 days (including overnight compiles).
It really comes down to how much you value your time and how quickly you want to get started learning computer vision. I always encourage you to use my free tutorials on installing OpenCV on the Raspberry Pi, but if you want to save yourself time (and headaches), then definitely consider going with the pre-configured Raspbian .img.
Which Practical Python and OpenCV bundles is the Raspbian image included in?
The pre-configured Raspbian image is included in both the Quickstart Bundle and Hardcopy Bundle of Practical Python and OpenCV. The pre-configured Raspbian image is not included in the Basic Bundle.
Which Raspberry Pi for Computer Vision bundles is the Raspbian image included in?
The pre-configured Raspbian image is included all bundles: Hobbyist, Hacker, and Complete Bundles.
After installing your distribution of Raspbian, how do I access Python + OpenCV?
See the “Using Python and OpenCV on your Raspberry Pi” section above.
Is Wolfram’s Mathematica included in your Raspbian distribution?
No, I am not legally allowed to distribute a modified version of Raspbian (that is part of a product) with Mathematica installed.
How did you reduce the size of the Raspbian image file?
To start, I removed unneeded software such as Wolfram’s Mathematica and LibreOffice. Removing these two pieces of software alone saved nearly 1GB of space.
From there, the size of the main partition was reduced by zeroing all bits and compressing the file to .gz format.
Which Operating System version of Raspbian is included?
The latest .imgs run Raspbian Buster.
I have your previous StretchOS image. Why won’t the workon command work?
My previous .imgs did not have the virtualenvwrapper settings in the ~/.bashrc (they were placed in ~/.profile ).
Therefore, you need to either (1) copy the virtualenvwrapper settings from ~/.profile to ~/.bashrc , or (2) source the profile first via source ~/.profile.
What Python packages are installed on the Raspberry Pi?
After accessing any virtual environment (see “Accessing a virtual environment”) run pip freeze to see a full list of Python packages installed.
In short, I have included all necessary Python packages you will need to be successful executing the examples in Raspberry Pi for Computer Vision and Practical Python and OpenCV, including OpenCV, NumPy, SciPy, scikit-learn, scikit-image, mahotas, and many others. Click the following image to enlarge it so you can see all the packages:

Where can I learn more about Python virtual environments?
My favorite resource and introduction to Python virtual environments can be found here. I also discuss them in the first half of this blog post.
Where can I purchase a copy of Practical Python and OpenCV?
To purchase your copy of Practical Python and OpenCV, simply click here, select your bundle (I recommend either the Quickstart Bundle or the Hardcopy Bundle), and checkout.
Where can I purchase a copy of Raspberry Pi for Computer Vision?
To purchase your copy of Raspberry Pi for Computer Vision, simply click here, select your bundle (I recommend either the Hacker Bundle or the Complete Bundle if you really want to master the Raspberry Pi), and checkout.
Can I purchase the .img as a standalone product?
The .img files are intended to accompany my books as added benefits. I would recommend purchasing a book to gain access to the .img.
I have another question.
If you have a question not listed in this FAQ, please send me a message.
Sound good?
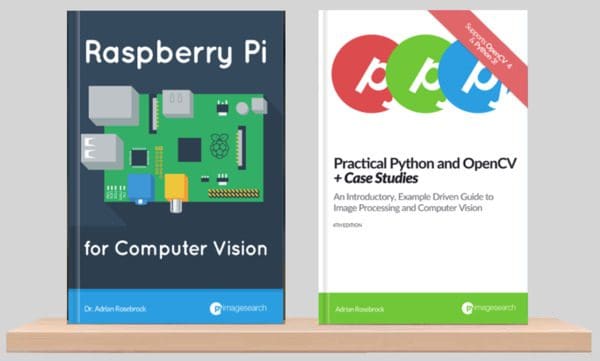
If you’re ready to put the .img to use on all of the Raspberry Pis you own, just purchase one of my books that come with the .img.
To purchase your copy of Raspberry Pi for Computer Vision, just click here. All bundles come with the pre-configured Raspbian .img files.
Or to purchase your copy of Practical Python and OpenCV, just use this link. You will find the pre-configured Raspbian .img files inside both the Quickstart Bundle and the Hardcopy Bundle (the Basic Bundle does not include the Raspbian .img).
To see all the products I offer, click here.

Join the PyImageSearch Newsletter and Grab My FREE 17-page Resource Guide PDF
Enter your email address below to join the PyImageSearch Newsletter and download my FREE 17-page Resource Guide PDF on Computer Vision, OpenCV, and Deep Learning.
