Table of Contents
- DeepSeek-V3 from Scratch: Implementing the DeepSeek Trainer
- Training Infrastructure with Hugging Face Trainer
- Implementation: Custom Trainer and Data Handling
- Training Configuration
- Data Preparation: TinyStories Dataset
- Training DeepSeek-V3 from Scratch and Saving Checkpoints
- Testing Generation: Bringing the Model to Life
- Summary
DeepSeek-V3 from Scratch: Implementing the DeepSeek Trainer
Over the past 5 lessons, we have carefully constructed DeepSeek-V3 piece by piece: beginning with its configuration and Rotary Position Embeddings (RoPE), advancing through Multi-head Latent Attention (MLA), scaling capacity with the Mixture of Experts (MoE), enhancing the training objective with Multi-Token Prediction (MTP), and finally assembling the complete architecture. Each step has brought us closer to a fully realized model, blending theory with hands-on implementation to illuminate how DeepSeek-V3 achieves efficiency, scalability, and cutting-edge performance.
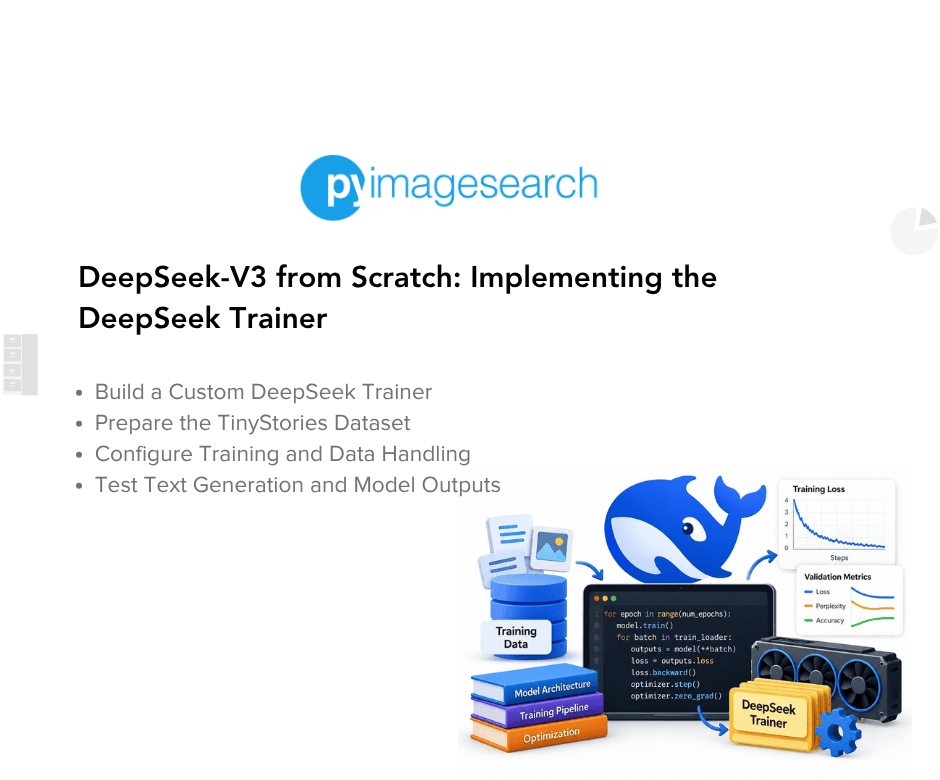
In this final lesson, we shift our focus to the DeepSeek trainer. This component brings the architecture to life. Training is where all the innovations converge, transforming static design into a dynamic system capable of learning from data. We will explore the training loop, optimization strategies, loss weighting, and practical considerations for scaling experiments. By the end, you will not only understand how to train DeepSeek-V3 from scratch but also appreciate how each architectural innovation integrates seamlessly into the training process. This marks the culmination of our journey: a complete, working DeepSeek-V3 model built step by step, ready for experimentation, extension, and exploration.
This lesson is the last in the 6-part series on Building DeepSeek-V3 from Scratch:
- DeepSeek-V3 Model: Theory, Config, and Rotary Positional Embeddings
- Build DeepSeek-V3: Multi-Head Latent Attention (MLA) Architecture
- DeepSeek-V3 from Scratch: Mixture of Experts (MoE)
- Autoregressive Model Limits and Multi-Token Prediction in DeepSeek-V3
- DeepSeek-V3 from Scratch: Building the Architecture in PyTorch
- DeepSeek-V3 from Scratch: Implementing the DeepSeek Trainer (this tutorial)
To learn about DeepSeek-V3 and build it from scratch, just keep reading.

Training Infrastructure with Hugging Face Trainer
Training a transformer model from scratch requires careful orchestration of many components: data loading and batching, optimization with learning rate (LR) scheduling, gradient accumulation for large effective batch sizes, mixed-precision training for efficiency, checkpoint management, and evaluation. Implementing all of this from scratch is time-consuming and error-prone.
The Hugging Face Trainer application programming interface (API) provides a robust solution. It is a high-level interface that handles the training loop while remaining flexible enough for custom models. The key challenge is adapting our custom DeepSeek model to work with the expectations of Trainer.
The accompanying Colab uses a tested training stack: transformers==4.57.3, datasets==4.8.5, and accelerate==1.15.0, alongside Colab’s existing CUDA-compatible PyTorch. If these libraries were already imported, restart the runtime after installing the pinned versions.
The default Trainer expects a compatible output containing a loss, such as a mapping with a loss entry or a tuple whose first item is the loss. Our model returns (logits, loss), so a custom compute_loss method adapts this output to the expected format of Trainer.
Gradient Accumulation: For memory-constrained graphics processing units (GPUs), we cannot always use large batch sizes. Gradient accumulation simulates larger batches by accumulating gradients over multiple small batches before updating weights:

where  is the number of gradient accumulation steps. On a single GPU, if we can handle a batch size of 4 but want an effective batch size of 16, we use
  accumulation steps.
Learning Rate Scheduling: Training deep networks benefits from learning rate schedules. We use a warmup schedule:
![\eta_t = \left\{\begin{array}{l} \eta_\text{max} \cdot \dfrac{t}{T_\text{warmup}} \qquad \text{if } t \ {<} \ T_\text{warmup} \\[18pt] \eta_\text{max} \cdot \dfrac{T_\text{total} - t}{T_\text{total} - T_\text{warmup}} \qquad \text{otherwise}\end{array} \right.](https://b2633864.assetcdn.net/2633864/wp-content/latex/5b6/5b660307ee5ba1c7c39eb6c0c704b511-ffffff-000000-0.png?size=307x91&lossy=2&strip=1&webp=1 "\eta_t = \left\{\begin{array}{l} \eta_\text{max} \cdot \dfrac{t}{T_\text{warmup}} \qquad \text{if } t \ {<} \ T_\text{warmup} \\[18pt] \eta_\text{max} \cdot \dfrac{T_\text{total} - t}{T_\text{total} - T_\text{warmup}} \qquad \text{otherwise}\end{array} \right.")
Warmup (gradually increasing LR) helps training stability at the start when parameters are random. Linear decay toward 0 helps final convergence.
Mixed Precision Training: Modern GPUs have specialized hardware for FP16 (16-bit floating point) computation, which can improve training throughput compared with FP32 (32-bit floating point); the actual speedup depends on hardware and workload. Mixed precision training keeps model parameters in FP32 for stability while autocast selects an appropriate precision for eligible operations. Loss scaling helps prevent small gradients from underflowing:


Scaling raises small gradients into a representable range to reduce FP16 underflow, and gradients are unscaled before the optimizer update. If the scaler detects nonfinite gradients, it skips the optimizer update and reduces the scale; after a sustained period without overflow, it can increase the scale.
Implementation: Custom Trainer and Data Handling
from transformers import (
    Trainer,
    TrainingArguments,
    DataCollatorForLanguageModeling,
)
from datasets import load_dataset
from torch.utils.data import Dataset

# Setup logging
logging.basicConfig(
    format="%(asctime)s - %(levelname)s - %(message)s",
    level=logging.INFO,
)
logger = logging.getLogger(__name__)


class TextDataset(Dataset):
    """Custom dataset for text data"""

    def __init__(self, texts: List[str], tokenizer, max_length: int = 1024):
        self.texts = texts
        self.tokenizer = tokenizer
        self.max_length = max_length

    def __len__(self):
        return len(self.texts)

    def __getitem__(self, idx):
        text = self.texts[idx]
        encodings = self.tokenizer(
            text,
            truncation=True,
            max_length=self.max_length,
            padding="max_length",
            return_tensors="pt",
        )

        input_ids = encodings["input_ids"].squeeze()
        attention_mask = encodings["attention_mask"].squeeze()

        # For language modeling, labels are the same as input_ids
        labels = input_ids.clone()
        labels[attention_mask == 0] = -100  # Ignore padding in loss

        return {
            "input_ids": input_ids,
            "attention_mask": attention_mask,
            "labels": labels,
        }
Lines 1-49: Custom Dataset Class: The TextDataset class wraps our text data for the PyTorch data loading system. In __init__, we store the texts, tokenizer, and maximum sequence length. The __len__ method returns the dataset size (required by PyTorch). The __getitem__ method is the core: given an index, it retrieves the corresponding text, tokenizes it with truncation and padding to ensure fixed length, and creates labels by cloning input token identifiers (IDs) and masking padding positions with -100 (which the PyTorch cross-entropy loss ignores). This masking is crucial because we do not want the model to receive gradient signals from predicting padding tokens.
class DeepSeekDataCollator:
    """Custom data collator for DeepSeek model"""

    def __init__(self, tokenizer):
        self.tokenizer = tokenizer

    def __call__(self, features: List[Dict[str, torch.Tensor]]) -> Dict[str, torch.Tensor]:
        batch = {
            "input_ids": torch.stack([f["input_ids"] for f in features]),
            "labels": torch.stack([f["labels"] for f in features]),
        }

        if "attention_mask" in features[0]:
            batch["attention_mask"] = torch.stack([f["attention_mask"] for f in features])

        return batch
Lines 51-66: Data Collator: The role of the collator is to take a list of individual samples and combine them into a batch. We stack the tensors along a new batch dimension. This is straightforward for our fixed-length sequences. The collator also handles the attention mask if present, which distinguishes real tokens from padding. The __call__ method makes the object callable, allowing Trainer to use it as a function.
class DeepSeekTrainer(Trainer):
    """Custom Trainer for DeepSeek model"""

    def compute_loss(self, model, inputs, return_outputs=False, **kwargs):
        """Custom loss computation to handle DeepSeek's output format"""
        input_ids = inputs["input_ids"]
        labels = inputs.get("labels", input_ids)

        # Forward pass
        logits, loss = model(input_ids, targets=labels, attention_mask=inputs.get("attention_mask"))

        if return_outputs:
            return loss / self.args.gradient_accumulation_steps, {"logits": logits}
        return loss / self.args.gradient_accumulation_steps
Lines 67-80: Custom Trainer Loss Computation: We extend the Hugging Face Trainer with a custom compute_loss method. The default Trainer expects a compatible output containing a loss, but our model returns (logits, loss). We extract input IDs and labels, pass the attention mask to the model, and return the loss. Passing this mask connects the trainer to the padding-mask handling implemented in the previous lesson, while labels marked -100 are excluded from the loss. For this pinned integration, the division by gradient_accumulation_steps normalizes the contribution of each microbatch. This normalization is specific to the pinned integration between Trainer and the model and should not be copied blindly into another Trainer subclass. The return_outputs flag allows the method to optionally return model outputs alongside the loss when those outputs are requested.
    def prediction_step(
        self,
        model,
        inputs,
        prediction_loss_only,
        ignore_keys=None,
    ):
        """
        Custom prediction step for evaluation

        Perform an evaluation step on model using inputs and returns:
        - loss
        - logits (if not prediction_loss_only)
        - labels (if not prediction_loss_only)
        """
        has_labels = "labels" in inputs
        inputs = self._prepare_inputs(inputs)

        # Forward pass
        with torch.no_grad():
            if has_labels:
                input_ids = inputs["input_ids"]
                labels = inputs["labels"]

                # Get model outputs
                logits, loss = model(input_ids, targets=labels, attention_mask=inputs.get("attention_mask"))

                # Ensure loss is a scalar
                if loss.dim() > 0:
                    loss = loss.mean()
            else:
                input_ids = inputs["input_ids"]
                logits, loss = model(input_ids, attention_mask=inputs.get("attention_mask"))
                loss = None

        if prediction_loss_only:
            return (loss, None, None)

        # Return predictions and labels
        # logits shape: [batch_size, seq_len, vocab_size] or [batch_size, seq_len, num_tokens, vocab_size]
        if logits.dim() == 4:
            # Multi-token prediction: use first prediction head
            logits = logits[:, :, 0, :]  # [batch_size, seq_len, vocab_size]

        # Get labels
        labels = inputs.get("labels")

        return (loss, logits, labels)
Lines 82-129: Prediction Step for Evaluation: The prediction_step method handles evaluation. It is more complex because evaluation needs loss (for metrics) and logits (for qualitative analysis). We prepare inputs, pass attention masks through the model, and run a forward pass with gradients disabled to save memory. When labels are provided, the model returns main-head logits with shape [batch_size, seq_len, vocab_size]. The 4-dimensional branch is a compatibility fallback, not the normal MTP output of the current model. The method returns a tuple of (loss, logits, labels), which Trainer uses to compute evaluation metrics. The evaluation loss is the combined objective defined in the previous lesson, rather than next-token loss alone, and is returned without the accumulation divisor used in compute_loss.
Training Configuration
training_args = TrainingArguments(
    output_dir="./deepseek_checkpoints",
    num_train_epochs=2,
    per_device_train_batch_size=4,
    per_device_eval_batch_size=4,
    learning_rate=5e-4,
    warmup_steps=10,
    weight_decay=0.01,
    logging_dir="./deepseek_checkpoints/logs",
    logging_steps=50,
    save_steps=50,
    save_total_limit=3,
    eval_steps=50,
    eval_strategy="steps",
    save_strategy="steps",
    load_best_model_at_end=True,
    metric_for_best_model="eval_loss",
    greater_is_better=False,
    gradient_accumulation_steps=4,
    fp16=torch.cuda.is_available(),
    dataloader_num_workers=2,
    remove_unused_columns=False,
    report_to="none",
    push_to_hub=False,
    save_safetensors=False
)
Lines 1-26: Training Arguments: These hyperparameters control training behavior. We train for 2 epochs with a batch size of 4 and 4 gradient accumulation steps (an effective batch size of 16 on a single device). A learning rate of 5e-4 is reasonable for a model this size. Larger models often use a lower learning rate (e.g., 1e-4). We use 10 warmup steps (modest warmup since our model is small). A weight decay of 0.01 provides regularization. Logging, checkpoint saving, and evaluation run every 50 optimizer steps, not individual microbatches. We retain up to 3 checkpoints while protecting the best checkpoint when load_best_model_at_end=True; these are not necessarily the 3 lowest-loss checkpoints. The load_best_model_at_end flag ensures we end with the checkpoint that had the lowest validation loss, not necessarily the last checkpoint. FP16 is enabled if CUDA is available, which can improve training throughput depending on the GPU and workload.
Data Preparation: TinyStories Dataset
We train on TinyStories, a dataset of simple children’s stories generated to have vocabulary and grammar suitable for training small language models. Each story is 1-3 paragraphs and exhibits basic narrative structure.
Data Processing Pipeline:
- Load raw text stories
- Add special tokens (
story_start,story_end) for structure - Tokenize using the Generative Pretrained Transformer 2 (GPT-2) tokenizer, which uses byte-pair encoding (BPE)
- Truncate or pad each story to the configured sequence length (
config.block_size) - Clone input IDs into labels and mask padding with
-100; the model shifts logits and targets internally - Batch the sequences and feed them to the model
The tokenizer converts text to integers via byte-pair encoding, which balances vocabulary size with representation efficiency. Common words may be represented by single tokens; less common words may be split into subword units.
from transformers import GPT2TokenizerFast

# Create tokenizer
tokenizer = GPT2TokenizerFast.from_pretrained("gpt2")

# Add special tokens from config
special_tokens_dict = {
    'additional_special_tokens': list(config.special_tokens.values())
}
num_added_tokens = tokenizer.add_special_tokens(special_tokens_dict)

# Set pad token if not present
if tokenizer.pad_token is None:
    tokenizer.pad_token = tokenizer.eos_token

print(f"✓ Loaded tokenizer: {len(tokenizer)} tokens")
print(f"✓ Added {num_added_tokens} special tokens:")
for name, token in config.special_tokens.items():
    token_id = tokenizer.convert_tokens_to_ids(token)
    print(f"  {name}: '{token}' (ID: {token_id})")

# Load dataset
logger.info("Loading TinyStories dataset...")
dataset = load_dataset("roneneldan/TinyStories", split="train", streaming=False)

# Use a subset for faster training (remove for full training)
max_samples = 10000
dataset = dataset.select(range(min(max_samples, len(dataset))))

# Extract texts
texts = [config.special_tokens["story_start"] + item["text"] + config.special_tokens["story_end"] for item in dataset]
print(f"✓ Loaded {len(texts)} stories")

# Show example
print(f"\n📖 Example story:")
print("=" * 80)
print(texts[0])
print("=" * 80)

# Split into train and eval
split_idx = int(0.9 * len(texts))
train_texts, eval_texts = texts[:split_idx], texts[split_idx:]

# Create datasets
train_dataset = TextDataset(train_texts, tokenizer, max_length=config.block_size)
eval_dataset = TextDataset(eval_texts, tokenizer, max_length=config.block_size)

print(f"\n✓ Dataset split:")
print(f"  Training: {len(train_dataset)} samples")
print(f"  Evaluation: {len(eval_dataset)} samples")
Lines 1-50: Loading the TinyStories Dataset: This code sets up the data pipeline for training by first loading a GPT‑2 tokenizer and extending it with custom special tokens defined in the configuration, ensuring that a pad token is available by defaulting to the end-of-sequence (EOS) token if necessary. It then loads the TinyStories dataset from Hugging Face, selects a smaller subset of 10,000 samples for faster experimentation, and wraps each story with start and end special tokens to mark boundaries. After printing a sample story for inspection, the first 10,000 stories are split in order into training and evaluation sets with 90% used for training and 10% for evaluation (9,000 and 1,000 samples), without shuffling. This evaluation set comes from the selected training subset, not the official validation split of the dataset. Finally, both splits are converted into TextDataset objects using the tokenizer and a fixed block size, giving properly tokenized sequences ready for model training and evaluation (Figure 1).

Training DeepSeek-V3 from Scratch and Saving Checkpoints
# Create fresh model for training
torch.cuda.empty_cache()

model = DeepSeek(config)
data_collator = DeepSeekDataCollator(tokenizer)

# Create trainer
trainer = DeepSeekTrainer(
    model=model,
    args=training_args,
    train_dataset=train_dataset,
    eval_dataset=eval_dataset,
    data_collator=data_collator,
)

print("✓ Trainer created. Starting training...")
print("=" * 80)

# Train!
trainer.train()

print("=" * 80)
print("✓ Training complete!")

# Save final model
trainer.save_model("./deepseek_final")
tokenizer.save_pretrained("./deepseek_final")
print("✓ Model saved to ./deepseek_final")
Lines 1-28: Model Training: This script initializes and runs the training process for the DeepSeek model. It begins by releasing unused cached GPU allocations; torch.cuda.empty_cache() does not free live tensors or reset the model. Creating DeepSeek(config) initializes a fresh model, and the data collator prepares tokenized inputs for training. A custom trainer object is created, tying together the model, training arguments, datasets, and collator. Once the trainer is set up, the script prints a confirmation message and launches the training loop, reporting progress until completion. After training finishes, the final model and tokenizer are saved to disk in the ./deepseek_final directory, making them available for later inference or fine‑tuning.
Testing Generation: Bringing the Model to Life
After training comes the exciting part: generating text. We load the trained model and use its generate method:
# Load best model
model = DeepSeek(config)
checkpoint_path = "./deepseek_final/pytorch_model.bin"

if os.path.exists(checkpoint_path):
    checkpoint = torch.load(checkpoint_path, map_location="cpu")
    model.load_state_dict(checkpoint)
    print("✓ Loaded trained model")
else:
    print("⚠ Using untrained model (checkpoint not found)")

model.eval()
device = torch.device("cuda" if torch.cuda.is_available() else "cpu")
model.to(device)

print(f"✓ Model ready on {device}")
def generate_story(prompt: str, max_tokens: int = 200, temperature: float = 0.8, top_k: int = 50):
    """Generate a story from a prompt"""
    # Encode prompt
    input_ids = tokenizer.encode(prompt, return_tensors="pt").to(device)

    # Generate
    with torch.no_grad():
        output_ids = model.generate(
            input_ids,
            max_new_tokens=max_tokens,
            temperature=temperature,
            top_k=top_k,
        )

    # Decode
    generated_text = tokenizer.decode(output_ids[0], skip_special_tokens=True)
    return generated_text

# Generate stories with different prompts
prompts = [
    "Once upon a time",
    "In a magical forest",
    "There was a little girl named Lucy who",
    "The brave knight"
]

print("🎨 Generating Stories")
print("=" * 80)

for i, prompt in enumerate(prompts, 1):
    print(f"\n📖 Story {i}: '{prompt}'")
    print("-" * 80)
    story = generate_story(prompt, max_tokens=150, temperature=0.8)
    print(story)
    print("-" * 80)
Temperature: Controls randomness. At  , we sample directly from the probability distribution of the model. A lower temperature (
 ) makes sampling less random; a higher temperature (
 ) makes it more random:

Top-k Sampling: We only sample from the  most probable tokens. This prevents sampling very unlikely tokens that might break coherence. With
  , we consider only the 50 most likely next tokens.
Example Outputs: The following story is an illustrative example, not a recorded output from the supplied Colab run. Actual generations will vary (Figure 2):
Prompt: Once upon a time
Generated: Once upon a time, there was a little girl named Lily. She loved to play in the park with her red ball. One day, the ball rolled into a bush. Lily looked inside and found a tiny bird. The bird was blue and sang a happy song. Lily smiled and said, “Hello, bird!”
Output quality depends on training data, model size, training duration, and sampling choices. Our small model will not match large pretrained models, and generations may repeat, drift, or become incoherent; successful training alone does not guarantee coherent, grammatical stories.

What's next? We recommend PyImageSearch University.

120+ total classes • 115+ hours of on-demand code walkthrough videos • Last updated: October 2026
★★★★★ 4.84 (128 Ratings) • 16,000+ Students Enrolled
I strongly believe that if you had the right teacher you could master computer vision and deep learning.
Do you think learning computer vision and deep learning has to be time-consuming, overwhelming, and complicated? Or has to involve complex mathematics and equations? Or requires a degree in computer science?
That’s not the case.
All you need to master computer vision and deep learning is for someone to explain things to you in simple, intuitive terms. And that’s exactly what I do. My mission is to change education and how complex Artificial Intelligence topics are taught.
If you're serious about learning computer vision, your next stop should be PyImageSearch University, the most comprehensive computer vision, deep learning, and OpenCV course online today. Here you’ll learn how to successfully and confidently apply computer vision to your work, research, and projects. Join me in computer vision mastery.
Inside PyImageSearch University you'll find:
- ✓ 120+ courses on essential computer vision, deep learning, and OpenCV topics
- ✓ 94+ Certificates of Completion
- ✓ 115+ hours of on-demand video
- ✓ Brand new courses released regularly, ensuring you can keep up with state-of-the-art techniques
- ✓ Pre-configured Jupyter Notebooks in Google Colab
- ✓ Run all code examples in your web browser — works on Windows, macOS, and Linux (no dev environment configuration required!)
- ✓ Access to centralized code repos for all 540+ tutorials on PyImageSearch
- ✓ Easy one-click downloads for code, datasets, pre-trained models, etc.
- ✓ Access on mobile, laptop, desktop, etc.
Summary
In the final part of our DeepSeek-V3 from Scratch series, we shift focus from architecture to training and testing the model. We begin by outlining the training infrastructure, leveraging the Hugging Face Trainer to streamline experimentation and provide a flexible foundation. This sets the stage for building a custom trainer that handles data efficiently, ensuring our implementation is both scalable and adaptable to different tasks.
We then walk through the training configuration, where we define hyperparameters and optimization strategies, followed by data preparation using the TinyStories dataset. This lightweight dataset allows us to quickly prototype and validate our setup while still capturing meaningful language patterns. With everything in place, we start the actual training process, observing how the model learns and adapts over time.
Finally, we bring the model to life by testing text generation, showcasing how DeepSeek-V3 produces outputs after training. This step highlights the transition from theory and implementation to practical results, demonstrating how to sample text from the trained model. By the end of this lesson, we have not only assembled and trained DeepSeek-V3 but also seen it in action, completing our journey from scratch to a fully functioning language model.
Citation Information
Mangla, P. “DeepSeek-V3 from Scratch: Implementing the DeepSeek Trainer,” PyImageSearch, S. Huot, A. Sharma, and P. Thakur, eds., 2026, https://pyimg.co/u5mv8
@incollection{Mangla_2026_deepseek-v3-scratch-implementing-deepseek-trainer,
  author = {Puneet Mangla},
  title = {{DeepSeek-V3 from Scratch: Implementing the DeepSeek Trainer}},
  booktitle = {PyImageSearch},
  editor = {Susan Huot and Aditya Sharma and Piyush Thakur},
  year = {2026},
  url = {https://pyimg.co/u5mv8},
}
To download the source code to this post (and be notified when future tutorials are published here on PyImageSearch), simply enter your email address in the form below!

Download the Source Code and FREE 17-page Resource Guide
Enter your email address below to get a .zip of the code and a FREE 17-page Resource Guide on Computer Vision, OpenCV, and Deep Learning. Inside you'll find my hand-picked tutorials, books, courses, and libraries to help you master CV and DL!


Comment section
Hey, Adrian Rosebrock here, author and creator of PyImageSearch. While I love hearing from readers, a couple years ago I made the tough decision to no longer offer 1:1 help over blog post comments.
At the time I was receiving 200+ emails per day and another 100+ blog post comments. I simply did not have the time to moderate and respond to them all, and the sheer volume of requests was taking a toll on me.
Instead, my goal is to do the most good for the computer vision, deep learning, and OpenCV community at large by focusing my time on authoring high-quality blog posts, tutorials, and books/courses.
If you need help learning computer vision and deep learning, I suggest you refer to my full catalog of books and courses — they have helped tens of thousands of developers, students, and researchers just like yourself learn Computer Vision, Deep Learning, and OpenCV.
Click here to browse my full catalog.