Table of Contents
- PNG Image to STL Converter in Python
- Why Convert a PNG to STL?
- Set Up Your Environment to Convert PNG to STL
- Importing Libraries for PNG to STL Conversion
- Upload and Prepare the Image To Be Used in the PNG to STL Conversion
- Setting Up TripoSR Parameters
- Initialize the Model and Process the PNG
- Processing the Image for PNG to STL Conversation
- Generating the 3D Model That Will Be Used to Convert the PNG to STL
- PNG to STL Final Step
- Display the 3D Model
- PNG to STL Summary
PNG Image to STL Converter in Python
In this guide, we’ll demonstrate how you can convert a PNG (Portable Network Graphics) image to an STL (STereoLithography) file, perfect for 3D printing or other uses. We use TripoSR, a state-of-the-art model for fast 3D reconstruction, which allows you to take a 2D image and quickly generate a high-quality 3D model. Whether you’re a designer, engineer, or hobbyist, this tutorial will walk you through the steps to convert your images into STL files.

To learn how to convert a PNG image to an STL file, keep reading!
Why Convert a PNG to STL?
When you’re working with 3D printing or modeling, converting a 2D image (e.g., a PNG) into a 3D file format such as STL can open up numerous possibilities. From custom designs to practical applications, having the ability to easily convert images to STL format is invaluable.
STL (Stereolithography) is a popular format widely used in 3D printing, representing the geometry of a 3D object. By leveraging TripoSR, we can make this conversion process simple and efficient. With the power of machine learning and image processing, you can quickly transform flat 2D images into printable 3D objects.
Set Up Your Environment to Convert PNG to STL
We’ll first need to set up our environment to work with TripoSR and Python.
!git clone https://github.com/pyimagesearch/TripoSR.git
import sys
sys.path.append('/content/TripoSR/tsr')
%cd TripoSR
!pip install -r requirements.txt -q
Here, we’re cloning the TripoSR repository, adding it to our Python path, changing to the TripoSR directory, and installing the necessary dependencies for running the model.
Need Help Configuring Your Development Environment?

All that said, are you:
- Short on time?
- Learning on your employer’s administratively locked system?
- Wanting to skip the hassle of fighting with the command line, package managers, and virtual environments?
- Ready to run the code immediately on your Windows, macOS, or Linux system?
Then join PyImageSearch University today!
Gain access to Jupyter Notebooks for this tutorial and other PyImageSearch guides pre-configured to run on Google Colab’s ecosystem right in your web browser! No installation required.
And best of all, these Jupyter Notebooks will run on Windows, macOS, and Linux!
Importing Libraries for PNG to STL Conversion
Next, we import the required libraries:
import torch
import os
import time
from PIL import Image
import numpy as np
from IPython.display import Video
from tsr.system import TSR
from tsr.utils import remove_background, resize_foreground, save_video
import pymeshlab as pymesh
import rembg
We are importing libraries for image processing, 3D modeling, and utility functions. pymesh will be used to convert the 3D model into the STL format.
Setting Up the Device
We determine whether to use CUDA (GPU) or CPU:
device = "cuda" if torch.cuda.is_available() else "cpu"
This line checks if a CUDA-compatible GPU is available and sets the device accordingly.
Upload and Prepare the Image To Be Used in the PNG to STL Conversion
from google.colab import files
uploaded = files.upload()
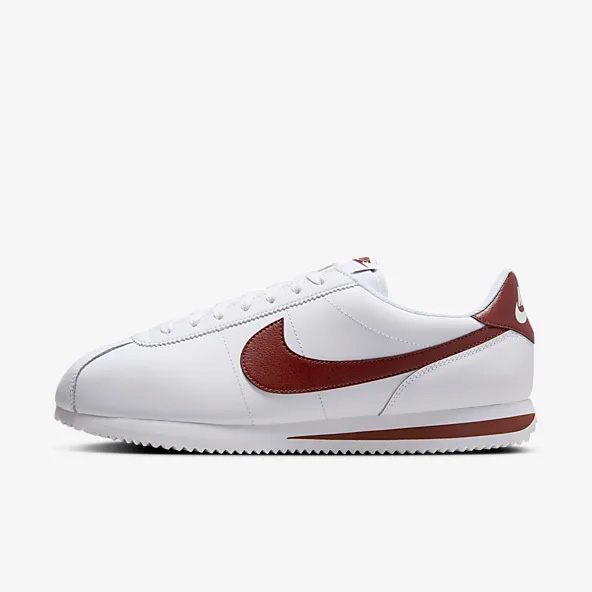
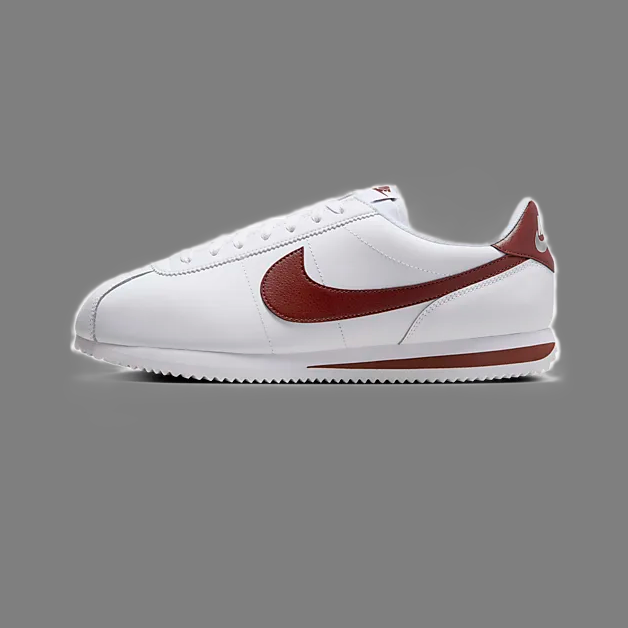
original_image = Image.open(list(uploaded.keys())[0])
original_image.resize((512, 512)).save("examples/product.png")
Here, you upload your PNG image and use Google Colab’s file upload feature to get our image. Then, we resize and save for processing. This PNG image will be transformed into a 3D model.
Setting Up TripoSR Parameters
image_paths = "/content/TripoSR/examples/product.png"
device = "cuda:0"
pretrained_model_name_or_path = "stabilityai/TripoSR"
chunk_size = 8192
no_remove_bg = True
foreground_ratio = 0.85
output_dir = "output/"
model_save_format = "obj"
render = True
output_dir = output_dir.strip()
os.makedirs(output_dir, exist_ok=True)
These parameters define the path to your image, model settings, and output format (in this case, the intermediate format is OBJ, which we will later convert to STL).
Initialize the Model and Process the PNG
We now initialize TripoSR and process the PNG image to generate a 3D model.
model = TSR.from_pretrained(
	pretrained_model_name_or_path,
	config_name="config.yaml",
	weight_name="model.ckpt",
)
model.renderer.set_chunk_size(chunk_size)
model.to(device)
Here, we load the pretrained TripoSR model, set the chunk size for rendering, and move the model to the specified device (GPU or CPU).
Processing the Image for PNG to STL Conversation
Now, we process our input image:
images = []
rembg_session = rembg.new_session()
image = remove_background(original_image, rembg_session)
image = resize_foreground(original_image, foreground_ratio)
if image.mode == "RGBA":
    image = np.array(image).astype(np.float32) / 255.0
    image = image[:, :, :3] * image[:, :, 3:4] + (1 - image[:, :, 3:4]) * 0.5
    image = Image.fromarray((image * 255.0).astype(np.uint8))
image_dir = os.path.join(output_dir, str(0))
os.makedirs(image_dir, exist_ok=True)
image.save(os.path.join(image_dir, "input.png"))
images.append(image)
In this step, we remove the background from the image, resize it, and handle RGBA images by blending the alpha channel with a gray background.
Generating the 3D Model That Will Be Used to Convert the PNG to STL
Finally, we generate the 3D model:
for i, image in enumerate(images):
    print(f"Running image {i + 1}/{len(images)} ...")
    with torch.no_grad():
        scene_codes = model([image], device=device)

    if render:
        render_images = model.render(scene_codes, n_views=30, return_type="pil")
        for ri, render_image in enumerate(render_images[0]):
            render_image.save(os.path.join(output_dir, str(i), f"render_{ri:03d}.png"))
        save_video(
            render_images[0], os.path.join(output_dir, str(i), "render.mp4"), fps=30
        )

    meshes = model.extract_mesh(scene_codes, has_vertex_color=False)
    mesh_file = os.path.join(output_dir, str(i), f"mesh.{model_save_format}")
    meshes[0].export(mesh_file)
This loop processes each image (in our case, just one) through the TripoSR model. It generates the 3D scene codes, renders multiple views of the 3D model, saves these renders as images and a video, and exports the 3D mesh.
PNG to STL Final Step
After generating the 3D model in OBJ format from the PNG, we convert it to STL using pymesh.
obj_file = "/content/TripoSR/output/0/mesh.obj"
ms = pymesh.MeshSet()
ms.load_new_mesh(obj_file)
stl_file = 'model.stl'
ms.save_current_mesh(stl_file)
# Convert to .stl format
stl_file = 'model.stl'
ms.save_current_mesh(stl_file)
In this step, the PNG to STL converter workflow is complete. We load the OBJ file generated by TripoSR, convert it into the STL format, and save it.
Using MeshSet() from the pymesh library, we load it into a new mesh object.
To save it as an .stl file, we change the file name and use the save_current_mesh function.
You can download the resulting STL file from the PNG to STL conversion process from your environment or directly from the Colab interface if used.
Display the 3D Model
You can also render the 3D model and view a video of it:
Video('output/0/render.mp4', embed=True)
What's next? We recommend PyImageSearch University.

86+ total classes • 115+ hours hours of on-demand code walkthrough videos • Last updated: May 2026
★★★★★ 4.84 (128 Ratings) • 16,000+ Students Enrolled
I strongly believe that if you had the right teacher you could master computer vision and deep learning.
Do you think learning computer vision and deep learning has to be time-consuming, overwhelming, and complicated? Or has to involve complex mathematics and equations? Or requires a degree in computer science?
That’s not the case.
All you need to master computer vision and deep learning is for someone to explain things to you in simple, intuitive terms. And that’s exactly what I do. My mission is to change education and how complex Artificial Intelligence topics are taught.
If you're serious about learning computer vision, your next stop should be PyImageSearch University, the most comprehensive computer vision, deep learning, and OpenCV course online today. Here you’ll learn how to successfully and confidently apply computer vision to your work, research, and projects. Join me in computer vision mastery.
Inside PyImageSearch University you'll find:
- ✓ 86+ courses on essential computer vision, deep learning, and OpenCV topics
- ✓ 86 Certificates of Completion
- ✓ 115+ hours hours of on-demand video
- ✓ Brand new courses released regularly, ensuring you can keep up with state-of-the-art techniques
- ✓ Pre-configured Jupyter Notebooks in Google Colab
- ✓ Run all code examples in your web browser — works on Windows, macOS, and Linux (no dev environment configuration required!)
- ✓ Access to centralized code repos for all 540+ tutorials on PyImageSearch
- ✓ Easy one-click downloads for code, datasets, pre-trained models, etc.
- ✓ Access on mobile, laptop, desktop, etc.
PNG to STL Summary
In this tutorial, we’ve explored how to convert a PNG to STL file using TripoSR in Python. We set up the environment, imported the necessary libraries, processed the image to generate a 3D model, and then converted the model from OBJ to STL format. This process allows you to convert a 2D PNG image into an STL that is suitable for 3D printing or further modeling.
For anyone looking for a reliable and fast PNG to STL converter, TripoSR is an excellent tool for generating high-quality 3D models from images. Whether you’re working on product designs, prototypes, or creative projects, this tutorial shows how accessible and efficient the process can be!
Citation Information
Martinez, H. “PNG Image to STL Converter in Python,” PyImageSearch, P. Chugh, S. Huot, R. Raha, and P. Thakur, eds., 2024, https://pyimg.co/wol2r
@incollection{Martinez_2024_png-image-to-stl-converter-in-python,
  author = {Hector Martinez},
  title = {{PNG Image to STL Converter in Python}},
  booktitle = {PyImageSearch},
  editor = {Puneet Chugh and Susan Huot and Ritwik Raha and Piyush Thakur},
  year = {2024},
  url = {https://pyimg.co/wol2r},
}
To download the source code to this post (and be notified when future tutorials are published here on PyImageSearch), simply enter your email address in the form below!

Download the Source Code and FREE 17-page Resource Guide
Enter your email address below to get a .zip of the code and a FREE 17-page Resource Guide on Computer Vision, OpenCV, and Deep Learning. Inside you'll find my hand-picked tutorials, books, courses, and libraries to help you master CV and DL!

Comment section
Hey, Adrian Rosebrock here, author and creator of PyImageSearch. While I love hearing from readers, a couple years ago I made the tough decision to no longer offer 1:1 help over blog post comments.
At the time I was receiving 200+ emails per day and another 100+ blog post comments. I simply did not have the time to moderate and respond to them all, and the sheer volume of requests was taking a toll on me.
Instead, my goal is to do the most good for the computer vision, deep learning, and OpenCV community at large by focusing my time on authoring high-quality blog posts, tutorials, and books/courses.
If you need help learning computer vision and deep learning, I suggest you refer to my full catalog of books and courses — they have helped tens of thousands of developers, students, and researchers just like yourself learn Computer Vision, Deep Learning, and OpenCV.
Click here to browse my full catalog.