
Table of Contents
- Generating Video Highlights Using the SmolVLM2 Model
- Configuring Your Development Environment
- Setup and Imports
- Setup Logger
- Get Video Duration in Seconds
- Load Model and Processor
- Analyze Video Content
- Determine Highlights
- Process Video Segment
- Concatenating Video Scenes into a Final Highlight Reel
- Interface Logic
- Launch the Gradio Application
- Outputs
- Summary
Generating Video Highlights Using the SmolVLM2 Model
In our previous tutorial, we talked about the SmolVLM model’s architecture, training setup, and design choices that make it compact yet capable. Later, we demonstrated how the model can reason across multiple images by passing a chat-style formatted prompt with two images to the model.

Now, we’re taking things one step further.
In this tutorial, we’ll use SmolVLM2 for video understanding. We’ll extract key frames from a long video, build structured prompts around them, and let the model generate highlight-worthy videos automatically.
This lesson is the last in a 2-part series on Vision-Language Models — SmolVLM:
- SmolVLM to SmolVLM2: Compact Models for Multi-Image VQA
- Generating Video Highlights Using the SmolVLM2 Model (this tutorial)
To learn how to create your own video highlights using the SmolVLM2 model, just keep reading.
Would you like immediate access to 3,457 images curated and labeled with hand gestures to train, explore, and experiment with … for free? Head over to Roboflow and get a free account to grab these hand gesture images.
Need Help Configuring Your Development Environment?

All that said, are you:
- Short on time?
- Learning on your employer’s administratively locked system?
- Wanting to skip the hassle of fighting with the command line, package managers, and virtual environments?
- Ready to run the code immediately on your Windows, macOS, or Linux system?
Then join PyImageSearch University today!
Gain access to Jupyter Notebooks for this tutorial and other PyImageSearch guides pre-configured to run on Google Colab’s ecosystem right in your web browser! No installation required.
And best of all, these Jupyter Notebooks will run on Windows, macOS, and Linux!
Configuring Your Development Environment
To follow this guide, you need to have the following libraries installed on your system.
!pip install -q torch gradio transformers num2words av flash-attn
torchhandles tensor computations and is the core deep learning library used for loading and running the model.gradiohelps us build an interactive web interface for video input and model output.transformersprovides access to SmolVLM2 and its associated processor for handling vision-language inputs.num2wordsis used by the SmolVLM2 processor to convert numeric digits into their word equivalents (e.g.,5→"five"), which aligns better with how language models process textual data.avis a Pythonic binding for FFmpeg libraries. It allows frame-level access to videos, enabling us to load, decode, and extract video frames efficiently. This is a crucial step for video understanding tasks.flash-attnis an optimized attention mechanism that significantly speeds up model inference, especially for long-context or multi-modal prompts on GPU.
Setup and Imports
import os
import json
import torch
import tempfile
import gradio as gr

import logging
import subprocess
from pathlib import Path
from transformers import AutoProcessor, AutoModelForImageTextToText
Next, we import all the necessary libraries.
os,json,tempfile, andPathhelp us manage files, paths, and temporary directories while processing videos.torchis needed to compute tensor operations.gradiowill let us wrap the entire pipeline into a shareable UI.loggingis used to track errors and status updates during runtime.subprocessallows us to run FFmpeg commands for frame extraction and video encoding.AutoProcessorandAutoModelForImageTextToTextare the Hugging Face components that load SmolVLM2’s processor and model, which do the heavy lifting for multimodal understanding.
Setup Logger
Before diving into the main logic, we initialize a logger to help us track what’s happening under the hood.
logging.basicConfig(level=logging.INFO)
logger = logging.getLogger(__name__)
logging.basicConfig(level=logging.INFO)sets the logging level toINFO, which means we’ll see informative messages during execution (without overwhelming debug noise).logger = logging.getLogger(__name__)creates a logger tied to the current file.
This logger will be useful for printing updates, errors, or anything we want to monitor — especially when working with long videos or GPU-heavy models.
Get Video Duration in Seconds
Before we generate highlights, we need to know how long the input video is. This helper function uses ffprobe to fetch the duration in seconds.
def get_video_duration_seconds(video_path: str) -> float:
   """Use ffprobe to get video duration in seconds."""
   cmd = [
       "ffprobe",
       "-v", "quiet",
       "-print_format", "json",
       "-show_format",
       video_path
   ]
   result = subprocess.run(cmd, capture_output=True, text=True)
   info = json.loads(result.stdout)
   return float(info["format"]["duration"])
- We define a function that takes the path to a video and returns its duration in seconds (Line 1).
- We build a command list that runs
ffprobesilently (-v quiet), outputs in JSON format, and focuses on the video’s format metadata. This avoids clutter and gives us clean, parseable info (Lines 3-9). - We run the command using
subprocess.run()while capturing its output, then parse the result usingjson.loads()to convert the JSON string into a Python dictionary (Lines 10 and 11). - Finally, we extract the
durationvalue from the parsed data and return it as a float. This gives us the video length in seconds — a critical step for chunking videos or syncing timestamps later on (Line 12).
Load Model and Processor
Now, we load the SmolVLM2 model and its processor. This helper function simplifies the process using Hugging Face Transformers.
def load_model_and_processor(model_path: str, device: str = "cuda", dtype=torch.bfloat16):
   processor = AutoProcessor.from_pretrained(model_path)
   model = AutoModelForImageTextToText.from_pretrained(
       model_path,
       torch_dtype=dtype,
       _attn_implementation="flash_attention_2"
   ).to(device)
   return processor, model
- We define a function that takes the model path, the device to load the model on (defaulting to GPU), and the tensor data type (Line 1).
- First, we load the processor using
AutoProcessor.from_pretrained(). This handles pre-processing like resizing frames, tokenizing text, and formatting inputs (Line 2). - Then, we load the SmolVLM2 model using
AutoModelForImageTextToText.from_pretrained(), specifying the tensordtype(bfloat16by default) and enabling efficient attention via Flash Attention v2. We move the model to the specified device (e.g., GPU) (Lines 3-7). - Finally, the function returns both the processor and the model, ready for inference (Line 8).
Analyze Video Content
This function sends a video to SmolVLM2 along with a system prompt, asking the model to describe what’s happening in the video, which is useful for understanding the overall content and structure.
def analyze_video_content(processor, model, video_path: str, device: str = "cuda") -> str:
   system_message = "You are a helpful assistant that can understand videos. Describe what type of video this is and what's happening in it."
   messages = [
       {
           "role": "system",
           "content": [{"type": "text", "text": system_message}]
       },
       {
           "role": "user",
           "content": [
               {"type": "video", "path": video_path},
               {"type": "text", "text": "What type of video is this and what's happening in it? Be specific about the content type and general activities you observe."}
           ]
       }
   ]
- We define a function that takes in the processor, model, path to the video, and the device to use (default is GPU) (Line 1).
- A system prompt is set up to instruct the model to behave like a helpful assistant for video understanding (Line 2).
- We construct a
messageslist with two entries: one for the system instruction and one for the user input that includes both the video path and a specific question (Lines 3-15).
   inputs = processor.apply_chat_template(
       messages,
       add_generation_prompt=True,
       tokenize=True,
       return_dict=True,
       return_tensors="pt"
   ).to(device, dtype=torch.bfloat16)

   outputs = model.generate(**inputs, max_new_tokens=512, do_sample=True, temperature=0.7)
   return processor.decode(outputs[0], skip_special_tokens=True).lower().split("assistant: ")[1]
- We apply the processor’s
apply_chat_template()method to format and tokenize the input messages for the model. This wraps the prompt in a chat-style format expected by SmolVLM2 (Lines 17-22). - We then move the inputs to the specified device (
cuda) and usebfloat16for better memory efficiency (Line 23). - We generate the model’s response with sampling enabled and a moderate temperature for diversity. We limit the output to
512tokens (Line 25). - The output is decoded, cleaned of special tokens, converted to lowercase, and split to extract only the assistant’s response (Line 26).
Determine Highlights
Once we have a description of the video, we use this function to ask the model what moments would make good highlights — essentially, scenes that are rare, dramatic, or emotionally charged.
def determine_highlights(processor, model, video_description: str, prompt_num: int = 1, device: str = "cuda") -> str:
   system_prompts = {
       1: "You are a highlight editor. List archetypal dramatic moments that would make compelling highlights if they appear in the video. Each moment should be specific enough to be recognizable but generic enough to potentially exist in other videos of this type.",
       2: "You are a helpful visual-language assistant that can understand videos and edit. You are tasked with helping the user to create highlight reels for videos. Highlights should be rare and important events in the video in question."
   }
   user_prompts = {
       1: "List potential highlight moments to look for in this video:",
       2: "List dramatic moments that would make compelling highlights if they appear in the video. Each moment should be specific enough to be recognizable but generic enough to potentially exist in any video of this type:"
   }
- The function takes the processor, model, video description, and a prompt type (
prompt_num) to determine the style of instruction (Line 1). - Based on the prompt number, we load a system instruction and a corresponding user prompt — offering flexibility between a more editorial tone and a more visual-language focused assistant (Lines 2-9).
   messages = [
       {
           "role": "system",
           "content": [{"type": "text", "text": system_prompts[prompt_num]}]
       },
       {
           "role": "user",
           "content": [{"type": "text", "text": f"""Here is a description of a video:\n\n{video_description}\n\n{user_prompts[prompt_num]}"""}]
       }
   ]

   print(f"Using prompt {prompt_num} for highlight detection")
   print(messages)
- We construct the message list in chat-style format, injecting the system and user prompts along with the actual video description. This prepares the model for highlight extraction (Lines 11-20).
- These print statements are for debugging. They log which prompt is being used and the full chat message structure (Lines 22 and 23).
   inputs = processor.apply_chat_template(
       messages,
       add_generation_prompt=True,
       tokenize=True,
       return_dict=True,
       return_tensors="pt"
   ).to(device, dtype=torch.bfloat16)

   outputs = model.generate(**inputs, max_new_tokens=256, do_sample=True, temperature=0.7)
   return processor.decode(outputs[0], skip_special_tokens=True).split("Assistant: ")[1]
- We tokenize and convert the chat messages into a model-ready format using the processor. We also specify
bfloat16for memory efficiency and move everything to the right device (Lines 25-31). - The model generates a response with controlled randomness (via temperature) and limits the response to
256tokens (Line 33). - We decode the response and split it to extract only the assistant’s actual answer — a list of potential highlight-worthy moments (Line 34).
Process Video Segment
This function checks whether a given video segment matches the style or essence of a known highlight. It leverages the SmolVLM2 model to compare the clip with reference highlight descriptions and determine if it qualifies as a moment of interest.
def process_segment(processor, model, video_path: str, highlight_types: str, device: str = "cuda") -> bool:
   messages = [
       {
           "role": "system",
           "content": [{"type": "text", "text": "You are a video highlight analyzer. Your role is to identify moments that have high dramatic value, focusing on displays of skill, emotion, personality, or tension. Compare video segments against provided example highlights to find moments with similar emotional impact and visual interest, even if the specific actions differ."}]
       },
       {
           "role": "user",
           "content": [
               {"type": "video", "path": video_path},
               {"type": "text", "text": f"""Given these highlight examples:\n{highlight_types}\n\nDoes this video contain a moment that matches the core action of one of the highlights? Answer with:\n'yes' or 'no'\nIf yes, justify it"""}]
       }
   ]

   print(messages)
- We define a function that takes a video path, a set of highlight examples, and a vision-language model to decide whether the segment contains a highlight-worthy moment (Line 1).
- We construct a
messageslist in chat format, where the system prompt defines the assistant’s role as a highlight analyzer, and the user message includes both the video and the textual instruction describing what qualifies as a highlight (Lines 2-13). - The function prints the constructed message useful for debugging and logging prompt inputs (Line 15).
   inputs = processor.apply_chat_template(
       messages,
       add_generation_prompt=True,
       tokenize=True,
       return_dict=True,
       return_tensors="pt"
   ).to(device, dtype=torch.bfloat16)

   outputs = model.generate(**inputs, max_new_tokens=64, do_sample=False)
   response = processor.decode(outputs[0], skip_special_tokens=True).lower().split("assistant: ")[1]
   print(f"Segment response {response}")
   return "yes" in response
- We apply the processor’s
apply_chat_template()to prepare the model input using a structured format, tokenize it, and return a PyTorch tensor on the target device. We also cast the inputs tobfloat16for efficiency (Lines 17-23). - The model generates a response based on the input. We limit the generation to
64tokens and turn off sampling to get a deterministic output (Line 25). - We decode the output, strip special tokens, convert it to lowercase, and extract the model’s reply by splitting on
"assistant: ". This gives us a clean answer from the model (Line 26). - Finally, we return
Trueif the model’s response contains"yes", indicating the video segment matches one of the provided highlight types (Lines 27 and 28).
Concatenating Video Scenes into a Final Highlight Reel
Once highlight-worthy segments are identified, we need to stitch them into a single output video. This function takes a list of timestamp pairs, trims each scene from the source video, and concatenates them using ffmpeg.
def concatenate_scenes(video_path: str, scene_times: list, output_path: str):
     """Concatenate selected scenes into final video."""
     if not scene_times:
         logger.warning("No scenes to concatenate, skipping.")
         return
- We define a function that takes a source video, a list of
(start, end)scene timestamps, and the path where the final output should be saved (Line 1). - If no scenes are provided, we log a warning and exit early. There is no need to run
ffmpegunnecessarily (Lines 3-5).
     filter_complex_parts = []
     concat_inputs = []
     for i, (start_sec, end_sec) in enumerate(scene_times):
         filter_complex_parts.append(
             f"[0:v]trim=start={start_sec}:end={end_sec},"
             f"setpts=PTS-STARTPTS[v{i}];"
         )
         filter_complex_parts.append(
             f"[0:a]atrim=start={start_sec}:end={end_sec},"
             f"asetpts=PTS-STARTPTS[a{i}];"
         )
         concat_inputs.append(f"[v{i}][a{i}]")

     concat_filter = f"{''.join(concat_inputs)}concat=n={len(scene_times)}:v=1:a=1[outv][outa]"
     filter_complex = "".join(filter_complex_parts) + concat_filter
- For each
(start, end)pair, we prepare two filter strings (Line 9):- One for trimming the video stream using
trimand resetting timestamps withsetpts=PTS-STARTPTS(Lines 10-13). - One for trimming the audio stream similarly using
atrimandasetpts(Lines 14-17).
- One for trimming the video stream using
- We build up
filter_complex_partswith these trimmed segments and separately keep track of their stream labels for the finalconcatstep (Lines 7-18). - We construct the full
filter_complexstring, which includes all trimmed segments and ends with aconcatfilter, combining them into one video (v=1) and one audio stream (a=1) (Lines 20 and 21).
     cmd = [
         "ffmpeg",
         "-y",
         "-i", video_path,
         "-filter_complex", filter_complex,
         "-map", "[outv]",
         "-map", "[outa]",
         "-c:v", "libx264",
         "-c:a", "aac",
         output_path
     ]

     logger.info(f"Running ffmpeg command: {' '.join(cmd)}")
     subprocess.run(cmd, check=True)
- We build the
ffmpegcommand, setting output codecs (libx264for video andaacfor audio), and map the final concatenated streams ([outv],[outa]) to the output (Lines 23-33). - Finally, we log the command using
logger.infoand run it withsubprocess.run. We also usecheck=Trueto raise an error if the command fails (Lines 35 and 36).
Interface Logic
This function defines a Gradio UI (user interface) that lets users upload a video and generates highlight clips by running a chain of inference and filtering steps.
def create_ui(model_path: str):
   with gr.Blocks() as app:
       gr.Markdown("## Generate Video Highlights Using SmolVLM2 Model")
       with gr.Row():
           with gr.Column(scale=1):
               input_video = gr.Video(
                   label="Upload your video (max 30 minutes)",
                   interactive=True
               )
               process_btn = gr.Button("Process Video", variant="primary")
- We define the main entry point for building the Gradio interface. It takes the path to a model directory or file, which will be used later to load a processor and model (Line 1).
- We use
gr.Blocksto structure the UI and introduce a title usinggr.Markdownto prompt user interaction (Lines 2 and 3). - The UI layout consists of two columns. The first one contains a video upload component and a button to trigger processing (Lines 4-10).
           with gr.Column(scale=1):
               output_video = gr.Video(
                   label="Highlight Video",
                   visible=False,
                   interactive=False,
               )

               status = gr.Markdown()

               analysis_accordion = gr.Accordion(
                   "Chain of thought details",
                   open=True,
                   visible=False
               )

               with analysis_accordion:
                   video_description = gr.Markdown("", elem_id="video_desc")
                   highlight_types = gr.Markdown("", elem_id="highlight_types")
- The second column holds the output video, a status message area, and an expandable accordion for showing inference details. Initially, all are hidden or empty (Lines 12-25).
- Inside the accordion, we define two text blocks for displaying the video’s inferred description and two sets of highlight prompts (Lines 27-29).
       def on_process(video):
           # Clear all components when starting new processing
           yield [
               "",  # Clear status
               "",  # Clear video description
               "",  # Clear highlight types
               gr.update(value=None, visible=False),  # Clear video
               gr.update(visible=False)  # Hide accordion
           ]

           if not video:
               yield [
                   "Please upload a video",
                   "",
                   "",
                   gr.update(visible=False),
                   gr.update(visible=False)
               ]
               return
- When the “Process Video” button is clicked, we reset all outputs to start fresh. This prevents stale content from previous runs (Lines 31-39).
- If no video is uploaded, we immediately show an error message and exit early (Lines 41-49).
           try:
               duration = get_video_duration_seconds(video)
               if duration > 1800:  # 30 minutes
                   yield [
                       "Video must be shorter than 30 minutes",
                       "",
                       "",
                       gr.update(visible=False),
                       gr.update(visible=False)
                   ]
                   return
- We use the utility function to check the video’s duration. If it’s longer than 30 minutes, we warn the user and stop processing (Lines 51-61).
               yield [
                   "Initializing video highlight detector...",
                   "",
                   "",
                   gr.update(visible=False),
                   gr.update(visible=False)
               ]

               processor, model = load_model_and_processor(model_path)

               yield [
                   "Analyzing video content...",
                   "",
                   "",
                   gr.update(visible=False),
                   gr.update(visible=True)
               ]

               video_desc = analyze_video_content(processor, model, video)
               formatted_desc = f"### Summary:\n {video_desc[:500] + '...' if len(video_desc) > 500 else video_desc}"
- We show a status update and load the processor and model from the provided path (Lines 63-71).
- The video is analyzed to produce a textual summary. We format and truncate the summary to keep the UI clean (Lines 73-82).
               yield [
                   "Determining highlight types (2 variations)...",
                   formatted_desc,
                   "",
                   gr.update(visible=False),
                   gr.update(visible=True)
               ]

               # Get two different sets of highlights
               highlights1 = determine_highlights(processor, model, video_desc, prompt_num=1)
               highlights2 = determine_highlights(processor, model, video_desc, prompt_num=2)
               formatted_highlights = f"### Highlights to search for:\nSet 1:\n{highlights1[:500] + '...' if len(highlights1) > 500 else highlights1}\n\nSet 2:\n{highlights2[:500] + '...' if len(highlights2) > 500 else highlights2}"
- We use the description to determine two different highlight criteria (prompt variations) (Lines 84-90).
- The highlights are formatted into Markdown-friendly text and truncated to stay readable (Lines 93-95).
               # Split video into segments
               temp_dir = "temp_segments"
               os.makedirs(temp_dir, exist_ok=True)

               segment_length = 10.0
               duration = get_video_duration_seconds(video)
               kept_segments1 = []
               kept_segments2 = []
               segments_processed = 0
               total_segments = int(duration / segment_length)

               for start_time in range(0, int(duration), int(segment_length)):
                   progress = int((segments_processed / total_segments) * 100)

                   yield [
                       f"Processing segments... {progress}% complete",
                       formatted_desc,
                       formatted_highlights,
                       gr.update(visible=False),
                       gr.update(visible=True)
                   ]
- We prepare to split the video into 10-second segments by creating a temporary directory and re-checking the video duration (Lines 98-102).
- We initialize tracking variables to store which segments should be retained for each highlight set (Lines 103 and 104).
- Each segment is processed one by one. We compute and show the progress to the user dynamically using
yield(Lines 105-117).
                   # Create segment
                   segment_path = f"{temp_dir}/segment_{start_time}.mp4"
                   end_time = min(start_time + segment_length, duration)

                   cmd = [
                       "ffmpeg",
                       "-y",
                       "-i", video,
                       "-ss", str(start_time),
                       "-t", str(segment_length),
                       "-c:v", "libx264",
                       "-preset", "ultrafast",  # Use ultrafast preset for speed
                       "-pix_fmt", "yuv420p",   # Ensure compatible pixel format
                       segment_path
                   ]
                   subprocess.run(cmd, check=True)
- We extract a 10-second video clip using
ffmpegwith speed optimizations and store it temporarily (Lines 120-134).
                   # Process segment with both highlight sets
                   if process_segment(processor, model, segment_path, highlights1):
                       print("KEEPING SEGMENT FOR SET 1")
                       kept_segments1.append((start_time, end_time))

                   if process_segment(processor, model, segment_path, highlights2):
                       print("KEEPING SEGMENT FOR SET 2")
                       kept_segments2.append((start_time, end_time))

                   # Clean up segment file
                   os.remove(segment_path)
                   segments_processed += 1
- Each segment is checked for relevance to both highlight sets. If it passes, we store its time range. The segment file is then deleted to save space (Lines 137-147).
               # Remove temp directory
               os.rmdir(temp_dir)

               # Calculate percentages of video kept for each highlight set
               total_duration = duration
               duration1 = sum(end - start for start, end in kept_segments1)
               duration2 = sum(end - start for start, end in kept_segments2)

               percent1 = (duration1 / total_duration) * 100
               percent2 = (duration2 / total_duration) * 100

               print(f"Highlight set 1: {percent1:.1f}% of video")
               print(f"Highlight set 2: {percent2:.1f}% of video")
- After processing all segments, we remove the temp folder and calculate how much of the video each highlight set covers (Lines 150-161).
               # Choose the set with lower percentage unless it's zero
               final_segments = kept_segments2 if (0 < percent2 <= percent1 or percent1 == 0) else kept_segments1

               # Create final video
               if final_segments:
                   with tempfile.NamedTemporaryFile(suffix='.mp4', delete=False) as tmp_file:
                       temp_output = tmp_file.name
                       concatenate_scenes(video, final_segments, temp_output)

                   selected_set = "2" if final_segments == kept_segments2 else "1"
                   percent_used = percent2 if final_segments == kept_segments2 else percent1

                   completion_message = f"Processing complete! Used highlight set {selected_set} ({percent_used:.1f}% of video)"
- We select the set of segments that gives a tighter highlight unless one of the sets finds nothing (Line 164).
- We use the chosen segments to generate a final highlight video using a utility that stitches them together (Lines 167-173).
- We generate a summary message indicating which highlight set was used and how much of the original video it retained (Lines 175).
                   yield [
                       completion_message,
                       formatted_desc,
                       formatted_highlights,
                       gr.update(value=temp_output, visible=True),
                       gr.update(visible=True)
                   ]
               else:
                   yield [
                       "No highlights detected in the video with either set of criteria.",
                       formatted_desc,
                       formatted_highlights,
                       gr.update(visible=False),
                       gr.update(visible=True)
                   ]
- All outputs — including the final highlight video — are displayed back in the interface (Lines 176-182).
- If no valid segments were found, we inform the user but still show the analysis output (Lines 183-190).
           except Exception as e:
               logger.exception("Error processing video")
               yield [
                   f"Error processing video: {str(e)}",
                   "",
                   "",
                   gr.update(visible=False),
                   gr.update(visible=False)
               ]
           finally:
               # Clean up
               torch.cuda.empty_cache()
- In case of unexpected errors, we log the issue and inform the user gracefully (Lines 192-200).
- To free up memory, we clear the CUDA cache after processing (Line 203).
       process_btn.click(
           on_process,
           inputs=[input_video],
           outputs=[
               status,
               video_description,
               highlight_types,
               output_video,
               analysis_accordion
           ],
           queue=True,
       )

   return app
- We bind the
on_processfunction to the “Process Video” button, linking inputs and outputs appropriately. Usingqueue=Trueallows async feedback (Lines 205-216). - The full Gradio Blocks interface is returned for rendering or launching (Line 218).
Launch the Gradio Application
This script block defines the entry point of the Python program. When executed directly, it sets up the CUDA device and launches the UI for the SmolVLM2 model.
if __name__ == "__main__":
   # Initialize CUDA
   device = torch.device('cuda' if torch.cuda.is_available() else 'cpu')

   app = create_ui("HuggingFaceTB/SmolVLM2-2.2B-Instruct")
   app.launch()
if __name__ == "__main__":ensures this block only runs when the script is executed directly, not when imported as a module (Line 1).- We initialize a PyTorch device object by checking if a CUDA-compatible GPU is available. If so, it sets the device to
'cuda'; otherwise, it defaults to'cpu'. This determines where tensors and models will be loaded (Line 3). create_ui("HuggingFaceTB/SmolVLM2-2.2B-Instruct")initializes the user interface using the specified model from Hugging Face. In this case, it isSmolVLM2-2.2B-Instruct. This function likely returns a Gradio app or similar interactive UI component (Line 5).app.launch()starts the UI application in a browser or local server, making the model accessible through a user interface for inference tasks (Line 6).
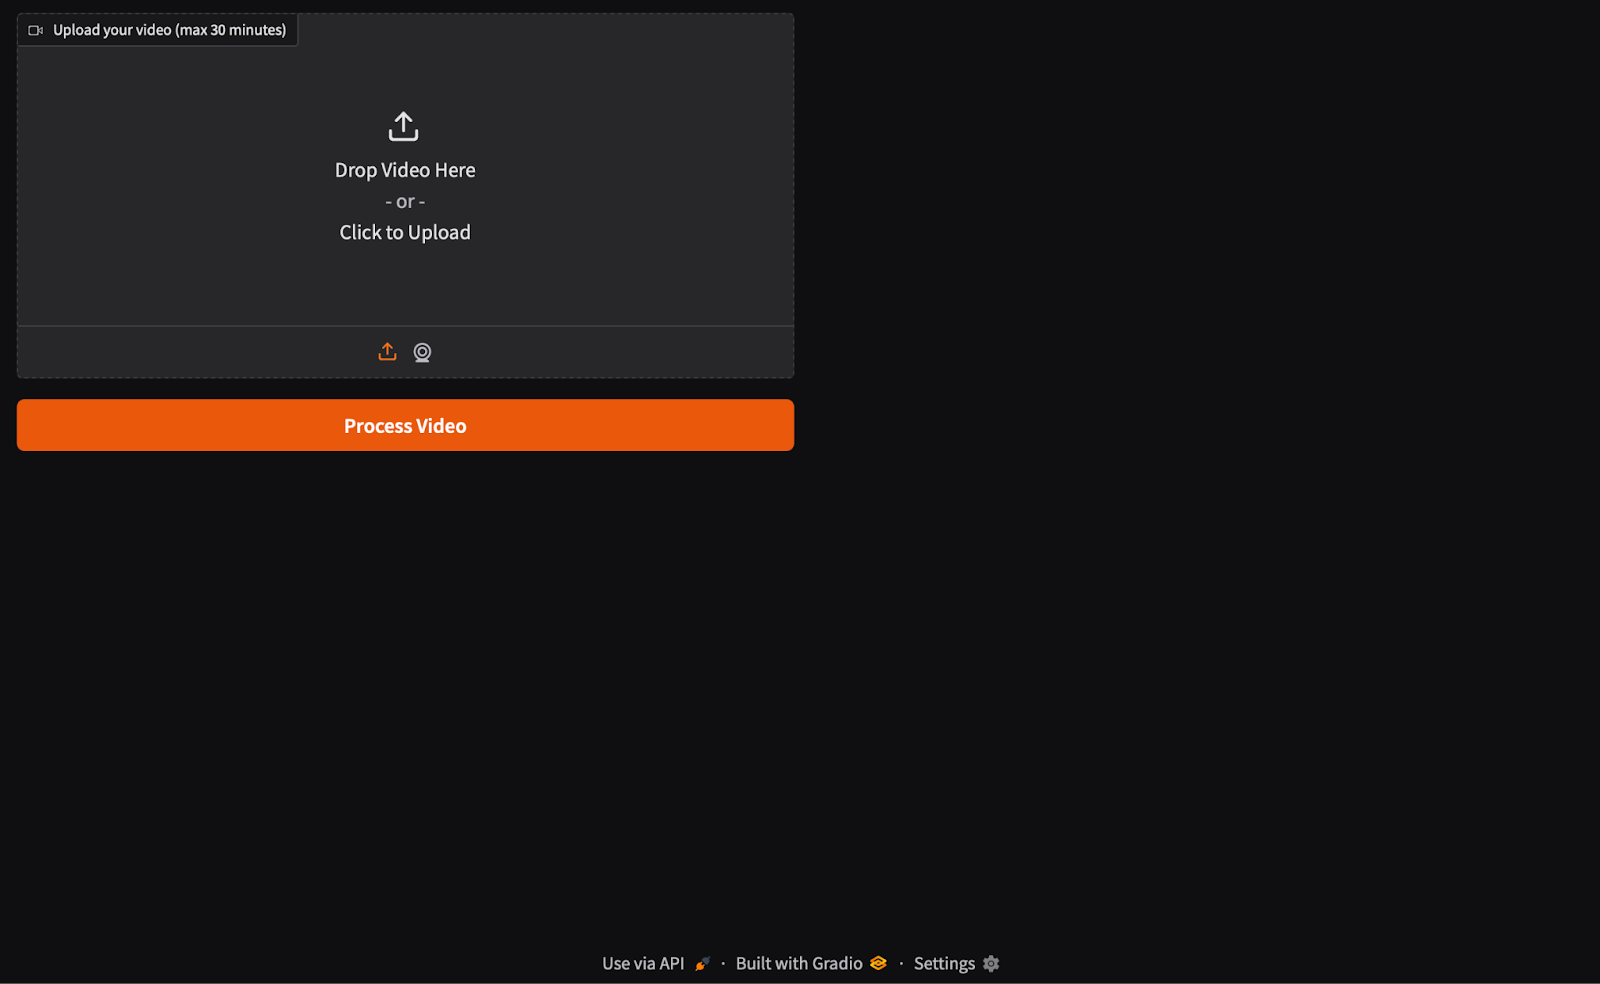
The Gradio application is shown in Figure 1.
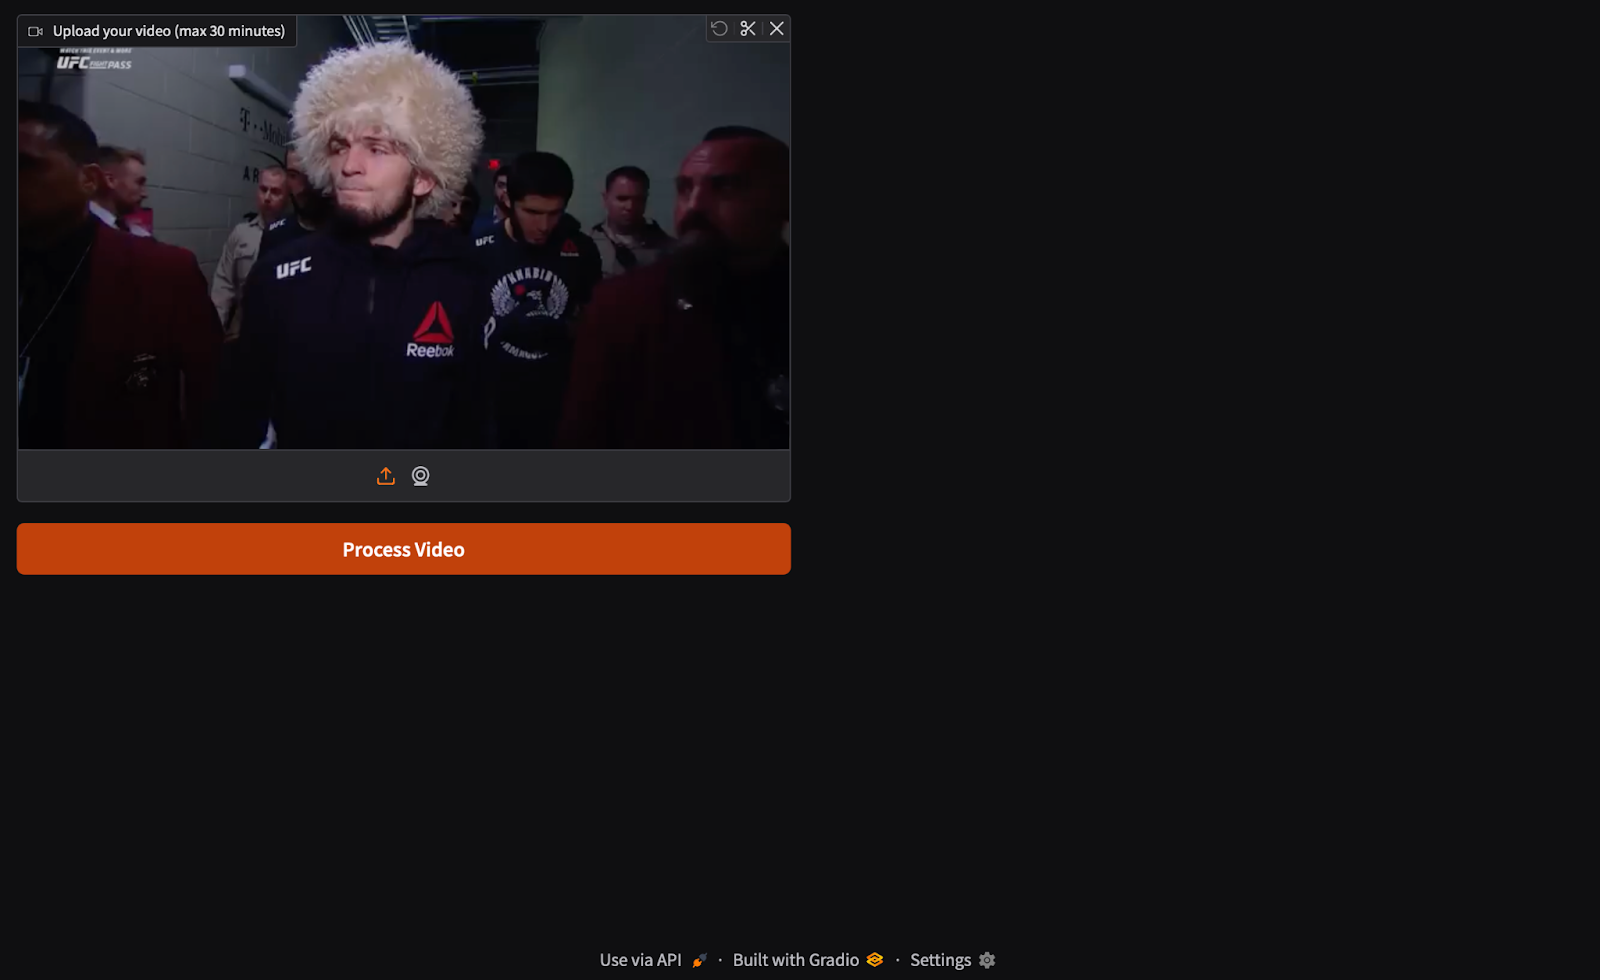
We first upload the input video, as shown in Figure 2, and click on “Process Video”.
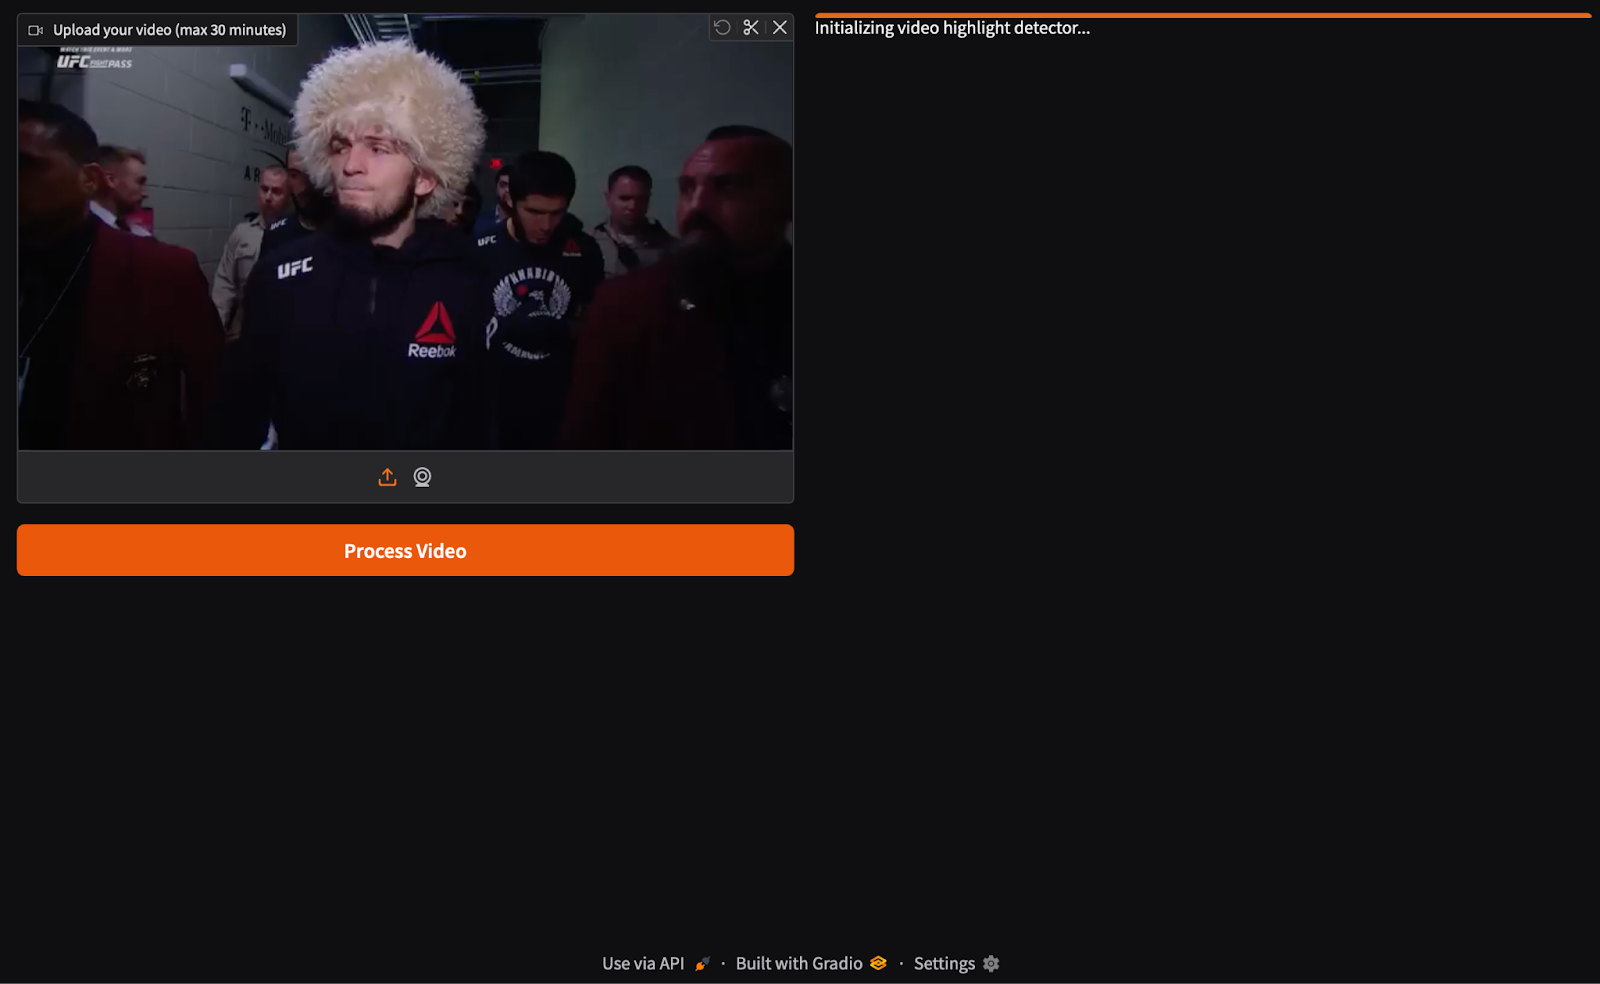
After pressing “Process Video”, the video highlight detector is initialized, as shown in Figure 3.
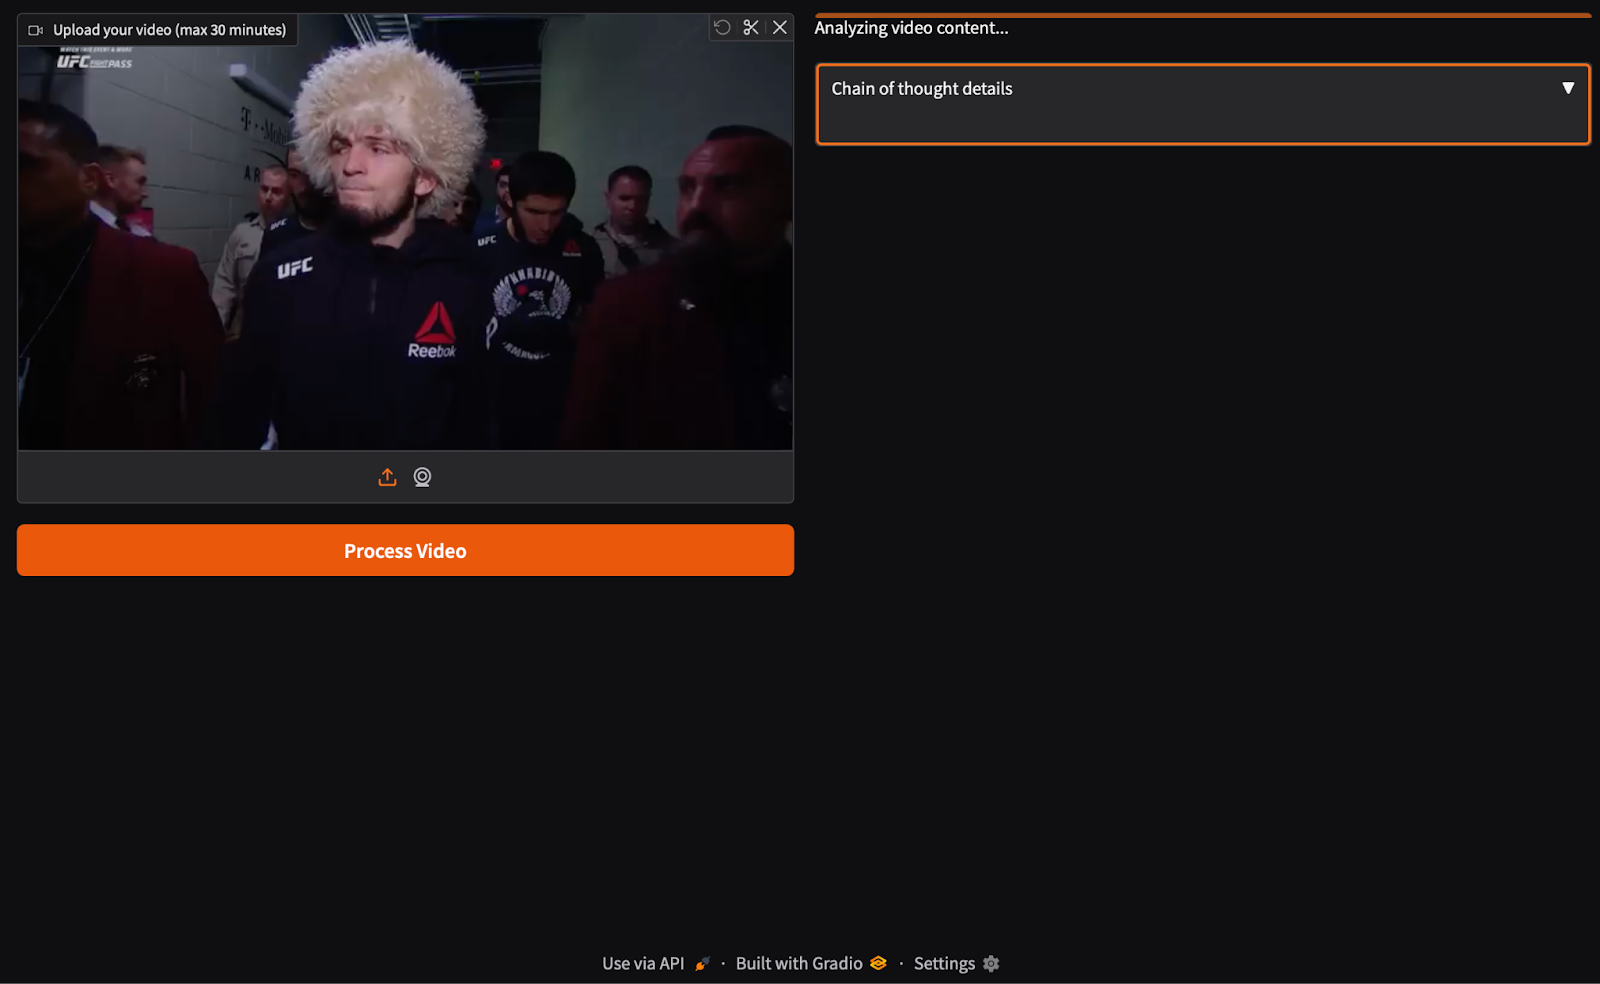
Once initialized, the video content is analyzed using the SmolVLM2 model, as shown in Figure 4.
The SmolVLM2 model analyses the video and generates a summary of the video, as shown in Figure 5.
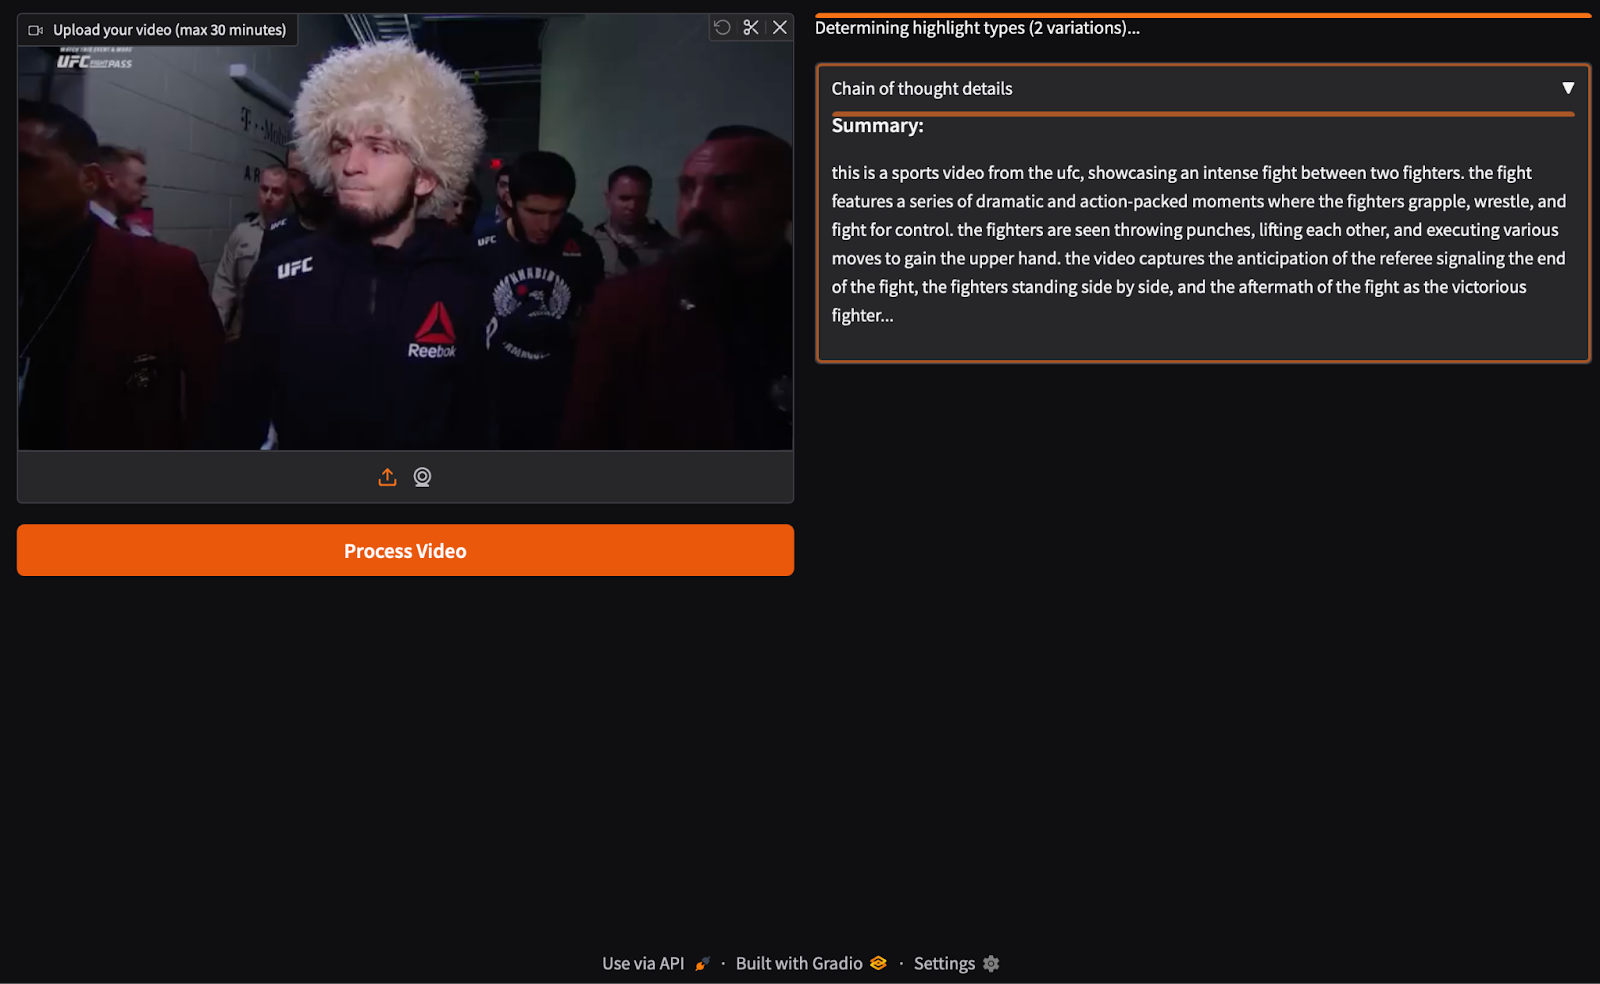
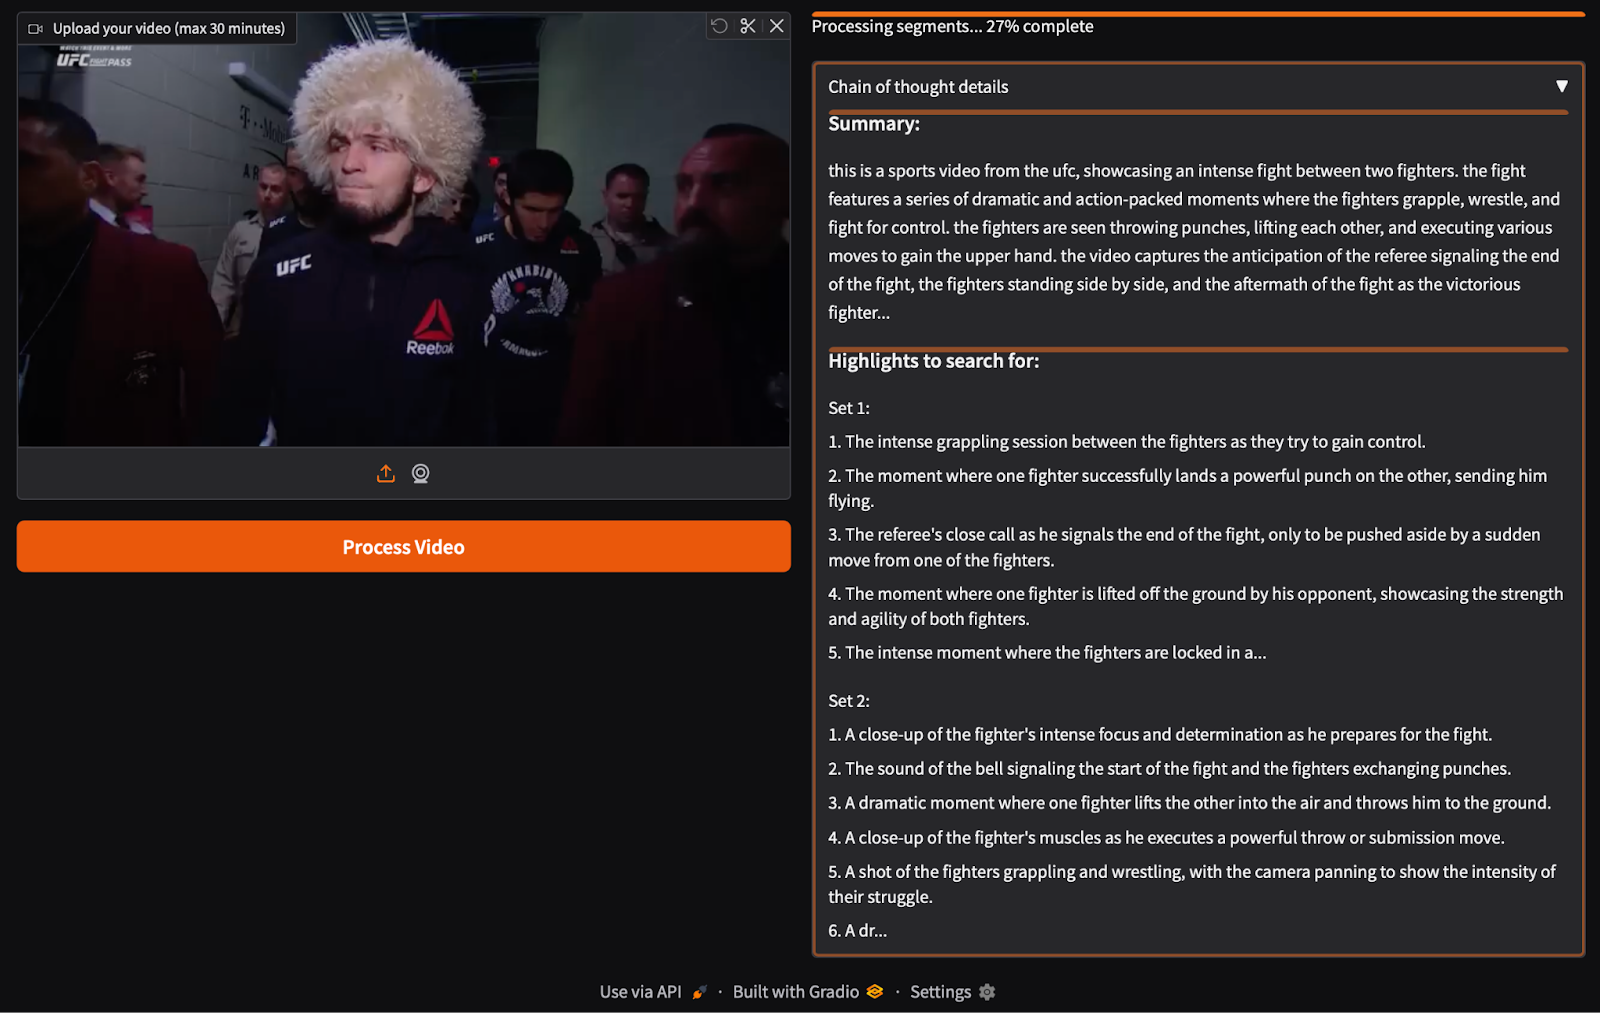
It also generates 2 sets of highlights so that the model can process both segments, as shown in Figure 6.
Finally, we get a video highlight (Figure 7) of the full-length video displaying the best scenes that are rare, dramatic, or emotionally charged.

Outputs
The following is the output generated after running the Gradio application above.
We referenced a publicly available YouTube video titled “Khabib Nurmagomedov vs. Conor McGregor” as an example. We used this video to demonstrate how the SmolVLM2 model can extract key moments.
⚠️ Copyright Disclaimer: This example is for educational demonstration purposes only. All rights to the original footage belong to the UFC. Please use your own licensed or personal video content when reproducing this tutorial.
What's next? We recommend PyImageSearch University.
86+ total classes • 115+ hours hours of on-demand code walkthrough videos • Last updated: July 2026
★★★★★ 4.84 (128 Ratings) • 16,000+ Students Enrolled
I strongly believe that if you had the right teacher you could master computer vision and deep learning.
Do you think learning computer vision and deep learning has to be time-consuming, overwhelming, and complicated? Or has to involve complex mathematics and equations? Or requires a degree in computer science?
That’s not the case.
All you need to master computer vision and deep learning is for someone to explain things to you in simple, intuitive terms. And that’s exactly what I do. My mission is to change education and how complex Artificial Intelligence topics are taught.
If you're serious about learning computer vision, your next stop should be PyImageSearch University, the most comprehensive computer vision, deep learning, and OpenCV course online today. Here you’ll learn how to successfully and confidently apply computer vision to your work, research, and projects. Join me in computer vision mastery.
Inside PyImageSearch University you'll find:
- ✓ 86+ courses on essential computer vision, deep learning, and OpenCV topics
- ✓ 86 Certificates of Completion
- ✓ 115+ hours hours of on-demand video
- ✓ Brand new courses released regularly, ensuring you can keep up with state-of-the-art techniques
- ✓ Pre-configured Jupyter Notebooks in Google Colab
- ✓ Run all code examples in your web browser — works on Windows, macOS, and Linux (no dev environment configuration required!)
- ✓ Access to centralized code repos for all 540+ tutorials on PyImageSearch
- ✓ Easy one-click downloads for code, datasets, pre-trained models, etc.
- ✓ Access on mobile, laptop, desktop, etc.
Summary
In this tutorial, we built a complete pipeline for automatic video highlight detection using the SmolVLM2 model. We processed a video, analyzed its content, identified dramatic highlight-worthy moments, split the video into short segments, and finally stitched together only the most relevant scenes. All of this was powered by a compact yet capable vision-language model wrapped inside an interactive Gradio app. This showcases how efficient the SmolVLM2 model is and how it can be used to build practical, real-world multimodal applications.
Citation Information
Thakur, P. “Generating Video Highlights Using the SmolVLM2 Model,” PyImageSearch, P. Chugh, S. Huot, G. Kudriavtsev, and A. Sharma, eds., 2025, https://pyimg.co/u6a02
@incollection{Thakur_2025_generating-video-highlights-using-the-smolvlm2-model,
  author = {Piyush Thakur},
  title = {{Generating Video Highlights Using the SmolVLM2 Model}},
  booktitle = {PyImageSearch},
  editor = {Puneet Chugh and Susan Huot and Georgii Kudriavtsev and Aditya Sharma},
  year = {2025},
  url = {https://pyimg.co/u6a02},
}
To download the source code to this post (and be notified when future tutorials are published here on PyImageSearch), simply enter your email address in the form below!

Download the Source Code and FREE 17-page Resource Guide
Enter your email address below to get a .zip of the code and a FREE 17-page Resource Guide on Computer Vision, OpenCV, and Deep Learning. Inside you'll find my hand-picked tutorials, books, courses, and libraries to help you master CV and DL!

Comment section
Hey, Adrian Rosebrock here, author and creator of PyImageSearch. While I love hearing from readers, a couple years ago I made the tough decision to no longer offer 1:1 help over blog post comments.
At the time I was receiving 200+ emails per day and another 100+ blog post comments. I simply did not have the time to moderate and respond to them all, and the sheer volume of requests was taking a toll on me.
Instead, my goal is to do the most good for the computer vision, deep learning, and OpenCV community at large by focusing my time on authoring high-quality blog posts, tutorials, and books/courses.
If you need help learning computer vision and deep learning, I suggest you refer to my full catalog of books and courses — they have helped tens of thousands of developers, students, and researchers just like yourself learn Computer Vision, Deep Learning, and OpenCV.
Click here to browse my full catalog.